After finding your way around the Mac’s interface, the next thing you’ll want to do is configure your system to suit your needs. The primary way to do this is with Mac OS X’s System Preferences application. Using the System Preferences and the panels within, you can configure and customize your system and how you interact with it. You can perform actions such as set your Desktop image, configure your network settings (including those for your .Mac account), and manage user accounts if your system has more than one user.
This chapter covers the use of the System Preferences application and describes all the individual panes that Mac OS X ships with. It also explains how the application works, including ways to add panes of your own to its display.
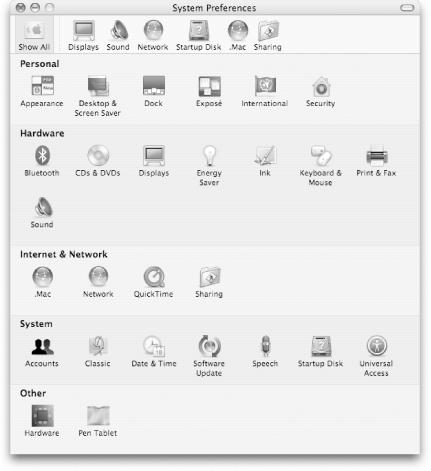
The System Preferences application, as seen in Figure 4-1, contains many individual preference panels, each represented by its own icon in the application’s main display window. Long-time Mac users will recognize that most of the panels in the System Preferences application are similar to the Control Panels found in earlier versions of the Mac OS. For a listing of the differences between Mac OS X and earlier versions of the Mac OS, see Chapter 3.
The System Preferences are divided into four categories: Personal, Hardware, Internet & Network, and System. There is also a toolbar at the top of the window. If you find yourself using a particular System Preference often, drag its icon to the toolbar. Likewise, if there is one you use rarely, or can add a menu item for (such as the Displays panel), drag the icon away, and the icon disappears in a puff of smoke, similar to what happens when you remove an icon from the Dock.
You can launch the System Preferences application by:
Clicking on its icon in the Dock; the System Preferences icon is the one that looks like a light switch with a gray Apple logo next to it.
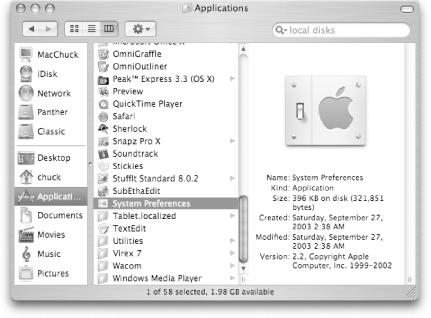
Double-clicking on its icon in the Finder (found in
/Applications), as shown in Figure 4-2.
Tip
There is one undocumented way to launch the System Preferences application. If you hold down the Option key and hit one of the volume controls on your keyboard, the System Preferences application will launch and quickly go to the Sound preferences panel.
When you click on one of the icons, the window changes to reflect
that particular panel’s settings, but the toolbar
remains in place. To hide the toolbar, click on the transparent
button in the upper-right corner of the window. To go back to the
main view, click the Show All button
(View
→Show All
Preferences, or ![]() -L). You can also select View→Organize
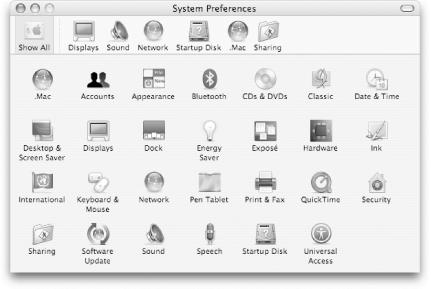
Alphabetically; this menu option changes the view of the System
Preferences window to that shown in Figure 4-3.
-L). You can also select View→Organize
Alphabetically; this menu option changes the view of the System
Preferences window to that shown in Figure 4-3.
Tip
If you Shift-click on the Toolbar button, System Preferences’ toolbar will hide and reveal itself slowly. You won’t gain anything by this, but it’s kind of fun to do once or twice.
Each panel is really a separate application, found in
/System/Library/PreferencePanes; however, they
are designed to work exclusively within the
System Preferences window rather
than as standalone programs. Add-on preference panels, such as
Apple’s Hardware panel (installed as part of the
CHUD tools), or those for Adobe Creative Suite’s
VersionCue or Wacom’s Pen Tablet software, are
stored in /Library/PreferencePanes.
To open a panel, click once on its icon, or select its name from the
View menu. This causes the System Preferences window to change into
an interface for that particular panel. To return to the main System
Preferences window, click the Show All icon in the upper-left corner
of the window’s toolbar or select View→Show All
Preferences (![]() -L).
-L).
When you’ve completed setting your
Mac’s preferences, you can quit System Preferences
by selecting System Preferences→Quit (![]() -Q) or by simply
closing the System Preferences window, using Window→Close
(
-Q) or by simply
closing the System Preferences window, using Window→Close
(![]() -W).
-W).
Get Mac OS X Panther in a Nutshell, 2nd Edition now with the O’Reilly learning platform.
O’Reilly members experience books, live events, courses curated by job role, and more from O’Reilly and nearly 200 top publishers.


