Managing and Administering Glossaries
After you create your glossary for your class or individual learners, you can start populating it with entries. I suggest you add a few entries and attach an example file when you first introduce the glossary to your course.
Checking out a glossary page
When you and your learners first view the newly created glossary page, it may look baffling because it appears quite busy with many features. It's actually easy to use, and your learners will have a lot of fun populating it when you start adding entries.
Click the glossary icon from the course front page. (It's located in the week or unit where you set up the glossary.) Moodle opens the glossary, as shown in Figure 9-9.
Figure 9-9: A new glossary page with an entry.
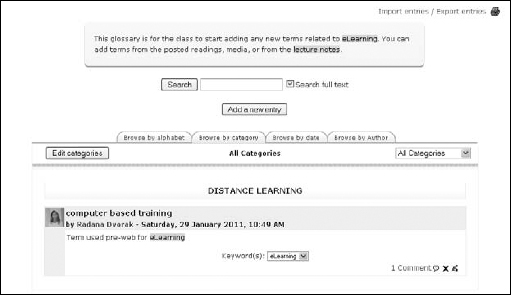
- Browsing the glossary: Notice the four large browsing tabs in the center.
- • Browse by Alphabet: Learners are able to look up words by its first letter.
- • Browse by Category: You can create categories for your glossary and then learners can use them when looking for specific words. For example, you can create categories for each unit topic and add related entries. To learn how to set up categories, see the next section.
- • Browse by Date: If learners will add content to the glossary, browsing by author is useful to keep track of who is participating in the assignment.
- Import Entries and Export Entries: In the top right under the ...
Get Moodle® For Dummies® now with the O’Reilly learning platform.
O’Reilly members experience books, live events, courses curated by job role, and more from O’Reilly and nearly 200 top publishers.

