Reviewing the Basics
The basics of taking advantage of Live View are pretty simple:
- Enabling Live View for photography: Rotate the Live View switch on the back of the camera to the still photography camera icon, as shown in Figure 4-1, and then press the LV (Live View) button in the center of the switch.
You hear a clicking sound as the internal mirror that normally sends the image from the lens to the viewfinder flips up, permitting the Live View preview to start. Then the scene in front of the lens appears on the monitor, and you can no longer see anything in the viewfinder. The Information screen, too, is no longer available; instead, critical settings appear superimposed over the live scene, as shown in Figure 4-1. The upcoming section “Customizing the Live View display” shows you how to control what data appears on the monitor.
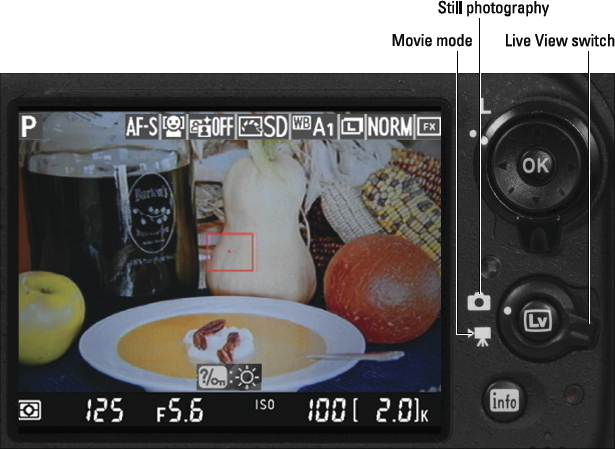
Figure 4-1: For still photography, rotate the Live View switch to the camera icon, as shown here; for movie recording, rotate it to the movie-camera icon instead.
- Enabling Live View for movie recording: Set the Live View switch to the movie mode camera icon, as shown on the left in Figure 4-2, and press the LV button to fire up the Live View display. This time, the live image reflects an image aspect ratio of 16:9, the movie aspect ratio, as opposed to the normal 3:2 aspect ratio for still photos.
To start and stop recording, press the red movie record ...
Get Nikon D600 For Dummies now with the O’Reilly learning platform.
O’Reilly members experience books, live events, courses curated by job role, and more from O’Reilly and nearly 200 top publishers.

