August 2004
Intermediate to advanced
96 pages
1h 45m
English
The Visual Studio .NET debugger can attach to a program running in an external process. Use this feature to debug NUnit tests as follows:
Open the Visual Studio .NET project that you are testing with the Visual Studio .NET IDE.
Run NUnit and load the Visual Studio .NET project.
From the Visual Studio .NET menu, select Tools→Debug Processes… to launch the Processes dialog as shown in Figure 1-23.
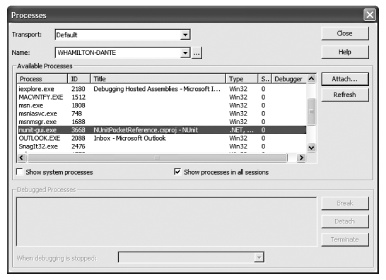
Figure 1-23. A Processes dialog
Select nunit-gui.exe from the list of processes and press the Attach… button to launch the Attach to Process dialog as shown in Figure 1-24.
Check Common Language Runtime in the Attach to Process dialog and click the OK button. The nunit-gui.exe process appears in the Debugged Process window of the Processes dialog as shown in Figure 1-25. Press the Close button to exit the Processes dialog (see Figure 1-23).
Run the tests in the NUnit GUI. You will now be able to debug the test assembly in Visual Studio .NET.
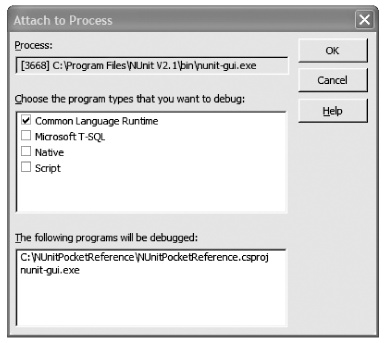
Figure 1-24. An Attach to Process dialog
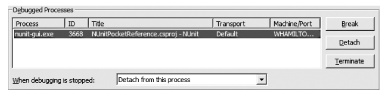
Figure 1-25. A Debugged Processes dialog
Once you have finished debugging, use one of the following techniques to detach debugging:
Select Debug→Stop Debugging from the Visual Studio .NET IDE menu.
Close the ...
Read now
Unlock full access


