Name
Tasks → Actions Menu
Synopsis
The Actions menu for Tasks is shown in Figure 9-1. The following sections describe creating tasks for your own personal use, assigning tasks to other people, setting task orders, and forwarding tasks.
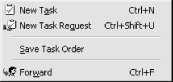
Figure 9-1. The Tasks Actions menu
Actions → New Task
To create a task:
From the Actions menu, select New Task.
Use the global keyboard shortcut Ctrl+Shift+K from anywhere in Outlook; use Ctrl+N from within Tasks.
Double-click in any open region of a Task view.
Select New Task from one of Tasks’ numerous context menus.
Use the TaskPad (see Chapter 7).
Any of these actions opens a new Task form (see Figure 9-2). The two tabs below the form’s toolbar—Tasks and Details—organize the entry of your task information.
A new task requires, at minimum, a subject. The subject describes the
task, and identifies it in all views. We recommend throughout this
book that you enter as much information as possible any time you
create a new record of any kind. If you’re pressed for time,
however, make sure you use key words for the subject and that
they’re detailed enough to remind you why you created the entry
in the first place. You’ll realize the wisdom of this the first
time you find an entry on your task list marked
Urgent:
Call
Supplier and you have no idea when it was created,
if there was a due date, or which supplier it was you were supposed
to call.
Figure 9-2. The New ...
Get Outlook 2000 in a Nutshell now with the O’Reilly learning platform.
O’Reilly members experience books, live events, courses curated by job role, and more from O’Reilly and nearly 200 top publishers.

