Saving Your Work
After all your editing and resizing effort, you want to be sure that you don't lose any of those files you struggled so hard to create. Saving your work is easy in Elements. When you're ready to save your file, press Ctrl+Shift+S to bring up the Save As dialog box, shown in Figure 3-22.
The top part of the Save As window is pretty much the same as it is for any program—you choose where you want to save your file, what you want to name it, and the file format you want. (More about file formats in a moment.) You also get some important choices that are unique to Elements:
Include in Organizer. This checkbox always appears turned on. Leave it on and your photo gets saved in the Organizer. Turn it off if you don't want the new file to go to the Organizer.

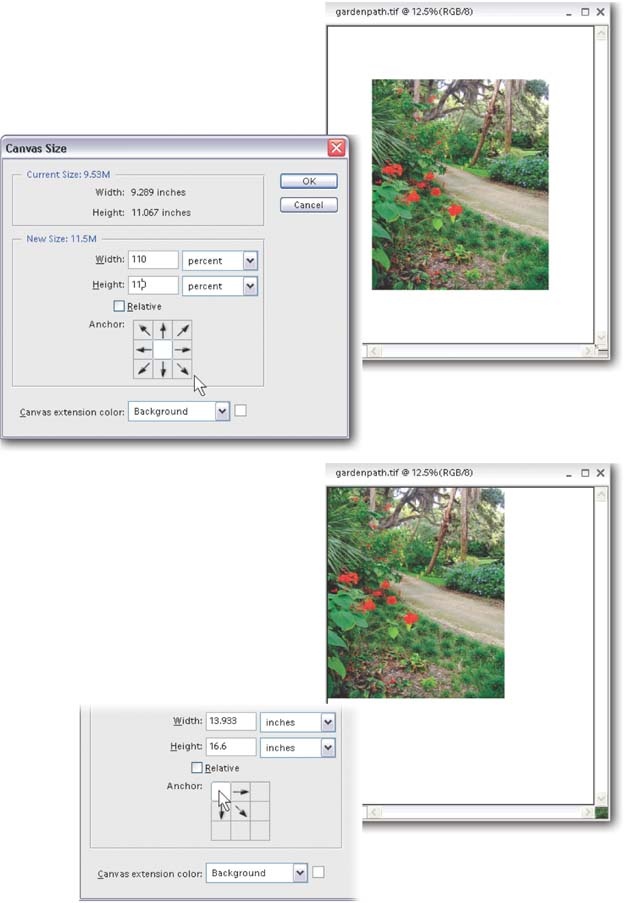
Figure 3-21. The Canvas Size dialog box isn't as complicated as it looks. The strange little Anchor grid with arrows pointing everywhere lets you decide exactly where to add new canvas to your image. The white Anchor box represents your photo's current position, and the arrows surrounding it show where Elements will add the new canvas. By clicking in any of the surrounding boxes, you tell Elements where to position your photo on the newly sized canvas. In the top pair of images, the new canvas has been added equally around all sides of the existing image. In the bottom pair, the new canvas has been added below and to ...
Get Photoshop Elements 4: The Missing Manual now with the O’Reilly learning platform.
O’Reilly members experience books, live events, courses curated by job role, and more from O’Reilly and nearly 200 top publishers.

