With Elements, you can dramatically improve the appearance of a photo with just a click or two—even if you have no idea of what you're doing. The Quick Fix window gathers together easy-to-use tools that can help you adjust the brightness and color of your photos and make them look sharper. You don't even need to understand much about what you're doing. You just need to know how to click a button or slide a pointer with your mouse, and then decide whether you like the look of what you just did.
If, on the other hand, you do know what you're doing, you may still find yourself adjusting things like shadows and highlights in the Quick Fix window because it's the only place in Elements that gives you a before-and-after view as you work.
In this chapter, you'll learn how to use all of Elements' Quick Fix tools. You'll also learn about what order to apply the fixes so you get the most out of these tools. Adobe is very focused on making Elements as easy to use as possible, so in Elements 4, they've given you two new tools for making quick fixes: the Magic Selection brush and the Adjust Color for Skin Tone command. The Magic Selection brush makes it easy to use the Quick Fix commands on only part of your photograph instead of altering the whole image. Adjust Color for Skin Tone fixes the colors in your photo based on the skin tones of someone in the picture. This chapter explains how to use these new tools, too.
Note
If an entire chapter on Quick Fix is frustratingly slow, you can start off by trying out the ultra-fast Auto Smart Fix: a quick-fix tool for the truly impatient. Section 4.2.2 tells you everything you need to know.
Getting to the Quick Fix window is easy. If you're in the Editor, go to the Shortcuts bar and click the Quick Fix button. If you're in the Organizer, on the Shortcuts bar, click the Edit button's drop-down triangle, and choose "Go to Quick Fix." The Quick Fix window looks like a stripped-down version of the Standard Editor (see Figure 4-1).
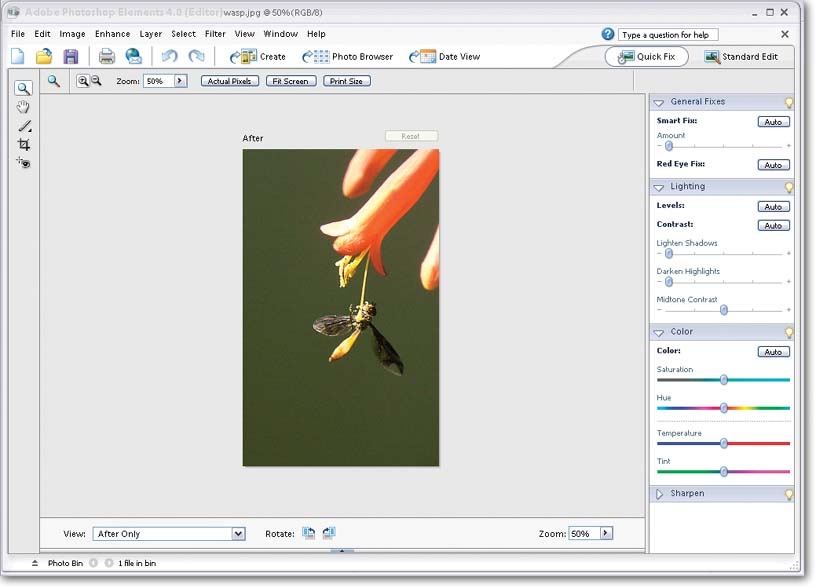
Figure 4-1. The Quick Fix window. If you have several photos open when you come into the Quick Fix window, you can use the Photo Bin (Section 1.3.2) to choose the one you want to edit. Just click a thumbnail at the bottom of your screen, and that photo becomes the active image, the one you see in the Quick Fix preview area in the center of your screen.
Your tools are neatly arranged on both sides of your image: on the left side, there's a five-item Toolbox, and on the right side, there's a collection of quick-edit palettes stored inside the Control Panel. First, you'll take a quick look at what tools Quick Fix provides you with. Then, later in the chapter, you'll learn how to actually use them.
The Toolbox holds an easy-to-navigate subset of the larger tool collection you'll find in the Standard Edit window. All the tools work the same way in both modes, and you can also use the same keystrokes to switch tools here. From top to bottom, the Quick Fix Toolbox holds:
The Zoom tool lets you telescope in and out on your image so that you can get a good close look at details or pull back to see the whole photo. (See Section 3.5.2 for more on how the Zoom tool works.) You can also zoom by using the Zoom pull-down menu below the image preview area.
The Hand tool helps move your photo around in the image window—just like grabbing it and moving it with your own hand (Section 3.5.3).
The Magic Selection Brush tool is new in Elements 4. It lets you apply Quick Fix commands to a part of your image only. The regular Elements Selection brush is also available in Quick Fix now. To get to the Selection brush, in the Toolbox, just click and hold on the Magic Selection brush icon, or click its icon in the Options bar when the Magic Selection brush is active. The difference between the two tools is that the Selection brush lets you paint a selection exactly where you want it (or mask out part of your photo to keep it from getting changed), while the Magic Selection brush makes Elements figure out the boundaries of your selection based on your much less precise marks on the image. The Magic Selection brush is much more automatic than the regular Selection brush.
To get the most out of both these tools, you need to understand the concept of selections. Chapter 5 tells you everything you need to know about working with selections, including the details of using these brushes, on Section 5.3.3.3.
The Crop tool lets you change the size and shape of your photo, by cutting off the areas you don't want (Section 3.4).
The Red Eye tool makes it a snap to fix those horrible red eyes you see in flash photos (Section 4.2.1).
The Control Panel, on the right side of the Quick Fix window, is where you'll make most of your adjustments. Elements helpfully arranges everything into four palettes—General Fixes, Lighting, Color, and Sharpen—listed in the order you'll typically use them. In most cases, it makes sense to start at the top and work your way down until you get the results you want. (See Section 4.2.6 for more suggestions on what order to work in.)
The Control Panel always fills the right side of the Quick Fix screen. There's no way to hide it, and you can't drag the palettes out of the Control Panel as you can in Standard Edit mode. But you can expand and collapse them, as explained in Figure 4-2.
When you open an image in Quick Fix, your picture first appears by itself in the main window with the word "After" above it. Elements keeps the Before version— your original photo—tucked away, out of sight. But you can pick from three other different layouts, which you can choose at any time: Before Only, Before and After (Portrait), and Before and After (Landscape). The Before and After views are especially helpful when you're trying to figure out if you're improving your picture— or not—as shown in Figure 4-3. Switch between views by picking the one you want from the pop-up menu just below your image.
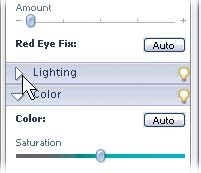
Figure 4-2. Clicking any of these triangles collapses or expands that section of the Control Panel. If you have a small monitor and you're bothered by the way the Sharpen slider (not shown here) scrapes the bottom of the window, close one of the upper sections to bring the Sharpen slider up onto your screen when you need to reach it.

Get Photoshop Elements 4: The Missing Manual now with the O’Reilly learning platform.
O’Reilly members experience books, live events, courses curated by job role, and more from O’Reilly and nearly 200 top publishers.

