This appendix provides an introduction to the Template Toolkit, a fast, flexible, powerful, and extensible template processing system written in Perl.[1] It is ideally suited for use in creating highly customized static and dynamic web pages and for building Perl-based web applications. This appendix explains how to get the best out of the Template Toolkit under mod_perl (although the Template Toolkit is in no way limited to use under mod_perl). All the example code is available for download from this book’s web site (http://www.modperl.com/).
This appendix’s goal is to give you a flavor of what the Template Toolkit can do for you and your web sites. It is by no means comprehensive, and you’re strongly urged to consult the copious documentation that is bundled with the Perl modules or available for browsing online at the Template Toolkit web site: http://template-toolkit.org/.
You can fetch the Template Toolkit from any CPAN site. It can be found at the following URL: http://www.cpan.org/modules/by-module/Template/.
Once you’ve unzipped and untarred the distribution, installation proceeds via the usual route. For example:
panic% perl Makefile.PL
panic% make
panic% make test
panic% su
panic# make install
Alternately, you can use the CPAN.pm module to
install it. Full details on installation can be found in the
INSTALL file in the distribution directory.
There is also a README file that is worth at
least a passing glance.
The Template Toolkit is a collection of Perl modules, scripts, and other useful bits and pieces that collectively implement a powerful template processing system for generating and manipulating content. It scans through source documents looking for special directives embedded in the text. These act as instructions to the processor to perform certain tasks.
A simple directive might just insert the value of a variable:
<a href="[% home %]">Home</a>
or perhaps include and process another template:
[% INCLUDE header
     title = 'A Dark and Stormy Night'
%]
More complex directives may make use of the powerful language constructs that the Template Toolkit provides. For example:
<h3>[% users.size %] users currently logged in:</h3>
<ul>
[% FOREACH user = users %]
   [%# 'loop' is a reference to the FOREACH iterator -%]
   <li>[% loop.count %]/[% loop.size %]:
       <a href="[% user.home %]">[% user.name %]</a>
   [% IF user.about %]
       <p>[% user.about %]</p>
   [% END %]
   [% INCLUDE userinfo %]
   </li>
[% END %]
</ul>
Chances are that you can work out what most of the above is doing without too much explanation. That’s the general idea—to keep the templates as simple and general as possible. It allows you to get a broad overview of what’s going on without too much detail getting in the way.
We’ll come back to this example later on and explain a little more about what’s going on.
A typical use of the Template Toolkit is as an offline tool for generating static web pages from source templates. This alone can be invaluable as a way of consistently adding standard headers, footers, menus, or other presentation elements to all of the pages in a web site.
The ttree utility, distributed as part of the toolkit, can be used to automatically process an entire directory tree of files in this way. Rather than creating and maintaining web pages directly, you write your pages as source templates and use ttree to run them through the Template Toolkit and publish them to a new location, ready to be viewed or accessed by your web server. During this process, any directives embedded within the templates are interpreted accordingly to build up the final HTML content. This can be then be combined automatically with any other standard page elements or layout templates before the output is written to the destination file.
You can also use the
Template Toolkit in CGI scripts and
mod_perl handlers for generating dynamic web content. The
Template module
provides a simple programming-level
interface to the template processing engine and allows you to cleanly
separate your application code from presentation logic and layout. It
provides a rich set of bindings between Perl data and code in the
backend and template variables in the frontend. That means you can
call into templates from your Perl code and also call into Perl code
from your templates. You can freely pass all kinds of Perl data
between the front- and backends, in the form of scalars, hashes,
lists, subroutines, and object references, allowing you to hide all
manner of internal complexity behind a simple data interface. This
makes it easy for you to perform all sorts of technical wizardry in
your templates, without having to directly expose or embed any of the
Perl code that makes it happen.
The Template Toolkit includes a number of
standard plug-in modules that provide
various useful add-on functionalities. These include modules for
creating HTML tables; fetching CGI parameters; parsing and processing
XML, POD, and LaTeX; accessing databases via DBI;
manipulating dates; processing URLs; and generating graphics, to name
just a few. It’s also trivially easy to load and use
other existing Perl modules. If CPAN doesn’t have
what you’re looking for, you can always implement
your own custom functionality as a Perl module, which can then be
loaded into the Template Toolkit for use and reuse as required.
This approach makes your code and your templates much easier to develop and maintain. If the people working on Perl application code are different from those who develop the HTML pages, it allows them to work on their separate areas without getting in each other’s way. Even if you’re the one doing all the work, it allows you to better separate the tasks and wear just one hat at a time. When you’re wearing your application developer’s hat, you can concentrate on the Perl code and making it work right. When you’re wearing your web page designer’s hat, you can concentrate on the HTML markup and making it look good.
It also makes your backend code and your frontend templates more reusable. You can have the same backend code running behind multiple sets of frontend templates, ideal for creating different versions of the same web site localized to spoken languages or customized to different users’ requirements. You can also reuse the same set of templates in front of different backend applications, CGI scripts, and mod_perl handlers. Common elements such as headers, footers, and menus can be encoded as templates and then shared between your static pages generated via ttree and your dynamic pages generated online. The result is that you get a consistent user interface and presentation style for all your pages, regardless of how they’re generated.
The Template Toolkit implements a general-purpose presentation language rather than a general-purpose programming language. What that means is that for general programming tasks, building backend applications, database access, and so on, you should continue to use Perl and the many fine modules available for use with it.
The strength of the Template Toolkit language is in building the
frontend—that is, the HTML that presents the output of an
application or displays the content of an XML file, the results of a
database query, the collection of snapshots of your pet camel, or
whatever it is that you’re trying to do. It has many
constructs that are familiar in programming languages, such as the
use
of variables
(GET, SET,
DEFAULT), conditional clauses
(IF, UNLESS,
ELSIF, ELSE, etc.), loops
(FOREACH, WHILE,
SWITCH, CASE), and exception
handling (TRY,
THROW, CATCH). However, these
are generally intended to be used from the perspective of layout
logic; that is, controlling how the output looks, not what the
underlying application actually does. To compliment these basic
operations, there are also various
directives more specifically
oriented to gluing chunks of content together
(PROCESS, INCLUDE,
INSERT, WRAPPER,
BLOCK), for providing useful content-manipulation
tools (FILTER, MACRO), and for
the loading of external modules (USE) by which the
toolkit can easily and quickly be extended.
Although we are focusing on HTML in particular, it is worth pointing out that the Template Toolkit is actually language-neutral. It operates on text files (although it can be used to generate binary files such as images or PDF documents), and as such, it doesn’t really care what kind of text you’re generating, be it HTML, XML, LaTeX, PostScript, or an Apache httpd.conf configuration file.
So without further ado, let’s see what a typical template looks like:
[% PROCESS header title="Some Interesting Links" %]

<p>
Here are some interesting links:
<ul>
[% FOREACH link = weblinks %]
   <li><a href="[% link.url %]">[% link.title %]</a></li>
[% END %]
</ul>
</p>

[% PROCESS footer %]
The first thing to note is that template directives are embedded
within [% and %]. You can
change these values, along with several dozen other configuration
options, but we’ll stick with the defaults for now.
The directives within those tags are instructions to the template
processor. They can contain references to variables (e.g.,
[%
link.url %]) or language
constructs that typically begin with an uppercase word and may have
additional arguments (e.g., [% PROCESS footer %]).
Anything else outside the tags is plain text and is passed through
unaltered.
The example shows the PROCESS directive
being used to pull in a
header template at the top of the page and a
footer template at the bottom. The
header and footer templates
can have their own directives embedded within them and will be
processed accordingly. You can pass arguments when calling
PROCESS, just as you might when calling a
subroutine in Perl. This is shown in the first line, where we set a
value for the title variable.
By default, variables are global, and if you
change title in one
template, the new value will apply in any other templates that
reference it. The
INCLUDE directive goes a little further to make
arguments more local, giving you better protection from accidentally
changing a variable with global consequences. Separate variable
namespaces can also be used to avoid collisions between variables of
the same name (e.g., page.title versus
book.title).
In the middle of the example, we see
the
FOREACH directive. This defines the start of a
repeated block that continues until the END
directive two lines below. Loops, conditionals, and other blocks can
be combined in any way and nested indefinitely. In this case,
we’re setting the link variable
to alias each item in the list referenced by the
weblinks variable. We print the
url and title for each item,
with some appropriate HTML markup to display them formatted as an
HTML bullet list.
The dot (.) operator is used
to access data items within data items, and it tries to do the right
thing according to the data type. For example, each item in the list
could be a reference to a hash array, in which case
link.url would be equivalent to the Perl code
$link->{url}, or it could be an object against
which methods can be called, such as $link->url(
). The dotted notation hides the specifics of your backend
code so that you don’t have to know or care about
the specifics of the implementation. Thus, you can change your data
from hash arrays to objects at some later date and slot them straight
in without making any changes to the templates.
Let’s now go back to our earlier example and see if we can make sense of it:
<h3>[% users.size %] users currently logged in:</h3>
<ul>
[% FOREACH user = users %]
   [%# 'loop' is a reference to the FOREACH iterator -%]
   <li>[% loop.count %]/[% loop.size %]:
       <a href="[% user.home %]">[% user.name %]</a>
   [% IF user.about %]
       <p>[% user.about %]</p>
   [% END %]
   [% INCLUDE userinfo %]
   </li>
[% END %]
</ul>
Anything outside a [% ... %]
directive—in this case, various HTML fragments that are
building a list of users currently logged in to our fictional
system—is passed through intact.
The various constructs that we meet inside the directives are:
-
users We’re assuming here that the
usersvariable contains a reference to a list of users. In fact, it might also be a reference to a subroutine that generates a list of users on demand, but that’s a backend implementation detail we’re quite rightly not concerned with here. The Template Toolkit does the right thing to access a list or call a subroutine to return a list, so we don’t have to worry about such things.The users themselves (i.e., the items in the
userslist) can be references to hash arrays, or maybe references to objects. Again, the Template Toolkit hides the implementation details and does the right thing when the time comes.-
users.size There are a number of “virtual methods” you can call on basic Perl data types. Here, the
.sizevirtual method returns the number of items in theuserslist.-
FOREACH user = users The
FOREACHdirective defines a block of template code up to the correspondingENDdirective and processes it repeatedly for each item in theuserslist. For each iteration, theuservariable is set to reference the current item in the list.-
loop The
loopvariable is set automatically within aFOREACHblock to reference a special object (an iterator) that controls the loop. You can call various methods in this object, such asloop.countto return the current iteration (from 1 to n) andloop.sizeto return the size of the list (in this case, the same asusers.size).-
user The
uservariable references each item in theuserslist in turn. This can be a reference to a hash array or an object, but we don’t care which. Again, these details are sensibly hidden from view. We just want thehomepart ofuser, and we’re not too worried about where it comes from or what has to be done to fetch it.-
IF user.about The
IFdirective defines a block that gets processed if the condition evaluates to some true value. Here we’re simply testing to see ifuser.aboutis defined. As you might expect, you can combineIFwithELSIFandELSEand also useUNLESS.-
INCLUDE userinfo The
INCLUDEdirective is used here to process and include the output of an external template called userinfo. TheINCLUDE_PATHconfiguration option can be used to specify where external templates can be found, so you can avoid hardcoding any absolute paths in the templates. All the variables currently defined are visible within the userinfo template, allowing it to access[% user.whatever %]to correctly reference the currentuserin theFOREACHloop.We’ve created this separate userinfo template and can assume it generates a nice table showing some interesting information about the current user. When you have simple, self-contained elements like this, it’s often a good idea to move them out into separate template files. For one thing, the example is easier to read without large chunks of HTML obstructing the high-level view. A more important benefit is that we can now reuse this component in any other template where we need to display the same table of information about a user.
Now that you’re familiar with what templates look like, let’s move on to see how we go about processing them.
In addition to the ttree script mentioned earlier, tpage is distributed with the Template Toolkit for no-frills simple template processing.
You might use it like this:
panic% tpage myfile.tt2 > myfile.html
or:
panic% tpage src/myfile.html > dest/myfile.html
It is extremely useful as a command-line tool to process a template
without having to write any Perl code. However, for most uses, be it
an offline script, CGI application, or mod_perl handler,
you’ll want to hook the Template
module into your Perl code.
To see how we would go about this, let us first take one of our earlier examples and save it in a file called example.html (see Example D-1).
Example D-1. example1/example.html
[% PROCESS header title="Some Interesting Links" %]

<p>
Here are some interesting links:
<ul>
[% FOREACH link = weblinks %]
   <li><a href="[% link.url %]">[% link.title %]</a></li>
[% END %]
</ul>
</p>

[% PROCESS footer %]
We’re referencing two external templates, header and footer, so we’ll have to create them, too. See Examples D-2 and D-3.
Example D-2. example1/header
<html>
<head>
<title>[% title %]</title>
</head>

<body bgcolor="#ffffff">

<h1>[% title %]</h1>
Now we can write a simple Perl script to process example.html, as shown in Example D-4.:
Example D-4. example1/process_template.pl
#!/usr/bin/perl

use strict;
use warnings;
use Template;

# create template processor
my $tt = Template->new( );

# define data
my $data = {
  copyright => '© 2002 Andy Wardley',
  weblinks  => [
      {
        url   => 'http://perl.apache.org/',
        title => 'Apache/mod_perl',
      },
      {
        url   => 'http://tt2.org/',
        title => 'Template Toolkit',
      },
      # ...and so on...
  ]
};

# process template - output to STDOUT by default
$tt->process('example.html', $data)
    || die $tt->error( );
After loading the Template module (use
Template;) we create a Template object
via the new( ) constructor method. You can specify
all sorts of options, either as a list of named arguments or by
reference to a hash array. If, for example, you want to put your
templates in a different directory (the default is the current
working directory), then you might do something like this:
my $tt = Template->new( INCLUDE_PATH => 'templates' );
A more complete example might look like this:
my $tt = Template->new({
INCLUDE_PATH => [ '/home/stas/web/tt2/templates',
'/usr/local/tt2/templates',
],
PRE_PROCESS => 'header',
POST_PROCESS => 'footer',
INTERPOLATE => 1,
POST_CHOMP => 1,
});The Template::Manual::Config manpage
has full details on the various
different configuration options and what they do.
Once you’ve created a Template
object, you can call the process( ) method to
process a template. The first argument specifies the template by name
(relative to one of the INCLUDE_PATH directories)
or as a reference to a file handle or scalar containing the template
text. The second optional argument is a reference to a hash array of
data that defines the template variables. A third optional argument
can also be provided to indicate where the output should be directed,
specified as a filename, file handle, reference to a scalar, or
object that implements a print( ) method (e.g., an
Apache request object $r). By
default, the generated output is sent directly to
STDOUT.
This is what it looks like:
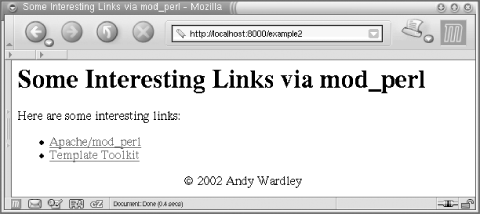
<html> <head> <title>Some Interesting Links</title> </head> <body bgcolor="#ffffff"> <h1>Some Interesting Links</h1> <p> Here are some interesting links: <ul> <li><a href="http://perl.apache.org/">Apache/mod_perl</a></li> <li><a href="http://tt2.org/">Template Toolkit</a></li> </ul> </p> <div align="center"> © 2002 Andy Wardley </div> </body> </html>
The external templates (header and
footer) have been pulled into place and the
title reference in the header and
copyright in the footer have
been correctly resolved. The body of the document is built from the
data passed in as weblinks.
There isn’t much to change between the implementation of a Perl CGI script such as the example above and the equivalent Apache/mod_perl handler.
The great advantage of using mod_perl is that it allows you to keep a
Template object persistent in memory. The main
benefit of this is that Perl can parse and compile all the Template
Toolkit code and all your application code once when the server
starts, rather than repeating it for each request. The other
important benefit is that the Template object will
cache previously used templates in a compiled state, from which they
can be redeployed extremely quickly. A call to process a template
becomes as efficient as a call to a precompiled Perl subroutine
(which is indeed how it is implemented under the hood), bringing you
runtime machine efficiency as well as the development-time human
efficiency and convenience of using a template-driven presentation
system.
Example D-5 shows a typical mod_perl handler roughly equivalent to the earlier Perl script.
Example D-5. Apache/MyTemplate.pm
package Apache::MyTemplate;
use strict;
use Apache::Constants qw( :common );
use
Template;
use vars qw( $TT );
sub handler {
my $r = shift;
# create or reuse existing Template object
$TT ||= Template->new({
INCLUDE_PATH => '/usr/local/tt2/templates',
});
my $data = {
uri => $r->uri,
copyright => '© 2002 Andy Wardley',
weblinks => [
{
url => 'http://perl.apache.org/',
title => 'Apache/mod_perl',
},
{
url => 'http://tt2.org/',
title => 'Template Toolkit',
},
],
# ...and so on...
};
$r->content_type('text/html');
$r->send_http_header;
$TT->process('example.html', $data, $r) || do {
$r->log_reason($TT->error( ));
return SERVER_ERROR;
};
return OK;
}
1;You need to adjust the value of INCLUDE_PATH to
point to the directory where header,
example.html, and footer
were created.
Here’s the configuration section for the httpd.conf file:
PerlModule Apache::MyTemplate
<Location /example2>
  SetHandler perl-script
  PerlHandler Apache::MyTemplate
</Location>
Of course, it’s not particularly useful to have the template name hardcoded as it is here, but it illustrates the principle. You can implement whatever kind of strategy you like for mapping requests onto templates, using the filename, path information, or pretty much anything else that takes your fancy. No doubt you can already spot numerous other enhancements that you might make to your own handlers.
Figure D-1 shows what you should expect when issuing a request to /example2.
If you’re not looking to do anything
too adventurous in terms of application
processing in your handler, the Apache::Template
module might be all you need to start processing templates from
within an Apache/mod_perl server.
Adding something like the following to your httpd.conf file is enough to engage the Template Toolkit to automatically process template files as they are served:
PerlModule Apache::Template

# set various configuration options, e.g.
TT2IncludePath /usr/local/tt2/templates
TT2PreProcess  header
TT2PostProcess footer

<Files *.tt2>
  SetHandler  perl-script
  PerlHandler Apache::Template
</Files>
We’ll come back to
Apache::Template in the next section. For further
examples and guidance on using the module, see the
Apache::Template documentation.
In this section we’re going to develop a web application based on the classic hangman example from the O’Reilly book Writing Apache Modules with Perl and C. Most of the game logic is borrowed intact or with minor modifications. However, when it comes to generating the HTML pages to return to the client, the script calls on the Template Toolkit to perform the task.
The first implementation shows a simple all-in-one CGI script that gets the job done quickly and easily. Following that, we’ll look at how it can be adapted into a Template Toolkit plug-in and subsequently deployed under mod_perl.
Here’s how the CGI script begins:
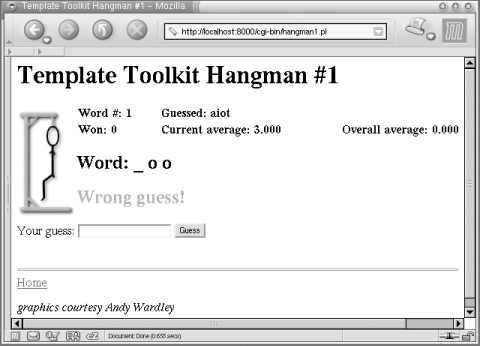
#!/usr/bin/perl
#
# hangman1.pl
#
# This variation of the classic hangman game implements
# the game logic at the start of the CGI script to
# define a game state.  It then processes an all-in-one
# template to generate the HTML page.
#
# The 'state' variable maintains the state of the game.
# It contains the following:
#   word     => the unknown word
#   guessed  => list of the guessed letters
#   gameno   => the number of words the user has tried
#   won      => the number of times the user guessed correctly
#   total    => the total number of incorrect guesses
#   left     => the number of tries the user has left on this turn
#

use IO::File ( );
use CGI qw(:standard);
use Template;

use strict;
use constant URL   => '/cgi-bin/hangman1.pl';
use constant ICONS => '/icons/hangman';
use constant WORDS => '/usr/games/hangman-words';
use constant TRIES => 6;
Nothing too taxing here. We provide some sensible comments, load the Perl modules we’re going to use (including the Template module, of course), and define some constants.
Next comes the core application logic:
# retrieve the state
my $state = get_state( );

# reinitialize if we need to
$state = initialize($state) if !$state or param('restart');

# process the current guess, if any
my ($message, $status) = process_guess(param('guess') || '', $state );
We first call the get_state( ) subroutine to
restore any current game state from the CGI parameters.
We’ll see the definition of that subroutine a little
later. For now, all we need to know is that it might return
undef, indicating that there
isn’t any current state. In this case, or if the
restart CGI parameter is set, we need to call
initialize( ) to set the state to contain some
sensible starting values.
Then we call process_guess( ) to process any
pending guess. We pass the value of the guess CGI
parameter or an empty string if not defined, and also a reference to
the $state hash array. The subroutine returns a
message and a status value that indicates the current state of play.
Now that we’ve got the application processing out of
the way, we can set about generating some output. To do this, we
create a Template object and call its
process( ) method, specifying a template to
process and a hash reference containing template variables:
# create a Template object
my $tt = Template->new( );

# define Template variables
my $vars = {
    url     => URL,
    icons   => ICONS,
    tries   => TRIES,
    title   => 'Template Toolkit Hangman #1',
    state   => $state,
    status  => $status,
    message => $message,
    wordmap => \&wordmap,
};

# process the main template at the end of this file
$tt->process(*DATA, $vars) || die $tt->error( );
In this example we’re going to define the main
template in the _ _DATA_ _ section of the CGI
script itself. The Template process( ) methods
allows a file handle such as *DATA to be specified
in place of a template name and will read the content and process it
accordingly. Doing this allows us to separate the game logic written
in Perl from the presentation template that generates the HTML page,
with the benefit of being able to keep everything self-contained in a
single file.
That’s the main body of the Perl code. Before we look at the template defined at the end of the file, let’s look at the subroutine definitions.
The get_state( ) subroutine reads the values of a
number of CGI parameters and populates them into the
$state hash, which it then returns:
sub get_state {
    return undef unless param( );
    my $state = {  };
    foreach (qw(word gameno left won total guessed)) {
        $state->{$_} = param($_);
    }
    return $state;
}
The initialize subroutine is called to start a new
game. It picks a new random word and updates the existing
$state hash or creates a new one:
sub initialize {
    my $state = shift || { };

    # pick a word, any word
    my $list = IO::File->new(WORDS)
        || die "Couldn't open ${\WORDS}: $!\n";
    my $word;
    rand($.) < 1 && ($word = $_) while <$list>;
    chomp $word;

    # setup state
    $state->{word}    = $word;
    $state->{left}    = TRIES;
    $state->{guessed} = '';
    $state->{gameno} += 1;
    $state->{won}    += 0;
    $state->{total}  += 0;
    return $state;
}
The process_guess( ) subroutine contains the core
of the game logic. It processes the guess passed as the first
argument and updates the current state passed as the second. It
returns two values: a message for displaying to the user and a status
flag indicating the current state of play.
sub process_guess {
    my($guess, $state) = @_;

    # lose immediately if user has no more guesses left
    return ('', 'lost') unless $state->{left} > 0;

    my %guessed = map { $_ => 1 } $state->{guessed} =~ /(.)/g;
    my %letters = map { $_ => 1 } $state->{word} =~ /(.)/g;

    # return immediately if user has already guessed the word
    return ('', 'won') unless grep(!$guessed{$_}, keys %letters);

    # do nothing more if no guess
    return ('', 'continue') unless $guess;

    # This section processes individual letter guesses
    $guess = lc $guess;
    return ("Not a valid letter or word!", 'error')
        unless $guess =~ /^[a-z]+$/;
    return ("You already guessed that letter!", 'error')
        if $guessed{$guess};

    # This section is called when the user guesses the whole word
    if (length($guess) > 1 and $guess ne $state->{word}) {
        $state->{total} += $state->{left};
        return ( qq{Loser!  The word was "$state->{word}."}, 'lost')
    }

    # update the list of guesses
    foreach ($guess =~ /(.)/g) { $guessed{$_}++; }
    $state->{ guessed } = join '', sort keys %guessed;

    # correct guess -- word completely filled in
    unless (grep(!$guessed{$_}, keys %letters)) {
        $state->{won}++;
        return (qq{Bingola!  The word was "$state->{word}."}, 'won');
    }

    # incorrect guess
    if (!$letters{$guess}) {
        $state->{total}++;
        $state->{left}--;
        # user out of turns
        return (qq{The jig is up!  The word was "$state->{word}".}, 'lost')
            if $state->{left} <= 0;
        # user still has some turns
        return ('Wrong guess!', 'continue');
    }

    # correct guess but word still incomplete
    return (qq{Good guess!}, 'continue');
}
In addition to these subroutines that are called from Perl, we also
define wordmap( ) and bind it by reference to the
corresponding wordmap template argument. This
allows it to be called from within the template.
sub wordmap {
    my($word, $guessed) = @_;
        my %guessed = map { $_ => 1 } $guessed =~ /(.)/g;
        join '', map { $guessed{$_} ? "$_ " : '_ ' } $word =~ /(.)/g;
}
The subroutine expects to be passed the current word and a string containing the letters previously guessed. It returns a string representing the word with only the guessed letters shown and the others blanked out.
At the end of the script, we have the template that is processed to
generate the HTML output. Notice that it follows the _
_DATA_ _ marker, which Perl will automatically bind to the
*DATA file handle that we passed as the first
argument to the process( ) method.[2]
In the opening segment, we first define the content type and general
HTML headers. This is followed by a directive that defines a
particular format for displaying floating-point
numbers, done by means of a standard format
plug-in loaded via the USE directive. We then go
on to calculate the number of tries remaining and the current game
averages, storing them in a hash array named
average:
_
_DATA_ _
Content-type: text/html
<!DOCTYPE HTML PUBLIC "-//W3C//DTD HTML 3.2 Final//EN">
<html>
<head>
<title>[% title %]</title>
</head>
<body onload="if (document.gf) document.gf.guess.focus( )">
[%
# define a format for displaying averages
USE format('%2.3f');
# how many guesses left to go?
tries_left = tries - state.left
# calculate current averages
average = {
current = state.total / state.gameno
overall = state.gameno > 1
? ( state.total - (tries - state.left)) / (state.gameno - 1)
: 0
}
%]This next section displays the game title and the appropriate image
for the number of tries left. It then generates a table to display
the current game averages. Note that the format is
now used to display the floating-point averages to a fixed precision.
<h1>[% title %]</h1>

<img src="[% icons %]/h[% tries_left %].gif"
     align="left" alt="[[% tries_left %] tries left]" />

<table width="100%">
<tr>
  <td><b>Word #: [% state.gameno %]</b></td>
  <td><b>Guessed: [% state.guessed %]</b></td>
</tr>
<tr>
  <td><b>Won: [% state.won %]</b></td>
  <td><b>Current average: [% format(average.current) %]</b></td>
  <td><b>Overall average: [% format(average.overall) %]</b></td>
</tr>
</table>
This is where we display the current word with unguessed letters
blanked out. We’re using the
wordmap variable, which results in a call back to
our wordmap subroutine. We pass the current word
and string of guessed letters as arguments:
<h2>Word: [% wordmap(state.word, state.guessed) %]</h2>
Is there a message to display? If so, this code makes it stand out as a red level-2 heading; otherwise, it does nothing.
[% IF message -%]
<h2><font color="red">[% message %]</font></h2>
[% END %]
Now we can generate the input form:
<form method="post" action="[% url %]" name="gf"
      enctype="application/x-www-form-urlencoded">

[% FOREACH var = [ 'word' 'gameno' 'left'
                   'won' 'total' 'guessed' ]
-%]
<input type="hidden" name="[% var %]" value="[% state.$var %]" />
[% END %]
We’re taking the simple approach and using hidden
form variables to maintain the state of the game between requests.
The FOREACH loop shown above generates these
fields for each of state.word,
state.gameno, state.left,
state.won, state.total, and
state.guessed. Rather than spelling out each one,
it uses an interpolated variable, state.$var. The
leading $ means that the value of the
var variable is used to specify the intended item
in state. In Perl, this would be just like writing
$state->{
$var }.
[% IF status =  = 'won' or status =  = 'lost' %]
   Do you want to play again?
   <input type="submit" name="restart" value="Another game" />
[% ELSE %]
   Your guess: <input type="text" name="guess" />
   <input type="submit" name=".submit" value="Guess" />
[% END %]

</form>
If the current game status is “won” or “lost”, the game is over and we generate a button allowing the player to start a new game. Otherwise, it’s business as usual and we generate an input field for the guess before closing up the form.
Finally, we have the page footer to add some trailing text and tidy up everything nicely:
<br clear="all">
<hr />

<a href="[% url %]">Home</a>

<p>
  <cite style="fontsize: 10pt">graphics courtesy Andy Wardley</cite>
</p>

</body>
</html>
And that’s it! We now have a self-contained CGI script that can be installed and run from a cgi-bin directory with little or no configuration required (see Figure D-2).
Perhaps the biggest limitation of the previous example is that the presentation template isn’t at all modular. In this example, we’re going to split the one large template into a number of smaller ones placed in separate files. This makes the main template much simpler and easier to follow. It also allows each of the individual template components to be updated in isolation. If you want to change the display of the game averages, for example, then you just need to edit the status template and can leave everything else as it is.
We’re also going to use a standard html/page template, provided as part of the Template Toolkit, to generate the required container elements to make a valid HTML page. The default location for these templates is /usr/local/tt2/templates. You will also need to define the directory in which you’re going to put the hangman templates. So, to the top of the previous script, we can add the following constant definitions (tailor them to your local values, of course):
use constant TEMPLATES => '/home/stas/templates/hangman2';
use constant SHARED    => '/usr/local/tt2/templates';
Then, when we create the Template object, we
specify these directories as a list reference for the
INCLUDE_PATH option:
# create a Template object
my $tt = Template->new({
    INCLUDE_PATH => [ TEMPLATES, SHARED ],
});
The rest of the script remains the same, with exception of the
template specified in the _ _DATA_ _ section. This
can now be written as:
_ _DATA_ _
Content-type: text/html

[% WRAPPER html/page
     html.head.title  = title
     html.body.onload = 'if (document.gf) document.gf.guess.focus( )'
%]

[% PROCESS header %]

[% IF status =  = 'won' or status =  = 'lost';
      PROCESS restart;
   ELSE;
      PROCESS guess;
   END
%]

[% PROCESS footer %]

[% END %]
We’ve moved the header, the
footer, and the two different variants of the
form out into separate templates. The entire page is enclosed within
a WRAPPER block, which generates the required
<html>, <head>, and
<body> tags to wrap around the page using
the standard html/page template.
The external header and
footer templates are shown in Examples D-6 and
D-7. According to the value of TEMPLATES set
above, these should be located in
/home/stas/templates/hangman.
Example D-6. hangman2/templates/header
<h1>[% title %]</h1>

[% # how many guesses left to go?
   tries_left = tries - state.left
%]

[%# display the appropriate image -%]
<img src="[% icons %]/h[% tries_left %].gif"
     align="left" alt="[[% tries_left %] tries left]" />

[% # display the game averages
   PROCESS status
%]To take our example
a stage further, we’re
going to convert this simple application into a Template Toolkit
plug-in module. A plug-in is just like any other Perl module, except
that it lives in a special namespace
(Template::Plugin::*) and gets passed a reference
to a special variable, the context, when its new(
) constructor is called. Plug-ins can be loaded and used
via the USE directive. Here’s
what the module looks like:[3]
#------------------------------------------------------------------
# Template::Plugin::Games::Hangman
#
# Implementation of the classic hangman game written as a
# plug-in module for the Template Toolkit.
#
# Written by Andy Wardley.
#------------------------------------------------------------------

package Template::Plugin::Games::Hangman;

use strict;
use Template::Plugin;
use Template::Exception;
use IO::File ( );
use CGI;

use base qw( Template::Plugin );

our $URL    = '/cgi-bin/hangman';
our $ICONS  = '/icons/hangman';
our $WORDS  = '/usr/games/hangman-words';
our $TRIES  = 6;
our @STATE  = qw( word gameno left won total guessed );
The start of the module is very similar to the CGI script. In this
case we’re defining everything to be in the
Template::Plugin::Games::Hangman namespace and
specifying that it is a subclass of the
Template::Plugin module.
sub new {
    my($class, $context, $config) = @_;

    # create plugin object
    my $self = bless {
        cgi      => CGI->new( ),
        url      => $config->{ url    } || $URL,
        icons    => $config->{ icons  } || $ICONS,
        words    => $config->{ words  } || $WORDS,
        tries    => $config->{ tries  } || $TRIES,
        _context => $context,
    }, $class;

    # restore current game or start new game
    $self->restore( ) || $self->init( );

    return $self;
}
When the plug-in is loaded via a USE directive,
the new( ) constructor method is called. The first
(zeroth) argument is the calling class name,
Template::Plugin::Games::Hangman->new($context,
$config)
, passed as a reference to a context object through
which you can access the functionality of the Template Toolkit. The
second argument is a reference to a hash array of any configuration
items specified with the USE directive.
This method defines an object, $self, using values
defined in the $config hash or the defaults
specified in the approprate package variables. It then calls the
restore( ) method and, if restore(
) doesn’t return a true value, the
init( ) method. Here are the definitions of those
methods:
sub restore {
    my $self = shift;
    my $cgi  = $self->{ cgi };
    return undef if !$cgi->param( );
    $self->{ $_ } = $cgi->param($_) foreach @STATE;
    return undef if $cgi->param('restart');
    return $self;
}

sub init {
    my $self = shift;

    # pick a word, any word
    my $list = IO::File->new($WORDS)
        || die "failed to open '$WORDS' : $!\n";
    my $word;
    rand($.) < 1 && ($word = $_) while <$list>;
    chomp $word;

    $self->{ word    }  = $word;
    $self->{ left    }  = $self->{ tries };
    $self->{ guessed }  = '';
    $self->{ gameno  } += 1;
    $self->{ won     } += 0;
    $self->{ total   } += 0;
    return $self;
}
They are just like their counterparts in the earlier CGI script, with
a few minor exceptions. A CGI object is defined in
$self->{ cgi } rather than using imported
subroutines, and operations are performed on $self
rather than on a $state hash array passed as an
argument.
The guess( ) method is also very similar to the
process_guess( ) subroutine in the CGI script:
sub guess {
    my $self  = shift;
    my $cgi   = $self->{ cgi };
    my $guess = $cgi->param('guess') || return;

    # lose immediately if user out of guesses
    return $self->state('lost')
        unless $self->{ left } > 0;

    my %guessed = map { $_ => 1 } $self->{ guessed } =~ /(.)/g;
    my %letters = map { $_ => 1 } $self->{ word    } =~ /(.)/g;

    # return immediately if user has already guessed the word
    return $self->state('won')
        unless grep(! $guessed{ $_ }, keys %letters);

    # do nothing more if no guess
    return $self->state('continue') unless $guess;

    # process individual letter guesses
    $guess = lc $guess;
    return $self->state(continue => 'Not a valid letter or word!')
        unless $guess =~ /^[a-z]+$/;
    return $self->state(continue => 'You already guessed that letter!')
        if $guessed{$guess};

    # handle the user guessing the whole word
    if (length($guess) > 1 and $guess ne $self->{word}) {
        $self->{ total } += $self->{ left };
        return $self->state(lost => "You lose.  The word was $self->{word}.");
    }

    # update the list of guesses and word map
    foreach ($guess =~ /(.)/g) { $guessed{$_}++; }
    $self->{ guessed } = join '', sort keys %guessed;

    # correct guess -- word completely filled in
    unless (grep(!$guessed{$_}, keys %letters)) {
        $self->{ won }++;
        return $self->state(won => qq{You got it!  The word was "$self->{word}".});
    }

    # incorrect guess
    if (!$letters{$guess}) {
        $self->{total}++;
        $self->{left}--;
        return $self->state(lost =>
            qq{No dice, dude! The word was "$self->{word}".})
                if $self->{left} <= 0;
        return $self->state(continue => 'Wrong guess!');
    }

    # correct guess but word still incomplete
    return $self->state(continue => 'Good guess!');
}
As a matter of convenience, we also provide the state(
) method, to retrieve the current state (when called
without arguments) or set both state and message (when called with
one or more arguments):
sub state {
    my $self = shift;
    if (@_) {
        $self->{ state   } = shift;
        $self->{ message } = join('', @_);
    }
    else {
        return $self->{ state };
    }
}
We also define averages( ) and wordmap(
) as object methods:
sub averages {
    my $self = shift;
    return {
        current => $self->{ total } / $self->{ gameno },
        overall => $self->{ gameno } > 1
             ? ($self->{ total } + $self->{ left } - $self->{ tries })
             / ($self->{ gameno } - 1)
             : 0
    };
}

sub wordmap {
    my $self = shift;
    my %guessed = map { $_ => 1 } $self->{ guessed } =~ /(.)/g;
    join ' ', map { $guessed{$_} ? "$_ " : '_ ' }
        $self->{ word } =~ /(.)/g;
}
We can also encode the high-level game logic in a method:
sub play {
    my $self = shift;

    # process any current guess
    $self->guess( );

    # determine which form to use based on state
    my $form = (exists $self->{ state } &&
                $self->{ state } =~ /^won|lost$/)
        ? 'restart' : 'guess';

    # process the three templates: header, form and footer
    $self->{ _context }->include([ 'header', $form, 'footer' ]);
}
The play( ) method calls guess(
) to process a guess and then calls on the context object
that we previously saved in _context to process
three templates: the header template, the form
relevant to the current game state, and the
footer template.
The script that uses this plug-in can now be made even simpler, as shown in Example D-8.
Example D-8. hangman3.pl
#!/usr/bin/perl
#
# hangman3.pl
#
# CGI script using Template Toolkit Hangman plug-in.
#
use strict;
use Template;
# may need to tell Perl where to find plug-in module
use lib qw( /usr/local/tt2/hangman/hangman3/perl5lib );
use constant TEMPLATES => '/home/stas/templates/hangman3';
use constant SHARED => '/usr/local/tt2/templates';
use constant URL => '/cgi-bin/hangman3.pl';
use constant ICONS => '/icons/hangman';
use constant WORDS => '/usr/games/hangman-words';
# create a Template object
my $tt = Template->new({
INCLUDE_PATH => [ TEMPLATES, SHARED ],
});
# define Template variables
my $vars = {
url => URL,
icons => ICONS,
words => WORDS,
title => 'Template Toolkit Hangman #3',
};
# process the main template
$tt->process(*DATA, $vars)
|| die $tt->error( );Other than creating a Template object and defining
variables, we don’t need to do any special
processing relevant to the hangman application. That is now handled
entirely by the plug-in.
The template defined in the _ _DATA_ _ section can
be made to look very similar to the earlier example. In this case,
we’re loading the plug-in
(Games.Hangman, corresponding to
Template::Plugin::Games::Hangman) and aliasing the
object returned from new( ) to the
hangman variable. We manually call the
guess( ) method and PROCESS
external templates according to the game state:
_ _DATA_ _
Content-type: text/html

[%  WRAPPER html/page
        html.head.title  = title
        html.body.onload = 'if (document.gf) document.gf.guess.focus( )';

        TRY;
            # load the hangman plug-in
            USE hangman = Games.Hangman(
                words = words
                icons = icons
                url   = url
            );

            # process a guess
            CALL hangman.guess;

            # print header showing game averages
            PROCESS header;

            # process the right form according to game state
            IF hangman.state =  = 'won'
            OR hangman.state =  = 'lost';
                PROCESS restart;
            ELSE;
                PROCESS guess;
            END;

            # now print the footer
            PROCESS footer;
        CATCH;
            # and if any of that goes wrong...
            CLEAR;
            PROCESS error;
        END;
    END
%]
One other enhancement we’ve made is to enclose the
body in a TRY block. If the plug-in init(
) method fails to open the words file, it reports the error
via die( ). The TRY directive
allows this error to be caught and handled in the corresponding
CATCH block. This clears any output generated in
the TRY block before the error occured and
processes an error template instead to report
the error in a nice manner.
The template in this example controls the overall flow of the game
logic. If you prefer, you can simply call the play(
) method and have the plug-in take control. It handles all
the flow control for you, processing the guess and then making calls
back into the Template Toolkit to process the
header, relevant form, and
footer templates.
_ _DATA_ _
Content-type: text/html

[%  #Template Toolkit Hangman #4
        WRAPPER html/page
        html.head.title  = title
        html.body.onload = 'if (document.gf) document.gf.guess.focus( )';

        TRY;
            USE hangman = Games.Hangman(
                words = words
                icons = icons
                url   = url
            );
            hangman.play;

        CATCH;
            CLEAR;
            PROCESS error;
        END;
    END
%]
The complete set of templates that go with this final example are presented in Examples D-9 through D-15.
Example D-9. hangman3/templates/header
<h1>[% title %]</h1>

[% # how many guesses left to go?
   tries_left = hangman.tries - hangman.left
%]

[%# display the appropriate image -%]
<img src="[% hangman.icons %]/h[% tries_left %].gif"
     align="left" alt="[[% tries_left %] tries left]" />

[% PROCESS status %]
Example D-10. hangman3/templates/status
[% # define a format for displaying averages
   USE format('%2.3f');
   average = hangman.averages;
%]

<table width="100%">
<tr>
  <td><b>Word #: [% hangman.gameno %]</b></td>
  <td><b>Guessed: [% hangman.guessed %]</b></td>
</tr>
<tr>
  <td><b>Won: [% hangman.won %]</b></td>
  <td><b>Current average: [% format(average.current) %]</b></td>
  <td><b>Overall average: [% format(average.overall) %]</b></td>
</tr>
</table>

<h2>Word: [% hangman.wordmap %]</h2>

[% IF hangman.message -%]
<h2><font color="red">[% hangman.message %]</font></h2>
[% END %]
Example D-11. hangman3/templates/guess
<form method="post" action="[% hangman.url %]"
      enctype="application/x-www-form-urlencoded" name="gf">
  Your guess: <input type="text" name="guess" />
  <input type="submit" name=".submit" value="Guess" />
  [% PROCESS state %]
</form>
Example D-12. hangman3/templates/restart
<form method="post" action="[% hangman.url %]"
      enctype="application/x-www-form-urlencoded">
  Do you want to play again?
  <input type="submit" name="restart" value="Another game" />
  [% PROCESS state %]
</form>
Example D-13. hangman3/templates/state
[% FOREACH var = [ 'word' 'gameno' 'left' 'won' 'total' 'guessed' ] -%]
<input type="hidden" name="[% var %]" value="[% hangman.$var %]" />
[% END %]
One of the benefits of
writing the hangman application as a
plug-in is that you no longer need to write a CGI script at all. You
can load and use the plug-in from any template, which you can process
via a generic CGI script, a mod_perl handler, or perhaps the
Apache::Template module.
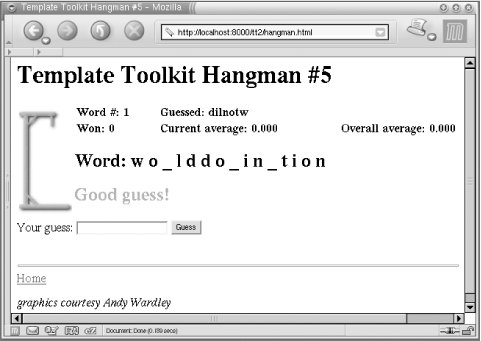
Here’s an example of a self-contained template using the hangman plug-in. All we need to do is to hardcode some variable values at the start of the template:
[%  title = 'Template Toolkit Hangman #5'
    url   = '/tt2/hangman.html'
    words = '/usr/games/hangman-words'
    icons = '/icons/hangman';

    WRAPPER html/page
        html.head.title  = title
        html.body.onload = 'if (document.gf) document.gf.guess.focus( )';

        TRY;
            USE hangman = Games.Hangman(
                words = words
                icons = icons
                url   = url
            );
            hangman.play;
        CATCH;
            CLEAR;
            PROCESS error;
        END;
    END
%]
If you’re using Apache::Template
to run the application, you can define these variables in the Apache
httpd.conf file:
PerlModule          Apache::Template

TT2IncludePath      /usr/local/tt2/hangman/hangman3/templates
TT2IncludePath      /usr/local/tt2/templates
TT2Variable         title  "Template Toolkit Hangman #5"
TT2Variable         words  /usr/games/hangman-words
TT2Variable         icons  /icons/hangman
TT2Params           uri

<Location /tt2/hangman.html>
    SetHandler      perl-script
    PerlHandler     Apache::Template
</Location>
Our three variables, title,
words, and icons, are defined
using the TT2Variable directive. In addition, we
use TT2Params to instruct
Apache::Template to make the request URI available
as the uri template variable. We previously used
url to denote the URL of the hangman application,
so we need to make one small change to the template. Using this
dynamic uri variable should mean that the value
will remain correct even if the application is moved to a new URL.
The template should now look like this:
[%
    # ...etc...

    USE hangman = Games.Hangman(
        words   = words
        icons   = icons
        url     = uri     # now use 'uri' not 'url'
    );

    # ...etc...
%]
The game in Figure D-3 is for you to complete.
This chapter deals with a lot of code, some of which was included in listings and some of which was not because it was too long. You can get all the code and configuration files from http://modperlbook.org/.
Template Toolkit home: http://www.template-toolkit.org/
Template Toolkit documentation: http://www.template-toolkit.org/docs.html
If you have any questions related to the Template Toolkit that the module documentation can’t immediately answer, you might like to post them to the Template Toolkit mailing list. To subscribe, send an email to templates-request@template-toolkit.org with the message “subscribe” in the body or use the web form located at http://www.template-toolkit.org/mailman/listinfo/templates/.
[1] There are also some optional components written in C for speed, but you don’t need to use them if you’re looking for a pure Perl solution.
[2] The drawback of using the _ _DATA_ _ marker
is that you cannot run this script under
Apache::Registry, as we explained in Chapter 6. However, the script can be easily converted
into a mod_perl handler, which has no problems with the _
_DATA_ _ marker.
[3] The code assumes that
Perl 5.6.0 or higher is used. If you are using an older version, use
the vars pragma instead of
our.
Get Practical mod_perl now with the O’Reilly learning platform.
O’Reilly members experience books, live events, courses curated by job role, and more from O’Reilly and nearly 200 top publishers.

