Creating a Web Form
To create the simple Web Form
that will be used in the next example, start up Visual Studio .NET
and open a New Project named
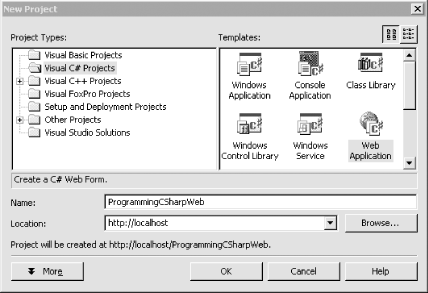
ProgrammingCSharpWeb. Select the Visual C#
Projects folder (because C# is your language of choice), select Web
Application as the project type, and type in its name,
ProgrammingCSharpWeb. Visual Studio .NET will
display http://localhost as the
default location, as shown in Figure 15-1.

Figure 15-1. Creating a project in the New Project window of Visual Studio .NET
Visual Studio places nearly all the files it creates for the project
in a folder within your local machine’s default web site. For
example,
c:\Inetpub\wwwroot\ProgrammingCSharpWeb.
Tip
In Visual Studio .NET, a solution is a set of
projects; each project will create a dynamic link library
(DLL) or an executable (EXE). All projects are
created in the context of a solution, and solutions are managed by
.sln
and .suo
files.
The solution files and other Visual Studio-specific files are stored
in <drive>\Documents and
<drive>Settings\<user name>\MyDocuments\Visual
Studio Projects
(where <drive>
and <user name> are specific to your
machine).
Tip
You must have IIS and the FrontPage Server extensions installed on your computer to use Web Forms. To configure the FrontPage Server extensions, open the Internet Service Manager and right-click the web site. Select All Tasks → Configure Server ...
Get Programming C# now with the O’Reilly learning platform.
O’Reilly members experience books, live events, courses curated by job role, and more from O’Reilly and nearly 200 top publishers.

