The best way to learn about Excel objects, properties, and methods is by recording code . It’s even better than online Help. Recording will almost always tell you what you need to know if you know how to use it. When Excel records code, it translates your actions into Visual Basic code. This lets you reverse-engineer recorded actions or simply cut and paste recorded actions into other procedures.
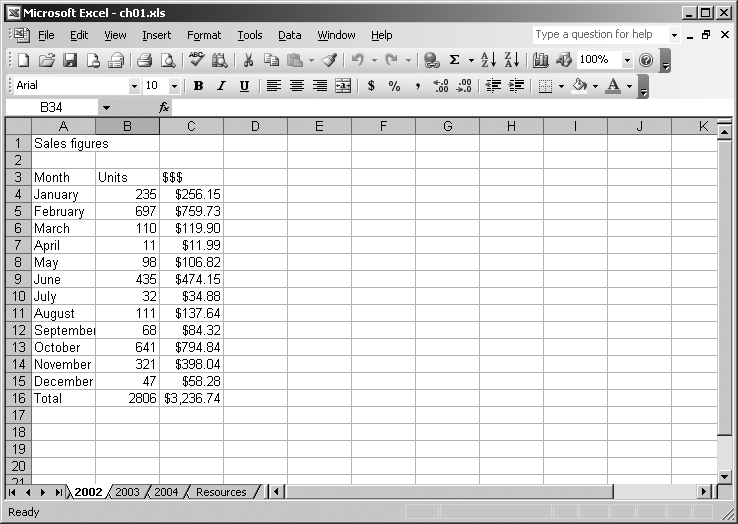
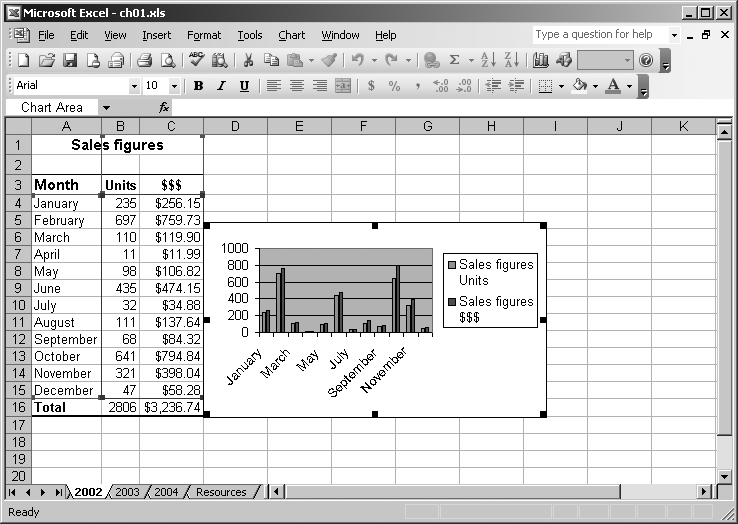
For example, suppose that you have a workbook containing multiple sheets of sales data as shown in Figure 1-1. You want to format the data on each of the sheets and add a chart comparing units sold and revenue. This is a great opportunity to record some code.
To record your code:
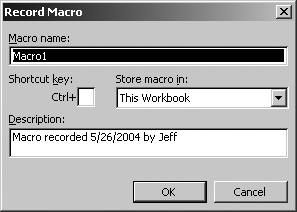
Choose Tools → Macros → Record New Macro. Excel displays the Record Macro dialog (Figure 1-2).
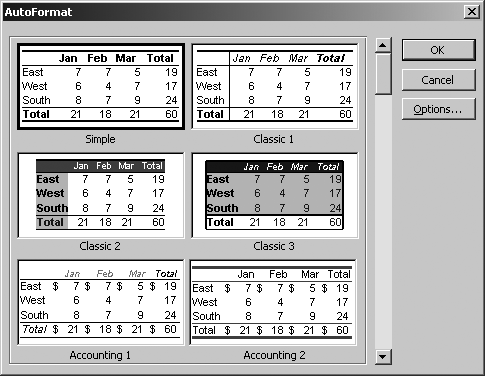
Select the range A1:C16 and choose Format → AutoFormat. Excel displays the AutoFormat dialog (Figure 1-3).
Select the Simple format and click OK. Excel formats the range.
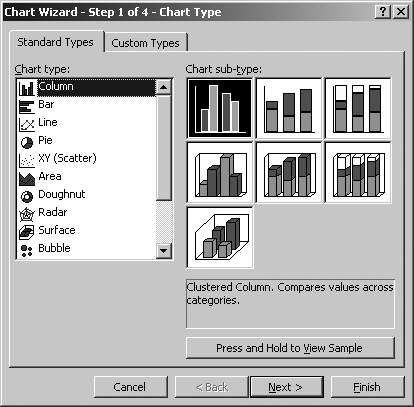
Press Shift-Up to deselect the Total row and then choose Insert → Chart. Excel displays the Chart Wizard (Figure 1-4).
Click Finish to insert a chart on the sheet as shown in Figure 1-5.
Finally, choose Tools → Macro → Stop Recording to turn off recording.
Now you could repeat this task by selecting one of the other worksheets and run the recorded code by pressing Alt-F8 and running Macro1, but the data would have to be in the same location on the active worksheet and the new chart would appear on the 2002 worksheet, not the active one. Instead, press Alt-F8 and click Edit. Excel starts the Visual Basic Editor (VBE) and displays your recorded code, as shown here:
    Sub Macro1( )     '<---------- Name of procedure.
    '
    ' Macro1 Macro   <----------- Comments describing procedure.
    ' Macro recorded 5/26/2004 by Jeff
    '

    '
        Range("A1:C16").Select    '<---- Following lines record what you did.
        Selection.AutoFormat Format:=xlRangeAutoFormatSimple, Number:=True, Font _
            :=True, Alignment:=True, Border:=True, Pattern:=True, Width:=True
        Range("A1:C15").Select
        Charts.Add


        ActiveChart.ChartType = xlColumnClustered
        ActiveChart.SetSourceData Source:=Sheets("2002").Range("A1:C15"), PlotBy:= _
            xlColumns      ' Long lines are continued using an underscore ---------^
       ActiveChart.Location Where:=xlLocationAsObject, Name:="2002"
End Sub '<---------- End of procedure.I added some labels in the recorded code to identify its parts:
Each procedure in a workbook has a unique name. Excel assigns the names
Macro1,Macro2, and so on to recorded code.Anything that appears after
'is a comment. Comments are descriptive text that don’t run as code.Lines of text that aren’t comments are executable statements . Statements tell Visual Basic what to do in Excel.
Lines that are longer than about 80 characters are continued on the next line using the
_character. Excel does that for readability. Actually, Visual Basic allows lines of code to be much longer if you don’t mind horizontal scrolling.Procedures always include an
Endstatement to tell Visual Basic where to stop.
So now that you’ve recorded code, what can you do with it? That’s up next.
Get Programming Excel with VBA and .NET now with the O’Reilly learning platform.
O’Reilly members experience books, live events, courses curated by job role, and more from O’Reilly and nearly 200 top publishers.
