Set File Permissions in Windows XP
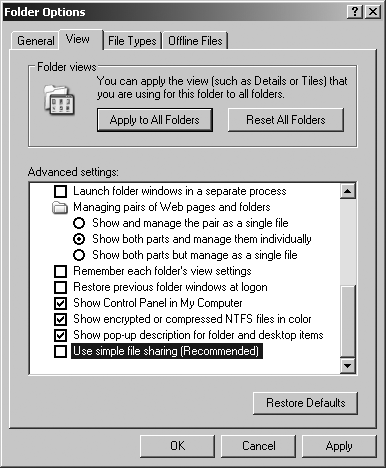
How you set permissions is not obvious from the default setup of Windows XP. First, you must disable the Use Simple File Sharing folder option in Windows Explorer, as shown in Figure 26-1.

Figure 26-1. Disable simple file sharing in Windows XP to set permissions
To set permissions on a folder or file:
In Windows Explorer, select the file or folder to set permissions on and select Properties from the File menu.
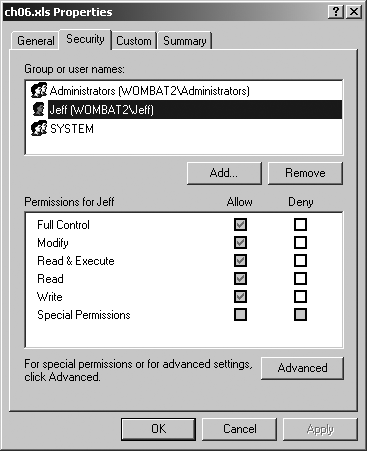
Select the Security tab on the Properties dialog box (Figure 26-2). The top list displays user groups and individual users with permissions for the item. The bottom list shows the permissions assigned to each group or user.
Select a group or user, then assign or deny permissions by clicking on the boxes in the permissions list. Click OK when done.

Figure 26-2. Setting permissions
If you’re unfamiliar with how this works, it’s a good idea to experiment with a file. For example, create an Excel workbook named Book1.xls, then deny Full Control for your username. OK, then try to open Book1.xls in Excel—you’ll get an Access Denied error. Now change the file permissions to allow Read & Execute but deny Write access. You’ll be able to open the file in Excel, but you can’t save it as Book1.xls.
These permissions don’t have much meaning in the preceding example ...
Get Programming Excel with VBA and .NET now with the O’Reilly learning platform.
O’Reilly members experience books, live events, courses curated by job role, and more from O’Reilly and nearly 200 top publishers.

