Chapter 13. Solderless Breadboard Setup
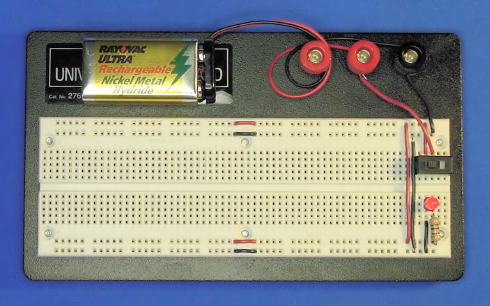
In this chapter, you'll prepare an 840 tie-point solderless breadboard for experimentation (see Figure 13-1). You'll install a battery, power switch, and an LED power indicator. You can use this basic setup over and over again for trying out robot circuits and modules.

Figure 13.1. Solderless breadboard after completed setup
Considering Power Sources
There are a lot of good options available for supplying power to a circuit on a breadboard.
Continuous power is available by attaching the circuit to a wall outlet through an ordinary power adaptor (otherwise known as a wall wart). Replacement adjustable-voltage supplies ...
Get Robot Building for Beginners now with the O’Reilly learning platform.
O’Reilly members experience books, live events, courses curated by job role, and more from O’Reilly and nearly 200 top publishers.

