The following sections go through the process of implementing a multiserver farm.
Before you begin, it's important to remember the following:
The account that you select for installing Office SharePoint Server 2007 must be a member of the Administrators group on every server on which you install Office SharePoint Server 2007, and this account is automatically assigned as the SSP administrator. Therefore, by default the SSP administrator is also the local administrator on all of the farm servers. You can, however, remove this account from the Administrators group on the servers after installation.
To deploy Office SharePoint Server 2007 in a server farm environment, you must provide credentials for several different accounts.
You must install Office SharePoint Server 2007 on the same drive on all load-balanced frontend web server computers.
You must install Office SharePoint Server 2007 on a clean installation of the Microsoft Windows Server 2003 operating system with Service Pack 1 (SP1) or later. If you uninstall a previous version of Office SharePoint Server 2007 and then install Office SharePoint Server 2007, Setup might fail to create the configuration database, and the installation will fail.
You must install the same language packs on all servers.
All the instances of Office SharePoint Server 2007 in the farm must be in the same language.
You must use the Complete installation option on all computers you want to be index servers, query servers, or servers that run Excel Calculation Services.
If you want to have more than one index server in a farm, you must use a different Shared Services Provider (SSP) for each index server.
Install the role of Application server onto each farm server. (For detailed instructions, refer to Chapter 3.)
Install .NET 3.0. (For detailed instructions, refer to Chapter 3.)
From the product disc, run Setup.exe on one of your web server computers. Alternatively, from the product download, run Officeserver.exe.
On the "Enter your Product Key" page, enter your product key, and then click Continue.
On the "Read the Microsoft Software License Terms" page, review the terms, select the "I accept the terms of this agreement" checkbox, and then click Continue.
On the "Choose the installation you want" page, click Advanced. (The Basic option is for standalone installations.)
On the Server Type tab, select Complete.
Optionally, to install Office SharePoint Server 2007 at a custom location, select the File Location tab, and then type the location or Browse to the location.
When you have chosen the correct options, click Install Now.
When Setup finishes, a dialog box appears that prompts you to complete the configuration of your server. Be sure that the "Run the SharePoint Products and Technologies Configuration Wizard now" checkbox is not selected.
Click Close to start the configuration wizard. Instructions for completing the wizard are provided in the next set of steps.
Follow steps 1 through 11 on all additional servers in this farm.
In step 10, we unchecked the box for running the configuration wizard. If you recall from the last chapter, the configuration wizard gives you a task list of configuration items to complete after installation. On larger farms, you will generally want to finish installing your entire farm before going back through and performing configuration. After we have installed the bits to all of our servers, it's time to run the SharePoint Configuration Wizard on our first server. Microsoft also recommends a certain order when installing.
Microsoft recommends that the Central Administration web application be installed on an application server, such as a query server or a server that runs Excel Calculation Services, but not on an index server (for performance reasons). If your farm will have an application server, install Office SharePoint Server 2007 on that server first. This also installs the Central Administration site.
All your frontend web servers.
The index server (if using a separate server for search queries and indexing).
Other application servers (optional).
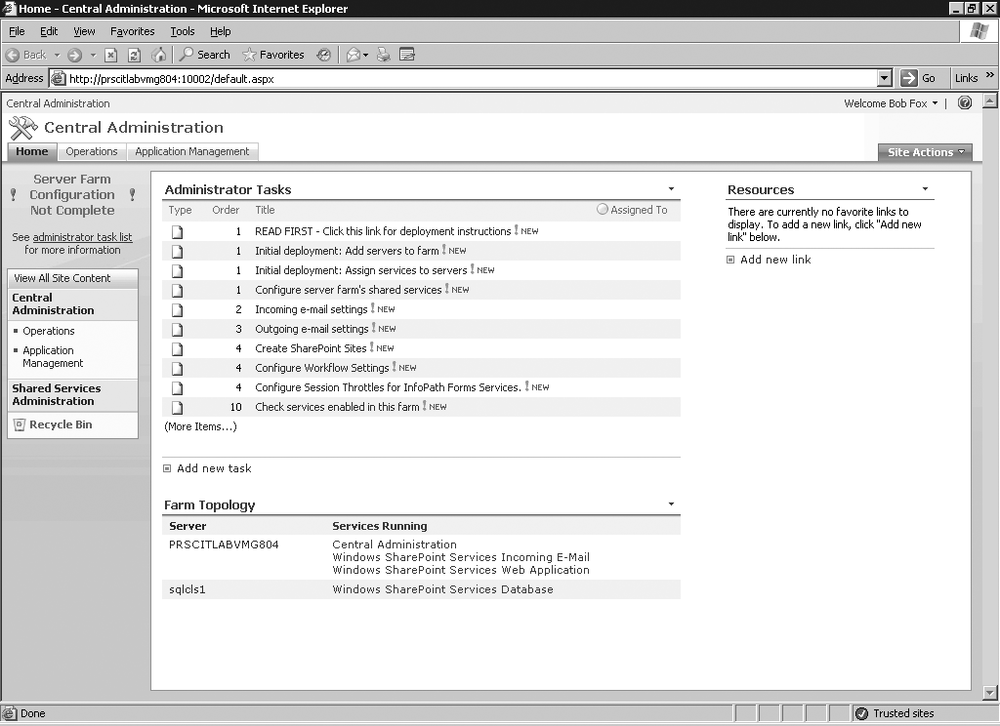
In Chapter 3, we went through the steps of running the Configuration Wizard on our first server. In Figure 4-5, we see the results after installing this first server. Notice that, at this point, simply the Database Instance and the first server are showing. We are going to change that with the next series of steps.
At this point, the first server has been configured, and now we want to run the Configuration Wizard on the rest of the boxes in our farm. If you refer to the Recommended Order of Install, you can run the Configuration Wizard on every box in your farm in any order, but it must be done one server at a time. The recommended order applies when you actually start to place the services on the respective boxes in your farm, and this can be completed after you have joined the servers to the farm, which happens during the next series of steps.
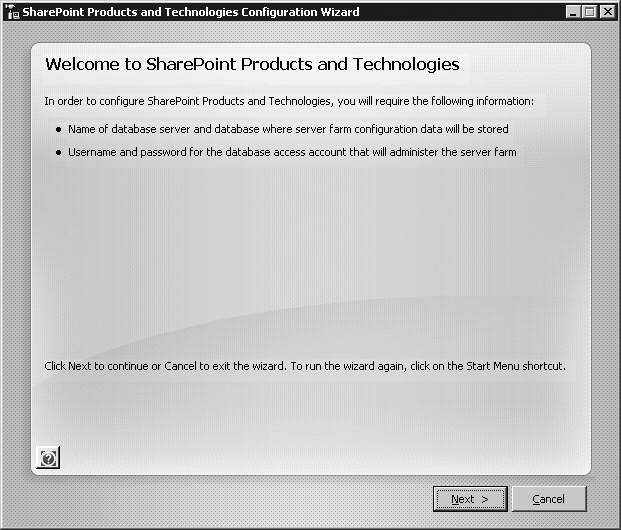
When the Initial Configuration Screen (Figure 4-6) opens, click Next.
You will be greeted with a notification that services will be restarted automatically (Figure 4-7). This is normal. Click Yes.
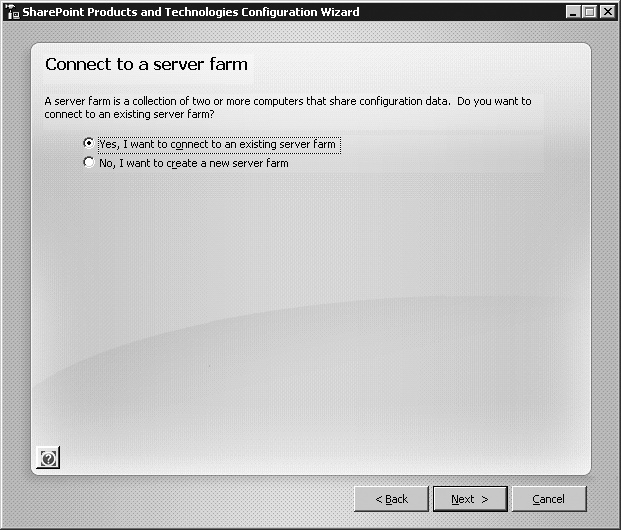
Since we're joining servers to an existing farm, we will select the radio button as shown in Figure 4-8 ("Yes, I want to connect to an existing server farm").
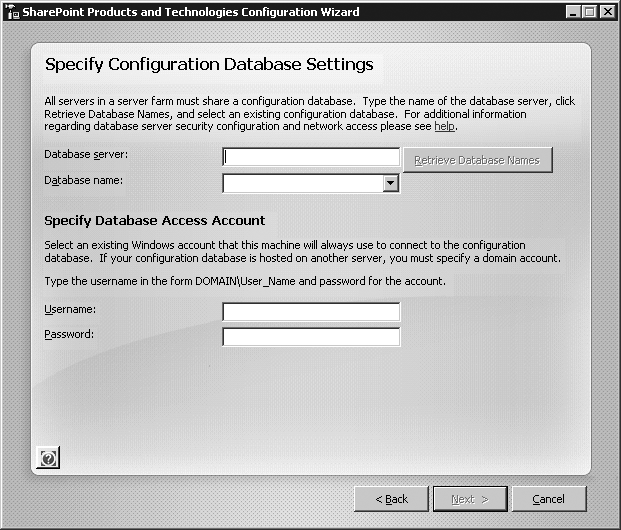
In the next screen (Figure 4-9), enter the name of your database server. Once you do this, the button Retrieve Database Names will become active (see Figure 4-10). Click it.
After clicking Retrieve Database Names, the configuration wizard finds the correct configuration database (Sharepoint_Config) and fills in the username. Next, enter the database account password (Figure 4-11).
Click Next after entering the SQL Account Password, and then click the Advanced Settings button, as shown in Figure 4-12.
After clicking Next, you will have two choices (Figure 4-13). This screen simply asks whether you want to allow this server to host an instance of the Central Administration Web Application. Generally you should have two servers in a farm with this role, so you can fall back on one if the other is down. In this case, select the top radio button: "Do not use this machine to host the web site." If you want to add this role to another box at a later time, you can do so via the Central Administration Web Console.
At this point (Figure 4-14), we are ready to begin the configuration; the wizard has all the information it needs. Click Next.
After selecting Next, the wizard will go through a series of nine steps (Figure 4-15). You do not need to do anything, and generally this completes within five minutes.
After the configuration part of the installation is complete (Figure 4-16), click Finish. You can go back to your Central Administration Console (Figure 4-17) and see that this server has been added to the farm.
Continue to run the installation procedure on every server that belongs in the farm. The end result should resemble Figure 4-18.
Get SharePoint 2007: The Definitive Guide now with the O’Reilly learning platform.
O’Reilly members experience books, live events, courses curated by job role, and more from O’Reilly and nearly 200 top publishers.


