If you've ever tried to collaborate on a budget, project bid, or any other team-oriented workbook in Excel, you know that just putting the .xls file up on a public server doesn't cut it. Only one person can edit the workbook at a time, and if somebody leaves the file open, the rest of the team is locked out until you find the culprit and get him to close his session. SharePoint solves this problem through shared workspaces and shared lists.
To share a workbook through SharePoint:
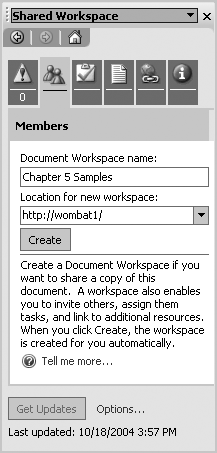
Open the workbook in Excel and select Tools → Share Workspace. Excel displays the Shared Workspace task pane, as shown in Figure 4-1.
Type the address of your SharePoint site in the Location box and click Create.
The SharePoint site may ask you to sign in. Enter your username and password and click OK.
Once the workbook is shared, Excel changes the task pane. You can click on "Open site in browser" to view the new shared workspace.
Note
Don't confuse Tools → Share Workspace with File → Save Workspace. Save Workspace creates an .xlw file that stores your Excel windows and open documents. Also, don't confuse it with Tools → Share Workbook. Share Workbook is the old way to allow multiple authors to edit a workbook at the same time.
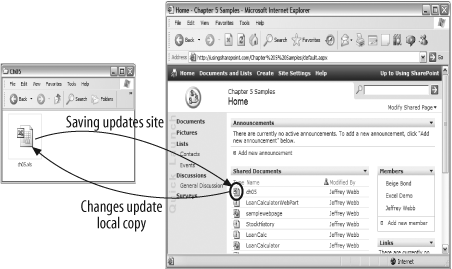
Excel connects to the SharePoint site and creates a new document workspace for each workbook you share from Excel. The workbook stored locally on your computer is now linked to the workbook stored on SharePoint. If you save the workbook, changes are saved locally and then sent to the server. If you close and then reopen the local workbook, Excel connects to SharePoint to get any changes that have been made by other users, as shown in Figure 4-2. See the later section "Reconciling Changes and Viewing History" for an explanation of how to manage changes made by others.
Sharing a workbook is actually only the first step to using SharePoint from Excel. After you share a workbook you can:
Add other documents to the workspace. New workspaces contain one document; you will probably want to add others.
Add members. By default, SharePoint only includes you in the workspace, and you must grant others access before they can edit documents in the workspace.
Send alerts. SharePoint automatically notifies new members when you add them to a workspace. Later, you can use alerts to notify members of changes or approaching deadlines.
Assign tasks. Workspaces also help you keep track of tasks that have been assigned to members.
Check files in and out. Checking a file out prevents others from changing it.
Reconcile changes. If a file is not checked out, members must reconcile their changes.
View document history.
The following sections describe how to accomplish those tasks from Excel through the Shared Workspace task pane.
If the local file is linked to a shared workspace, opening that file automatically connects it to the SharePoint site and updates the local file. (You may have to sign on to the SharePoint site.) Excel displays the update status, as shown in Figure 4-3.

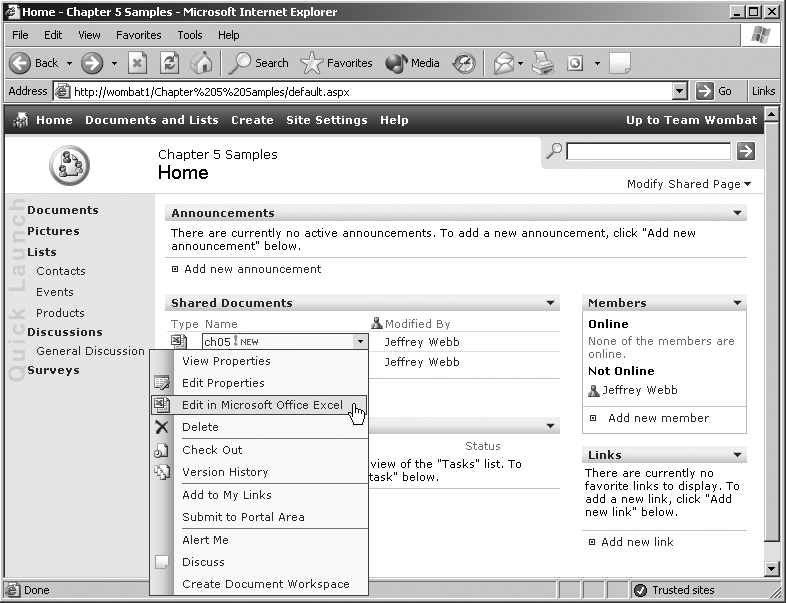
If the workbook is not linked, or if it is not stored locally, you can open it from the SharePoint site. If you double-click on a workbook in the SharePoint site, Excel opens it as read- only. To open the workbook for editing, select "Edit in Microsoft Office Excel" from the pop-up menu on the site, as shown in Figure 4-4.
SharePoint doesn't require you to check files in or out before making changes, though it is a good idea to do so. The advantage of checking files in and out is that others can't edit the document while you have it checked out.
The same thing is true if you open the document directly from the SharePoint site. While you have a file open for editing from the site, others can open that file only in read-only mode. However, this doesn't happen when working with local copies of a document that are linked to the SharePoint site. In that case, members must resolve conflicting changes using the Document Updates task pane.
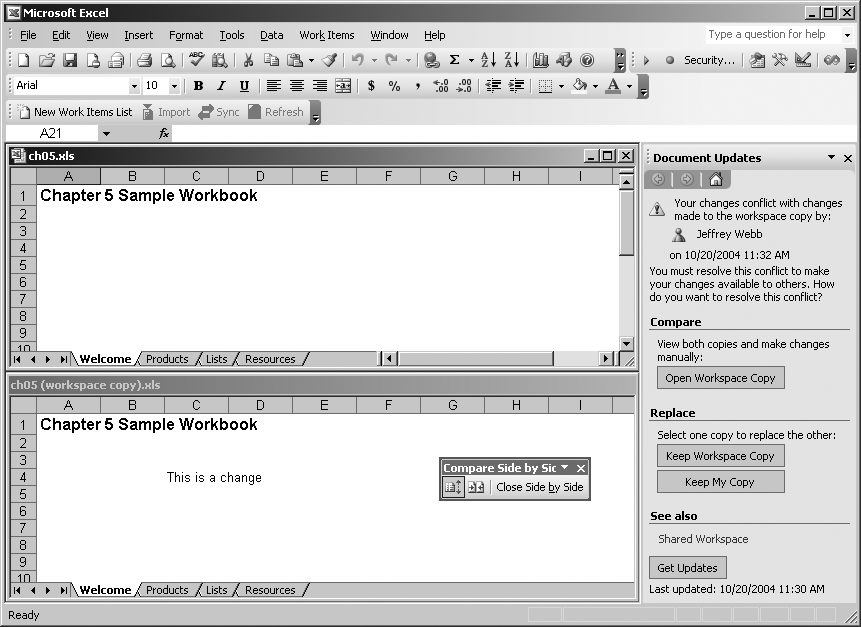
Whenever you open a document linked to a workspace, Excel checks to make sure you version is up to date. If others have made changes, Excel notifies you that your changes conflict with others'. To reconcile changes:
In the Document Updates task pane, click Open Workspace Copy.
Choose Window → "Compare Side by Side". Excel displays the two versions for comparison, as shown in Figure 4-5.
SharePoint can track changes to documents in the workspace, but that feature is turned off by default. To turn on version tracking:
From the workspace site's home page, select Shared Documents → "Modify columns and settings" → "Change general settings".
On the settings page, select Yes in the Document Versions section and click OK.
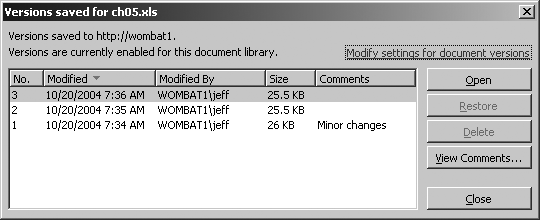
Once version tracking is on, a separate version of the document is saved each time a member updates it. To see the version history from the Shared Workspace task pane, select Document Information → "Version history". Excel displays the window shown in Figure 4-6.
Note
You can also view version history from the workspace home page by right-clicking the document and selecting Version History from the context menu.
Get SharePoint Office Pocket Guide now with the O’Reilly learning platform.
O’Reilly members experience books, live events, courses curated by job role, and more from O’Reilly and nearly 200 top publishers.

