SharePoint Services helps you locate a site by providing navigation links, a search framework, and standardized site layouts. These features help increase the productivity of your team and other users by reducing the time spent trying to locate a site or master the details of a new site layout.
In order to work with a SharePoint site, you must first know how to get to it from a web browser. Without knowing its direct link, finding the site can be challenging. SharePoint solves this problem by providing a page that lists all available sites.
Tip
Once your system administrator installs SharePoint, he will provide you a URL that points to the SharePoint home page. If you do not know this URL, ask your SharePoint administrator to provide you with the appropriate link.
From the Manage Sites and Workspaces page, you can access:
To access this page:
Go to the SharePoint home page and click Documents on the Quick Launch menu or Documents and Lists on the top menu bar.
Click the Sites link on the lefthand menu under the See Also section.
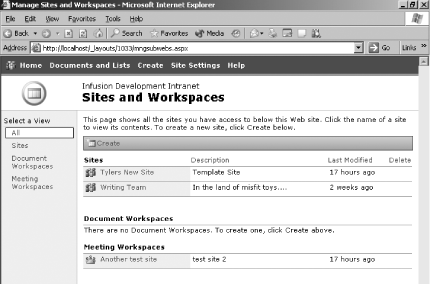
The current view displays the team sites you can access. If you want to view the document workspaces and meeting workspaces as well, click All under the section Select a View on the lefthand side. To filter just document workspaces or meeting workspaces, you can select the associated links on the lefthand side.
Figure 1-3 shows the list of all sites and workspaces at the Infusion Development intranet site.
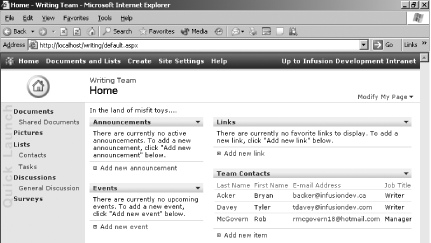
Once you have found a specific site, you can click the title of the site, which will forward you to the home page. Figure 1-4 displays a typical team site home page, in this case the site used by the writers of this book.
SharePoint separates a site into three distinct navigation areas. While the content in these areas may change, their location will usually remain the same.
The top menu bar remains the same across all sites and workspaces unless advanced customization tactics are used. The top menu bar provides links to the following areas:
- Home
A link back to the home page of the site.
- Documents and Lists
A link to the Documents and Lists main page. From here, you can manage all documents and lists within the site.
- Create
A link to the Create page. From here, you can create new Web Parts, including:
Document libraries
Picture libraries
Lists
Custom lists
Discussion boards
Surveys
Web pages
Each of these items is described in Chapter 2. You must have appropriate access rights to create any of the above items. Access rights are discussed in Chapter 4.
- Site Settings
A link to the Site Settings main page. From here, you can manage your personal information and the site settings you have permission to modify.
- Help
A link to the Help main page. Help appears in a new window, and allows the user to browse for help while still accessing the site.
- Up to <SharePoint Main Site Name>
The Quick Launch menu is found on the navigation bar located on the lefthand side of a SharePoint page and provides most of your navigation needs for accessing libraries and lists. Any library or list can be added and removed from the Quick Launch menu. This provides you with full control over the contents in the menu.
The Quick Launch menu is organized into five categories on the home page:
- Documents
Quick links to all document libraries.
- Pictures
Quick links to all picture libraries.
- Lists
- Discussions
Quick links to all discussions. Although the Web parts are called discussion boards, the quick launch bar always references these parts as Discussions.
- Surveys
Quick links to all surveys.
Each of these items is discussed in Chapter 2.
When you browse a SharePoint team site, the links on the Quick Launch menu change depending on the page being viewed. For example, when you select the Documents link on the Quick Launch menu, the menu changes to display the Select a View and See Also links.
The biggest change to the Quick Launch menu occurs with meeting workspaces. A meeting workspace does not have a Quick Launch menu. Instead, the workspace has tabs that provide the navigation for the site.
With the top and the lefthand side of a page devoted to site navigation, the remaining part of the page contains the main content of the site. The main content of a site is always changing, depending on which page you are viewing.
The home page main content area provides sections that a user typically needs to access immediately. For example, in a meeting workspace, the main page contains sections for attendees, agendas, objectives and documents.
With sufficient privileges, you can add and remove these sections in your personal view or for all users. Customization is discussed later in this chapter.
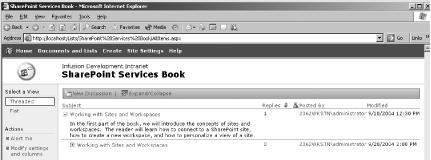
From the home page, you can navigate to pages that display a single item or Web Part. For example, from a "Writers Team" site, you might link to a page displaying a discussion on a particular book project, as shown in Figure 1-5.
Single-item pages display a limited set of choices. For example, on the discussion board page, you can only perform tasks that relate to the discussion, such as viewing an existing thread or creating a new discussion.
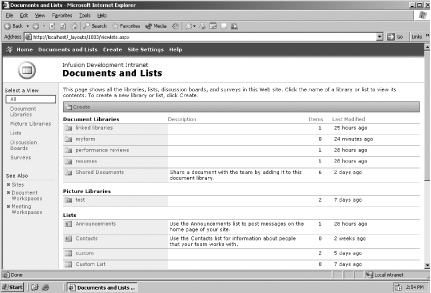
Other secondary pages contain Web Parts that have a wider range of choices. Figure 1-6 shows a Documents and Lists page. This page displays the libraries and lists that are available to users. Once you select a specific library or list, you will see a new page that looks more like a single-item page.
Not only can you select a specific library or list, you can also sort the items in each section by description, number of items, or last modified date.
Previous versions of SharePoint handled searching using Internet Information Services (IIS) catalogs. IIS catalogs index documents within a file system, limiting your search to those documents rather than all of the content in the site. To fix this limitation, Windows SharePoint Services stores all content, documents, and settings in a database. Now, instead of using IIS catalogs to search, SharePoint uses the full-text searching capabilities of the database. Searching the database ensures that all content, documents, and settings are searched.
Tip
Search is limited to installations of SharePoint using Microsoft SQL Server 2000 as the database. Microsoft SQL Server Desktop Engine 2000 (WMSDE) does not support searching. For more information on choosing a database, see Chapter 6.
In order to search a SharePoint site, you need to enable searching within SharePoint. Only site administrators can enable or disable the search setting. To enable or disable searching:
Open the SharePoint Central Administration site.
Click Configure Full Text Search from the Component Configuration section.
Click the "Enable full-text searching and index component" checkbox.
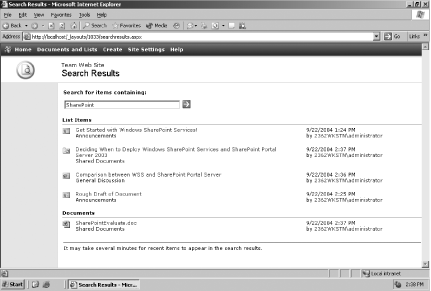
With searching enabled, a new search text box appears on the top right of all site pages. To execute a search, enter a search string in the text box and click on the arrow button. Figure 1-7 shows the results of a search on the Search Results page.
You can click on any result to access the returned item. If you performed the search within a subsite, you can search for additional results by clicking the "Search for <search string> on <main site title>" link. This will expand your search to include all the sites within SharePoint.
Get SharePoint User's Guide now with the O’Reilly learning platform.
O’Reilly members experience books, live events, courses curated by job role, and more from O’Reilly and nearly 200 top publishers.
