July 2005
Intermediate to advanced
240 pages
5h 27m
English
After you’ve created your wiki, it’s available for editing. You and your students can create wiki pages, link them together, and collaboratively create a collection of web pages.
After you create the wiki itself, Moodle will take you to the editing screen for the first page, as shown in Figure 11-2.
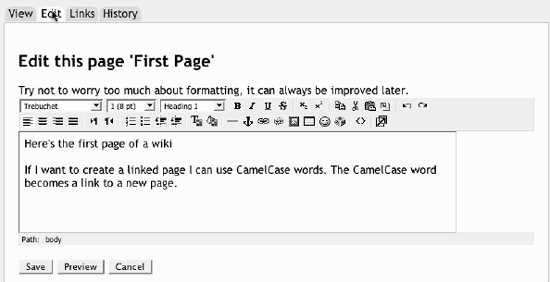
Figure 11-2. Wiki editing page
In the center of the screen, you’ll see the editing area for your wiki page. You can use the HTML editor as you would for any other document. You can add images, tables, and any formatting you need.
To add other pages to your wiki, simply type a word with a capital letter at the beginning and a capital letter somewhere else in the word. This is called CamelCase, as the two capital letters resemble a two-humped camel. Whenever you type a CamelCase word, Moodle will recognize it and look in the database for a page with that name. If you haven’t created a page with that name, Moodle will put a question mark next to the word. When you click on the question mark, you will be taken to another editing screen for the new page.
For example, if I create a new wiki and type the word “CamelCase” in the page, Moodle will look to see if a page with the name “CamelCase” has already been created. If it hasn’t, I’ll see a blue question mark next to the words when I view the page, as shown in Figure 11-3.
Figure 11-3. CamelCase words without link ...
Read now
Unlock full access


