Customizing the Start Screen
Although the Lock Screen might be the first thing you see when you start Windows 8, you’ll certainly spend a lot more time working on the Start screen, so that’s where we’ll start our tour of the tools and settings you can use to customize the interface.
Rearranging tiles
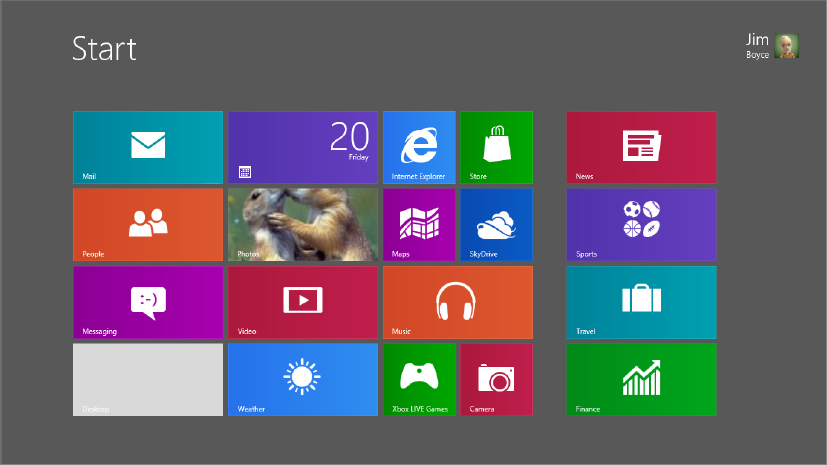
Figure 12.1 shows a portion of a typical Windows 8 Start screen. As the figure shows, the tiles on the Start screen are grouped. You can rearrange the tiles on the Start screen, moving them within a group, moving them to other groups, or even creating new groups.
FIGURE 12.1 Tiles on the Windows 8 Start screen

Moving tiles within a group is easy. If you are using a touch device, tap and hold the icon until a checkmark appears near the upper-right corner of the tile; then simply drag it into its new position. If you are using a mouse, right-click the tile to make the checkmark appear, and then left-click and drag the tile to its new position.
Adding and removing tiles
As you might expect, you can customize the tiles that appear on the Start screen, adding and removing tiles as desired. For example, you might add the documents or websites you use most often, and remove the apps you seldom or never use. The ...
Get Windows 8 Bible now with the O’Reilly learning platform.
O’Reilly members experience books, live events, courses curated by job role, and more from O’Reilly and nearly 200 top publishers.

