Printing
Fortunately, the setup described so far in this chapter is a one-time-only task. Once it’s over, printing is little more than a one-click operation.
Printing from Programs
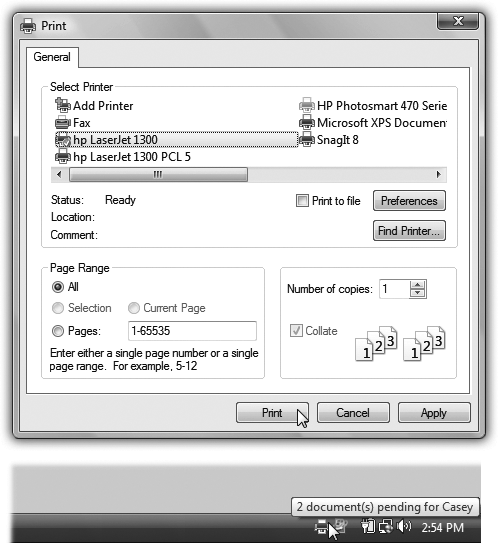
After you’ve created a document you want to see on paper, choose File→Print (or press Ctrl+P). The Print dialog box appears, as shown at top in Figure 11-3.

Figure 11-3. Top: The options in the Print dialog box are different for each printer model and each application, so your Print dialog box may look slightly different. For example, here are the Print dialog boxes from Microsoft Word and WordPad. Most of the time, the factory settings shown here are what you want (one copy, print all pages). Just click OK or Print (or press Enter) to close this dialog box and send the document to the printer. Bottom: During printing, the tiny icon of a printer appears in your notification area. Pointing to it without clicking produces a pop-up tooltip, like this one, that reveals the background printing activity.
This box, too, changes depending on the program you’re using—the Print dialog box in Microsoft Word looks a lot more intimidating than the WordPad version—but here are the basics:
▸ Name. If your PC is connected to several printers, or if you’ve created differently configured icons for the same printer, choose the one you want from this list of printers.
▸ Page range controls which pages of the document you want to ...
Get Windows Vista Annoyances now with the O’Reilly learning platform.
O’Reilly members experience books, live events, courses curated by job role, and more from O’Reilly and nearly 200 top publishers.

