Uninstalling Software
When you’ve had enough of a certain program, and want to reclaim the disk space it occupies, don’t just delete its folder. The typical application installer tosses its software components like birdseed all over your hard drive; therefore, only some of it is actually in the program’s folder.
Instead, ditch software you no longer need using the “Add or Remove Programs” program described above. Click the Change or Remove Programs button at the top left, and then proceed as shown in Figure 5-16.
Tip
If your computer is a member of a workgroup and you’re using Fast User Switching (see Section 17.6.1), don’t delete a program until you’ve verified that it isn’t running in somebody else’s account behind the scenes.
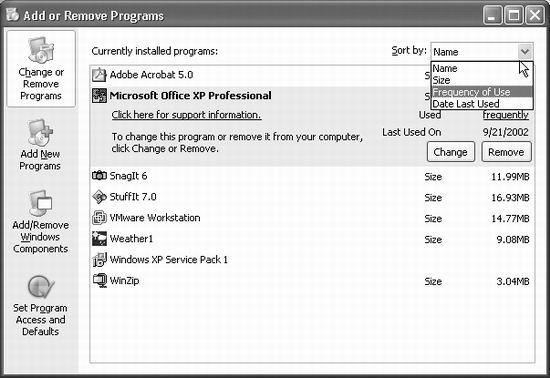
Figure 5-16. To vaporize a program, click its name to reveal its gray, highlighted panel, as shown here, and then click the Remove button. You can use the “Sort by” drop-down menu to sort the list by Frequency of Use or Date Last Used. (Note, though, that Windows doesn’t keep perfect track of all types of programs, especially those that run in the background, so these statistics are likely to be unreliable.)
Get Windows XP Pro: The Missing Manual, Second Edition now with the O’Reilly learning platform.
O’Reilly members experience books, live events, courses curated by job role, and more from O’Reilly and nearly 200 top publishers.

