Mapping Shares to Drive Letters
If you access network shares on a regular basis, you may want to consider another access technique called mapping shares. Using this trick, you can assign a letter to a particular shared disk or folder on the network. Just as your hard drive is called C: and your floppy drive is A:, you can give your Family Stuff folder the letter F: and the Jaz drive in the kitchen the letter J:.
Doing so confers several benefits. First, these disks and folders now appear directly in the My Computer window. Getting to them can be faster this way than navigating to the My Network Places window. Second, when you choose File→Open from within one of your applications, you’ll be able to jump directly to a particular shared folder instead of having to double-click, ever deeper, through the icons in the Open File dialog box. You can also use the mapped drive letter in pathnames anywhere you would use a path on a local drive, such as the Run dialog box, a File→Save As dialog box, or the command line.
To map a drive letter to a disk or folder, open any folder or disk window. Then:
Choose Tools→Map Network Drive.
The Map Network Drive dialog box appears, as shown in Figure 20-7
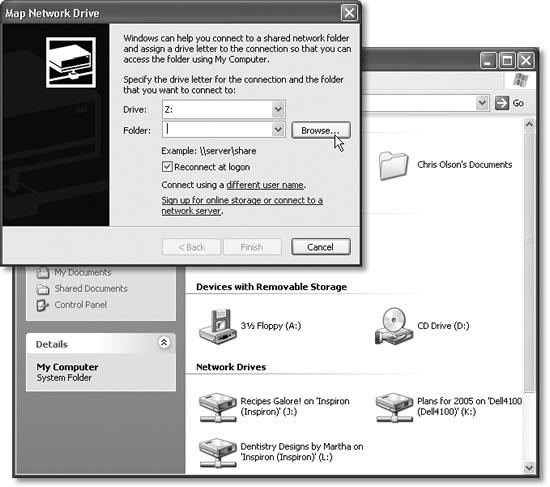
Figure 20-7. Top: The “Reconnect at logon” option tells Windows to locate the share and map this drive letter to it every time you start your computer. Bottom: Once you’ve mapped a few folders or ...
Get Windows XP Pro: The Missing Manual, Second Edition now with the O’Reilly learning platform.
O’Reilly members experience books, live events, courses curated by job role, and more from O’Reilly and nearly 200 top publishers.

