Configuring the Settings
At the very bottom of the navigation menu, you can find the Settings option. Click Settings, and a menu list opens that contains the following links, which we discuss in the sections that follow:
- General
- Writing
- Reading
- Discussion
- Media
- Privacy
- Permalinks
General
After you install the WordPress software and log in, you can put a personal stamp on your blog by giving it a title and description, setting your contact e-mail address, and identifying yourself as the author of the blog. You take care of these and other settings on the General Settings page.
To begin personalizing your blog, start with your general settings by following these steps:
- Click General link in the Settings menu list.
The General Settings page appears (see Figure 3-1).
Figure 3-1: Personalize the settings of your WordPress blog on the General Settings page.
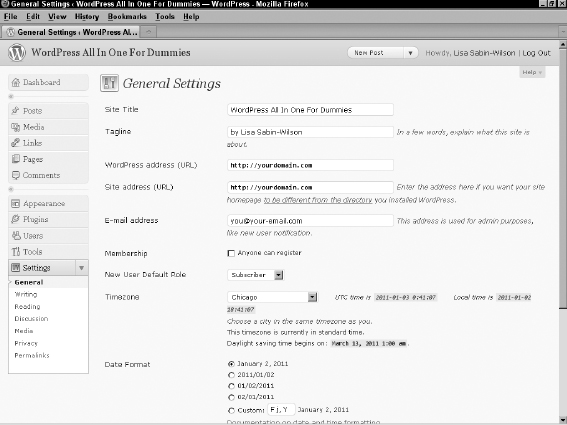
- Enter the name of your blog in the Site Title text box.
The title you enter here is the one that you gave your blog to identify it as your own. In Figure 3-1, Lisa gave the new blog the title WordPress All-In-One For Dummies, which appears on the blog, as well as in the title bar of the viewer's Web browser.
 Give your blog an interesting and identifiable name. You can use Fried Green Tomatoes, for example, if you're blogging about ...
Get WordPress® All-in-One For Dummies® now with the O’Reilly learning platform.
O’Reilly members experience books, live events, courses curated by job role, and more from O’Reilly and nearly 200 top publishers.

