Conceptually, you now understand the types of steps involved in building your app. It’s time to get more tactical again, though, so that you can help guide your app into the hands of your testers and eventually into the App Store.
Managing your app’s progress requires good organization and collaborative, real-time access to the status of features and their tasks. As customers enter the picture more fully—while testing the app, and later, when it’s live in the App Store—you’ll also need a way to track their input.
You can try to develop your own solutions, but it’s best to turn to any number of third-party tools built specifically to help you collaboratively manage your development progress or customer feedback. The tools available are plentiful and competitively priced. Before investing too heavily in any of them, ensure that they’ll meet your needs.
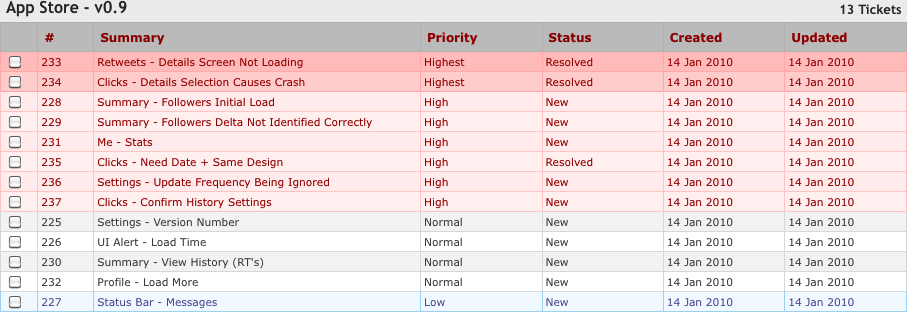
The tasks, from the breakdown of your features, are the smallest building blocks of your app. You’ll input these tasks (also referred to as “issues” or “tickets”) into an issue tracking tool, which will allow you to assign when they are due, their priority (e.g., highest, high, normal, or low), their owner, which release they are part of (in this case, probably the 1.0 release), their current status, and other information, depending on the tool you select. As you, your team members, and your customers uncover problems with your app, you will also log and track these problems (bugs) in this tool.
“Status” is an important field in any ticket, because it should inform you whether the ticket is not started, is in progress, or is completed. You and your team members should be very diligent about updating tickets with notes and editing fields such as “Status” or “Ownership” regularly. If tickets are kept up-to-date, you will know if you are staying on schedule in meeting your app’s submission date or if you have fallen behind. Because the highest-priority tickets will be worked on and completed first, you will start moving the lower-priority ones to the next release or the backlog.
Here are some issue tracking options to consider:
Unfuddle (see Figure 5-18), http://www.unfuddle.com/
Lighthouse, http://lighthouseapp.com/ (integrates with Beanstalk and GitHub)
FogBugz, http://www.fogcreek.com/FogBugz/ (integrates with Kiln)
If your app becomes very popular or even shows any signs of life, you’ll begin to get overwhelmed with customer inquiries and feedback through a variety of channels (e.g., Twitter and email). As with your tickets, you’ll need to stay organized, and the first step in doing that is to try to funnel as much of this information to one place as possible. Thus, your customer support tool will be comparable to your issue tracker, but externally (i.e., customer) focused.
Customer support tools present a couple of challenges, but don’t let this devalue their importance. The first challenge is that you won’t be able to capture a significant customer support channel—Twitter—through any automated fashion. The second challenge, which relates back to the first, is that customer support inquiries will often require that you create a ticket in your issue tracker. For example, if you receive a customer question—through Twitter, email, or your customer support tool—about a function of your app that you previously had not verified as broken, you’ll need to create a ticket in your issue tracker for this bug. When the bug is fixed you’ll need to update that ticket’s status and let the customer know the issue has been resolved. The interconnectedness of these actions is why some customer support tools integrate with issue trackers.
Unfortunately, there’s no perfect solution to this, and you’ll have to evaluate, publicize, and then be firm about how customers should contact you regarding support or feature requests. You may, for example, indicate that you don’t offer support through Twitter, or opt to use a shared support email inbox (e.g., support@tweebapp.com) instead of a third-party support tool.
Here are some customer support tools worth considering:
Zendesk, http://www.zendesk.com/
Tender, http://tenderapp.com/ (integrates with Lighthouse)
Get Satisfaction, http://getsatisfaction.com/
CoTweet, http://cotweet.com/
Be demanding yet reasonable throughout the design and development process. Your team should be iterating quickly, delivering new or updated assets every day. On the design side, these assets should be screens or artwork for the app. On the development side, this should be a working prototype of the latest app that incorporates the existing design assets. Speed and consistency are more important than polish and the risk of missing deadlines during the earliest stages of this process.
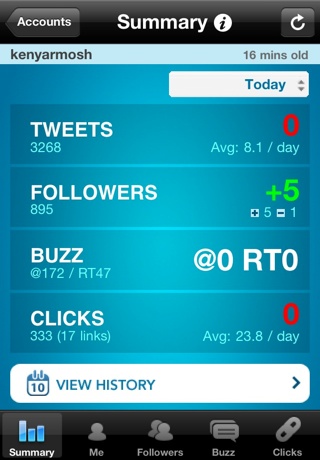
The value of a fully functioning prototype of your app—installed on an actual device—should not be underestimated. Your developer will demo your app in a tool called the iPhone Simulator. This tool only mimics an actual device and will not uncover certain bugs or include full support for capabilities such as Multi-Touch (although it can do so using a third-party tool called iSimulate; see http://www.vimov.com/isimulate/).
In general, the earlier your app gets on a device, the better. So, even early in this process, you should push your developer to always test the app by building it onto the device. Developers often won’t want to test the app this way because it takes slightly longer to load it onto the device compared to the iPhone Simulator. At the very least, however, it must be tested on the device itself before it is sent to you.
Note
Your next marketing checkup should occur when the design of a screen from your app is near completion. This screen will be used on its own, so it does not need to be integrated into your app yet. When that is the case, go to the Phase 3 section in Chapter 8. Figure 5-19 represents the evolution of the wireframe I showed you back in Chapter 3.
Get App Savvy now with the O’Reilly learning platform.
O’Reilly members experience books, live events, courses curated by job role, and more from O’Reilly and nearly 200 top publishers.

