It’s time for you to get musical. OK, not really. But I want you to grab on to the idea that your marketing efforts should be a crescendo. “Crescendo” is a term used in music that indicates a gradual increase in sound and intensity; the music starts soft and then slowly but surely gets significantly louder. The approach you follow for your marketing will be similar. You don’t want to start your marketing with a big bang (or people will run away!); rather, you want it to peak in conjunction with your app’s progress toward the App Store. Your initial marketing climax should occur when your app finally gets launched into the App Store.
Depending on your goals and the type of app you’ve built, that initial push may be all you need to achieve your goals. This is especially true if you are building timely or seasonal apps (e.g., a holiday-related app), or if you’re pursuing simpler or gimmicky apps. These types of apps have shorter life spans and it’s much more important to capitalize on all the buzz possible when the app is first launched. If you’re building a more complex app or an app that has long-term value, the initial attention garnered by the launch of your app into the App Store is just the start of the journey. This case, in particular, requires a higher dependence on customers’ goodwill post-App Store launch. Customers, and not bloggers or the press, will act as the gatekeepers for whether your app will be sustainable over the long haul.
In the following subsections, I outline the five phases of the marketing process, which correlate to ongoing development tasks. The final two phases are focused on readying for the actual launch of your app. All are referenced from their respective chapters as “marketing checkups.”
In Phase 1, you’ll further explore using Twitter. Twitter will serve to keep a real-time channel of communication open with the customers you’ve already interacted with, as well as help you discover new people who could be interested in your app.
Note
You should have visited this section once before, when you were done reading the section Surveys and the “social” web in Chapter 3. You might want to quickly review that section if it’s been a while since you read it.
Phase 1 will also ask you to begin tracking what’s happening in the iOS development community. You’ll develop a reading list of influential thought leaders and start following them on Twitter, while also forming peer relationships through Twitter and elsewhere.
Marketing your app begins when you first start talking with your customers. One of the channels identified in Chapter 3 that provided your first customers to talk with was Twitter. The Twitter demographic is ideal because it represents a more cutting-edge, early-adopter crowd. As you will shortly see, the value of Twitter extends beyond solely finding customers.
- Be useful
Twitter will be a primary way to engage meaningfully with your customers and keep them informed about what’s happening with your app. Even outside the App Store ecosystem, Twitter has become a popular means to answer customer questions, make announcements, and offer special Twitter-only deals (e.g., http://twitter.com/VirginAmerica).
Some amount of etiquette is involved in being successful on Twitter. I can summarize much of that for you with some simple advice from Laura Fitton, an author of Twitter for Dummies and founder of the Twitter app directory oneforty (http://oneforty.com): “Be useful.” Don’t make Twitter about yourself or your app. Make it about others. Make it about solving your customers’ problems, linking to great resources, and sharing practical advice. Being useful will increase the likelihood of people following you on Twitter, which in turn expands your audience and reach.
On that note, you will need to determine the presence you will have on Twitter. Some developers use their personal identities to represent their apps, while others create separate accounts specifically for the app. If you are new to Twitter, I recommend just starting with one account because maintaining that alone will entail some amount of learning. If you go with two accounts, consider whether you will launch more apps in the future. In that case, it’s better to make the Twitter username of the “app account” related to your iOS developer name.
Indie developer and college student Jeremy Olson, who created the app Grades, has his own personal Twitter account (http://twitter.com/jerols/) and one for his app (http://twitter.com/gradesapp). When discussing Grades on his personal account, he mainly uses it to interact with those in the iOS development community. The Grades account, which was created closer to the launch of Grades, is all about news related to Grades, including what other people are saying about it. Visit each account to better understand how they are used. In Jeremy’s interview at the end of this chapter, he shares some insights about Twitter, as well as marketing and launching an app.
- Twitter clients
Twitter can seem overwhelming if you haven’t used it before. One way to deal with those challenges is to find a Twitter client. The benefit of Twitter clients is that they streamline access to Twitter functions such as following a new account, mentioning (also known as “replying to”) an account, searching, and composing new tweets. oneforty, the Twitter directory mentioned earlier, has an extensive listing of Twitter clients at http://oneforty.com/category/Clients, but I’m also going to share my own preferences.
For my personal account (http://twitter.com/kenyarmosh), I use the app Echofon (http://echofon.com/) because it syncs my timeline (all of the tweets from the people I follow) across all devices (e.g., Mac, iPhone, and iPad). Like Jeremy and others, I use my personal account to interact with peers and track technology news.
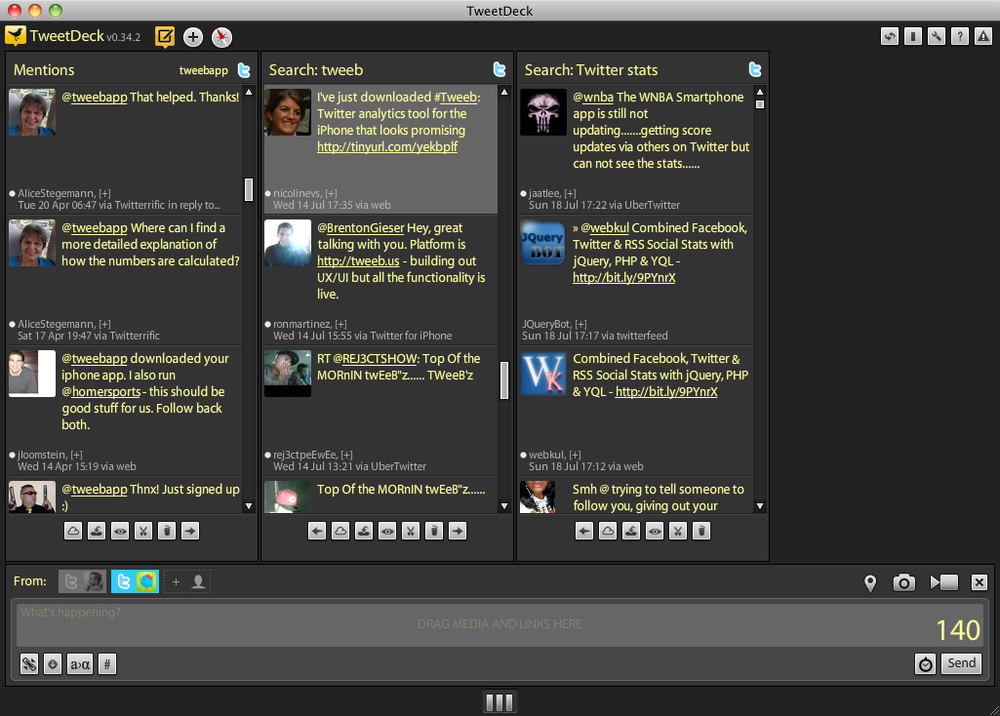
Before my interests in Tweeb were acquired, I also maintained an account for it (http://twitter.com/tweebapp). To manage the app account, I used a column-based client called TweetDeck (http://tweetdeck.com/). Column-based clients—including TweetDeck, HootSuite, and Seesmic—let you view much more information at once, allowing you to see what your customers are talking about while also keeping an eye on competitors and potential new customers (see Figure 8-1).
- Follow your customers
Whether you are using Twitter.com or a Twitter client, you should follow the customers you previously found on Twitter (see Chapter 3). If you decided to have an app-specific account, use that account to follow them. Don’t feel bad or stop following them if they don’t follow you back. Feel free to reply to them from this account if you have something relevant to contribute.
- Follow influencers and peers
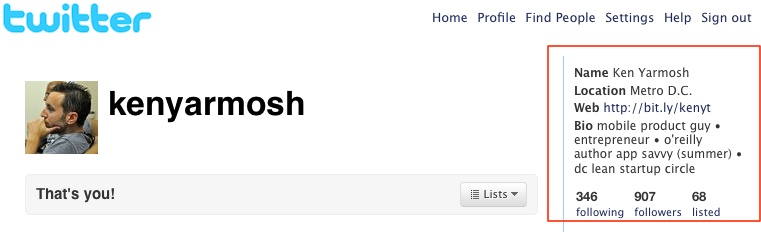
Twitter can also be used to track iPhone-related news and interact with peers. By following influencers in the iPhone and mobile community (see Figure 8-2), you’ll begin seeing tweets in your timeline that will provide helpful information to build your app and better understand the psyche of the iPhone community. You can usually—but not always—identify influencers by the number of followers they have. You can also check out their bios and timelines to see if their tweets contain information you find useful.
Beyond using Twitter search to find these types of people (e.g., searching for “iOS 4” and then perusing the accounts for the results returned), two tools I mentioned in Chapter 3 are again useful here: WeFollow and Twiangulate. For example, compare my account with Jeremy’s on Twiangulate (http://twiangulate.com/search/kenyarmosh-jerols/common_friends/table/my_friends-1/) and you’ll see the people in common that we each follow. Once you’ve found a couple of key influencers, plug them into Twiangulate and your job should become much easier.
You can find peers in pretty much the same way. Peers may not have very large follower counts. If you still consider their tweets interesting, follow them anyway. There’s a higher likelihood that peers are going to interact with you on Twitter, so don’t just try to cozy up to the “big dogs.” You’ll most likely want to add influencers and peers to your personal Twitter account (i.e., your nonapp account), to make those interactions less formal.
- Keywords
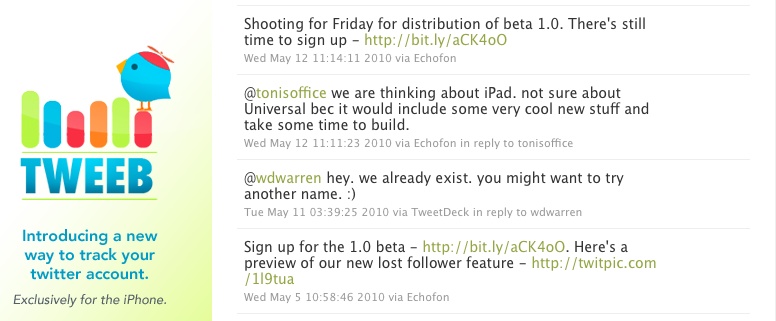
You can save Twitter keyword searches to your account, which allows you to more easily reference them. You can easily import a saved keyword search into a tool such as TweetDeck as a column (you can also create a search column directly in TweetDeck). You’ll then have a column dedicated to keywords that are relevant to your app.
For example, in the Tweeb account (@tweebapp), I had a search column for “tweeb” and “Twitter stats” (see Figure 8-1). These keyword searches are related to the features that customers of Tweeb considered important. With this setup, instead of prospecting for customers, they were pushed to me straight from Twitter. I then had the option of either interacting with these prospects right away or continuing to monitor them.
- Lists and competitors
Although you will use Twitter to find new prospects and even track competitors, you should to be smart about how you do this. This is where Twitter’s list feature, and specifically, a “private” list, will be applied.
The idea behind a list is essentially to group a number of Twitter accounts together. When you view this list, you will see all the tweets from those accounts. Again, a nice feature of a tool such as TweetDeck is that you can have an entire column dedicated to a list. By default, a list you create is public and others can see when their accounts are added to it. By marking it as private, that won’t be the case. I recommend creating private lists consisting of your competitors and your competitors’ most vocal customers. You can discover that latter group by seeing who your customers are mentioning in their tweets, as well as searching for mentions of your competitor (search the “@username” on Twitter or as a search column in your tool).
I also typically create lists to track the biggest advocates of my apps or client apps. Earlier in the process, such as where you are now, I use lists to add people that I’ll want to engage later based on what they are tweeting about. So, if you are tracking a particular keyword and an account keeps surfacing, you might want to add that person to a list. Like with competitor lists, I usually keep these lists private. For a somewhat more progressive and public use of lists, check out Jeremy’s account (@jerols).
Link sharing is very common on Twitter, so with the peer and influencer accounts you are following, you’ll receive pointers to lots of technology and iPhone articles. As you continue to visit those links, start either bookmarking the sites you find most informative or adding them to a feed reader such as Google Reader (http://www.google.com/reader). You can also visit sites such as Hacker News (http://news.ycombinator.com/news), Techmeme (http://www.techmeme.com), and Digg.com (http://digg.com/technology) to find the most popular community-driven tech articles of the day and subsequently discover new sites of interest. Spend 10 to 15 minutes a day tracking trends and digesting this information, whether from articles shared on Twitter or from your own favorite sources.
Note
I’ve purposefully not given you Twitter accounts to follow or blogs to read in this section because I want you to find these people and sources yourself. Explore Twitter and the Web extensively and aggressively. Ultimately, you’ll develop more natural relationships and learn much more by identifying these people and sources yourself.
Developing a reading list will show you who is important in the iPhone community. It will also identify the types of sites that might want to write about your app when it launches. Getting a sense of these outlets now will prepare you to pitch the most appropriate sites when the time comes.
Phase 1 doesn’t really “end.” You’ll continue to rely on Twitter to engage with your early customer community and peers, as well as keep tracking industry developments through your reading. What I’ve outlined in this section represents a baseline and starting point for you. Over time, you’ll develop your own strategies and the best ways to leverage these resources for you and your app.
In Phase 2, you’ll open another channel to communicate with customers and begin further enticing them with the vision behind your app. At this phase in the process, you still won’t have a working app and will likely only have some branding and logo assets at your disposal. Despite these limitations, Phase 2 will help you lay the foundation for your email marketing efforts and web presence.
Note
You should have visited this section once before, when you were done reading the Translating wireframes to screens section in Chapter 5. You might want to quickly review that section if it’s been a while since you read it.
With my focus on Twitter, email marketing may feel a little dated. But it still represents one of the best ways to broadcast information very quickly to a large and diverse audience. This last part is important, because although Twitter is becoming prevalent, it still is used more heavily by early adopters than it is by the general public. Comparatively, most people online today have an email address, meaning that email marketing will be useful to a larger number of customers or at least a different type of customer.
Recall that early in your app’s existence, interacting with “earlyvangelist” customers (see the Traits of the right customer section in Chapter 3) is preferable. These customers will endure the early hiccups of your app and stick with you because they’ll believe your app is going to solve their problems better than anything else. These types of customers will get you only so far, though. Although they’ll likely be your first paying customers, reaching normals will also be important.[9] These are the people who are potentially outside the reaches of Twitter, the blogosphere, and the tech community you’ve immersed yourself in up to now. If your customer discovery process produced many referrals for you, it’s possible that these types of people consist more highly of normals than earlyvangelists. The point here is that email marketing will provide a more universal means to communicate with all types of customers.
You don’t necessarily have to use an email marketing tool, but such a tool provides a number of advantages over email itself. Aside from basics, such as ensuring that your emails will get past spam filtering and helping manage your email list, one of the greatest advantages of email marketing tools is reporting. When sending an email, you’ll be able to see the delivery and open rates (how often people actually open the email) of the email, monitor unsubscribes (i.e., when people decide they no longer want to be on your email list), and later, even track clicks to your website. This data will inform you of the effectiveness of your outreach and what ideas and concepts are or are not resonating with your customers.
At a more fundamental level, however, your goal at this point will be to capture email addresses as you did with surveys. Most tools will provide you with a form to embed on your website (see Figure 8-3). This form will collect an email address from a visitor and allow you to later use it when you are ready to starting send email newsletters. Popular email marketing tools include MailChimp (http://www.mailchimp.com/), Campaign Monitor (http://www.campaignmonitor.com/), and Constant Contact (http://www.constantcontact.com/).
To place a form for visitors to fill out on a website or web page, you’ll need to have a website or web page. At this point, however, this page really won’t include much more than a basic graphic, some language that describes your app, and a form to capture emails.
These types of pages are often called splash pages or landing pages and their aim is to cast your app’s vision and pique interest early in the development process (recall that a splash screen is the first screen in your app). They can also be used to test ideas about an app. For example, you might want to get a sense of what features are intriguing customers the most or even inquire about price points on the splash page through a poll. Overall, though, you’ll want to focus the main action on capturing email addresses.
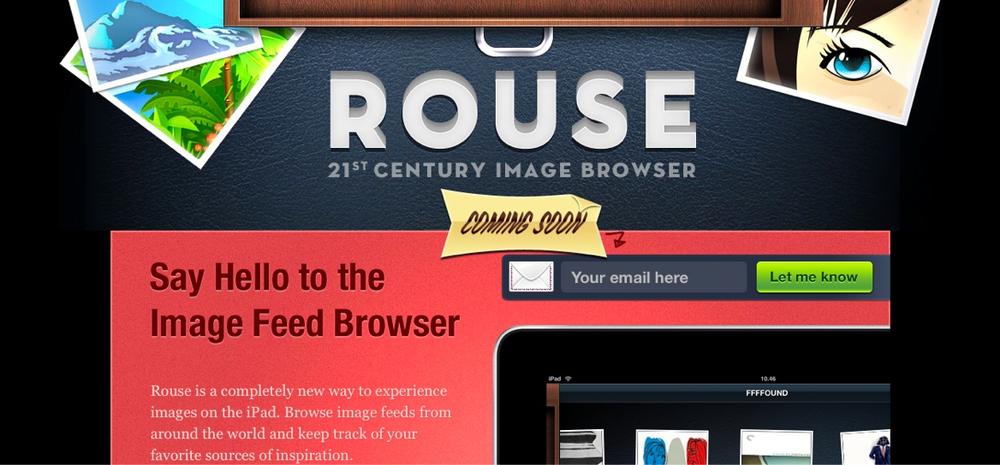
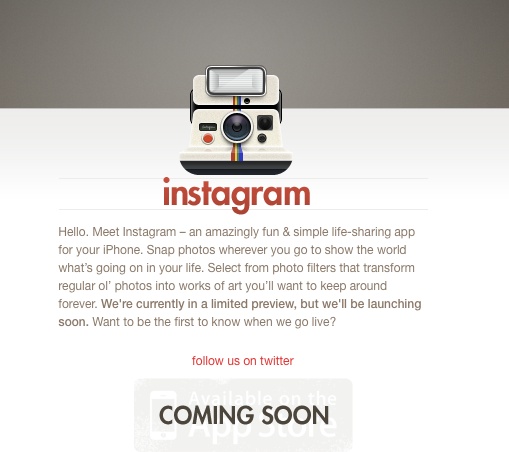
If you don’t have any web experience, someone on your team likely does. You can also look for web designers in the same sorts of places you may have looked for designers to build your app (see Chapter 4). If you are more of a self-starter, you might want to try tools such as Unbounce (http://unbounce.com/), which provides visual editors to quickly build and publish splash or landing pages; in other words, you won’t have to know HTML to use Unbounce. You can also take advantage of such tools’ email capture functionality, which will allow you to easily access captured email addresses and import them into your email marketing platform. The splash page shown in Figure 8-4 is for Instagram, a life-sharing app for the iPhone. I’ll show you my first splash page for Tweeb shortly.
It’s best to publish your splash page on the same domain on which your website will exist. Doing this will help you in a number of ways, including getting your domain indexed earlier by search engines and keeping customers familiar with the website for your app. This approach will provide a good foundation for your eventual website.
You’re still not looking to draw the attention of the world to your app, but bringing some visibility to your splash page is going to be beneficial to you. First, you want to grow your list of email addresses. Second, you may want to infuse new perspectives into the development of your app. The email addresses you receive will likely include more normals, and you may want to contact them about what compelled them to learn more about your app.
The first way to bring attention to your splash page is to tweet the link to your followers on Twitter. Even if you have the email addresses of some of these people, unless you specifically received permission to keep them informed about your app, you should not automatically add them to your email list. After you tweet the link, those who visit your splash page will decide if they also want to sign up to receive emails about your app or continue to remain updated through Twitter.
Note
At the time of this writing, Twitter had just begun to explore its advertising model through what it calls “Promoted Tweets.” Initially, this will allow advertisers to show up on the top of the search results page by buying related keywords. Watch Twitter in this space, as it could become another valuable advertising channel.
Chapter 3 also reviewed paid advertising through Google AdWords or Facebook. Both choices offer cost-effective ways to bring targeted traffic to your splash page. Depending on your app’s focus, even a budget of $5 to $15 a day could help you get some traction for your splash page.
When you first begin Phase 3 of your marketing crescendo, you’ll be in the midst of building your working app. At this point, you should have actual assets of your app, including screens for it. You’ll use these assets to spur new interest, and will use them along with an eventually more complete version of your app to recruit beta testers (as discussed in Chapter 6).
Note
You should have visited this section once before, when you were done reading the Screens and Prototypes section in Chapter 5. You might want to quickly review that section if it’s been a while since you read it.
Splash Page Example
Since Tweeb is a Twitter app, I decided to focus exclusively on Twitter during Phase 2. Thus, I did not place an email sign-up form on the splash page when I launched it. Instead, I used my personal Twitter account to announce the splash page and Tweeb Twitter account (see Figure 8-5).
The initial splash page was placed on the Tweeb domain—http://www.tweebapp.com—and reflected the colors, font styles, and logo of the app. Even though the splash page was very basic, visitors got an initial sense of what the app was about and understood the attention to design detail through those elements. The background for the Twitter account was created to match the splash page (see Figure 8-6), which reinforced the app’s branding.
The idea of teasers is not new. It happens often in the media, and most times it’s done to help build frenzy about what is to come. The key about teasers is to keep people wanting more. You want to get them interested and excited, but not satisfied. They need to be kept curious, or you’ll displace all of the anticipation that you are trying to create.
Since people are visual beings, when it comes to adapting teasers in the app world, text alone won’t be particularly exhilarating. Instead, you’ll want to focus on sharing pieces of the most finished designs of your app. In fact, keeping what you distribute almost entirely visual and not describing what it actually is will promote even more curiosity.
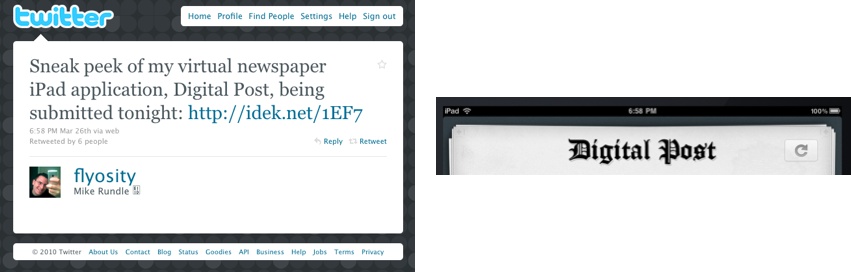
Mike Rundle (http://flyosity.com), a designer/developer and creator of the app Digital Post, did exactly that when he gave his followers a “sneak peek” (see Figure 8-7) of the iPad version of his app leading up to the launch of the iPad and the iPad App Store. As you can see, it was a simple yet captivating image, and he didn’t provide many more details about it at that point.
Twitter is a great place to share sneak peek designs from your in-progress app, but you’ll want to start leveraging those assets in other places too. Up to now, you’ve only created a splash page for your app, and it’s time to start expanding your web presence.
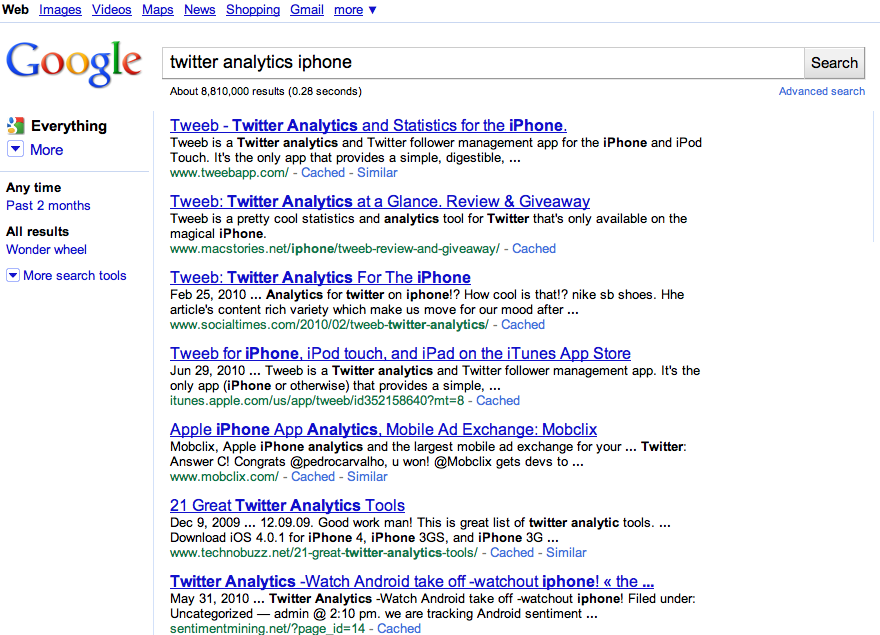
Blogs are another way to interact with existing and new customers. Obviously, whereas a sneak peek is focused on design, a blog is more about written content. The benefit of content is that search engines rely on it to index your site. So, when someone searches on a related keyword, aside from other important factors such as having your site linked to, your site absolutely cannot be shown as a search result (see Figure 8-8) if you don’t have any quality content on your site.
There’s no better way to start blogging than to start blogging. You’ll pick up good tips along the way, but it’s more important to get content published onto your blog than it is for you to know every blogging tip and trick in existence. If you have an existing blog or website and your app is going to have a separate page (or pages) on your site, you can use that blog to start discussing your app. Otherwise, consider using tools such as WordPress, Posterous, or Tumblr to get your blog started. If you want your blog to more seamlessly integrate with your splash page and website (which I recommend), take advantage of the custom domain options offered by some of these tools (e.g., http://blog.<yourappdomain>.com), have your blog reflect a design similar to that of your splash page, and possibly even use the self-hosted version of a tool such as WordPress (i.e., use http://wordpress.org instead of http://wordpress.com). A great first post on your blog can include some basic background about what your app will be about, incorporating the designs you just shared.
Note
Don’t proceed with the next section until your app is ready to be distributed to your customers for testing, which will occur by the time you get to Chapter 6. You’ll be guided back here once that is the case.
As with all customer interactions, recruiting those to beta-test your application is definitely a marketing activity. Beta testing will be the first time customers actually experience your application. You’ll want to set the tone for the purpose of beta testing and guide them in how they can be most helpful.
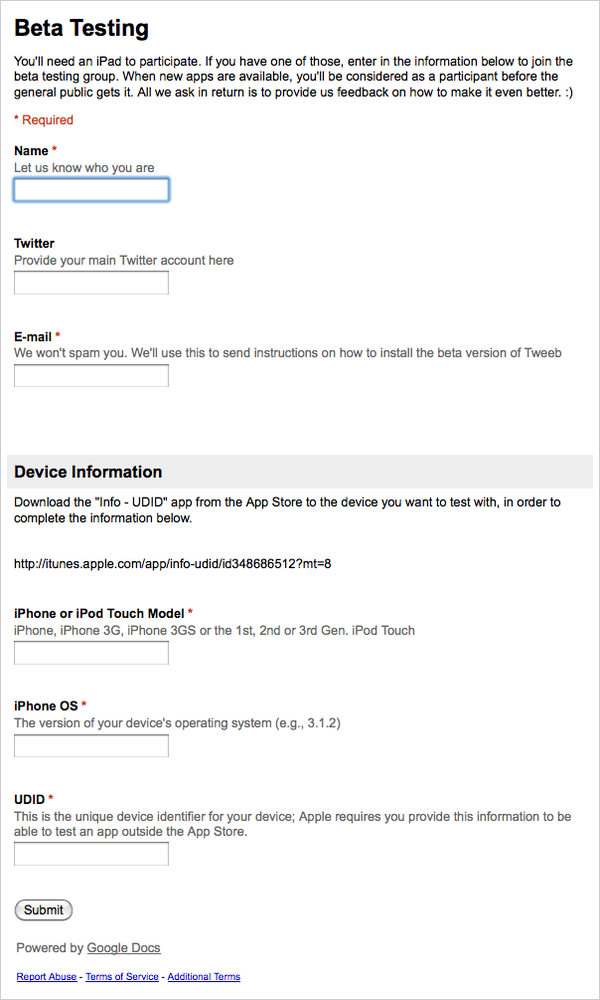
By now, you should have a minimum of three channels to recruit beta testers: Twitter, your email newsletter list, and your blog. You should use all three sources to recruit beta testers. To reach those on Twitter, the best approach is to create a post on your blog and then link to it from a tweet. Your post should include the objective of your beta testing (e.g., testing a specific feature), the OS and device requirements (e.g., iPhone 3GS running iOS 4), some background on providing their UDID (see the section UDID and Figure 6-1 in UDID), how they should sign up (e.g., sending an email or filling out a form; see Figure 8-9), and how public you want this part of the beta testing to be.
Depending on how far along you are in the development of your app, you may want to request that your beta testers not extensively discuss your app online. For example, you could ask that they not post screenshots of the app or write blog posts about it. Don’t be overbearing, but definitely articulate what makes you most comfortable. You can become more flexible about what they share online the closer your app is to being submitted and approved into the App Store.
With the design assets from your sneak peeks and the written content from your blog completed, you should begin sending out updates regularly to your email newsletter list. Always try to repurpose content you create elsewhere. What you include in the email newsletter should derive from what you post on Twitter and your blog.
Although there may be some overlap among those who get your emails and follow your blog and Twitter account, recall that email is in many ways reaching a different audience. You can also make your emails act as summaries of what’s happening elsewhere, with links back to blog posts, Twitter, or your website.
Don’t use your email list to recruit your earliest beta testers. Again, although I’m generalizing, think about your email list customers as being slightly less tech savvy, with less patience for an app that’s still not ready for prime time. As you near completion of the App Store version of your app and want some fresh perspectives, definitely consider including a request for beta testers through your email newsletter list; just don’t make this the primary motivation for the email.
In Phase 4, you’ll begin to transition to a “launch” mindset. Most of the development efforts for your app should be wrapping up and you either will have submitted or will be in the process of submitting your app to Apple for approval. Compared to other phases, the timing and execution of Phase 4 and Phase 5 marketing activities are much more critical. Be diligent with them so that you can maximize the buzz you generate around your app when it is approved.
Note
You should have visited this section once before, when you were done reading the section Your App Store App “Binary” in Chapter 7. You might want to quickly review that section if it’s been a while since you read it.
Write the launch content for when your app is approved. Starting with this content now—even though it’s not needed yet—will put you in a launch mindset. It will also make it easier to focus on other critical tasks once your app is approved.
Your launch content includes your more significant blog post announcement and email newsletter, as well as the content for your website. Discuss what makes your app interesting, what features you are planning to add going forward, and how you are planning to incorporate customer feedback (e.g., point to your Twitter account and other designated feedback or support channels). I’ll detail what you need for your website and what web content you need now.
The website for your app has already evolved from being a splash page with an email sign-up form to include a blog. You are now going to prepare the remainder of your website assets, which will be used in both Phase 4 and Phase 5 of your marketing crescendo, as well as post-launch. As with your app, splash page, and blog, you might not be doing the design of the website yourself, but this information will help you guide its development.
Designing an app website has some unique elements to it. As with your app, it has to embody Apple-like design and attention to detail. The best app sites are also extensions of an app, almost giving a sense of being in the app itself. I’m including a couple of examples of well-designed app websites in Figure 8-10 and Figure 8-11 and will subsequently review the common elements of them; refer back to these examples as needed.

- Structure
Because you won’t be unveiling your entire website at once, the most important aspect for you to address right now is its structure. You should build your site in such a way that it will be easy to roll out its new sections and features through Phase 4, Phase 5, and beyond. In fact, the smartest way to approach building your pre- and post-launch website is to build the post-launch website first and then remove elements from it until your app is approved into the App Store.
For example, in Figure 8-11, you can see an area of the page that’s dedicated to press quotes. You won’t have any quotes when your app website is in pre-launch mode. Similarly, you may not want to have any screenshots of your app available until after your app is approved.
To simplify thinking about the different stages of your website’s existence, consider this progression:
Splash page
Splash page plus blog
Pre-launch website
Post-launch website
You’ve already implemented the first two stages. I’ll cover the remaining elements of the last two stages of your app website in the order in which they’ll be needed.
- Pre-launch website
- Device
App websites typically have an actual or close approximate of a device (i.e., iPhone or iPad) in a prominent place on the page. Later, the screen of the device will come to house your app in action (e.g., a video). In the early stages, however, it could just include the splash screen for your app or even a logo.
The device image is one of the first elements you’ll want on the page because it immediately communicates that your website is about an app. It’s possible your splash page already had a device image; if not, include one on your pre-launch website.
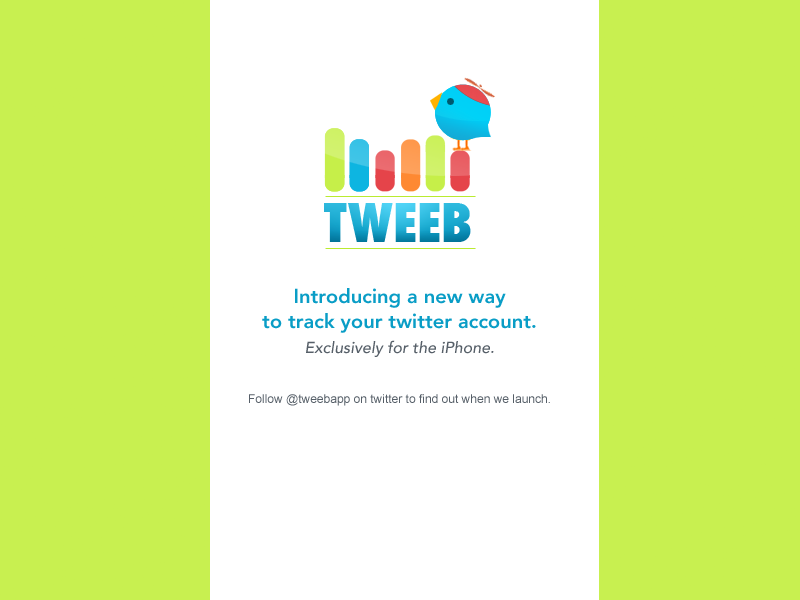
- Teaser text
Include some crafty verbiage about your upcoming app that teases out its concept. For example, Tweeb’s teaser text read, “Introducing a new way to track your Twitter account. Exclusively for the iPhone.” You should provide some language that it’s “coming soon.” This text might represent the bulk of the content that you include on the pre-launch website. Consider replacing or adding text underneath it later with more background and description about your app.
- Social media links
Link to your blog, Twitter, and other social media presences from your pre-launch site. I haven’t covered Facebook in detail, but that is another outlet you may want to consider using (learn about Facebook Pages at http://www.facebook.com/advertising/?pages). Usually, these are placed in the header or footer (top or bottom) of the page. Make them easier to discover by using icons to represent the links.
- Email sign-up
Your email sign-up form should still also be present on your pre-launch website. Compared to your splash page, it should not be as highly promoted (see Figure 8-12).
- About and contact pages
Make it easy for people to learn more about you or to get in touch. You can create separate “about” and “contact” pages to include this information, or for now, incorporate it on the same page. If your app or apps gain more prominence over time, you will likely want separate pages detailing this information. For example, your contact page might distinguish between questions about how your app works and feature requests.
Note
Don’t forget to include web analytics on your site so that you can understand traffic sources and how people are using the site. Install a solution such as Google Analytics (http://www.google.com/analytics), which is free, easy to use, and powerful.
- Post-launch website
To reiterate, you won’t be flipping the switch on your post-launch website until after your app is approved. Building the pre- and post-launch websites at the same time will streamline this process, though. As mentioned earlier, you should think about the pre-launch website as the skeleton of the post-launch website, meaning that it contains all aspects of the final site minus the more thorough post-launch details.
- Device image revisited
Once your app is approved, your post-launch website should make your app feel “alive” by inserting more than just a static splash screen into the device image. The two most common ways to do that are either to cycle through the images in a slideshow fashion inside the device or to integrate a video. Keep the video short and with either concise dialogue or no narration and some catchy, upbeat music. Consider using a tool such as SimFinger to make it even better (http://github.com/atebits/SimFinger).
This may be confusing to you, but it won’t be to a web designer. Creating a video takes a little more effort, but it can be of tremendous value when you begin pitching your app.
- Features/description
At this point, you should know the most compelling features of your app and have your launch content and preliminary or final application description (for the App Store) at your disposal. Use these assets to include more details about your app on the website. Start with some brief narrative content, but err on the side of bulleting the key features of the app. You can usually place this type of content under your teaser text. It’s also good to include the operating system and device requirements of your app at the bottom of this area.
- Price tag
If you consider your price a key part of your strategy, or if your app is priced competitively, you might want to include a price tag on the page. You can always change this later. Regarding this point, since you will be looking for the optimal price of your app and may be adjusting your price often, be mindful that you’ll want to update this element.
- App Store button
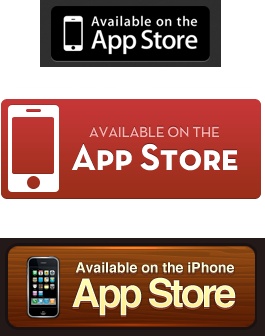
If you’ve viewed any number of app websites, you’ve probably seen Apple’s Available on the App Store buttons. Include one of those buttons, edited to match the color scheme of your app and the website, for branding purposes. In all likelihood, Apple’s App Store will be better-known than your app when it first launches. Position this button close to where your app is located. Some developers also opt for a Buy Now button instead (see Figure 8-13).
- Additional screenshots
Under your device image, place thumbnail images that, when clicked, expand to show an entire screen of your app. Although visitors to your site might view the image slideshow or video, they may want to explore these screens more thoroughly and at their own leisure.
- Media and customer quotes
Designate an area for quotes from bloggers, the press, and customers. This last group is important, because even if your app is not initially reviewed by those in the media, it’s possible that you’ll receive App Store reviews or write-ups on customer blogs. Consider including two or three quotes and use well-known names and brands if you have them.
- What’s new
Highlight the latest update (e.g., v1.0.1) and the release date (e.g., 10/30/10) of your app and any critical fixes or key new features added. Not only is this useful information, but it will also show visitors that you are maintaining the app.
- FAQs/support
Creating a page that is completely dedicated to frequently asked questions about your app will help you and your customers. You can initially launch this page with the questions customers asked you during beta testing or with questions you think will be common. Whether you have a FAQ page or not, be sure to highlight the best way for customers to get in touch with you about problems they are having with your app (this information could also be placed on the contact page). That might include a dedicated support email address, your app’s Twitter account, a support tool you implemented in Chapter 5, or all three.
Remember that within your apps, you will have only a limited amount of space dedicated to helping customers with questions and engaging them more extensively. Take full advantage of Twitter, email, your blog, and your website to supplement this limitation.
Your media outreach is going to be the most time-sensitive part of getting your marketing crescendo to work. I can tell you from personal experience that beginning to do outreach too early, as well as too late, can very negatively impact your marketing plans. So, like Goldilocks, you’ve got to make your timing be “just right.”
The purpose of media outreach is to find websites that could be interested in doing a review about you or your app. I include “you” because with the number of apps being pitched for review every day, having some interesting backstory about the app can help differentiate you from others. For example, in the earliest days of the App Store, the media loved Steve Demeter, creator of the highly successful game Trism, not only because of the game’s sales numbers ($250,000 in two months) but also because he initially worked on the game at night while maintaining his day job. Backstories are a little more important for larger or more traditional media outlets such as newspapers, so don’t overplay them. Here are some details of whom to pitch, how to pitch, and when to pitch:
- Whom to pitch
With your Twitter community humming and the reading list you developed in the early marketing phases, you should have a pretty good handle on the types of outlets and people you’ll want to pitch. Realize, however, that most people are probably pitching the same blogs and sites you are. That doesn’t mean you should forgo those sites; instead, broaden your horizons to people, blogs, and sites outside the most typical ones. These may include smaller blogs that your peers or even customers have.
One way to find media outlets outside of those you are currently familiar with is to use search engines to identify those writing about features related to your app. More specifically, sites such as Google News are article-based and will return stories and blog posts rather than more generalized results. When you find a relevant article, look at the person who wrote it and track down an email address. If it’s not listed there, you can also Google the person’s name. Make sure you bookmark what this person wrote; I’ll come back to how that’s useful in a moment.
A good way to think about whom to pitch is to break down your list of outlets in two ways. The first is by likelihood of receiving a review (e.g., unlikely, probable, or definite). If you see that all of your sites are part of the “unlikely” category, you need to diversify. The second way to group your list is by reviewer type. You should not focus only on sites that review apps, but also on ones that are interested in what your app is about. For example, with Tweeb, my nonapp pitches were to people and sites who wrote about social media, Twitter, and analytics. That landed me three reviews on very reputable sites (SocialTimes, ReadWriteWeb, and Twitterrati), which are not extremely app-focused.
- How to pitch
For your pitches, you are going to reuse many of the assets developed for your pre- and post-launch websites. This includes your teaser text, a brief description about features, screenshots, and a video, if you have one. If you are still sending pitches after your app is approved and in the store—which you should do—also include your iTunes URL and a promo code (promo codes and a useful promo code trick are discussed in Launching Your App (Phase 5)). If your app is not approved yet, which is the more likely scenario at this point, having a video will be particularly useful.
As with other types of outreach, I prefer to use templates for pitches. To be more effective, however, you will customize the first part of your template based on whom you are pitching. So, for example, use some context from an article or post someone wrote; that’s where the bookmark to the person’s writing comes into play.
Here’s an email template I used while pitching Tweeb. It received a 60% success rate during my initial outreach. The customized part of the template is in bold italics, and although it’s true, you can see it was fairly generic.
Been reading your stuff for many years now. I wanted to drop you a note about my latest iPhone app “Tweeb.” It’s focused exclusively on Twitter stats and includes click data from bit.ly/j.mp links shared in tweets.
Would love for you to check it out. Feel free to drop me a line with any feedback.
Blog Post
http://kenyarmosh.com/tweeb-twitter-analytics-for-the-iphone/
Tweeb Links
@tweebapp
The template is short and sweet. You may want to add attachments such as your screenshots or a link to your video. If your video is not live on your app website, you can either put it on a nonpublicized directory/URL or host it on YouTube or Vimeo. Arnold Kim, the proprietor of the largest iPhone game review site on the Web—TouchArcade.com—discusses the importance of videos and how best to pitch review sites in an interview at the end of this chapter.
- When to pitch
There are different perspectives on how far in advance you should make your pitch. I recommend that you do so about one or two weeks before you hope for your app to be approved. This time frame is more important for larger sites, which are typically bombarded by review requests and often have editorial schedules to follow.
Making this timing “just right” is yet another example of the importance of intertwining your development and marketing efforts. You’ll need to have a firm handle on how close your app is to being “App Store ready,” when you plan to submit it to Apple, and how long the approval process is currently taking. Knowing this information will help you estimate when you are one to two weeks away from having your app in the store. Be careful, however, because your first time through the App Store approval process may result in a rejection.
Another tip on when to pitch is that you should stay away from making contact with the larger media outlets at the beginning of the week, and in particular, on Monday and Tuesday. Thursday and Friday have less volume; if you are a night owl or workaholic, try pitching on a Friday night or over the weekend. You may not receive a response as quickly, but I find that the response rates are higher.
Compared to many others who are pitching for reviews, you should have an immediate advantage given the approach you’ve taken to building your app. Your app should be considerably more useful and interesting than apps that weren’t validated by customers. The media, in general, don’t write scathing reviews unless they want to mock an app that is horribly embarrassing. That’s not to imply that they won’t have criticisms about your app, because they will. The point is that they want to write about apps that are unique, are creative, are well done, are supported by communities, and give them a story.
As for those who show interest in writing about your app, you will want to try to time their reviews, as well as all reviews, with the approval of your app into the App Store. You can let them know you’ll follow up with them when the app is approved. If they are excited about it, however, don’t hold them back if they want to write about it immediately. By receiving a review before your app is live, you’ll be able to leverage it as confirmation of your efforts. You’ll also be able to tweet a link to the review and select a quote from the review or article to use in your App Store description and on your website.
Get App Savvy now with the O’Reilly learning platform.
O’Reilly members experience books, live events, courses curated by job role, and more from O’Reilly and nearly 200 top publishers.

