No, I didn’t forget Phase 5. The actual launch of your app is significant enough that it deserves to be called out separately. The nice thing about Phase 5 is that with all the work you’ve done through the first four phases, the majority of what you’ll be doing once your app is approved will mostly feel like quickly checking items off a to-do list. Yes, there’s actually a method to the madness!
If you have a paid app, you’ll want to use promo codes to distribute promotional (i.e., free) copies of your app. Although many people don’t realize this, promo codes are useful even if you have a free app, so keep reading.
Note
I’m addressing promo codes outside of what I call the “launch checklist” because there’s a little-known aspect of them that can help people preview your app before it’s technically available on the App Store.
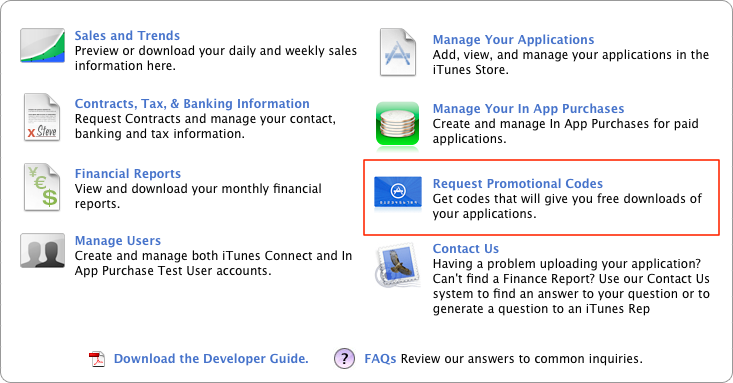
The iTunes Connect home page includes an area called Request Promotional Codes (see Figure 8-14). You’ll visit this link to get up to 50 promo codes. In reality, that’s not many, so be somewhat selective with who receives one of them. Also, reserve about 5 to 10 of these codes for your most loyal and helpful beta testers.
There are a number of stipulations about the use of promo codes, including that they can be redeemed only one time, are valid only in the U.S. App Store, and will expire after 28 days. You will, however, get another 50 codes for the app once an update is submitted.
Redeeming promo codes is a somewhat tedious process, but there’s a nice trick—uncovered by tap tap tap—to make them easier to redeem and distribute. Give out a URL such as the following: https://phobos.apple.com/WebObjects/MZFinance.woa/wa/freeProductCodeWizard?code=REPLACEWITHPROMOCODE, where “REPLACEWITHPROMOCODE” should be replaced with the actual promo code. When sharing promo codes, always use this method.
One final tip about promo codes, which makes them useful for paid as well as free apps, is that if your app has been approved but you have not yet made it available on the App Store, you can create promo codes and have people download your app using them. That’s useful for reviewers who may have only seen a video or screenshot of your app but want to experience it firsthand before it’s in the App Store (note that more technical reviewers may also be OK with the ad hoc distribution process described in Chapter 6).
There’s another way to get paid apps in people’s hands for free once your app is released: Gift This App, which I will cover in the next section.
As mentioned before (see the App Store Approval Process section in Chapter 7), once your app has reached the Ready for Sale status you’ll have the option of launching it into the App Store. Or if your Availability Date has already lapsed, your app will automatically be published to the App Store shortly. In either case, when your app is set to be published into the App Store, it will likely take some time—usually several hours—before it begins appearing there. These first items are what you should complete during that time. I’ll then detail a second set of tasks to finish once the app is actually showing in the store.
- Notify key media contacts
Notify key media contacts who agreed to review or write about your app that the app has been approved. These contacts should receive promo copies of your app. So, send them the promo code link in your email.
- Deploy post-launch website
With your app’s entry in the App Store imminent, you should push your post-launch website live. One piece of information that you were previously missing was the iTunes link to your app. You’ll find this link in the approval email Apple sent you next to your Application Name. Copy this link and use it for your App Store or Buy Now button. If you really want to be savvy, sign up as an iTunes affiliate (http://www.apple.com/itunes/affiliates/)—powered by LinkShare—and use the URL generated to earn an additional 5% from any apps that are sold by clicking on that link.
- Publish blog post
Publish the announcement blog post about your app being approved. You won’t publicize your post on Twitter or other channels until the app is showing in the App Store.
Note
Some people advocate issuing a formal, paid press release. Although this varies according to the audience you’re targeting, I find that they generally are not worth what they cost. Consider a “social media release” as an alternative. You can read “How to Write a Social Media Press Release” (http://www.copyblogger.com/social-media-press-release/) or try a nifty tool called PressDoc (http://pressdoc.com/).
After your app is available on the App Store, proceed with the remaining launch checklist items:
- Notify other contacts
Continue to reach out to other contacts (family, friends, colleagues, customers, reviewers, etc.) after your app is live in the App Store. Provide promo code links to your most engaged customers as a sign of thanks for their help.
- Get ratings and reviews
When you email your friendly contacts (including family, friends, and customers), ask them to rate and review your app on the App Store. They’ll need to have downloaded or purchased the app to write a review. As a reminder, a review consists of both a star rating (from one to five stars) and a written description.
You’ll need a combination of five ratings or reviews for your app before the Ratings will show any stars. People visiting your App Store listing will definitely look at this area, especially if your app is not free or is priced more aggressively. Getting friendly ratings and reviews in early will get you started in the right direction. If you are a purist and wonder if this move is “cheating,” don’t worry; if your app is bad or hurting, you’ll hear about it.
- Adjust App Store description and website
If there are any early favorable web or App Store reviews, snag quotes and highlight them on your website and in your App Store description. For the App Store description, place these quotes near the top, with the most popular names first.
- Tweet it up
Tweet a link to your app’s App Store listing and your initial blog post. If you really want people to read the blog post, ensure that it has a link to your app on the App Store and only tweet the link to your blog post.
- Send email newsletter
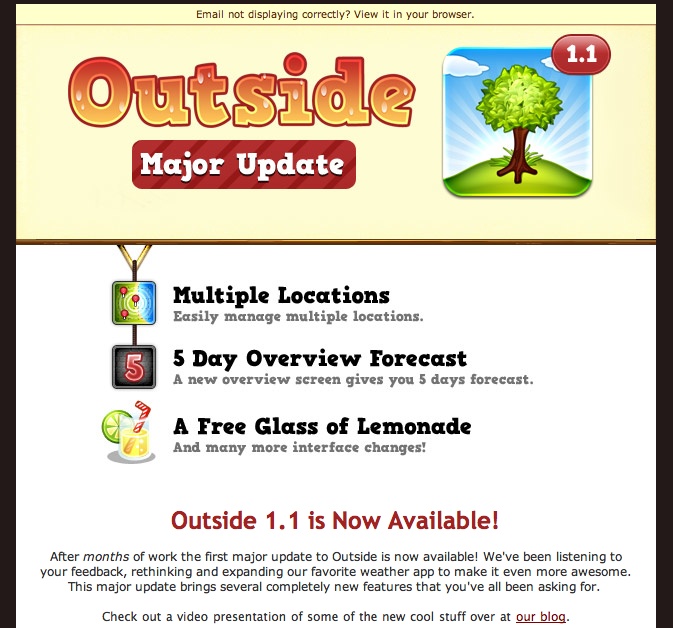
Finally, once you’ve completed the preceding steps, announce the launch of your app to your email newsletter subscribers (see Figure 8-15). Try to reuse the content from your blog post or just introduce it and then link over to your blog. Be sure to include a link to your app on the App Store in your email newsletter.
After the initial buzz for your app has settled, you should do some additional promotion. In fact, the first 30 days of being on the App Store are critical for the long-term viability of your app. There are a number of ways to keep people interested. For instance, you can and should continue to pitch bloggers and media outlets and get additional press for your app. Although I recommend that you come up with your own creative approaches, here are some proven ways to get additional promotion for your app:
- App giveaways
One way to make it more appealing for app review sites to take a look at your app is to offer to conduct an app giveaway for their readers. In this case, you’re providing them promo codes, which they subsequently will decide how to distribute to their readers based on something a reader must do (e.g., follow the review site’s Twitter account and then tweet a link to the review). Promo codes are precious commodities, though, so don’t send these over until someone has agreed to do an app giveaway with you.
- Gift This App
A newer feature that Apple introduced into iTunes is called Gift This App. As you now know, you get only 50 promo codes; the Gift This App feature can help overcome that limitation. The added benefit to this approach is that you can use it in conjunction with further growing your email list, since gifting requires that you know the email of the recipient. You could create a page on your website dedicated to this promotion (e.g., the first X people to subscribe to our newsletter get a free copy of our app), or use one of the tools covered in Chapter 3, such as Google Docs, Wufoo, or Unbounce, to do something similar.
Initially, Gift This App might seem expensive to you. For example, if your app costs just $0.99, it would cost you $1,000 to gift 1,000 copies of it. Remember, though, that you’ll get 70% of each sale back. So, it actually would only cost you $300 to gift 1,000 copies. Because of the time constraints for giving away that many copies at once, you probably won’t proceed with such a large promotion—but the point still stands. The Gift This App option is a powerful and cost-effective tool for you to buy goodwill and grow one of your key communication channels. By the way, this feature does not impact ranking, so don’t try to buy your way up the charts.
- Contests
As you saw, Gift This App is a way to conduct a contest. In the preceding example, there were multiple winners and the “prize” was a free copy of your app. Contests, though, are an area where you can get really creative. Some contests occur over a period of days or weeks and involve multiple steps, such as following a Twitter account and tweeting about joining the contest. The prizes for some contests involve winning much more expensive items, such as iPads or even computers.
Develop your contest around a goal and budget. If you want more followers for your Twitter account, focus on providing an easy way to do that while verifying that it occurs. You also don’t have to spend a large amount of money to make a contest successful. Your prize might be related to your app. If your app is focused on productivity, consider your prize to be a new bestselling business book. I generally recommend creating contests in which there are more prizes that cost less, yielding a greater opportunity for more people to win.
If you do proceed with a contest, clearly set the guidelines either on the page or with a link to them. The guidelines should include what constitutes entering, prize details, the length of the contest, and other limits and liabilities (e.g., no more than one entry per person).
- Promotional pricing
Offering a temporary promotional price for your app can be a way to infuse activity back into your app. You can automatically start and end promotional pricing periods using the Price Tier Effective Date and Price Tier End Date, described in Chapter 7.
One of the immediate benefits of changing your price is that there are a number of sites and Twitter accounts that watch for price drops. They’ll automatically post your price drop, with your app’s App Store link, when your promotional pricing period goes into effect.
Dropping your price typically makes sense when you have a major update coming, are celebrating or trying to spur an event (e.g., getting to 500 Twitter followers or 1,000 sales), or are about to release a new app. You should also experiment with different prices throughout the week and during holidays, because general trends are that downloads increase 10% to 20% through the weekend and spike even higher during holidays.
- Cross-app promotions
One concept I touched on in Chapter 1 is that you increase your chances of being successful with future apps once you’ve released your first app. That’s even truer if that app has gotten some attention and buzz and helped make a name for you. Not only will customers be excited for other apps you are working on, but you’ll also have the opportunity to use your most popular apps to cross-promote those new ones.
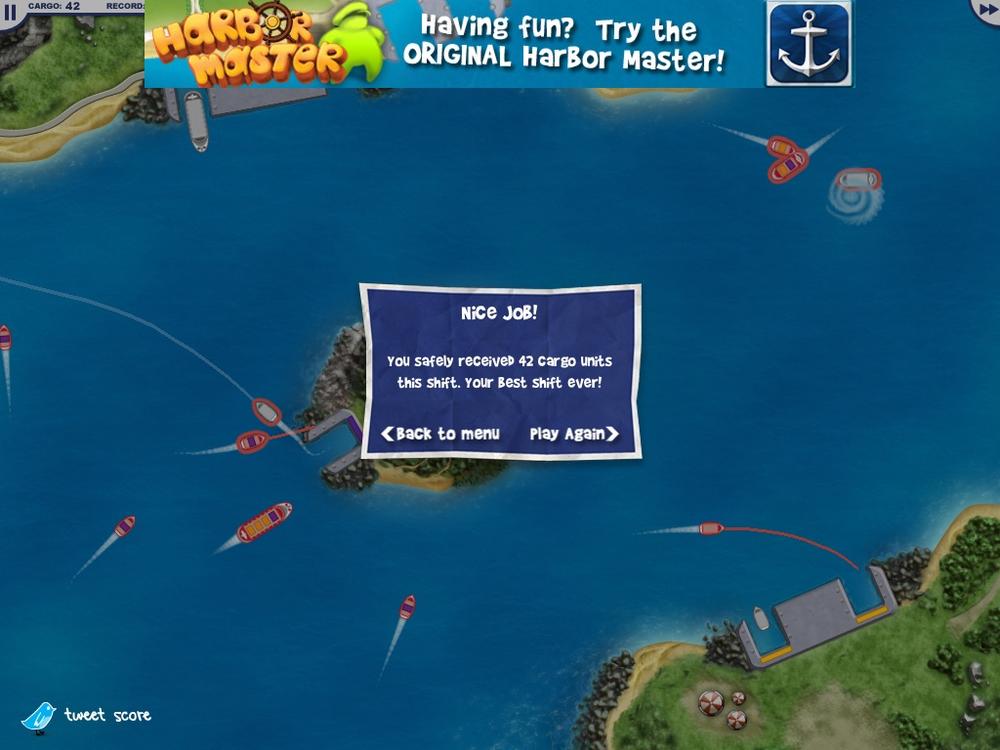
There are a couple of more common ways to do cross-app promotions, and you’ll often find that they are combined. A more basic approach is to run an advertisement in your most popular app that promotes your newest app, linking to it in the App Store. Some developers use their own advertising framework to accomplish the cross-promotion of their own apps, but AdMob’s AdWhirl and other third-party advertising options can also help with that integration (see Figure 8-16).
A more aggressive cross-app promotion is to make one app free. When Imangi Studios launched the Harbor Master HD iPad version of its popular iPhone app Harbor Master it decided to make it free. It then cross-promoted its iPhone games, including Harbor Master and Hippo High Dive (see Figure 8-16). Its strategy can be considered doing a promotional “price” of free combined with cross-app promotion.
- Mobile advertising
Leveraging mobile advertising to increase exposure for your app is definitely something to explore. You can run campaigns on mobile ad networks to drive awareness and, ultimately, more downloads for your app. Tapjoy also offers an innovative “pay per install” model, whereby you set the price you are willing to pay for someone to install your app (http://tapjoy.com/Company/AboutPPI/). Of course, you need to be smart about how you use these options; spending money makes sense only if it helps you achieve your goals or, at the very least, allows you to break even.
- Networks
A popular approach, for games in particular, is to have your app be part of a “network.” Imangi Studios—the creator of Harbor Master—is part of a network called App Treasures (http://www.apptreasures.com/), which consists of a number of small, independent game developers. Each app in this network contains an area dedicated to promoting the apps of all members of the network. Mentioned in Chapter 2, larger options in the game space include Plus+ (http://plusplus.com/) and OpenFeint (http://www.openfeint.com/), which also provide tools for game developers.
The lack of formalized networks for other categories is actually an opportunity for you. Seek out apps complementary to yours, or talk with your colleagues in the development community and explore forming your own network. This will give you another channel through which to promote your app and further strengthen your ties with peers.
- Local media
Like smaller review sites and less popular bloggers, local media outlets are often ignored. With everyone clambering to get attention with app review sites and nationally known publications, you’ll have significantly less, and possibly no, competition for your local community news sites. If your city or town also has a local print publication, pitching to it may also mean your name winds up in print. Remember that you are still in a relatively new industry, and that although iPhone or iPad stories are a dime a dozen in larger publications, it could represent a scoop for a local news outlet.
Obviously, much of what is covered in this chapter is useful beyond the pre-launch and immediate post-launch of your app. You can consider adopting many of these same principles and processes throughout the existence of your app, whether for a simple update or for a more significant release.
Get App Savvy now with the O’Reilly learning platform.
O’Reilly members experience books, live events, courses curated by job role, and more from O’Reilly and nearly 200 top publishers.

