Chapter 4. An Objective-C ApplicationWithout Interface Builder

As we saw in Chapter 3, Interface Builder is a tremendously powerful program. But IB also hides a lot of the nuts and bolts of how Cocoa applications work, and a knowledge of those nuts and bolts will serve you well as you learn Cocoa programming. In this chapter, we will create a simple Cocoa application in Objective-C without using IB. In the process, we’ll learn the fundamentals of the Objective-C programming language, the Cocoa class hierarchy, and memory management under Cocoa.

The Tiny.m Program

In this chapter, we’ll discuss a small application called Tiny.m (the .m extension means that the file contains Objective-C code). This program will bring up a window and will draw a dodecagon (12-sided polygon) with a fancy pattern in it (see Figure 4-1).

The Tiny.m application window

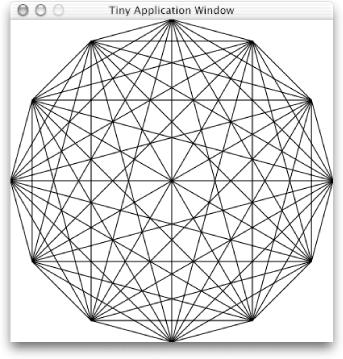
Figure 4-1. The Tiny.m application window

Before discussing the application in detail, we’ll show you the complete Objective-C source code for Tiny.mExample 4-1. We’re showing you this now because the best way to learn a new language is to read a program that’s written in that language. As you’ll see, much of the code in Tiny.m that relates to on-screen objects will not be necessary when we combine Objective-C with IB.

Tip

Throughout this book, we’ve elected to include comments in the programming examples, even though we are also explaining the code within the book’s text. We do this because it is good programming style to include comments in the code. We hope you’ll get used to using comments in the code that you write.

Example 4-1. Tiny.m

/* Tiny.m
 * A tiny Cocoa application that creates a window 
 * and then displays graphics in it.
 * IB is not used to create this application.
 */

#import <Cocoa/Cocoa.h>         // include the Cocoa Frameworks

/************************************************************
 ** A DemoView instance object of this class draws the image.

@interface DemoView : NSView    // interface of DemoView class
{                               // (subclass of NSView class)
}
- (void)drawRect:(NSRect)rect;  // instance method interface
@end

@implementation DemoView        // implementation of DemoView class

#define X(t) (sin(t)+1) * width * 0.5     // macro for X(t)
#define Y(t) (cos(t)+1) * height * 0.5    // macro for Y(t)

- (void)drawRect:(NSRect)rect   // instance method implementation
{
    double f,g;
    double const pi = 2 * acos(0.0);

    int n = 12;                 // number of sides of the polygon

    // get the size of the application's window and view objects
    float width  = [self bounds].size.width;
    float height = [self bounds].size.height;

    [[NSColor whiteColor] set];   // set the drawing color to white
    NSRectFill([self bounds]);    // fill the view with white

    // the following statements trace two polygons with n sides
    // and connect all of the vertices with lines

    [[NSColor blackColor] set];   // set the drawing color to black

    for (f=0; f<2*pi; f+=2*pi/n) {        // draw the fancy pattern
        for (g=0; g<2*pi; g+=2*pi/n) {
            NSPoint p1 = NSMakePoint(X(f),Y(f));
            NSPoint p2 = NSMakePoint(X(g),Y(g));
            [NSBezierPath strokeLineFromPoint:p1 toPoint:p2];
        }
    }

} // end of drawRect: override method

/* windowWillClose: is a delegate method that gets invoked when
 * the on-screen window is about to close (user clicked close box).
 * In this case, we force the entire application to terminate.
 */

-(void)windowWillClose:(NSNotification *)notification
{
    [NSApp terminate:self];
}
@end  // end of DemoView implementation

/* 
 * setup(  ) performs the functions that would normally be performed by
 * loading a nib file.
 */

void setup(  )  
{
    NSWindow *myWindow;      // typed pointer to NSWindow object
    NSView   *myView;        // typed pointer to NSView object
    NSRect    graphicsRect;  // contains an origin, width, height

    // initialize the rectangle variable
    graphicsRect = NSMakeRect(100.0, 350.0, 400.0, 400.0);

    myWindow = [ [NSWindow alloc]              // create the window
               initWithContentRect: graphicsRect
                         styleMask:NSTitledWindowMask 
                                  |NSClosableWindowMask 
                                  |NSMiniaturizableWindowMask
                           backing:NSBackingStoreBuffered
                             defer:NO ];

    [myWindow setTitle:@"Tiny Application Window"];

    // create amd initialize the DemoView instance
    myView = [[[DemoView alloc] initWithFrame:graphicsRect] autorelease];

    [myWindow setContentView:myView ];    // set window's view

    [myWindow setDelegate:myView ];       // set window's delegate
    [myWindow makeKeyAndOrderFront: nil]; // display window
}

int main(  )
{
    // create the autorelease pool
    NSAutoreleasePool *pool = [[NSAutoreleasePool alloc] init];

    // create the application object 
    NSApp = [NSApplication sharedApplication];

    // set up the window and drawing mechanism
    setup(  );

    // run the main event loop
    [NSApp run];

    // we get here when the window is closed

    [NSApp release];      // release the app 
    [pool release];       // release the pool
    return(EXIT_SUCCESS);
}

Before we analyze the program, we suggest that you type it in and save it in a file called Tiny.m.

Tip

We strongly recommend that you type the examples within this book by hand, rather than downloading them from the Web. You will learn more about Cocoa programming by actually typing in the examples — and then finding your typos — than you will by merely reading them.

You can use any of the text editors that come with Mac OS X: Project Builder, TextEdit, GNU Emacs, vi, or ed. If you’re just starting out with Unix, you’ll probably want to use PB or TextEdit, because they work like most other Cocoa programs and have several nice features for writing code. TextEdit is the basis of the editor that’s built into PB. It is extended in PB with some powerful features for browsing a program’s source code and interfacing directly with gdb, the GNU debugger we discussed in Chapter 2.

After you’ve typed the source code in the file Tiny.m, open a Terminal window and change to the directory where the file resides. Compile Tiny.m and then (if there are no errors inadvertently introduced by typing mistakes) run the executable Tiny with the commands shown here in bold type:

% cc -Wall -o Tiny Tiny.m -framework Cocoa
% ./Tiny      

Tiny is now running — look for its window.

The components of this compiler call command are described in Table 4-1.

Table 4-1. Compiler call command components

What you typed

What it means

cc

Invokes the C compiler. (In Cocoa, the C, Objective-C, and C++ compilers are all invoked with this same command, although the C++ compiler is usually invoked with the /usr/bin/c++ command.)

-Wall

Makes the compiler list all warnings.

-o Tiny

Places the result of the compilation in the Tiny file.

Tiny.m

Compiles the program in the Tiny.m file (which resides in the working directory).

-framework Cocoa

Instructs the linker to use the Cocoa “framework.”

If the program compiles without errors (and there should be no errors, not even any warnings), you can run it as specified above, by typing “./Tiny” and hitting Return.

You should see the window displayed earlier, in Figure 4-1.

Warning

This demo program lacks many fundamental elements of a standard Cocoa program, and therefore it does not interact properly with the Mac OS X environment. In particular, this program does not display a menu, it does not bring its window to the front of the window stack when it starts up, and it does not appear in the Dock. A side effect of these characteristics is that you may find it difficult to find the Tiny window. If this happens to you, try hiding your running applications until the Tiny window appears.

You can close the Tiny application by clicking the red close button at the top-left corner of its window or by typing Control-C in the Terminal window.

Before we explain how Tiny works, let’s take a detour and look at some basics of the Objective-C programming language. This discussion is not meant to be exhaustive, but rather a foundation on which we can build throughout the rest of the book.

Get Building Cocoa Applications: A Step by Step Guide now with the O’Reilly learning platform.

O’Reilly members experience books, live events, courses curated by job role, and more from O’Reilly and nearly 200 top publishers.