After you define a site, you’ll want to start building pages. Just choose File→New or press Ctrl+N (⌘-N on a Mac) to open Dreamweaver’s New Document window (see Figure 1-15). It’s a little overwhelming at first. You have so many options it’s hard to know where to start. Fortunately, when you just want to create a new HTML file, you can skip most of these options.
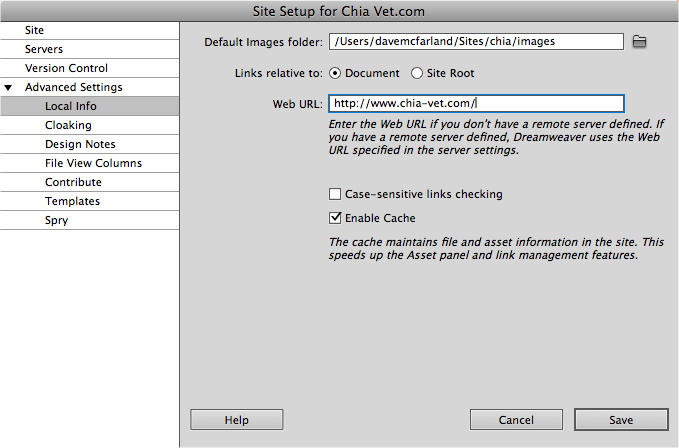
Figure 1-14. You can happily use Dreamweaver without ever visiting the Advanced Settings options listed in the left-hand column of the Site Setup window. The Local Info options are discussed above, and the other options are discussed elsewhere in this book: Cloaking on page 708, Design Notes on page 721, File View Columns on page 650, Contribute on page 750, Templates in Chapter 20, and Spry on on page 188.
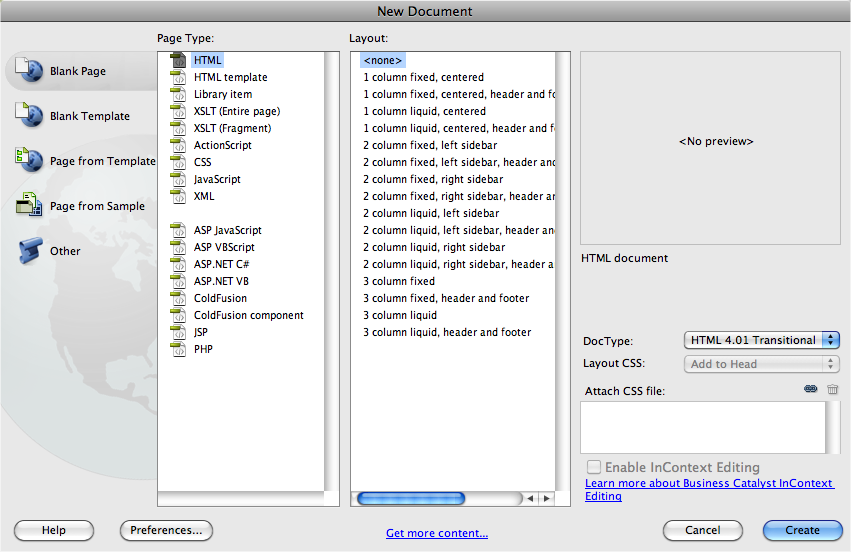
Figure 1-15. The New Document window lets you create nearly every type of web document under the sun. Dreamweaver CS5 includes a revamped set of prepackaged CSS layouts, using the latest web design techniques. You can learn more about these “CSS Layouts” in Chapter 9.
To create a basic HTML file for a web page:
From the left-hand list of document categories, choose Blank Page.
The Blank Page category lets you create a new empty document—this might be a web page or something a bit more esoteric like an XML file (see Storing Data in an XML File for more on XML), an external JavaScript file, or one of the several server-driven pages, such as a PHP file (discussed in Part Six).
Both the Blank Template and "Page from Template” categories relate to Dreamweaver’s Template feature discussed in Chapter 20. The "Page from Sample” category lets you choose from several different files with already-created designs. It’s best to avoid these—they’re old and left over from earlier versions of the program, aren’t very attractive, and don’t use the best techniques for building a web page. Dreamweaver CS5 does ship with some useful page layouts you can access from the Blank Page category. You’ll learn about these in Chapter 10. The last category, Other, lets you create documents for different programming languages like ActionScript or Java—unless you’re a Flash or Java programmer, you probably won’t ever need these.
From the Page Type list, choose HTML.
You can also create other types of documents, most of which you’ll learn more about later in this book, such as PHP for database-driven sites (see Part Six of this book), XSLT files for processing XML (Chapter 27), templates (Chapter 20), library items (Chapter 19), or CSS files (Chapter 4).
From the Layout list, choose “<none>”.
“<none>” creates a blank document. The other choices (“1 column elastic, centered”, “1 column elastic, centered, header and footer”, and so on) are predesigned page layouts. These designs (not to be confused with the designs under the “Page from Sample” category) use CSS, which you’ll learn much more about starting in Chapter 4. Because CSS-based layout can be tricky, Dreamweaver includes all the code you need to create many of the most common types of page designs. You’ll learn more about this feature in Chapter 10.
Select a document type from the DocType menu.
Selecting a document type identifies the type of HTML you’ll use on the page you create. It affects how Dreamweaver writes the HTML code and how a web browser understands it. Fortunately, since Dreamweaver writes all the code for you, you don’t need to worry about the subtle differences between the different document types.
XHTML 1.0 Transitional is the normal setting in Dreamweaver, but HTML 4.01 Transitional, HTML 4.01 Strict, and XHTML 1.0 Strict are also fine choices. The transitional doc types let you use a few HTML tags and properties that have been phased out of the strict types. Most notably, transitional doc types can use the “target” property for links—a simple way to force links to open in a new browser window.
If you don’t really understand or care about doc types, just select HTML 4.01 Transitional. But make sure you avoid None (which can force browsers to display pages in what’s called “quirks mode” and makes perfecting designs difficult) and XHTML 1.1 (which requires a special setting on your web server to work properly).
Note
If you don’t want to deal with the New Document window every time you create a new page, choose Edit→Preferences in Windows or Dreamweaver→Preferences on a Mac. In the Preferences dialog box, click the New Document category and then turn off the "Show New Document Dialog on Control-N” checkbox.
While you’re at it, you can specify the type of file Dreamweaver creates whenever you press Ctrl+N (⌘-N). For example, if you usually create plain HTML files, choose HTML. But if you usually create dynamic pages (like PHP pages), choose a different type of file—PHP, for example.
With these settings, pressing Ctrl+N (⌘-N) instantly creates a new blank document of your choosing. (Choosing File→New, however, still opens the New Document window.)
Click Create.
Dreamweaver opens a new, blank web page ready for you to save and title (see Figure 1-16).
Choose File→Save.
The Save As dialog box appears. You need to save the file somewhere inside the local root folder. You can save it inside any subfolder within the root folder as well.
Type a name for the file and then click Save.
Make sure the name doesn’t contain spaces or any characters except letters, numbers, hyphens, and underscores, and that it ends in either .html or .htm.
Although most operating systems let you save files with long names, spaces, and characters like #, $, and &, some browsers and servers have trouble interpreting anything other than letters and numbers.
Furthermore, web servers rely on file extensions like .htm, .html, .gif, and .jpg to know whether a file is a web page, graphic, or some other type of file. Dreamweaver for Windows automatically adds the extension to your saved document names. But on the Mac—which lets you save files without extensions—make sure the file ends in the suffix .html or .htm when you save it.
At the top of the document window, click inside the Title box and then type a name for the page (see Figure 1-16).
Every new document Dreamweaver creates has the unflattering title Untitled Document. If you do a quick search on Google for “Untitled Document”, you’ll find (at the time of this writing) 27,500,000 results (obviously there are still some people who need to pick up a copy of this book). Dreamweaver probably created most of those pages. You should change this to a descriptive title indicating the main topic of the page, like “Contact Chia Vet,” “About Chia Vet’s Chia Pet Services,” or “Technical Specifications for the Anodyne 3000 Indoor Lawn Mower.” Not only is replacing “Untitled Document” more professional, but providing a descriptive title can improve a web page’s ranking among search engines. In addition, the title appears on Google’s, Yahoo’s, and Bing’s search listings.
Get Dreamweaver CS5: The Missing Manual now with the O’Reilly learning platform.
O’Reilly members experience books, live events, courses curated by job role, and more from O’Reilly and nearly 200 top publishers.

