Another quick way to get some dynamic content into your DVDSP projects is to use video assets directly for your buttons. You've actually done something quite similar when working with the templates in Chapter 1. You can do the same work in DVDSP with your own custom backgrounds.
Let's make another quick-and-dirty test menu to prove how easy it is to incorporate your own video buttons.
Start a new project and grab the following files from the projects/ch04 folder:
castle_tours_scaled.psd
cawdor.m2v
cawdor.AC3
holyrood.m2v
holyrood.AC3
urquhart.m2v
urquhart.AC3
Then, perform the following steps:
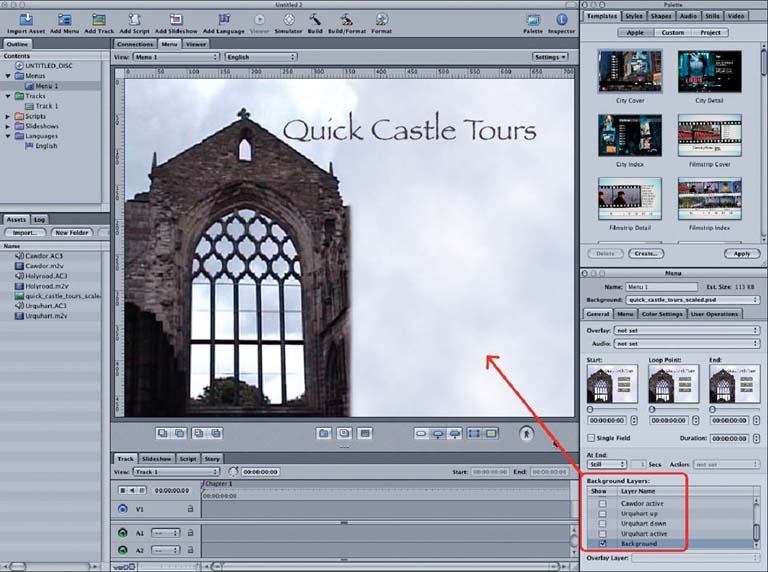
Create a New Menu. Use the castle_tours_scaled.psd file for the background of a standard menu (not a layered menu). Then, use the property sheet to turn on the background layer. See Figure 4-24 for an example. Notice that you don't have any buttons now. That's just fine.
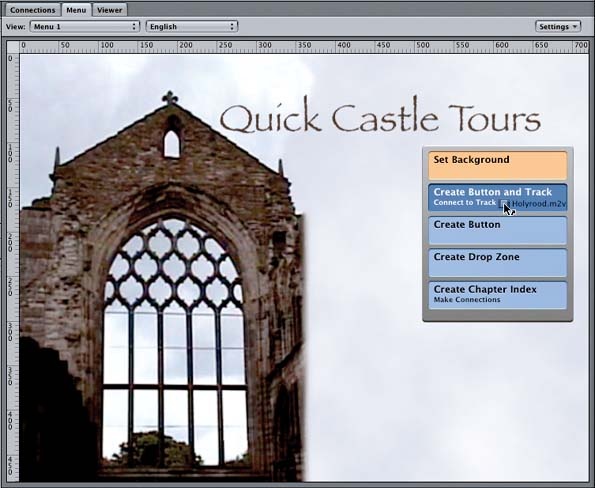
Create a Video Button. Grab the holyrood.m2v asset and drag it over to the menu. Choose the Create Button and Track option, as shown in Figure 4-25.
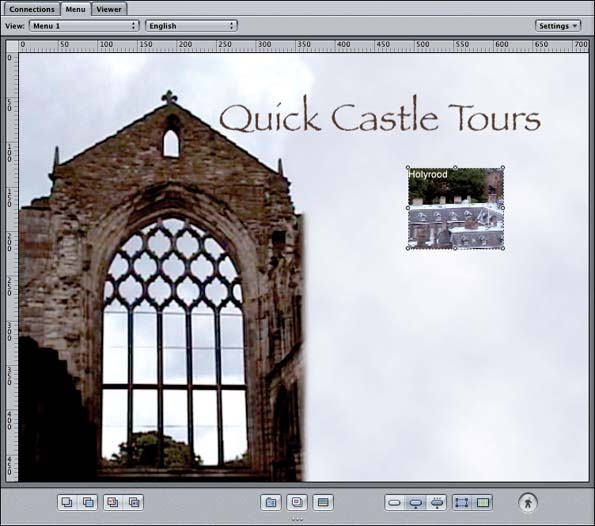
Voilà! You should have a video button. We moved ours into position along the right side and ended up with the menu you see in Figure 4-26. The default size is based on the video's aspect ratio. You can resize it as you want. DVDSP will scale and crop the video to fill the button while keeping the video's aspect ratio intact.
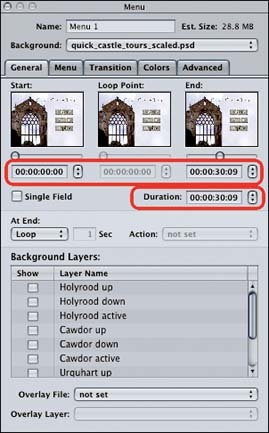
Add Video Buttons for the Other Tracks. As you add the other tracks you can reposition them in the menu. DVDSP will highlight alignment points with other objects in the menu. If you want, you also can steal some of the audio from one of the castles for the entire menu to utilize. The menu's property sheet will enable you to choose which segment of the music you want to loop. It also sets the duration shared by all the other buttons. These properties are highlighted in Figure 4-27.
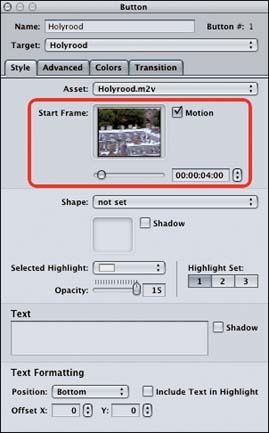
You can use the property sheets for the individual buttons to select which video segment is seen in the menu loop (see Figure 4-28). As noted before, the menu properties determine the button loop's duration (refer back to Figure 4-27).
Get DVD Studio Pro 3: In the Studio now with the O’Reilly learning platform.
O’Reilly members experience books, live events, courses curated by job role, and more from O’Reilly and nearly 200 top publishers.

