Chapter 1. Installing Flex Builder 3
Getting started with Flex begins with downloading the Flex Builder 3 integrated development environment (IDE). You can do that for free by going to the Adobe website (http://adobe.com/flex) and clicking on the Try Flex Builder 3 link. It’s a pretty big download, so while you are waiting you might want to check out Chapter 2 to get some inspiration regarding what you can do with Flex.
Installing the IDE
Flex Builder installs just like any other software you would install on your Windows, Macintosh, or Linux box. The only small difference is that you will need to close your browser(s) so that the installer can upgrade your version of Flash Player to the debugger version. You will want to do that so that you can use the full debugging capabilities built into Flex Builder 3. The debugging system is very good, and becoming familiar with it will be well worth your time.
I strongly suggest that when the download page prompts you to subscribe to the email notifications from Adobe you accept the offer. It’s a spam-free mailing list that gives you news and information about Flex and comes in handy as you delve deeper into the framework.
Once you have the software installed, launch it and you should see the splash screen shown in Figure 1-1.
On the splash screen you will see the words Built on Eclipse. Eclipse is an extensible cross-platform IDE developed by IBM that is popular in the Java™ world. However, you can also use it to build PHP as well as Rails or, in this case, Flex applications.
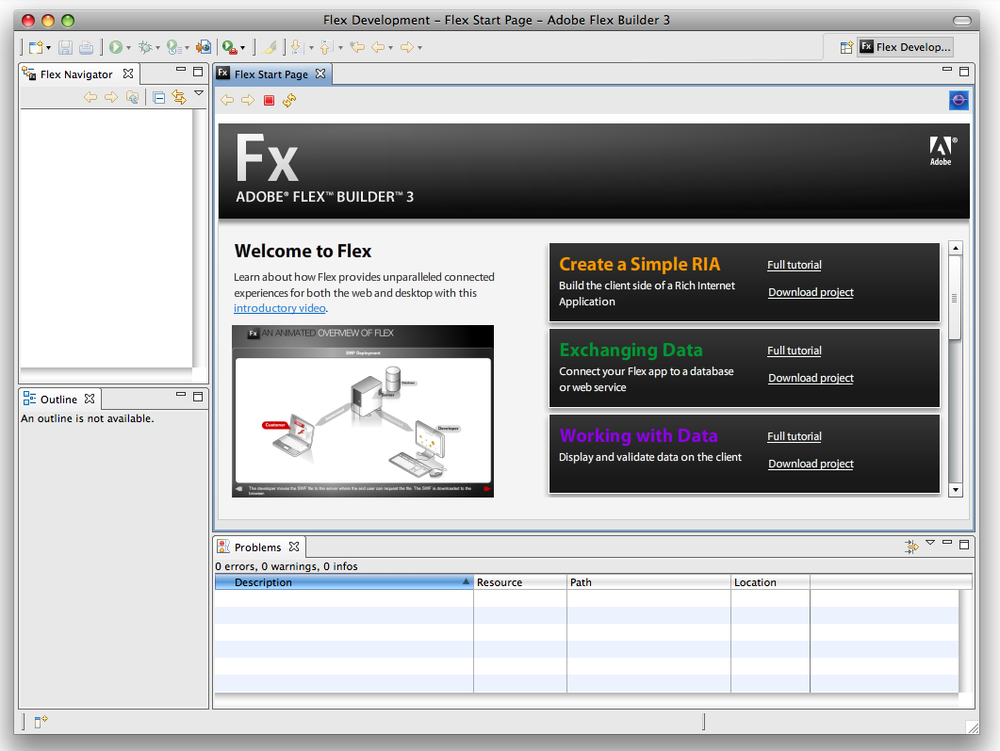
If you are familiar with Eclipse you will be fairly familiar with what you see in Figure 1-2.
Figure 1-2 shows the IDE when no projects are defined. On the upper left is the project and file area. On the bottom left is the Outline inspector that will show you the nested tags in your Flex application files. On the top right is the Start page that comes up by default. You should check out the links on the Start page because they will bring you to helpful material to get you started. The bottom-right panel, labeled Problems, is where you are alerted to issues (e.g., syntax errors) in your Flex code that keep Flex Builder from successfully compiling your application.
Having Some Image Fun
To get started quickly with Flex, select a new Flex project from the New item in the File menu. Use whatever project name you like. I used “starter.” From there, take any image from your computer, rename it to myimage.jpg, and drop it into the src folder of your new project.
Next, double-click on the MXML file for the application and add the code in Example 1-1.
<?xml version="1.0" encoding="utf-8"?>
<mx:Application xmlns:mx="http://www.adobe.com/2006/mxml"
  layout="absolute">
  <mx:Image source="@Embed('mypicture.jpg')" height="100"
    top="30"
left="30" rotation="−10">
    <mx:filters>
      <mx:DropShadowFilter />
    </mx:filters>
  </mx:Image>
</mx:Application>
Now use the Run command in the Run menu to run the application. You should see your picture rotated a little bit, with a drop shadow added. Already, you can see that Flex can do some things that are difficult to do in the browser without any code.
Our next step will be to add some dynamic behavior to the example by adding controls for the rotation, the sizing, and the visibility of the image. The updated code appears in Example 1-2.
<?xml version="1.0" encoding="utf-8"?>
<mx:Application xmlns:mx="http://www.adobe.com/2006/mxml"
  layout="absolute">
  <mx:HBox top="10” left="10">
    <mx:HSlider minimum="−30” maximum="30” value="−10”
      toolTip="Rotation”
      change="myimg.rotation=event.currentTarget.value”
        liveDragging="true” />
    <mx:HSlider minimum="100” maximum="300” value="100”
      toolTip="Size”
      change="myimg.height=event.currentTarget.value”
        liveDragging="true” />
    <mx:CheckBox label="Visible” change="myimg.visible=
      event.currentTarget.selected”
      selected="true"/>
  </mx:HBox>
  <mx:Image id="myimg" source="@Embed('mypicture.jpg')"
    height="100" top="60" left="30" rotation="−10">
    <mx:filters>
      <mx:DropShadowFilter />
    </mx:filters>
  </mx:Image>
</mx:Application>
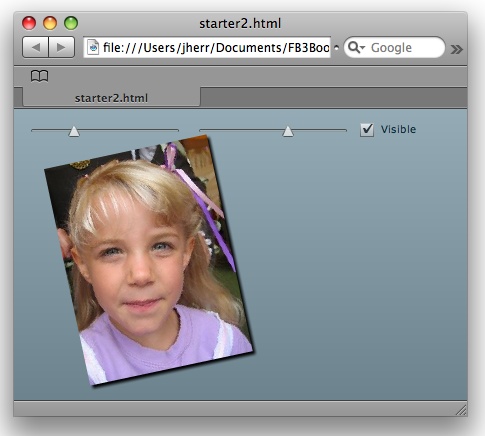
Now we have two sliders and a checkbox. One slider controls the rotation and the other controls the size of the image as the user adjusts the setting. The checkbox will hide or show the image. Figure 1-3 shows the result.
To have a little more fun with the example I’ll add some effects that fade the image in or out when its shown or hidden. Example 1-3 shows the updated image code.
<mx:Image id="myimg" source="@Embed('mypicture.jpg')"
  height="100" top="60" left="30" rotation="−10">
    <mx:filters>
      <mx:DropShadowFilter />
    </mx:filters>
    <mx:showEffect>
      <mx:Fade alphaFrom="0” alphaTo="1” duration="1000” />
    </mx:showEffect>
    <mx:hideEffect>
      <mx:Fade alphaFrom="1” alphaTo="0” duration="1000” />
    </mx:hideEffect>
  </mx:Image>
I’ve chosen to use a fade effect, but there are lots of different filters and effects that you can apply to any Flex control. You can even combine effects in parallel or as a sequence to create cool transitions almost always without using any ActionScript code.
Get Getting Started with Flex 3 now with the O’Reilly learning platform.
O’Reilly members experience books, live events, courses curated by job role, and more from O’Reilly and nearly 200 top publishers.


