The Camera Module
Rather than jump straight to the full program for this project, we are going to start with a very simple example then build it up. This will become the “Spy Camera Test” project. You can download this later, but for now, it will be a good exercise to build it from scratch as described below.
Create a new project and give it the name “Spy Camera Test.” We have added “Test” to its name so as not to get it mixed up with the final Spy Camera Project. If you are not sure how to make a new project, refer to Creating a New Project.
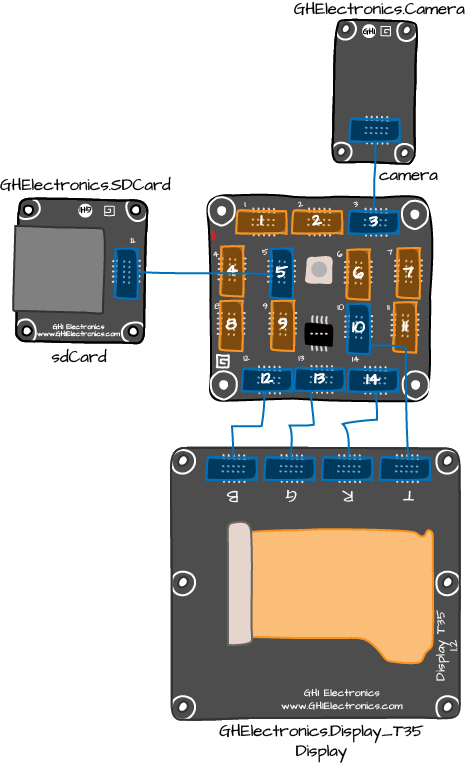
As with our “Hello World” project in Chapter 1, the first step in this project is to add the necessary components to the design in Visual Studio’s designer. Make sure you have the same Mainboard on your canvas as you actually have. Next drag on a Display, a Camera, and an SD Card, and arrange them as shown in Figure 2-2. Note that you do not have to add the red USB DP Power module to the Visual Studio Design. This will always be connected to connector 1.

Figure 2-2. Spy Camera Design
Let’s start by looking at the camera module (see Figure 2-3). This module is the kind of camera that is usually found in a webcam and therefore you are not going to be making a 14 megapixel camera out of it. The camera is manual focus and you will find that the front of the lens screws in and out to allow you to set the focus.
Figure 2-3. Fez Spider Camera Module
The camera’s ...
Get Getting Started with .NET Gadgeteer now with the O’Reilly learning platform.
O’Reilly members experience books, live events, courses curated by job role, and more from O’Reilly and nearly 200 top publishers.

