Creating a Cubic Bezier Curve Loop
You can create some very interesting paths using the four points
in a cubic Bezier curve. One such effect is a loop. To create a loop,
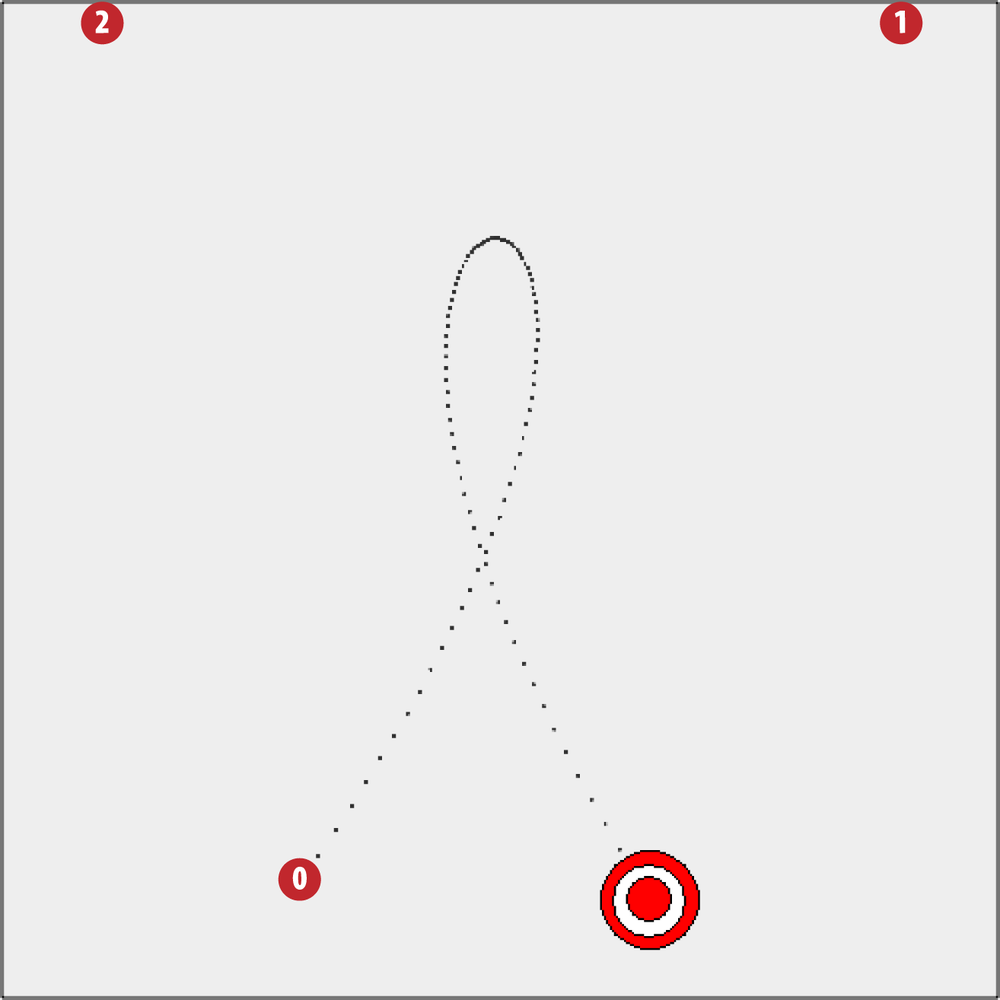
you need to make sure the points form an X, with p0 diagonal from p1, and p2
and p3 on an opposite diagonal from
the other two points. p0 and p3 must be closer to the center of the canvas
than p1 or p2. The points we will use to create this
effect in Example 5-13 are as follows:
varp0={x:150,y:440;varp1={x:450,y:10};varp2={x:50,y:10};varp3={x:325,y:450};
Because it is much easier to show than tell when it comes to cubic Bezier curves, look at Figure 5-17. It shows what the looping curve looks like when Example 5-13 is executed in a web browser.
Note
This effect can be created only with the four points of a cubic Bezier curve. There is also a three-point Bezier curve known as a quadratic Bezier curve. You cannot create loops or S curves with quadratic Bezier curves because the three points are not as precise as the four points of a cubic Bezier curve.

Figure 5-17. Moving an object in a loop using a cubic Bezier curve
Because the code for this example is essentially the same as in Example 5-12 (besides the four points), we have highlighted in bold the changed code in Example 5-13. We have done this to show you that—with relatively simple changes—you can create dramatic animation effects using cubic Bezier ...
Get HTML5 Canvas, 2nd Edition now with the O’Reilly learning platform.
O’Reilly members experience books, live events, courses curated by job role, and more from O’Reilly and nearly 200 top publishers.

