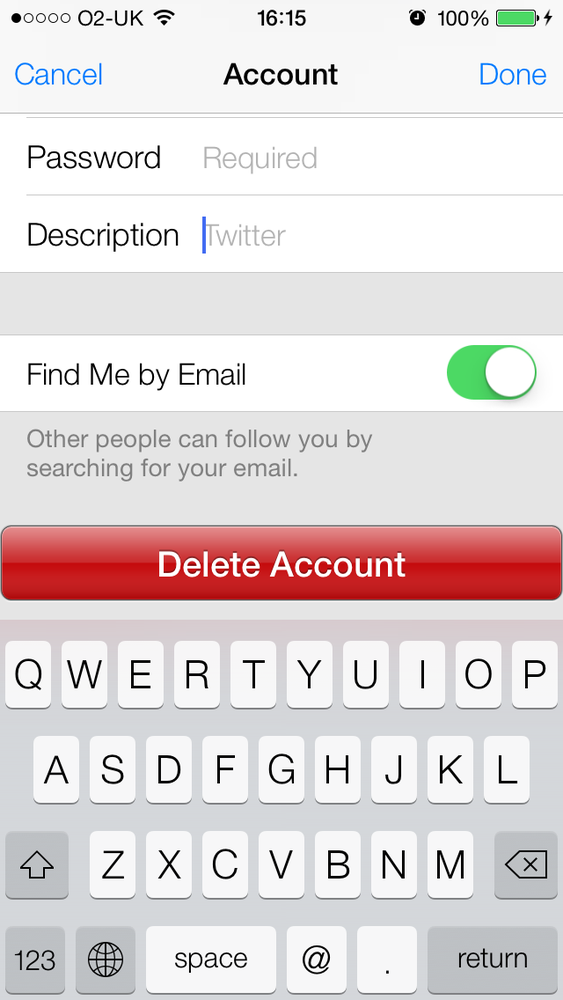
A text field is very much like a label in that it can display text, but a text field can also accept text entry at runtime. Figure 1-49 shows two text fields in the Twitter section of the Settings app on an iPhone.
Note
A text field allows only a single line of text to be input/displayed. As a result, the default height of a text field is only 31 points. In Interface Builder, this height cannot be modified, but if you are creating your text field in code, you can change the text field’s height. A change in height, though, will not change the number of lines you can render in a text field, which is always 1.
Let’s start with the implementation file of our view controller to define our text field:
#import "ViewController.h"@interfaceViewController()@property(nonatomic,strong)UITextField*myTextField;@end@implementationViewController...
And then let’s create the text field:
-(void)viewDidLoad{[superviewDidLoad];CGRecttextFieldFrame=CGRectMake(0.0f,0.0f,200.0f,31.0f);self.myTextField=[[UITextFieldalloc]initWithFrame:textFieldFrame];self.myTextField.borderStyle=UITextBorderStyleRoundedRect;self.myTextField.contentVerticalAlignment=UIControlContentVerticalAlignmentCenter;self.myTextField.textAlignment=NSTextAlignmentCenter;self.myTextField.text=@"Sir Richard Branson";self.myTextField.center=self.view.center;[self.viewaddSubview:self.myTextField];}
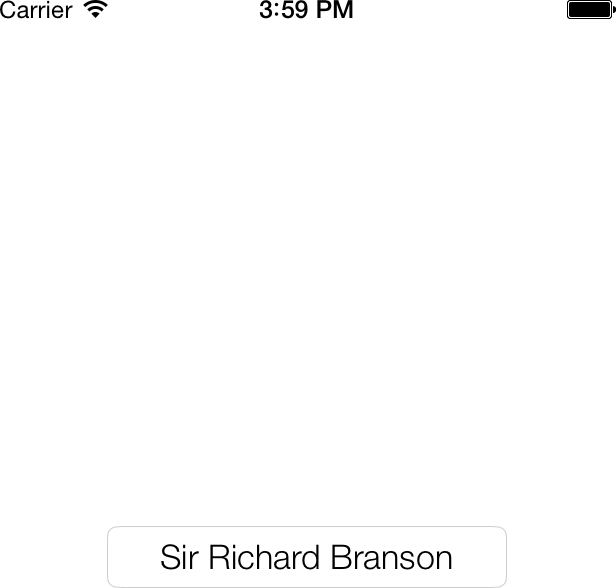
Before looking at the details of the code, let’s first have a look at the results (Figure 1-50).
In order to create this text field, we used various properties of
UITextField.
borderStyleThis property is of type
UITextBorderStyleand specifies how the text field should render its borders.contentVerticalAlignmentThis value is of type
UIControlContentVerticalAlignmentand tells the text field how the text should appear, vertically, in the boundaries of the control. If we didn’t center the text vertically, it would appear on the top-left corner of the text field by default.textAlignmentThis property is of type
NSTextAlignmentand specifies the horizontal alignment of the text in a text field. In this example, we have centered the text horizontally.textThis is a read/write property: you can both read from it and write to it. Reading from it will return the text field’s current text, and writing to it will set the text field’s text to the value that you specify.
A text field sends delegate messages to its delegate object.
These messages get sent, for instance, when the user starts editing the
text inside a text field, when the user enters any character into the
text field (changing its contents in any way), and when the user
finishes editing the field (by leaving the field). To get notified of
these events, set the delegate
property of the text field to your object. The delegate of a text field must conform to the UITextFieldDelegate protocol, so let’s first
take care of this:
@interfaceViewController()<UITextFieldDelegate>@property(nonatomic,strong)UITextField*myTextField;@end@implementationViewController
Hold down the Command key on your computer and click the UITextFieldDelegate protocol in Xcode. You
will see all the methods that this protocol gives you control over. Here
are those methods with descriptions of when they get called:
textFieldShouldBeginEditing:A method that returns a
BOOLtelling the text field (the parameter to this method) whether it should start getting edited by the user or not. ReturnNOif you don’t want the user to edit your text field. This method gets fired as soon as the user taps on the text field with the goal of editing its content (assuming the text field allows editing).textFieldDidBeginEditing:Gets called when the text field starts to get edited by the user. This method gets called when the user has already tapped on the text field and the
textFieldShouldBeginEditing:delegate method of the text field returnedYES, telling the text field it is OK for the user to edit the content of the text field.textFieldShouldEndEditing:Returns a
BOOLtelling the text field whether it should end its current editing session or not. This method gets called when the user is about to leave the text field or the first responder is switching to another data entry field. If you returnNOfrom this method, the user will not be able to switch to another text entry field, and the keyboard will stay on the screen.textFieldDidEndEditing:Gets called when the editing session of the text field ends. This happens when the user decides to edit some other data entry field or uses a button provided by the supplier of the app to dismiss the keyboard shown for the text field.
textField:shouldChangeCharactersInRange:replacementString:Gets called whenever the text inside the text field is modified. The return value of this method is a Boolean. If you return
YES, you say that you allow the text to be changed. If you returnNO, the change in the text of the text field will not be confirmed and will not happen.textFieldShouldClear:Each text field has a clear button that is usually a circular X button. When the user presses this button, the contents of the text field will automatically get erased. We need to manually enable the clear button, though. If you have enabled the clear button and you return
NOto this method, that gives the user the impression that your app isn’t working, so make sure you know what you are doing. It is a very poor user experience if the user sees a clear button and presses it but doesn’t see the text in the text field get erased.textFieldShouldReturn:Gets called when the user has pressed the Return/Enter key on the keyboard, trying to dismiss the keyboard. You should assign the text field as the first responder in this method.
Let’s mix this recipe with Recipe 1.17 and create a dynamic text label under our text field. We’ll also display the total number of characters entered in our text field in the label. Let’s start with our implementation file:
@interfaceViewController()<UITextFieldDelegate>@property(nonatomic,strong)UITextField*myTextField;@property(nonatomic,strong)UILabel*labelCounter;@end@implementationViewController
Now for the creation of the text field along with the label
and the text field delegate methods we require. We skip implementing
many of the UITextFieldDelegate
methods, because we don’t need all of them in this example:
-(void)calculateAndDisplayTextFieldLengthWithText:(NSString*)paramText{NSString*characterOrCharacters=@"Characters";if([paramTextlength]==1){characterOrCharacters=@"Character";}self.labelCounter.text=[NSStringstringWithFormat:@"%lu %@",(unsignedlong)[paramTextlength],characterOrCharacters];}-(BOOL)textField:(UITextField*)textFieldshouldChangeCharactersInRange:(NSRange)rangereplacementString:(NSString*)string{if([textFieldisEqual:self.myTextField]){NSString*wholeText=[textField.textstringByReplacingCharactersInRange:rangewithString:string];[selfcalculateAndDisplayTextFieldLengthWithText:wholeText];}returnYES;}-(BOOL)textFieldShouldReturn:(UITextField*)textField{[textFieldresignFirstResponder];returnYES;}-(void)viewDidLoad{[superviewDidLoad];CGRecttextFieldFrame=CGRectMake(38.0f,30.0f,220.0f,31.0f);self.myTextField=[[UITextFieldalloc]initWithFrame:textFieldFrame];self.myTextField.delegate=self;self.myTextField.borderStyle=UITextBorderStyleRoundedRect;self.myTextField.contentVerticalAlignment=UIControlContentVerticalAlignmentCenter;self.myTextField.textAlignment=NSTextAlignmentCenter;self.myTextField.text=@"Sir Richard Branson";[self.viewaddSubview:self.myTextField];CGRectlabelCounterFrame=self.myTextField.frame;labelCounterFrame.origin.y+=textFieldFrame.size.height+10;self.labelCounter=[[UILabelalloc]initWithFrame:labelCounterFrame];[self.viewaddSubview:self.labelCounter];[selfcalculateAndDisplayTextFieldLengthWithText:self.myTextField.text];}
One important calculation we are doing is in the textField:shouldChangeCharactersInRange:replacementString:
method. There, we declare and use a variable called wholeText. When this method gets called, the
replacementString parameter specifies
the string that the user has entered into the text field. You might be
thinking that the user can enter only one character at a time, so why
can’t this field be a char? But don’t
forget that the user can paste a whole chunk of text into a text field,
so this parameter needs to be a string. The shouldChangeCharactersInRange parameter
specifies where, in terms of location inside the text field’s text, the
user is entering the text. So using these two parameters, we will create
a string that first reads the whole text inside the text field and then
uses the given range to place the new text inside the old text. With
this, we will come up with the text that will appear in the text field
after the textField:shouldChangeCharactersInRange:replacementString:
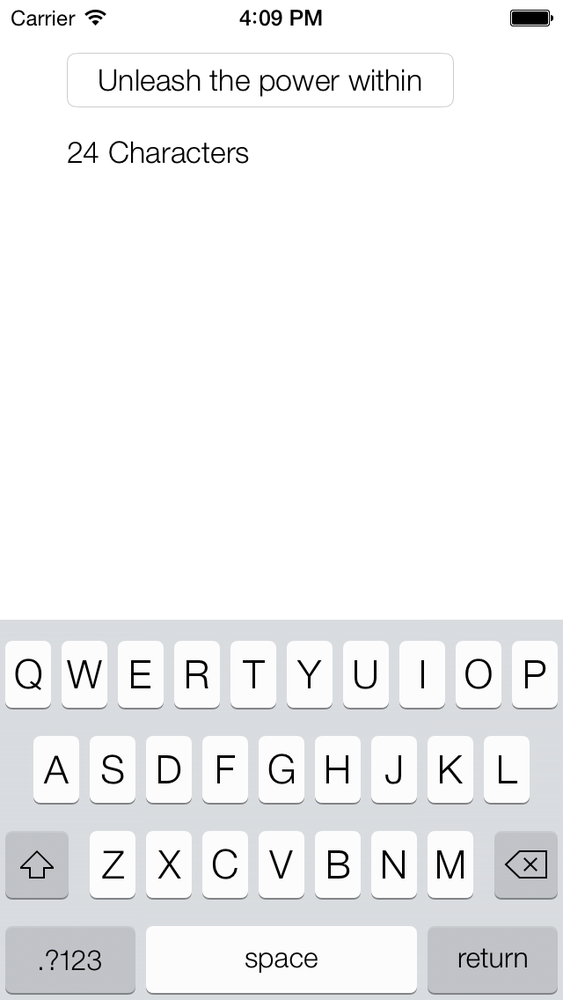
method returns YES. Figure 1-51 shows how
our app looks when it gets run on the simulator.
In addition to displaying text, a text field can also display
a placeholder. A placeholder is the text displayed
before the user has entered any text in the text
field, while the text field’s text property is empty. This can be any
string that you wish, and setting it will help give the user an
indication as to what this text field is for. Many use this placeholder
to tell the user what type of value she can enter in that text field.
For instance, in Figure 1-49, the
two text fields (password and description) have placeholders that say
“Required,” etc. You can use the placeholder property of the text field to set
or get the current placeholder. Here is an example:
CGRecttextFieldFrame=CGRectMake(38.0f,30.0f,220.0f,31.0f);self.myTextField=[[UITextFieldalloc]initWithFrame:textFieldFrame];self.myTextField.delegate=self;self.myTextField.borderStyle=UITextBorderStyleRoundedRect;self.myTextField.contentVerticalAlignment=UIControlContentVerticalAlignmentCenter;self.myTextField.textAlignment=NSTextAlignmentCenter;self.myTextField.placeholder=@"Enter text here...";[self.viewaddSubview:self.myTextField];
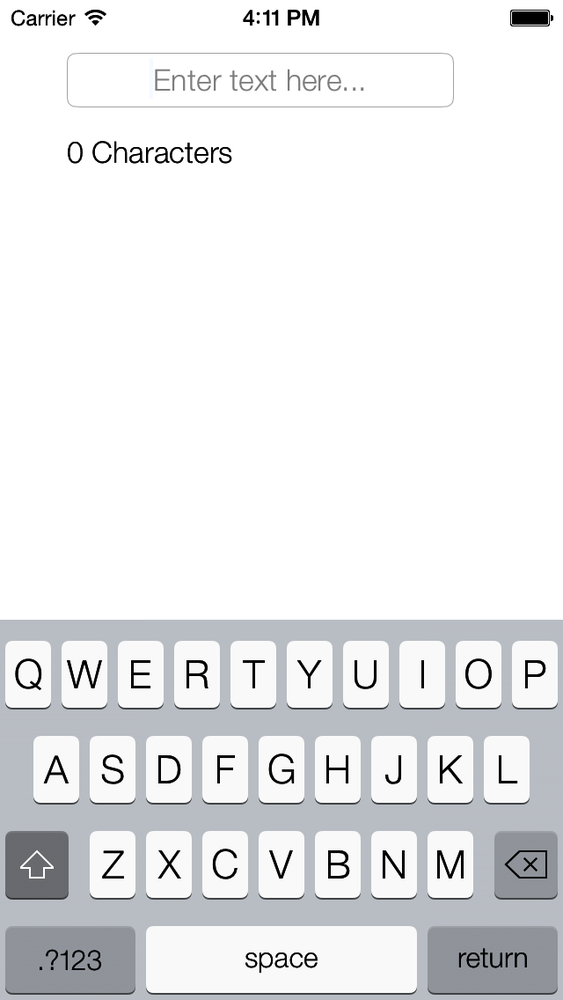
The results are shown in Figure 1-52.
Text fields have two really neat properties called leftView and rightView. These two properties are of type
UIView and are read/write. They
appear, as their names imply, on the left and the right side of a text
field if you assign a view to them. One place you might use a left view,
for instance, is if you are displaying a currency text field where you
would like to display the currency of the user’s current country in the
left view, as a UILabel. Here is how
we can accomplish that:
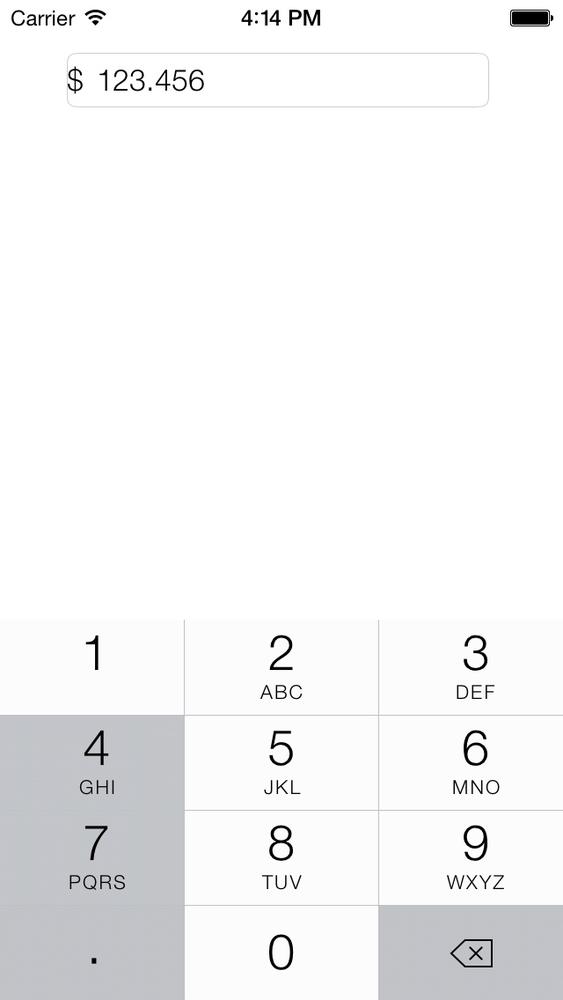
UILabel*currencyLabel=[[UILabelalloc]initWithFrame:CGRectZero];currencyLabel.text=[[[NSNumberFormatteralloc]init]currencySymbol];currencyLabel.font=self.myTextField.font;[currencyLabelsizeToFit];self.myTextField.leftView=currencyLabel;self.myTextField.leftViewMode=UITextFieldViewModeAlways;
If we simply assign a view to the leftView or to the rightView properties of a text field, those
views will not appear automatically by default. When they show up on the
screen depends on the mode that governs their appearance, and you can
control that mode using the leftViewMode and rightViewMode properties, respectively. These
modes are of type UITextFieldViewMode:
typedefNS_ENUM(NSInteger,UITextFieldViewMode){UITextFieldViewModeNever,UITextFieldViewModeWhileEditing,UITextFieldViewModeUnlessEditing,UITextFieldViewModeAlways};
So if, for instance, you set the left view mode to UITextFieldViewModeWhileEditing and assign a
value to it, it will appear only while the user is editing the text
field. Conversely, if you set this value to UITextFieldViewModeUnlessEditing, the left
view will appear only while the user is not editing
the text field. As soon as editing starts, the left view will disappear.
Let’s have a look at our code now in the simulator (Figure 1-53).
Get iOS 7 Programming Cookbook now with the O’Reilly learning platform.
O’Reilly members experience books, live events, courses curated by job role, and more from O’Reilly and nearly 200 top publishers.
