Chapter 4. MEDIA AND DATA
The iPhone is a media powerhouse, but there are ways to make it even more powerful.
Unlike other smartphones, the iPhone builds directly on a rich iPod heritage. This means that it has best-of-breed audio and video performance and compatibility with the widely used tools for preparing content for video-enabled iPods. Also unlike most smartphones to date, it runs Unix; specifically, Mac OS X, which means that many of the open source, Linux, or BSD projects that could be compiled for the Mac can also run on the device. Both the iPhone and iPod touch have extensive networking support—and more wireless connectivity options than most laptops. When you put it all together, you have a portable iPod successor that is for all intents and purposes always connected to the Internet, combined with gigabytes of high-speed solid-state storage.
If you’re a news junkie or RSS fiend, the iPhone is your friend. If you’re obsessed with music, your new iPod connects you to others just as obsessed as you. If you’re a bookworm, you’ll be able to overfill your iPhone’s digital bookshelf. And if you’re a videophile, you can carry dozens of feature-length movies on your iPod or remotely stream hundreds of DVD rips from home—this chapter will show you how.
Carry a Portable File Server
Make your iPhone into the wireless successor to the thumb drive.
In Manipulate Your iPhone’s Filesystem we discussed looking at files anywhere on your filesystem. Although there are now hundreds of ways to push your data into the “cloud”—email, FTP accounts, WebDAV, Amazon S3—sometimes you don’t want your data hosted out there on the Internet. Sometimes you’re not online, but you just need a way to carry your files with you and get them onto another computer easily.
Part of the reason for the popularity and ubiquity of thumb drives is the need for a sneakernet—the term for “networking” by walking files from one computer to another. But using the iPhone as a physically connected thumb drive alternative is somewhat inconvenient—you must have your cable with you, you may need to install iTunes, and often a photo application will pop up. And it’s just not as cool.
But it’s also silly that you have to carry around your iPhone and a thumb drive, and that you can’t peek into your thumb drive and check which files are on it without plugging it into the computer.
Luckily, several App Store apps solve both of these issues by turning the iPhone into a convenient portable file server.
Air Sharing
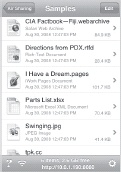
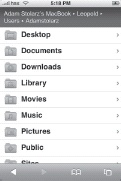
Air Sharing is a clean, feature-filled app that makes the iPhone or iPod touch into a temporary WebDAV server. WebDAV (Web-based Distributed Authoring and Versioning) is a file-serving protocol that allows you to share a hard drive over HTTP. You launch the app, and right on the bottom of the screen you’ll find a WebDAV URL (Figure 4-1): in the example, http://10.0.1.190:8080.
Here are operating-system-specific instructions:
Mac OS X: Finder→Go→Connect to Server, then type in the URL.
Windows Vista: Start→right-click My Computer→Map Network Drive, select a drive letter, type in the URL.
Windows XP: Start→My Network Places→Add a Network Place→Next→Choose another network location→Type in the URL.
Linux GNOME: Use the Nautilus File browser, but change the URL prefix from http:// to dav://
Linux KDE: Konquerer expects the URL to be changed to webdav:// instead of http://
Any web browser: Type in the URL. You’ll be able to browse and download files (but not upload).
One of the nicest things about Air Sharing is that it allows convenient previews of any file that you upload and that the iPhone is capable of previewing, which includes any multimedia like MP3s and MOVs. So if you have a set of movies or music that you don’t want to go through the whole sync-to-iTunes process with, or if they’re work- or demo-related and not intended to be part of your personal listening library, this application is a great way to play them back outside of the iPod application.
Mobile Studio
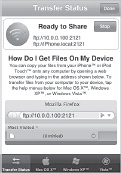
Another very similar application is Mobile Studio. Its heritage is in the MobileFinder group of applications Manipulate Your iPhone’s Filesystem but it’s been completely sanitized for the App Store. Nonetheless, it is a very effective FTP server for the iPhone, with features similar to Air Sharing. The good thing about FTP is that it’s ubiquitous—every computer has an FTP client, if only a command-line one—and thus it’s less clunky than mounting a WebDAV share if you know what you’re doing. Mobile Studio presents the URLs that can be entered into most web browsers if you just want to view the files, or can be connected to by any FTP client on your machine. Mobile Studio also provides tutorials within the app on how to get connected from the various OSs you might be on. And if you’re inclined to use the command line, typing ftp <IP address of your phone> will get you in.
Bonjour
Both of these applications offer the ability to use a Bonjour address. Bonjour is Apple’s fun name for Zeroconf, a “zero configuration” network addressing standard that allows local IP network devices to be discovered by name. You can read about its details at www.zeroconf.org. More importantly, if you’re on XP, Vista, Windows 7, or a Linux distribution, you can make your discovery of these servers easier, and set it up so you can use the same name (the name of your device) each time you connect, instead of an ever-changing IP address. You can get Bonjour for Windows from www.apple.com/macosx/technology/bonjour.html. Most Linux distributions come with Bonjour compatibility.
Limitations
Because of the App Store restrictions, applications can access files only in their own private storage area, so you’ll be able to download only files that you upload to these servers. It’s also worth noting that these apps act as a server only while they’re running—which can be considered both a bug (no sharing if you quit) and a feature (if it ran all the time, you’d be advertising your files to anyone). By default, these servers have no passwords set. If you’re concerned about security, set a password.
Going Beyond
Mount the iPhone Filesystem on Your Mac with AppleTalk or SSH discusses using AFP and SSH, and if you’ve jailbroken your phone, you can easily install those applications in Cydia, mount your entire iPhone filesystem on a Mac, and access it using a free SCP program on Windows or Linux. But with these apps you get the cute file previews, the tidy isolation of your files, and the ability to connect quickly without a password. So even if you’re jailbroken, you will probably find these apps useful.
Convert Videos, DVDs, and Blu-Ray Discs to iPhone- and iPod touch–Ready Formats
Not everything is on the iTunes store, and much of it is already in your collection. But you can put media from any source on your device.
There’s a lot of video out there, and not all of it comes in tidy iPod-compatible formats. In fact, before the iPod with video and the Sony PlayStation Portable (PSP) came along, the DivX/XviD formats (technically, MPEG-4 part 2 in an AVI container) had pretty much wrapped up the harddrive-based video space. But now, because of Apple’s commanding presence in downloadable video distribution, we find a large amount of content in MOV. To get content to work on the iPod touch or the iPhone, it’s necessary to compress it into an iPod-compatible format.
Video Compression 101
If you’re familiar with online video, you’ve probably downloaded AVI files, WMF files, and perhaps MOV files. You may have downloaded files that ended in .xvid or .divx. The irony of this alphabet soup is that most of these file formats share the same basic compression technique—MPEG-4. Yet you can’t just put them on your iPod touch and hit play. Why must the world be like this? Read on.
Here’s a quick list of the main things you need to know about video compression:
Media container (file formats)
Video is stored in a digital “box” or container. Examples are .mov, .mp4, .avi, .wmv, .m4v, and .mkv. You can store all kinds of codecs (see the next list item) in an MOV; thus, the mere presence of an MOV extension doesn’t mean that it will play on an iPhone. Similarly, you might have perfect iPhone compatible data in an AVI container, but the iPhone isn’t going to understand it, because it’s in the wrong “box.”
Codecs (compressor-decompressors)
The codec is the technique used to squish gigabytes of video into mere tens or hundreds of megabytes. Examples include DivX/XviD (MPEG-4 part 2), WMV (Microsoft’s VC-1 codec, similar to MPEG-4), H.264/AVC (advanced video codec; basically, MPEG-4 part 10, a more recent version of MPEG-4), and MPEG-2 (DVD “VOB” files; also digital broadcast television, satellite, TiVo, and most set-top boxes encode to MPEG-2).
Resolution
Resolution refers to how many dots are in the picture. Aspect ratio is the ratio of horizontal dots to vertical dots. Not all dots are square, because video is often stored at a small resolution and then blown up—or on the iPhone, shrunk—to fit the screen. Video can be high-definition (i.e., 1280x720 pixels or 1920x1080 pixels). Standard-definition video is in the range of 640x480 or 720x480. The iPhone screen is exactly 480x320, so widescreen (letterboxed) movies can be encoded at 480x270.
Frame rate
Movies usually run at 24 frames per second (fps). TV shows usually run at 30fps or 29.97fps, or 25fps in Europe. Sometimes for Internet this frame rate is cut in half to 15fps or 12fps.
Codec profiles and levels
In the MPEG-4 standard, there are profiles and levels. Profiles are bundles of audio and video codec settings that target a particular class of devices. You’ll hear of “Main,” “Baseline,” and “Simple” profiles. Within a profile are levels—how much computation it takes to encode video in that format.
Bit rate
The bit rate specifies how much data the device can decode, and how fast. A studio DVD might have anywhere from 6 megabits per second (Mbps) to 10 Mbps of MPEG-2 data, meaning how fast the firehose of data flows. Blu-Ray sends tens of megabytes of MPEG-4 data. Your Internet connection might support from 1 Mbps up to 20 Mbps. A portable device like the iPhone or the PSP might take video that’s only 1-2 Mbps or less.
So with all that knowledge, you should have no trouble understanding Apple’s iPhone specifications:
H.264 video, up to 1.5 Mbps, 640x480 pixels, 30 fps, Low-Complexity version of the H.264 Baseline Profile with AAC-LC audio up to 160 Kbps, 48kHz, stereo audio in .m4v, .mp4, and .mov file formats
H.264 video, up to 2.5 Mbps, 640x480 pixels, 30 fps, Baseline Profile up to Level 3.0 with AAC-LC audio up to 160 Kbps, 48kHz, stereo audio in .m4v, .mp4, and .mov file formats
MPEG-4 video, up to 2.5 Mbps, 640x480 pixels, 30 fps, Simple Profile with AAC-LC audio up to 160 Kbps, 48kHz, stereo audio in .m4v, .mp4, and .mov file formats
What does it all mean? Basically, the iPhone supports two flavors of MPEG-4: H.264 (the new stuff) and MPEG-4 (the old stuff). But it supports them only with particular settings. So getting video into an iPhone compatible form isn’t hard, but getting the best possible compression and best possible picture for the best possible storage is, as always, a series of tradeoffs. The best-looking file for your iPhone may not be the best format for your Apple TV or, especially, your non-Apple home theater PCs. Thus, you have to choose—do you want a lowest-common-denominator (which Apple has attempted to provide with its downloadable standard-definition movies), or do you want to have several versions of your library—one in portable MP4, and one in a higher-resolution Xvid format?
The choice is yours; here, we’ll present a couple of the easiest tools to get started.
HandBrake
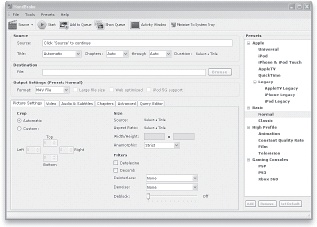
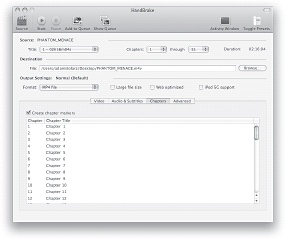
Probably the leading free, open source, cross-platform (Windows, Linux, and Macintosh) tool for encoding videos for the iPhone/iPod family of devices is HandBrake, available for download at handbrake.fr. This tool has come a long way. Originally it was primarily a DVD ripping program, but with the recent integration of the famous open source video codec ffmpeg libraries (ffmpeg.mplayerhq.hu), it can now convert almost any file into an iPhone format.
Figures Figure 4-3 and Figure 4-4 show HandBrake on Mac OS X and Windows XP, respectively. A Linux version with GUI is also available. To use it, select the file to convert using the “Source” button in the top left. On the right-hand side of the main window (the presets drawer) are a variety of settings, and under the Apple tab are presets for the Apple family of devices and computers.
The “Universal” setting is designed to produce a file that will give good results and be compatible across the full line of devices, from Apple TV to older iPods. If you’re trying to optimize for size and quality on an iPhone or iPod touch for solely handheld viewing, you can make smaller files to fit the 360x480 screen. However, if you plan to watch these files on a television on computer screen, Universal is best.

Command-Line HandBrake
If you’re more into command-line utilities, perhaps for creating batch encoding workflows for your voluminous library, HandBrake has a command line interface. You can download it separately at http://handbrake.fr, and read the documentation at http://trac.handbrake.fr/wiki/CLIGuide.
The command line is quite easy to use, and allows you to set any minute parameter for tweaking. In its most basic form, it looks like this:
HandBrakeCLI -iinputFile-ooutputFile
which uses the default settings to create a 1Mbps MP4 file.
More complicated options can also be set, such as:
HandBrakeCLI -iinputFile.avi-ooutputFile.m4v-e x264 -b 1500 -B 160
which will create an H.264-encoded, 1.5Mbps MP4 file with 160kbps audio.
To see all the available options, enter this command:
HandBrakeCLI -h
QuickTime Pro
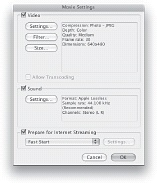
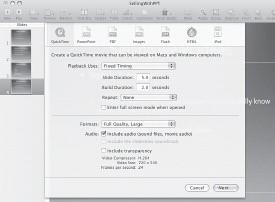
If you have to convert a file quickly, you have a couple of options. If you have a registered copy of QuickTime Pro on the Mac or PC, then you can export (slowly) MOV and H.264 files with easy save-for-iPhone presets (Figure 4-5).
However, on a PC, although QuickTime Pro can export to the iPhone, the likelihood that it will be able to open your format in question is low, as it prefers to open MOV files. So you’re better off using another tool.
iMovie (OS X)
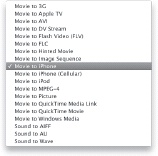
iMovie HD, bundled with most Macs, lets you export to a variety of different formats, including one especially for the iPod (which, in turn, works just great on the iPhone). iMovie has built-in support for many MPEG-2, MPEG-4, and MOV files, so it can load things that even the QuickTime player won’t load. The downside is that it takes a while to import the file, and it translates the resolution to an iMovie HD format, which is then reduced down for the device. The upside is that you can edit the movie and import a variety of formats. Once that’s done, go to File→Export, click the Mobile button (Figure 4-6), and let ‘er rip. After the conversion is done, your new video will be sent straight to your iTunes library.
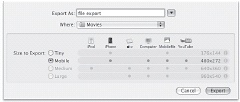
Photo-JPEG
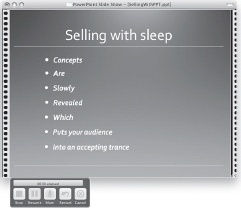
It’s worth noting that the iPhone codecs listed previously are the main ones that Apple specifies as supported. Although iTunes will refuse to transfer them to your iPhone, you can also save files as Photo-JPEG—a video format where each frame is simply a JPEG file, with no fancy MPEG-4 stuff going on. This format is excellent for exporting files like PowerPoint, in which there are lots of high-resolution stills that need to be played back Present PowerPoint on a Projector or TV Using Your iPhone or iPod touch.
As an example, the QuickTime Pro export settings shown in Figure 4-7—30fps Photo-JPEG with Apple Lossless audio—produced a file playable on the iPhone. The file won’t transfer in iTunes, but when copied to the device and played in AirSharing Carry a Portable File Server or emailed as an attachment, it works just fine.
Hardware Assist
One of the first things that is apparent when converting movies is that it takes a long time. Although “real-time” conversion sounds fast, in fact it simply means that it takes two hours to convert a two-hour movie. Converting a whole library could take weeks or months. Although dedicating a quad-core or 8-core machine to the task is one option, if you have a Mac, there is a cheaper option that will save a tremendous amount of CPU time and increase encoding performance.
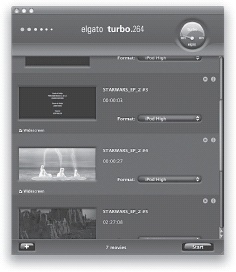
Elgato (www.elgato.com) makes a device called Turbo.264 that is a USB-connected MPEG-4 encoding accelerator (Figure 4-8). For $100, it adds an MPEG-4 encoder chip to your Mac that when used with special software, allows the Mac to do encoding without using much CPU time at all. If you have an older Mac (such as a Power PC), the speed increase can be ten times faster, and even on dual-core Intel Macs, the performance is increased several times over.

Videora (Windows)
If your videos sit on a Windows-based machine, most of your choices involve some $25–$50 shareware app from a company that you’ve likely never heard of.
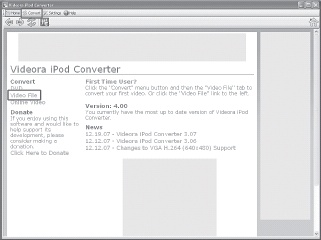
However, there’s a freeware alternative called iPhone Converter from Videora at www.videora.com/en-us/Converter/iPhone. It converts video to a suitable iPhone format almost too easily (and all without spy- or adware). It’s a small download and a quick install, and it converts files quickly.
Launch the app and flip over to the Convert tab, then click the Video File tab. When you’re prompted to Select Mode, pick Normal. You’ll have to go through a couple simple steps by pressing the orange Next button a couple times. Once you reach the Video Settings page (Figure 4-9), make any changes to the video quality, but leave the Video Format and Video Size settings the same. Scroll down and click the Start Converting button.
When a file is done converting, it will go into both your Library tab as well as be placed automatically into your iTunes library. If you get an error when it tries to transfer it to iTunes, you may have to just browse for the video file and drag it into iTunes. From there, of course, you can sync it onto your iPhone and enjoy.
Web-based Conversions
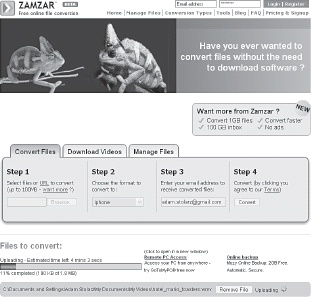
If you don’t want to download or install anything, and your video is under 100 MB, a simple service called Zamzar (www.zamzar.com), shown in Figure 4-10, can convert all manner of files to different formats, including converting non-iPhone video to H.264 (and it’s watermark-free!). You simply go on, select a file, choose a resulting format, punch in your email, and start it. After your movie is uploaded, it will be converted. Once it’s done, Zamzar will send you an email with the link to the file, what file it was, what format it was, and what you converted it to. The file will stay available for one day.
This service is perfect for any sort of small files, or if you’re traveling and your laptop doesn’t have a conversion program. If iTunes rejects a video converted using the “iPhone” format, you could try using the “iPod” format, which often can solve the problem.
DVD and Blu-Ray on Your iPhone
If you don’t know what an MP3 is, you probably aren’t reading this book. And if you aren’t reading this book, you probably don’t know that the way to make an MP3 is to “rip” a CD by simply inserting the CD in a drive and clicking Import in iTunes.
With us so far? Well, you may be surprised to find that it’s not as easy with DVDs. Basically, though CDs are (for the most part) not copy-protected or encrypted, DVDs are. Therefore, most of the mainstream “ripping” programs for audio don’t import DVD video. Yet there are many reasons that you might want to convert and back up DVDs:
Scratch prevention
Children scratch their DVDs. It’s cute to watch them try to insert them in computers and DVD players, and it’s a good “teachable moment”—but it rapidly makes them unplayable.
Mobility
Physical DVDs, though small, aren’t small enough. If you’re going on a trip and want to bring some of your DVD library with you, a copy on your iPhone takes up even less space than a DVD.
Convenience
It’s unlikely that you’d get to enjoy all four seasons that you bought of your favorite show on DVD unless they were there whenever you had a bit of downtime—on the plane, in a hotel, at a family gathering, on a date.
Security
If your house burns down or gets robbed, do you really want to have to buy all your DVDs again?
DVD and Blu-Ray Ripping
Putting DVD video on your iPhone can be accomplished in two steps. First, you need to extract (a.k.a. rip) the video content from the DVD. Then, you convert the video content to an iPhone-compatible MP4 format that can be synced with iTunes. This is hard to accomplish because of copy protection, also known by the fancy name of Digital Rights Management (DRM). Copy protection for DVD and Blu-Ray comes in the following various flavors.
Content Scrambling System (CSS)
This is the form of encryption used by DVD players. There are many codes and each DVD may use a different code. Compliant DVD players know all the codes. It was cracked in the late 1990s by the reverse-engineering of a software player.
AACS
This protection is like CSS, but for Blu-Ray. Every Blu-Ray disc has a key to playing it back. Thousands of unique keys are then used to lock a copy of this key. Every authorized Blu-Ray player uses one of these keys. If that player ever gets hacked, it will get excommunicated, and all future discs will have that key disabled and the player won’t be able to play new Blu-Ray releases. It was cracked shortly after Blu-Ray was released.
BD+
This is an extra form of protection on top of AACS. Even after it’s decrypted, the content of a Blu-Ray won’t look right, because it’s scrambled. Each Blu-Ray title has a tiny program on it that the Blu-Ray player must run to descramble the content. This step slows down the speed of cracking new DVD titles, because each disc has to be carefully analyzed to see how its unique descrambling code works.
DVDs consist of 4–9 GB of VOB (video object) files. These are basically MPEG-2 video files with audio interleaved either in a PCM (uncompressed) or AC3 (Dolby surround) format. If you just insert a DVD in a drive and try to copy the files off, they either won’t copy, or they won’t work once copied off. They are encrypted. To defeat the encryption, you need a decryption program.
The DVD has a specific file structure. The video is stored in a folder called VIDEO_TS on the DVD.
Blu-Ray discs can be as big as 50 GB. The video is stored in high-definition 1920x1080 resolution, and encoded with MPEG-2, MPEG-4 AVC, or sometimes Microsoft’s VC-1 (WMV 9-ish) codec.
The Blu-Ray disc has a specific file structure. The movie is stored in a folder called BDMV. Home-burned discs have a different folder, BDAV.
There are two basic approaches to ripping:
Get an all-in-one program that rips a DVD or Blu-Ray and converts it to iPhone-compatible formats.
Archive your movies by saving the VIDEO_TS folder or BDMV contents on your hard drive. Then, use a program such as those described earlier in this hack to encode for iPhone.
Note
The most definitive resource online for DVD backups is www.doom9.org.
Why Is It So Hard?
Generally, the copyright owners of DVDs and Blu-Ray discs have done their best to keep DVD ripping software off the market. It persists in two forms: open source projects, often hosted internationally, where there is no financial motive and, thus, no one to sue; and off-shore corporations in countries that aren’t under a reachable jurisdiction. Proponents of these tools contend that the software has substantial legal, noninfringing use—under the fair-use or fair-dealings laws of the countries that it is used in. Opponents contend that it violates laws about defeating encryption.
Ripping on a Mac
To rip a DVD, you can use either MacTheRipper (www.mactheripper.org) or FairMount (www.metakine.com/products/fairmount). FairMount requires the VLC Media Player from www.videolan.org to function. But it’s not necessary to have VLC Media player running when you’re using FairMount. You can see FairMount mounting a DVD in Figure 4-11. MacTheRipper can be seen ready to rip a DVD in Figure 4-12.
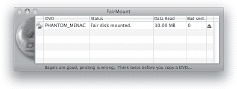
With a DVD inserted in your computer’s drive, start up FairMount; it will automatically mount the disc. In Finder, the DVD should now show up as a removable drive, instead of as a disc. When you click on it in Finder, you’ll see that it contains a folder titled VIDEO_TS. You could rip this folder to your hard drive, and then convert the video, or you can just select (or drag) this folder with your video conversion program.
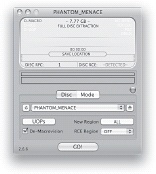
Occasionally, you may run into a title that doesn’t rip in either MacTheRipper or through FairMount. Two other Mac ripping programs that handle a wider range of encryption methods are http://ripitapp.com and OSEx (www.macupdate.com/info.php/id/9830). If that still doesn’t work, and if you have Boot Camp on your Mac, you can boot to Windows and try one of the PC-based ripping programs, which should do the trick.
PC Ripping
There are a couple of options for PC ripping. Some are free, and many are free for a while but later start charging. Some free options are:
DVDFab HD Decrypter
A free, simplified version of this program can be found at www.dvdfab.com/free.htm. This version gives you the basic tools—which are enough. The Full Disc option rips the entire disc. The Main Movie option, shown in Figure 4-13, allows you to select which parts of the DVD to rip. Because you probably just want the main movie, select Main Movie and start ripping the DVD. DVDFab will output a folder containing two folders titled AUDIO_TS and VIDEO_TS. VIDEO_TS will contain a file ending with .VOB, which you’ll need to convert. The “HD” in DVDFab HD Decrypter is telling you that it can extract some HD titles on HD-DVD and Blu-Ray. You’ll see when you insert your disc (assuming that you have the appropriate drive on your PC) whether those discs can be extracted.
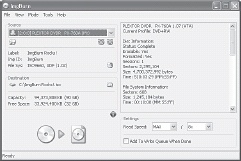
ImgBurn
Another classic DVD decryption tool is ImgBurn (www.dvddecrypter.org.uk). ImgBurn is the successor to DVD Decrypter, a favorite at the Doom9.org forums. It’s ready to rip in Figure 4-14.
A payware solution on the PC for DVD and Blu-Ray ripping is AnyDVD from SlySoft (www.slysoft.com/en). Although it costs money, they have a development team actively working to play catchup with the ever-changing Blu-Ray title encryptions. At the time of this writing it’s the most workable solution for Blu-Ray ripping. You can see it ready to go in Figure 4-15.
Encoding and Conversion
Once you have extracted your DVD or Blu-Ray disc via one method or another and have the video ready for encoding, you’ll need to use a tool to get it onto your iPhone. If you’re going to hook your iPhone up to a television or use this file on your Mac or PC in addition to the iPhone or iPod touch, you may want to encode it in 640x480 or similar resolution, instead of the native iPhone resolution. And while you’re at it, you’ll probably want to encode it with chapters. This recent addition to the various encoding tools gives you a similar experience to what you would get buying movies from the iTunes store, with chapter markers corresponding to the normal chapters in the DVD.
As mentioned earlier in this hack, HandBrake is the best free, cross-platform (Macintosh/Windows/Linux) tool for DVD encoding. Figure 4-16 shows HandBrake with a DVD:
Mac Encoding
On the Mac, there are a few other programs of note. As mentioned earlier, Elgato’s Turbo.264 hardware accelerator works with their encoding software, which you can download and check out from their website (www.elgato.com). It presents a very clean interface (Figure 4-17), and when encoding a main title, automatically creates chapters.
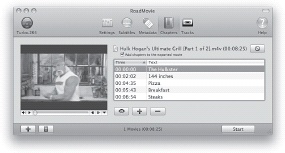
RoadMovie (Figure 4-18) from Bitfield software (www.bitfield.se) has excellent support for subtitles and enhanced metadata, allows you to edit and create your own chapters if your DVD lacks them or you want to put in your own, and can also use the Elgato Turbo.264 encoder.
All-in-one Programs that Rip and Convert
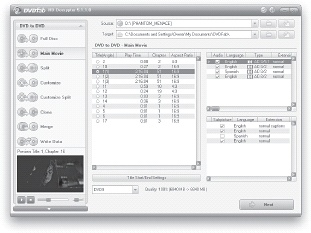
If you want a simple one-click way to put DVD video on your iPhone, there are a number of programs for both PC and Mac that do both the ripping and converting. You may be able to get a trial version of the program, but it may not be fully functional until you purchase it. A couple of the most popular all-in-one programs that offer trial versions are:
For the Mac: DVD to iPod Converter for Mac (www.iphone-tool.com/tool/dvd-to-ipod-converter-for-mac.html)
For the PC: Cucusoft iPod Video Converter Suite (www.top5soft.com/video/cucusoft-ipod-video-converter-dvd-to-ipod-suite.html)
It’s worth noting, however, that some of the best DVD ripping tools in life are free.
Present PowerPoint on a Projector or TV Using Your iPhone or iPod touch
You can use an iPhone or iPod touch to show presentations on most projectors.
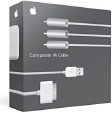
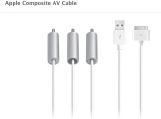
Apple provides two video output cables: the composite AV cable (Figure 4-19) and a component AV cable. These allow the iPhone to send movies and slideshows to an external television. If you’re trying to display video on an older television that doesn’t support composite or component connectors, then Watch Your iPhone or iPod touch on a TV will show you how to hook up to coaxial input. Because many projectors also accept composite and component signals, an obvious application is to ditch the laptop and show your PowerPoint presentations with your phone. Alas, though this works, you lose much of the fidelity of your presentation because PowerPoint’s movie exporter does not preserve the transitions, slide-in-text, or other animations that may be part of a presentation.
There are actually three built-in Apple programs that can output to the TV screen: YouTube, the built in movie player, and the Pictures application—if you connect the cable to the television. But until recently, App Store applications could not access the video output. And until Apple releases a Keynote player for the iPhone, we’re going to have to take other measures.
Note
Mirror or Output the iPhone Screen with TV-Out shows how to enable video out for almost any application.
Simple Slide Export
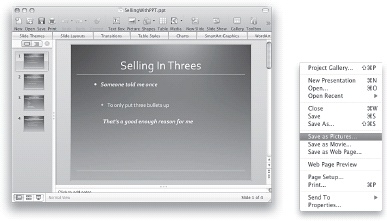
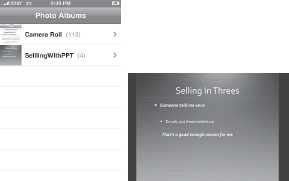
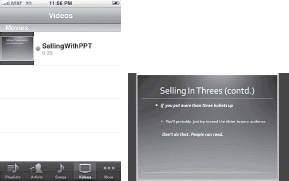
If your PowerPoint presentation makes minimal use of animations and transitions, the basic trick of exporting each slide to a JPEG file and storing them in your photo library will do the trick. PowerPoint on both Mac and PC has a feature to “Save as Pictures” or “Save as Movie” (Figure 4-20).
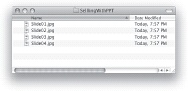
The “Save as Pictures” option will save files to a folder (Figure 4-21) that you can drag to iPhoto, create an album, and then sync to the iPhone or iPod touch with iTunes (Figure 4-23).
On Windows PowerPoint, choose “Save As…” and choose JPEG. Then choose to save Every Slide (Figure 4-22).
Once you’ve got the files onto your iPhone or iPod touch, go into Photo Albums, select your presentation, and press the play triangle. If your video cable is connected, the presentation will play on your projector or TV (Figure 4-24).
Exporting with Animation
If you are on a Mac, or are a PC user with access to a Mac, you can use Apple’s Keynote package (if you have it) to open the PowerPoint document and export it as a movie (Figure 4-25).
If you’re already doing your presentations with Keynote, then this is a good option for you. However, if you’ve carefully constructed a complex animation, your presentation embeds additional movies and sounds, or it plays back correctly only on your machine, then you’ll need to try another option.
Hack It with Screen Capture
There are dozens of applications for screen capture and “screencasting.” By using screen capture software, you can run through your presentation—at the speed you want to, as if you were delivering it—and turn it into a video file. A few of them are free, but record only video, not audio. For a lot of presentations, that’s sufficient.
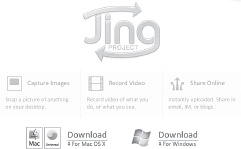
A good free option for screen recording on Mac and PC is Jing (www.jingproject.com; Figure 4-26).
Using Jing is straightforward. Although it’s oriented towards uploading your videos, it can just as easily save them to disk, as a SWF format (which you’ll need to convert to MP4 using Convert Videos, DVDs, and Blu-Ray Discs to iPhone- and iPod touch–Ready Formats). To get it working, follow these steps:
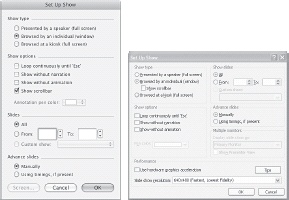
Make sure that PowerPoint is set to display in an individual window, not as a full screen. Go to Slide Show→Set Up Show to change this setting (Figure 4-27).
When you present your movie, you’ll have it in a window. Choose your size—640x480 is good, and that’s as high-res as you can play back on the iPhone, but you may need to go higher if fonts are too grainy (and then size it down when you convert). Jing helps you set a precise window size, such as 640x480. You can pause the recording right after it starts, adjust your PowerPoint window, and then resume recording.
Once you start the slideshow, use Jing to wrap a capture window around your presentation (Figure 4-28), start the recording, and go through your presentation at your own pace so that you’ll know the timings—and when to pause, if necessary—when you finally present it.
Capturing Audio and Video
If you’re on a PC, another free option that does capture audio is CamStudio (http://camstudio.org; Figure 4-29). You’ll need to download the 2.0 version or newer to get the audio capture feature. It will save the file as an AVI, and it gives you the option of saving it as an SWF (Flash video). Don’t bother; you’ll need to convert that AVI to a file that can play on your iPhone Convert Videos, DVDs, and Blu-Ray Discs to iPhone- and iPod touch–Ready Formats, and Flash is no help there.
Note
Photo-JPEG videos Convert Videos, DVDs, and Blu-Ray Discs to iPhone- and iPod touch–Ready Formats can play on an iPhone, making for great still frames when the content is paused.
If you need to record audio on the Mac, you’ll find some options in the $30–$70 range with iShowU (http://store.shinywhitebox.com) and SnapzProX (www.ambrosiasw.com/utilities/snapzprox).
Presenting
Once you’ve converted your file, drag it to iTunes, sync your device (Figure 4-30), hook it up to the TV or projector, and play (Figure 4-31).
Because you had the chance to rehearse the timings when you made the video, you should have a pretty good sense of when things happen. If you need to pause, perhaps to answer an audience question or because you’re talking longer, you can just tap on your iPhone to pause and the image will remain on the screen. And using the seek slider, it’s pretty easy to go back to any part of your presentation.
As low-tech as this may sound, you’re going to need to stretch a video cable from your iPhone adapter over to the projector, and if you have audio and video, you’ll need to extend both of them. Luckily, the low-tech solution is easy to find. At any RadioShack or comparable store, you should be able to find an RCA female-to-female adapter (also known as a coupler) to connect to your Apple composite AV cable (Figure 4-32). Then you can use any long RCA cable to reach the projector. It’s possible that the A/V staff at your venue will have the cable you need, but just in case, you can pick up any thin 25-foot video cable as well.
But you don’t have to go with the 50-foot wires. Apple does provide a remote control for your iPhone and iPod touch (Figure 4-33): the Apple Universal Dock.
You can dock your device, plug in the Apple composite AV cable to the dock, plug the cable into the projector, and control your presentation from anywhere in the room.
Even with all the accessories, this solution is much smaller than your laptop, and you could carry enough gear in your pockets to deliver impromptu presentations.
One More Thing
If you really want to stay light while you present on the road, you’ll need a tiny projector, like the Optomo Pico pocket projector (www.optoma.co.uk/optomapico/PicoIntro.aspx, Figure 4-34).
Sync Music and Videos from Multiple Computers to Your iPhone
![]() Your device can be friends with more than one iTunes.
Your device can be friends with more than one iTunes.
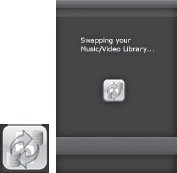
Normally, if you try to sync your iPhone with multiple computers, the music and videos that you synced from the previous computer will be overwritten by the media on the new computer. Luckily, there is a native app called SwapTunes that solves this problem by creating two separate media libraries on your iPhone. SwapTunes allows you to sync between two different computers.
SwapTunes can be downloaded from Installer or Cydia Install Third-Party Apps. After you sync with iTunes on the first computer, click on the SwapTunes icon on your springboard, and a screen that says “Swapping your Music/Video Library…” will open, as in Figure 4-35. After about five seconds, the screen will automatically close to signal that it has finished swapping libraries. Now when you open your iPod, you won’t have any music or videos in it.
You can now sync with iTunes on the other computer without your previous media getting erased. Just run SwapTunes whenever you want to switch between the two media libraries on your iPhone.
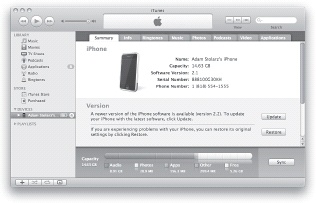
Normally, whenever you connect your iPhone to iTunes, the capacity bar at the bottom will be multicolored to show amount of memory taken up by Audio, Video, Photos, Other, and Free Space, as shown in Figure 4-36. After you swap libraries with SwapTunes, iTunes on the same computer will show your iPhone’s memory as being solely composed of other media, as in Figure 4-37. Because iTunes doesn’t recognize there are any songs or videos on your iPhone, you can now sync it with another computer’s library without the older library getting erased.
Stream Music and Videos from Your Computer to Your iPhone
You’re never too far away from your media.
Although the iPhone’s multigigabyte capacity allows a significant amount of media to be stored on it, it probably isn’t big enough to hold your entire collection of music and videos. To still be able to access your computer’s vast media collection, you will have to stream it over the Internet. The good thing is that you can access your desktop computer anywhere in the world from your iPhone, as long as you have Internet access. Whether you use a Mac or PC, setting up a media stream from your computer is very easy—and free!
Mac
For streaming on Macs, you will be using a system called Telekinesis that allows for (appropriately) remote control of your Mac using your iPhone. Telekinesis uses AppleScript to manipulate your Mac in many ways, differently from VNC Control Your Desktop or Laptop with Your iPhone or iPod touch.
Download the iPhone Remote application from http://code.google.com/p/telekinesis. The first time you run it, it will ask you to set up a username and password for logging in to your computer.
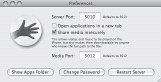
To stream videos over Telekinesis, go into iPhone Remote’s configurations, shown in Figure 4-38. If you enable “Share media insecurely,” you won’t need a password, but it also allows anyone who contacts that port and knows the direct path of your files to download them.
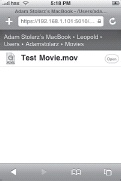
Make sure that iPhone Remote is running. On your iPhone, open up Safari and type in the IP for your Mac, starting with https://. The example in Figure 4-39 displays https://192.168.1.101:5010.
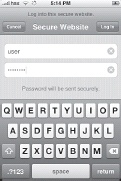
Accept the certificate, and log in with the account that you created when you first ran iPhone Remote. This will bring you to the main screen, as shown in Figure 4-40.
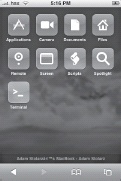
As you can see, there are many different applications that you can use with Telekinesis, but for now we will concern ourselves only with Media. Tap Media to open a browser of your filesystem, shown in Figure 4-41.
The movie in this example is appropriately in the Movies folder. So a tap will bring you to that folder and display the contents as in Figure 4-42.
Now that you have it all working on your local LAN, you need to get it working through your firewall. The basic procedure is to set a static IP on your Mac, use a dynamic DNS service so that you can attach a name to your home IP address, and then configure your Internet gateway for port forwarding. Once you know the URL to your home PC, you can connect from anywhere. Connect to Your iPhone or iPod touch from Outside Your Home/Office Network has more information on this common but sometimes complicated task.
If your media is elsewhere, it’s easy enough to find with Telekinesis’s browser. Now just tap to open the video or song, and it will begin streaming. It will continue to play if you go into another iPhone app, but not if you switch Safari pages.
PC
If you’re a PC user, or you’d rather use a PC to set up your iPhone media server, there’s an even easier solution to your remote-media needs. Orb is a software + service that helps you access your media anywhere. And naturally, they’ve added support for the iPhone.
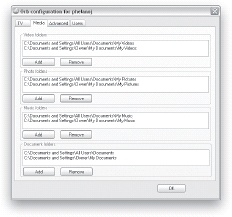
Go to http://corp.orb.com/download_orb, create a user account, download Orb, and then install it. Once it is installed on your computer, start the program and you’ll see a new icon for Orb at the bottom right of your monitor. Right click the icon, and select Configuration. In the configuration menu, click on the Media tab to select which media folders on your computer will be streamed by Orb, as shown in Figure 4-43.
Whenever the Orb application is running on your computer, your media is being streamed, and is accessible from anywhere. The Orb software and website handles all the complicated parts of firewalls and transcoding.
Once you have Orb configured correctly, you can access it from any browser, not just your iPhone, via http://mycast.orb.com. Log into your account, and you now have access to all the media on your computer, even if you’re thousands of miles away from it! Figure 4-44 shows the iPhone app.

The Orb application costs $10, but the good thing is that you can run the free version of their App Store app and connect to your server to see whether the service works for you before you buy.
Linux: MythTV
The Linux-based DVR project MythTV is a powerful system for viewing and recording TV. With a lot of hard work and a little luck, you can stream recorded shows from your MythTV computer to your iPhone.
For the purposes of this hack, we’ll assume that you have to get MythTV set up and running on a computer. If not, instructions can be found on the MythTV wiki (www.mythtv.org) and support pages for your specific Linux distribution.
Make sure that you have the MythWeb package installed, and that you can view your MythTV web page from another computer.
The next step is to transcode the recordings into MP4 format. Detailed instructions can be found on the MythTV wiki (http://mythtv.org/wiki/index.php/Streaming_to_iPod_touch_or_iPhone). The basic process is to create a script that uses ffmpeg to transcode into an iPod-friendly format. Make sure to test this on your MythTV system before continuing. From a terminal, run the script on a recording, and confirm that the output can be played by mplayer, or any other media player. lib-faac is a common source of issues, and depending on the Linux distribution you’re using, you may need to compile lib-faac from its source.
After confirming that transcoding works, load mythtv-setup and create a user job to call the transcoding script that you created. In this case, the user job is named “ipod transcoding.”
Enter MythTV frontend, and set the user job to run automatically after a recording is finished.
Confirm that MythTV can run the user job correctly by selecting a recording, then click “run ipod transcoding.”
Wait a few seconds, then open a terminal and enter
ps -ef|grep ffmpeg. Confirm that ffmpeg is running. If the only output is only “grep ffmpeg” or blank, go back to the “System Information” screen in MythTV, and confirm that the user job status is “running” and not “queued.” If MythTV lists it as running, and there is still no ffmpeg process, then the syntax of the user job is probably incorrect. Double-check it in mythtv-setup and confirm that it is correct.Because MythTV can’t manage the transcoded files, you will need to create a cron job to delete the MP4 files after the associated recording has been deleted.
The MythTV-for-iPhone project is available on Google Code, (http://code.google.com/p/mythtv-for-iphone/wiki/InstallationGuide) and provides an iPhone-formatted web interface to the recorded MythTV programs.
Download the MythTV-for-iPhone files, and install smarty and php-curl. The smarty directories should go in the root web folder. For example, if the mythweb folder is under /var/www/mythweb, then the smarty folders would go into /var/www/smarty. Smarty templates would be installed into /var/www/smarty/templates.
Create a mythiphone directory (/var/www/mythiphone) and copy the MythTV-for-iPhone PHP files into it. Copy i_settings.php.dist to i_settings.php and edit it based on the settings of your MythTV server.
Update apache2.conf and add the line:
Alias /recordings <mythtv recording folder>at the end of the file.
The MythTV-for-iPhone project references the /recordings folder, and without this alias, the recordings won’t show up.
At this point, everything should be installed. On the iPhone, open Safari and navigate to the iPhone folder on your MythTV server. For example, 192.168.2.101/mythiphone. Any recordings that are green should be viewable on the iPhone.
If you want to access the recordings from a remote location, you will need to assign your MythTV server a static IP Connect to Your iPhone or iPod touch from Outside Your Home/Office Network. If you want to password protect the mythiphone folder, you should configure Apache’s basic authentication feature (see http://httpd.apache.org/docs/2.0/howto/auth.html).
Cross-Platform: Simplify Media
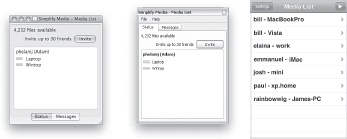
One last candidate that has support for Linux, Windows, and Mac is Simplify Media (www.simplifymedia.com). Although it works only for audio, it has some features that Orb does not, like the ability to share within a small group so that all your media—from multiple computers—is shared to any of your devices. You can even share within a small group of friends and let them access your media library as well. A trio of media lists can be seen in Figure 4-45.
Other Options
It seems like pretty much every home theater system (except maybe Windows Media Center) is adding support for remote iPhone connectivity.
TVersity: http://tversity.com
EyeTV: www.elgato.com
—Christopher Kurpinski & Adam Stolarz
Read News, RSS, and Websites Quickly
Consume your feeds efficiently.
One of the most interesting evolutions over the last decade of the Web has been syndicated content. Although not everyone is a “news junkie,” almost everyone has a daily ration of information that they need to get. However, the excessive load times experienced on even the fastest devices and networks can make accessing this content difficult.
There are dozens of ways to get concise, cleanly formatted, and edited information to your device, and more App Store apps are appearing all the time. This hack will cover a few of the basic ways of maximizing information consumption while minimizing load time.
Really Simple Syndication (RSS)
RSS is a protocol for syndicating content, and is used by weblogs, news sites, and others. The little orange icon you see on many websites (Figure 4-46) indicates a link to an RSS feed. You can read it on a web page, or you can read it more efficiently in an RSS reader.
For the purposes of this hack, find a site that has news you care about, find its RSS icon, click on it, and you’ll be redirected to the RSS address. Copy or write down this web address, because you’ll need it soon.
As examples we’ll use Slashdot, WoW Insider, and the update feed for webcomic XKCD.
View RSS Feeds on Your iPhone’s Web Browser
The easiest way to view a feed is to just enter it in Safari. If you get to the feed on your computer, you can quickly get it onto your phone by emailing it, texting it Text Your iPhone with Your Desktop Instant Messenger, or bookmarking it and synchronizing your bookmarks.
In Safari, it will appear like Figure 4-47.

Usually people subscribe to several (or a lot) of RSS feeds. An RSS reader aggregates these various feeds into one customized diet of news.
Google News
Google provides one popular RSS aggregator that’s optimized for the iPhone. There are dozens—if not hundreds—of these web-based aggregators for the iPhone, so take this as more of an example than a preference.
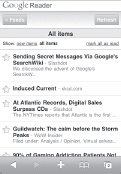
To view your feeds on your iPhone, just open up your Safari browser, and go to www.google.com/reader. Log in, and you’ll see your RSS feed subscriptions that you can select to view (Figure 4-48).
View RSS Feeds on Your iPhone with App Store Apps
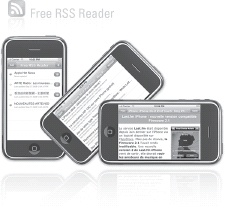
Searching for RSS in the App Store will give you more than enough applications to try out. Free RSS Reader by Simon Oulid (Figure 4-49) is a solid, basic offering. The paid version enables automatic caching of pictures.
If you’re looking for a more polished interface, you can spend a few bucks more and get iPhoneNewsreader (www.iphonenewsreader.com). Figure 4-50 shows the navigation interface and Figure 4-51 shows nice reading presentation.
More than RSS
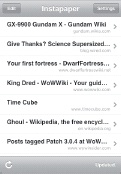
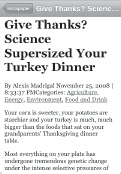
If it’s not just RSS feeds you need to keep up with but websites of any variety, check out Instapaper. Like many of the social bookmarking tools, it allows you to mark pages of interest while you’re on your PC with the use of a simple bookmarklet. The killer feature, however, is that these bookmarked pages are automatically downloaded and cached for rapid offline reading when you launch the app (Figure 4-52).
A key low-tech-is-better feature of this app is that you can go into a “text-only” mode and enjoy the words without all of the website noise (Figure 4-53).
Intelliscreen
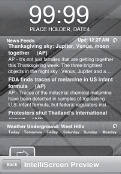
The jailbroken phones always get something a little cooler. You can install Intelliscreen using Cydia on a jailbroken device. If you’re familiar with Windows Mobile devices, you know that one nice feature they have is useful, at-a-glance information on the screen when the phone is locked. The iPhone tells you only the time and the date and what network you’re on. With Intelliscreen, you have a variety of configurable available data—including your RSS feeds. A news-centric screen is shown in Figure 4-54.
Read e-Books on Your iPhone
The term “e-book” in the general sense describes any method by which one could read something approximating a physical book (sequential chapters of text) on an electronic device (hence the “e”). The problem is that due to the vagaries of reader devices and the unproven financial and security models, no single dominant e-book standard has emerged. (You can look at a laundry list of e-book formats here: http://en.wikipedia.org/wiki/Comparison_of_e-book_formats.)
Nonetheless, a number of workable standards have emerged. You may be amused that text (.txt) and HTML (.html) are two of the most common standards, which shows how hard it is to improve upon the basics. A variety of iPhone applications will allow you to experience the joy of reading literature on what is probably your most handy reading device.
An e-Book Reader Anthology
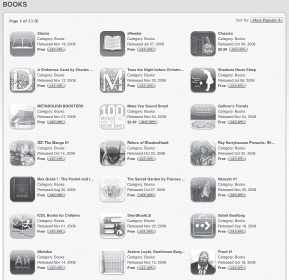
At the moment, books are handled rather inconsistently in the App Store. Because Apple didn’t want to go into the e-book distribution business and compete with Amazon (yet?), there is no “books” option that allows you to buy titles to read with some one-and-true Apple e-book program.
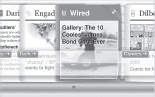
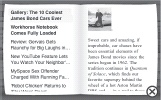
Instead, you have several options: download one of several e-book readers that work with a motley crew of DRM-free formats, or download one of dozens of books, such as iPhone: The Missing Manual (O’Reilly), that are packaged individually. A gallery of these is shown in Figure 4-55.
Stanza
The most popular App Store e-book application is the free Stanza, from Lexcycle (www.lexcycle.com). Stanza works with the desktop application of the same name, which can work with HTML, PDF, Microsoft Word, RTF, as well as all the major e-book standards:
This desktop app (Figure 4-56) lets you easily view and copy your e-books wirelessly over to your iPod. The iPod app also lets you browse from thousands of free e-books and download them straight to your device.
With an e-book open in Stanza, you can share it to your device over a wireless network by enabling sharing. Now from your device you can find all the books that you currently have open in Stanza and download them (Figure 4-57). And you’re ready to read!

One interesting feature of Stanza is an experimental feature to export books as MP3 audiobooks, so you can listen to them instead of reading them—especially useful if you are driving.
eReader
eReader (www.ereader.com), which you can see in Figures Figure 4-58 and Figure 4-59, is an application provided by fictionwise.com and ereader.com e-book store websites, and is the only one so far to support a form of DRM tolerable to a wider range of commercial publishers. The reader supports convenient direct downloads of eReader-formatted PDB books from these two stores. (Note that PDB is a container format, and not all PDB books work with the program, so make sure that it matches eReader.)
When you purchase a DRM-protected title, you’ll have to enter your credentials at least once to make eReader unlock these files (Figure 4-60). You have to get the name you registered with when you made your account online just right, and you have to type in the credit card you used for the purchase. It’s best to use the same credit card for all your purchases, as that is your DRM “key.”

Also, you can feed eReader-formatted PDB books you download from other sites, or PDB files you’ve created yourself, by serving them from a local web server or uploading them to your eReader.com or Fictionwise.com account and then downloading them to your device (www.ereader.com/personal-content).
BookShelf
BookShelf (www.iphonebookshelf.com) is an App Store application (Figure 4-61) that supports several e-book formats, as long as they aren’t DRM-encrypted, including text, HTML, a variety of Palm formats (Plucker, PalmDoc, Mobi), and a few others. To feed it books, run the ShelfServer application on your computer desktop (PC, Mac, and Linux are supported; Figure 4-62). ShelfServer can also slurp the text out of PDFs to convert them for ingestion as an e-book.
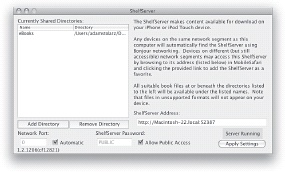
You can also download from online book sites that support the ShelfServer protocol, listed at www.iphonebookshelf.com.
PDFs
For reading e-books that are PDF format, there’s not much to do—you just email the PDF to yourself. The problem is that most PDFs are unreadable on small devices and require much scrolling and clicking when zoomed in to a readable magnification. This is not so much a fault of the iPhone as a known fault of PDF, which was designed to preserve, with high fidelity, the look and dimensions of a conventional book. If you’re in a pinch and need to read a large PDF, one trick is to email it to a Gmail account—Gmail lets you read the PDF attachment as a text file, which can make a single-column view in Safari a better experience.
Classics
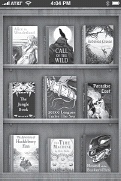
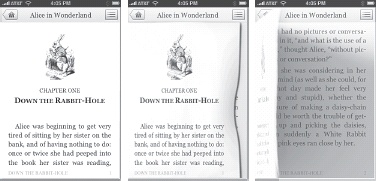
One e-book offering available in the App Store that has to be mentioned is Classics. A model of user interface design, this application packages up nine classic books into a classy and fun-to-read interface (Figure 4-63). A bookshelf presentation, followed by 3D effects for page turns (Figure 4-64) and attention to hyphenation, spacing, fonts, and readability, this application sets a high bar for e-books on the iPhone. Unfortunately, as of now there’s no way to add books to this handsome bookshelf.
ComicZeal
If you like comics, then there’s another app for you—ComicZeal (www.bitolithic.com/ComicZeal/comiczeal.htm). This application provides excellent features for reading comics (Figure 4-65).
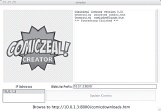
Because most of the CBR/CBZ comic files that are downloadable from the Internet are of too high a resolution for the iPhone’s screen, Bitolithic provides the ComicZealCreator for Mac and Windows to convert comic files to the ComicZeal .cbi format (www.bitolithic.com/ComicZeal/comiczealcreator/comiczealcreator.htm). These reduced-size files are easier on the iPhone’s CPU, which translates to longer battery life and thus longer readability. The program even starts up a mini web server, so you can type the address into ComicZeal and download your files.
Finding Professional-Quality Content
The problem with e-books is that no one has created the “iTunes of e-books” (not that Amazon.com isn’t trying), in the sense that the majority of new books are not available in a digital format. Music CDs are inherently digital; books, using “dead-tree technology,” are still primarily analog media, despite their digital production process.
Like iTunes Plus and the variety of music options available on the market without DRM, there are some places where you can purchase unencumbered e-books of twentieth- and twenty-first-century content (i.e., content still under copyright).
Note
A good resource for e-book sources is http://wiki.mobileread.com/wiki/E-book_stores.
Examples include:
Feedbooks (http://feedbooks.com)
eReader (www.ereader.com)
Fictionwise (http://fictionwise.com)
ManyBooks (http://manybooks.net)
PanMacmillan (www.panmacmillan.com)
CyberRead (www.cyberread.com)
Project Gutenberg (http://gutenberg.org)
Safari Books (http://safari.oreilly.com)
Dictionaries
If you’re going to read, you’ll often want a dictionary nearby. Fortunately, there are a number of great options for iPhone-based dictionaries.
WeDict (free)
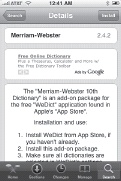
Of key import for college students, writers, and people learning another language is a portable knowledge base for all things linguistic. That’s what you get with WeDict, a flexible dictionary for the iPhone and iPod touch. One of the cleverest things about WeDict is that you can download it from the App Store, but then enhance it (on a jailbroken phone) via Cydia.
Add the Merriam-Webster dictionary via Cydia (Figure 4-66).
Open WeDict, type in the word you want defined, and then hit the Search button at the top right to get your results. A gallery of different dictionary results is displayed, as in Figure 4-67.

AHED
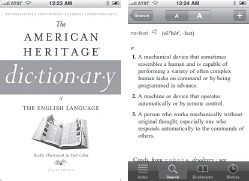
One of the remarkable things about the iPhone and iPod touch is that you can get full, unabridged dictionaries. Figure 4-68 shows the American Heritage Dictionary, available for a hefty $30—but worth it all. This is the real deal—it’s a standard for many writers and editors, rather than a cheap knockoff, and you won’t be left scratching your head for a missing definition.
Despite the early, disorganized state of the iPhone/iPod e-book economy, there are real gems to be found in the hundreds of thousands of books available in e-book format. Your iPhone or iPhone touch just became your walking dictionary (and more). It just goes to show that the more you put into the iPhone, the more you get out of it!
Take Panoramas and Nightshots with Your Built-in Camera
The iPhone’s built-in camera is unable to compete with dedicated cameras for image quality. However, you have it with you everywhere you go, and chances are good that you don’t carry your camera except to special events. Therefore, there are many times when you want to milk the last bit of image quality out of your camera.
Two areas where you may want to enhance your iPhone camera are:
Resolution and Field of View Enhancement
A 2-megapixel resolution isn’t too shabby for a tiny camera hiding in the corner of your iPhone. If you where you want a much bigger image, you may be missing your 8-megapixel dedicated camera. The solution is to stitch your photos together to create a larger frame. One common application for this is when you want to photograph a large poster at a conference, so you can read the text later, but the fonts are too small to see in one frame.
If you have a Mac, you can use software called Calico Panorama, manufactured by Kekus Digital (www.kekus.com. It is relatively cheap: $39 as of this printing. On a PC, you can use freeware software called AutoStitch that uses a prior version of the same code engine (www.cs.ubc.ca/~mbrown/autostitch/autostitch.html).
First, take a “panorama set” of photos, that is, a series of photos, making sure to overlap them generously. When going from side to side, I find it useful to move the camera just enough to put the right half of the screen onto the left half. Therefore, for a total image width of three fields of view, you will take five side-by-side photos. If you wish, you can do multiple rows as well.
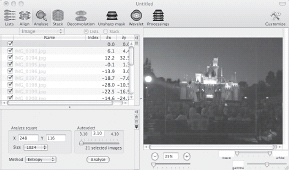
Figure 4-69 shows an example I made at the Getty museum in Los Angeles (www.getty.edu), starting with several side-by-side images.
Run these through the panorama software (in this case, I used AutoStitch), shown in Figure 4-70.

The result is the maximum field of view that the software can produce from the images you gave it. It will automatically align them and adjust contrast and color settings to make the result seamless. The last thing you’ll need to do is crop the edges to produce a finished product, as shown in Figure 4-71.

Low Light Conditions
The iPhone camera is pretty smart about auto-adjusting contrast when bright and dim objects are both in the field of view. Nevertheless, it requires a minimum light intensity in order to form an image. At night, for example, there often is insufficient light to create a nice photo. However, if you can distinguish any shapes in your image, then you can merge dozens of photos in order to produce a single higher-contrast image. You need to have one well-defined visible object in the image. This can be a penlight, street lamp, or whatever. This provides a single object that is visible in each image and allows you to align the images. Next, you will need an open source software package available (for Macs only!) called Lynkeos. Generally, it is used by astronomers to improve the quality of images taken through telescopes—but there’s no reason that you can’t use it to create images of the beautiful city lights taken from your drive home after skiing (when you had only your iPhone).
First, you need to obtain images. Set your camera against an object so that it is very still. Even a slight shake of your hand will introduce blurring in the final image. This means you can set your iPhone on its side on a rock, table, against a tree, or something like that. You can even use a shoe as a tripod. Shoes and socks are handy because you (hopefully) always have them with you and they won’t scratch your iPhone.
Adjust your iPhone position so that you can both reach the snapshot button and so that your frame contains at least one sharp, bright object. You should see it well in your camera roll on every photo. This is critical or Lynkeos will not be able to squarely align the images.
Take as many images as you can stand—you will probably need several dozen, and you won’t know if you got enough until you go to process them. The more images you take, the better your final image becomes—assuming you are photographing a still environment. Unfortunately, this technique won’t work for catching a moving object! (No photographing nocturnal panthers using your iPhone!)
When you get back home, download the images onto your computer, and use Lynkeos (http://lynkeos.sourceforge.net) to “stack” the images and produce one final high-quality frame (Figure 4-72). Note that Lynkeos is available only for Mac OS X.
There is a very quick and easy tutorial for Lynkeos available from its Help menu. You should go through that tutorial, which takes less than 10 minutes.
Figure 4-73 shows an example of an image before processing; Figure 4-74 shows the results.


PanoLab Pro
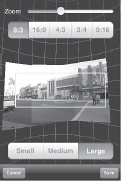
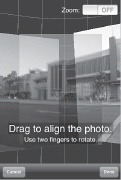
If you’d like to do your photo fixing and panoramas right on the phone, PanoLab (Figure 4-75) is an option. This inexpensive App Store app helps you align your panorama pictures as you take them (Figure 4-76), and lets you easily align the edges of the various pieces using your fingers and multitouch.
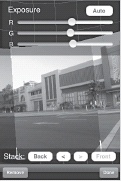
PanoLab Pro also includes an exposure adjustment feature (Figure 4-77) that helps adjust for varying light conditions between shots.
You can export your large panoramas at high resolutions to your computer so that they can be printed out or displayed in their full glory.
—Zack Gainsforth & Damien Stolarz
Record and Upload Videos with Your iPhone
![]() Surprise: Your iPhone is a great videocamera.
Surprise: Your iPhone is a great videocamera.
One of the most conspicuous missing features of the iPhone is out-of-the-box videocamera capability. Almost every other smartphone on the market is smart enough to record decent video clips for posterity. Until Apple adds video recording, there are several video camera alternatives for your jailbroken phone.
A Brief History of Consumer Filming
In the 1940s, we could really film only movies and wars. The 1950s and 1960s brought us 8 mm cameras, but only presidents and other wealthy elite could afford the film. It was the invention of the VCR in the 1970s that paved the way for the 1980s, when videocameras came to the mass market. Weddings, bar mitzvahs, birthday parties, and births were all preserved for time immemorial using boombox-sized cameras on the shoulder. The 1990s brought us smaller and cheaper cameras and we began branching out, stealthily capturing concerts, movie bootlegs, and police beatings. Once we finally went digital and solid-state in the 2000s, videocameras jumped onto phones—and now almost anyone can catch the ephemeral events of life and upload them for viewing by complete strangers.
Cycorder
Cycorder (www.saurik.com) by Jay Freeman (a.k.a. saurik), is a fantastic, responsive, and free (ad-supported) application for video capture. You can find it featured in Cydia.
Cycorder records at a little less than half of a normal TV’s or videocamera’s frames per second, taking a JPEG picture of each 384x288 frame. Because they’re JPEG instead of MPEG-4, each frame is very clear when paused. You can see the specs in Figure 4-78.
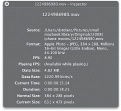
Because of the quality of the recording and the relatively light compression, the bit rate is very high (in this case, almost 2.5Mbps), so a 15-second movie takes almost 5 MB on disk.
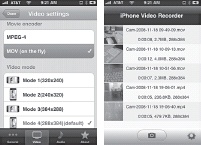
iPhone Video Recorder
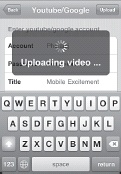
The payware solution, which still requires a jailbroken phone, is iPhone Video Recorder (www.iphonevideorecorder.com), shown in Figure 4-79. You can install it by adding the www.iphonevideorecorder.com source to Cydia. It allows you to capture either to JPEG MOVs in real time (like Cycorder) or to do a post-encode to MPEG-4, which is significantly smaller and thus easier to upload. The iPhone, as you might imagine, was never intended as a video encoding device (its MPEG-4 chip accelerates only playback, not recording).
A remarkable feature of this software is the ability to upload videos directly to YouTube (Figure 4-80). Naturally, you’ll need a YouTube account and you’ll need to add your login and password in the application.
We can only speculate why the iPhone shipped without an integrated videocamera application, but it’s easy to remedy on a jailbroken phone.
Get iPhone Hacks now with the O’Reilly learning platform.
O’Reilly members experience books, live events, courses curated by job role, and more from O’Reilly and nearly 200 top publishers.

