Chapter 1. Meet the iPod: Out of the Box and into Your Ears in 15 Minutes
If you’re like most people, you want to jump right in and get your spiffy new iPod up and running. You probably don’t want to wade through any quick-start instructions longer than a couple of paragraphs, and you’d like plenty of color pictures, too.
Sure, Apple thoughtfully includes a little pamphlet of starter info with every iPod it sells. It’s nicely designed as far as pamphlets go. But you may find that it doesn’t go far enough. You want more help than a few line drawings and some haiku-like instructions can provide.
This book—and especially this chapter—is designed for you.
You won’t get bogged down in a bland gray ocean of print here. You’ll learn a bit about your particular iPod model and how to get it whistling sweet tunes in your ear in no time. If you want more information on in-depth iPodding or getting the most out of iTunes, you can find that stuff in chapters farther down the road.
But for now, let’s get rolling with your new iPod. Ready?
Meet the iPod Nano
The iPod Nano may be Apple’s mid-sized music player, but it’s also one of its most versatile models. Sure, it can play songs, podcasts, and audio books like all the other iPods. And like the iPod Touch and iPod Classic, it can display photos, text notes, contacts, and calendars on its bright color screen. But unlike those ‘Pods, which can merely play video, the Nano can also shoot video. It’s one of the smallest camcorders ever.
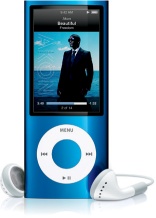
If that’s not enough, there’s more: The 2009 Nano is the first iPod to include a built-in FM radio. That’s right—you don’t need a third-party attachment or any extra add-ons to pull live broadcasts out of the air and into your earphones. And unlike standard receivers, the Nano’s radio can even pause live shows for a few minutes should someone start talking at you in the middle of a song.
You navigate through all these goodies using the Nano’s smooth, touch-sensitive click wheel. With its 2.2-inch color screen and sharp 320×376 pixel resolution, the Nano can also play movies, TV shows, and video podcasts just like the bigger iPods, and it comes with its own selection of video games. But the Nano’s perfect for gym workouts or that mad dash for the last train because it uses a flash memory chip to store everything. That means it’s much more tolerant of jumping around than the traditional Classic iPod, with its big ol’ hard drive tucked inside.
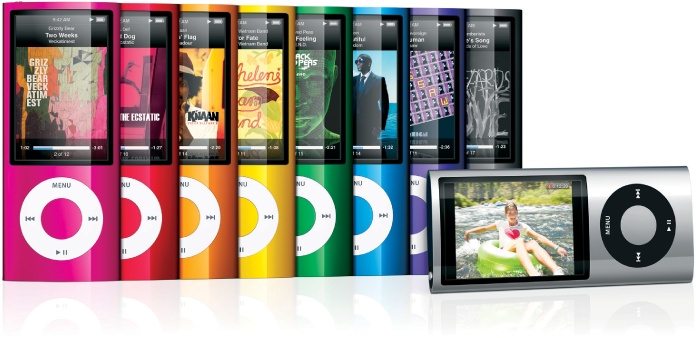
The Nano comes in two sizes: 8-gigabyte and 16 GB, all wrapped in scratch-resistant anodized aluminum. And you’re not stuck deciding between two colors when you buy a Nano, either—you get a rainbow of nine choices: silver, black, purple, blue, green, yellow, orange, red, and pink. Oh, and if you like your music flowing all day long, you’ll be glad to know the Nano’s battery lasts up to 24 hours—you’ll probably conk out before it does.
The Nano has a few other tricks under its aluminum hood. For one thing, it’s got a built-in pedometer to measure your steps. It even reports how many calories you burn on your walk.
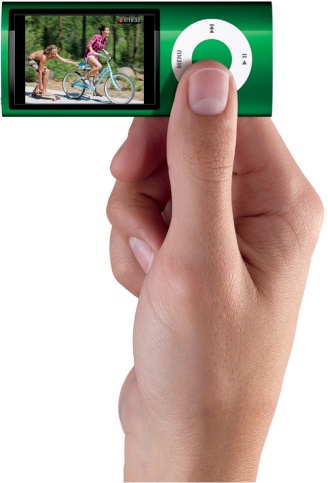
There’s also an accelerometer (tilt sensor), which means the Nano senses movement and knows which way you’re holding it. Turn it sideways to watch a movie, and the picture instantly spins around to orient itself for the wider view.
The accelerometer is shaking things up in another way, too—literally. Not in the mood for that song that just came on? Give your Nano a shake to have it shuffle up a new tune. And certain video games were made with the Nano in mind, making you tilt and move your way through a pixelated landscape in search of that next level.
The Nano is also one of the most accessible iPods ever for visually impaired listeners. An optional Spoken Menus feature recites the names of songs, albums, artists, and menus out loud, letting you navigate through this iPod’s content with verbal cues. And for those of you tired of squinting, you can make the on-screen font size larger if you like.
At about a quarter of an inch thick and tipping the scales at a mere 1.3 ounces, who’d have thought it’d be this easy to fit a combination video camera/radio receiver/jukebox/movie theater/fitness trainer/handheld gaming console in your pocket?
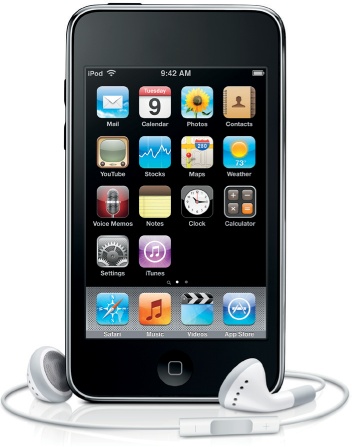
Meet the iPod Touch
If an iPod Nano and Apple’s iPhone ever had a kid, it would surely look something like the youngest iPod family member, the iPod Touch. The Touch gets its moniker from its responsive touch screen, the smooth front-side surface that lets you navigate through your music, videos, and photos with a tap or drag of your finger.
While it may have inherited its sensitivity from the iPhone, the Touch gets its stability from the same flash memory that’s inside the Nano. No matter how hard you run or rock out, you’ll probably never hear your music skip. You get about 30 hours of audio playback on a battery charge, or 6 hours of video.
Speaking of video, the iPod Touch sports the iPhone’s eye-catching 3.5-inch widescreen display and 480×320 pixel resolution. Flip it sideways to see why it makes movies and TV shows look so good.
Apple gives you three Touches to choose from: an 8-gigabyte model, a 32-gigabyte version, or one that can store 64 gigs of your favorite stuff. That’s 1,750 songs or 10 hours of iPod-friendly video on the 8 GB Touch; 7,000 songs or 40 hours of video on the 32 GB model; and a relatively whopping 14,000 songs and 80 hours of video on the big 64-gigabyte model.
But the Touch is much more than just a pretty face. In addition to all its regular iPod capabilities, like listening to music or showing off your latest photos, this iPod can reach right out and touch the Internet. Thanks to a built-in Wi-Fi chip and a small-but-powerful version of Apple’s Safari Web browser, you cancatch up on all the latest news whenever you’re in range of a Wi-Fi network. You use your fingertips to point your way around the Web—or fire up the Touch’s onscreen keyboard when you have to enter text for a Web address or on a page.
And where there’s Internet, there’s email, stock-market updates, weather forecasts, and online maps. If that’s not enough, there’s a whole new world of possibilities in the iTunes App Store, where you can customize your iPod with additional software. Whether you’re connected or not, you also get a handy notepad, your personal calendar, and your computer’s address book, too.


If you hate leaving your computer for fear of missing something totally cool posted on YouTube, the popular video-sharing site, the Touch is there for you. This wireless iPod comes with its own one-click link to YouTube so you can keep up with the Web’s funniest videos.
Oh, and one more thing…have you ever been listening to your iPod and wished you could buy even more music right there, no matter where you are? With the Touch (and a wireless network connection), you can. This little Internet iPod can step right up to the iTunes Wi-Fi Music Store (Chapter 7) and search, sample, and snap up tracks over the airwaves.
Note
They may look an awful lot alike, but the iPod Touch and the iPhone have some distinct differences. For one thing, the iPod Touch is not a mobile phone. While this means Touch owners get to skip the AT&T Experience, it also means there’s no ubiquitous cellphone network to use for online fun when your pool of Wi-Fi hotspots runs cold. There’s also no integrated 2-megapixel camera. On the plus side, without the extra hardware inside, the Touch is much more svelte.
Meet the iPod Classic
With its solid, rectangular shape and horizontal screen, the faithful iPod Classic still looks the most like the original boxy white-and-chrome iPod that arrived on the scene in 2001. Less than a decade later, Apple has transformed that humble little 5-gigabyte music player with a black-and-white screen into a full-color, gorgeous portable media system that can play movies, TV shows, and video games—all while still fitting comfortably in the palm of your hand. And it’s come a long way from those first 5 gigabytes: now you can stuff 160 gigabytes of music, photos, videos, and more onto it.
In those 160 gigabytes, you can fit 40,000 songs or 200 hours of video. And you don’t have to stock up on the Duracells, either, because the iPod has a rechargeable battery that can play audio for 36 hours or video for 6 hours.
The iPod Classic comes in either silver or black. Unlike earlier iPods that sported hard glossy plastic on the front, Apple’s latest version comes outfitted in a full metal jacket—anodized aluminum on the front and shiny stainless steel on the back.
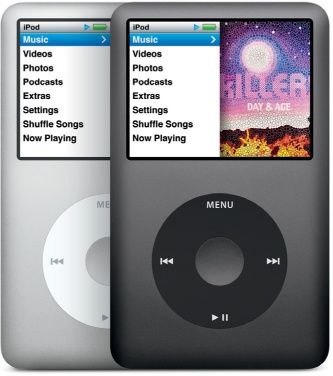
Along with the click wheel—think of it as the iPod’s mouse—the 2.5-inch color screen is the player’s other main component. Capable of displaying more than 65,000 colors at a resolution of 320×240 pixels (translation: high-quality), the Classic’s a great place to store and show off your latest vacation photos. In fact, you can have up to 25,000 pictures on your ‘Pod. The screen also makes it a delight to catch up on that episode of The Daily Show you missed, or play a few rounds of solitaire while you listen to your favorite music or podcast.
The Classic comes with everything you need to hook it up to your Windows PC or Macintosh: a USB 2.0 cable. You also get those iconic see-what-I’ve-got white earphones. Once you get up and iPodding, you’ll find that everyone and their grandmother wants to sell you other iPod accessories—all you have to do is stroll down to your favorite computer store and browse the ever-increasing selection of cases, cables, battery chargers, and more.
Meet the iPod Shuffle
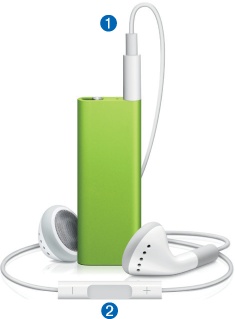
The smallest member of Team iPod doesn’t have a screen—but it doesn’t need one, because it’s designed for fuss-free music on the go. You don’t have to worry about losing your Shuffle, because it clips right to your lapel or pocket—it’s like jewelry you can rock out with. Take your pick of five standard Shuffle colors: blue, black, green, pink, and silver. You can get it with a 2-gigabyte memory chip (about 500 songs) or go for the 4-gigabyte model (1,000 songs); a special-edition 4-gigabyte version in shiny steel is also available. And even though it’s called the iPod Shuffle, you don’t have to shuffle your music; you can play your tracks in order with the nudge of a button (see below).

This petite ‘Pod is so tiny, it doesn’t even have room for a USB jack or navigation and volume controls—you control everything through the headphone jack. You plug a USB adapter into it to load music from iTunes and to charge the player, while a remote control built into the headphone cord handles volume control and music navigation chores.
The Shuffle, which offers about 10 hours of playing time, may not have a screen, but it includes Apple’s VoiceOver technology, which audibly announces the name and artist of the song currently playing.
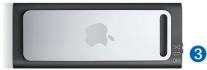
Those trademark white Apple headphones plug into the headphone jack on the top of the Shuffle, but look closely—there’s also a remote control right there on the cord.
The + and – buttons on the remote raise and lower song volume. Click the gray center button to play and pause music. Click and hold the center button to hear artist and playlist names (see Chapter 6 for the scoop on playlists). Double-click the center button to skip to the next track or triple-click it to rewind.
A little silver switch on top of the Shuffle turns it off and on, and flips between playing tunes in order (
 ) and shuffling them (
 ).
).
Install iTunes
Before you can have hours of iPod fun, you need to install Apple’s iTunes multi-media, multifunction jukebox program on your computer. With iTunes, you also get Apple’s QuickTime software—a video helper for iTunes. iPods once came with a CD packing all these programs, but these days you have to download everything yourself:
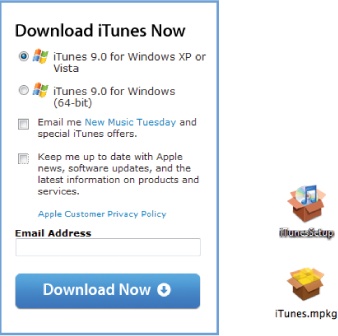
Fire up your computer’s Web browser and point it to www.itunes.com/downloads.
Click the “Download Now” button. (Turn off the “Email me…” and “Keep me up to date…” checkboxes to spare yourself future marketing missives.) Wait for the file to download to your computer.
When the file lands on your hard drive, double-click the iTunesSetup.exe file. If you use a Mac, double-click the iTunes.dmg file and then open the iTunes.mpkg file to start the installation. But if your Mac’s younger than six years old, you probably already have iTunes installed. Go to
 Menu→Software Update and ask your Mac to see if there’s a newer version of iTunes, just in case.
Follow the screens until the software installer says it’s done.
You may need to restart your computer after you install the software. Once that’s done, you’re ready to connect your new iPod to the computer.
Unpack iPod and Set It Up
If you haven’t torn open the plastic box already, liberate your iPod from its box. The items you’ll find inside vary depending on which iPod you purchased, but all of them come with:
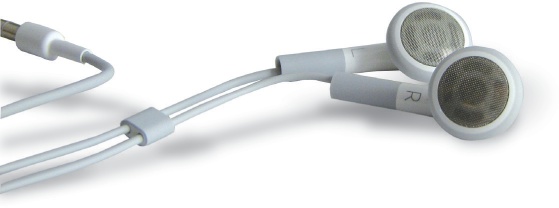
Apple’s classic white headphones.
A USB cable to connect the iPod to your computer. The iPod Nano, Touch, and Classic use the same white USB cable with the flat dock-connector port, while the iPod Shuffle has its own little USB adapter.
A little pamphlet of basic quick-start information that’s not nearly as fun or as colorful as this book.
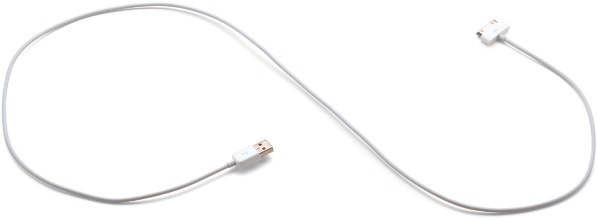
What you want right now is the USB cable. Connect the small, narrow end to your computer’s USB port and the wide, flat end (or the adapter, if you have a Shuffle) to the iPod. The first time you connect your iPod to a computer, iTunes’ Setup Assistant walks you through a few steps to get your iPod ready to go.
The next step, if you want to hear some music, is to get some music.
Three Ways to Get Music for iTunes (and iPod)
Once you have iTunes running on your computer, you can start filling it with music. Chapters Chapter 4 and Chapter 5 have info on digital audio formats and technical settings you can tweak, but if you’ve got a brand-new iPod, odds are you don’t care about that right now. No, you’d probably just like to load some music on your ‘Pod. Here are three simple ways:
Import Existing Songs into iTunes
If you’ve had a computer for longer than a few years, odds are you already have some songs in the popular MP3 format on your hard drive. When you start iTunes for the first time, the program asks if you’d like to search your PC or Mac for music and add it to iTunes. Click “Yes” and iTunes will go fetch.

Note
Now, many Windows fans, if they do have existing music, may have songs in the Windows Media Audio (WMA) format. The bad news here is that iTunes can’t play WMA files. The good news is that when iTunes finds WMA files, it can automatically convert them to an iPod-friendly format. Just be sure to turn on the last checkbox in the box above during iTunes setup. If you miss this step, you can always add WMA tracks by choosing File→Add to Library and selecting the songs you want; iTunes then converts them. One last thing to remember: the program can’t convert copy-protected tracks you downloaded from other online music stores.
Import a CD
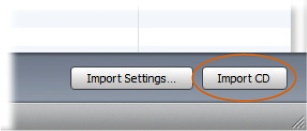
You can also use iTunes to convert tracks from your audio CDs into iPod-ready digital music files. Just stick a CD in your computer’s disc drive after you start up iTunes. The program asks if you want to import the CD into iTunes. (If it doesn’t ask, click the “Import CD” button at the bottom-right of the iTunes window.) If you’re connected to the Internet, iTunes automatically downloads song titles and artist information for the CD (yes, strange as it may seem, music managers like iTunes don’t get information about an album from the album itself, they search for it in a huge database on the Web).
Once you tell it to import music, iTunes gets to work and begins adding the songs to your library. You can import all the tracks from a CD, but if you don’t want every song, turn off the checkbox next to the titles you want iTunes to skip. Chapter 4 has more about using iTunes to convert CDs.
Buy Music in the iTunes Store
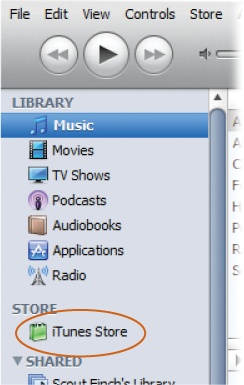
Another way to get music for your iTunes library and iPod is to buy it from the iTunes Store. Click the iTunes Store icon in the list on the left side of iTunes. Once you land on the Store’s main page and set up your iTunes account, you can buy and download songs, audio books, and videos. The content goes straight into your iTunes library and then onto your iPod. Chapter 7 is all about using the iTunes Store.
Get Stuff Onto the iPod Nano or Classic: The Quick Way
You don’t have to do much to keep your iPod’s music and video collection up to date with what’s on your computer. That’s because iTunes has a nifty autosync feature, which automatically makes sure that whatever’s in your iTunes library also appears on your iPod once you connect it to the computer.
The first time you plug in your new iPod (after you install iTunes, of course), the iPod Setup Assistant leaps into action, asking you to name your iPod, and if you’d like to “Automatically sync songs to my iPod”. If your answer’s “yes,” just click the Finish button. iTunes loads a copy of everything in its library that fits onto your iPod. That’s it. Your iPod’s ready to go.

You can copy photos from your computer and turn on the talking VoiceOver menus here, too. But if you just want to stick with the music for now, Chapter 9 can fill you in on the photo business. If you generally like autosync but want more control over what goes onto your iPod, read on to find out how to make that happen.
Note
If you have a small-capacity iPod, you may already have more music than can fit on the player. If that’s the case, your automatic option is the Autofill button at the bottom of the iTunes window. Skip ahead to Fill Up Any iPod Quickly to learn more about Autofill, which lets iTunes decide what to put on your iPod. And if you want to selectively sync certain playlists or artists, check out Adjust Your iPod’s Syncing Preferences with iTunes for the details.
Manually Load the iPod Nano or Classic
If you don’t have enough room on your Nano or Classic for your whole iTunes collection, or if you plan to load music onto your iPod from more than one computer (say your work and home PCs), you’ll want to manually manage your songs and other stuff. To put your iPod on manual right from the get-go, turn off the checkbox on the iPod Setup Assistant screen next to “Automatically sync songs…” (If you’ve already done the Setup thing, see Load Songs Onto an iPod from More than One Computer for how to come back to Manual Land.) iTunes now refrains from automatically dumping everything onto your iPod. “But,” you ask, "how do I get the music on there by myself?” It’s easy. You just drag it:
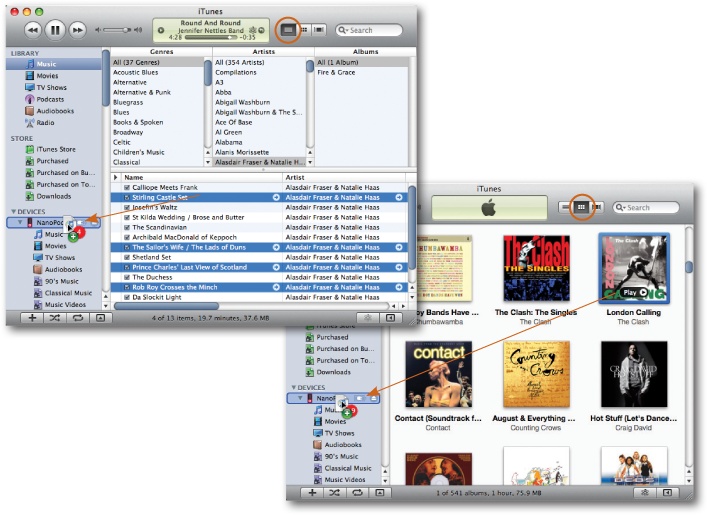
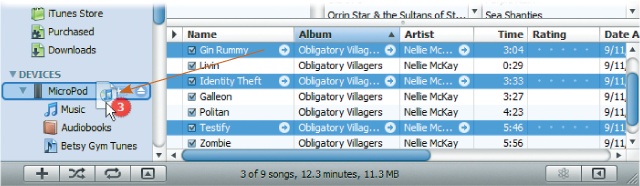
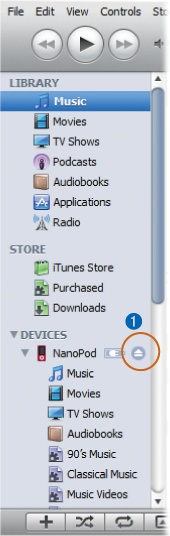
In iTunes, click the Music icon under “Library”. Click the button circled below to see a list of all the songs in your music library. You can also click Ctrl+B (⌘-B) to go into Column Browser view, where iTunes lists your music by genre, artist, and album.
Click the songs or albums you want to copy to your iPod. Grab multiple song titles or albums by holding down the Control or ⌘ key.
Drag your selection onto the iPod icon. The number of songs you’re dragging appears inside a red circle.
You can manually place any items in your iTunes library—audio books, movies, whatever—onto your iPod this way.
Fill Up Any iPod Quickly
Most people’s entire music library is too big to stuff onto the wee Shuffle or even the 8-gigabyte Nano or Touch. If you love all your music and don’t want to spend time cherry-picking tracks to load up your iPod, you can Autofill it to the brim with a full serving of tunes.
If you have a Shuffle and this is the first time you’re plugging it into your PC, the iPod Setup Assistant appears. Leave the “Automatically choose songs…” checkbox turned on, click Done, and presto: iTunes grabs a random collection of songs from your library and copies them onto your tiny iPod. After that, each time you connect your Shuffle, a small panel appears at the bottom of iTunes, inviting you to fill up your iPod with the click of the Autofill button.
Although Autofill used to be a Shuffle-only feature, other iPods can use it as well, as long as you set them to manually manage music. To use Autofill with a Nano, Touch, or Classic, connect the iPod and click the flippy triangle next to its icon in the iTunes Source list—the left-most column in iTunes. The Autofill bar appears at the bottom of the screen. Click the Autofill button to load up.

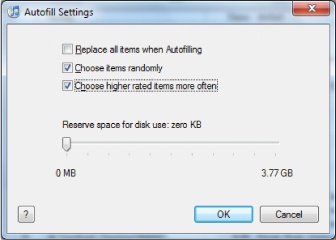
With the Autofill From pop-up menu, iTunes can snag songs from your entire library or just a particular playlist (see Chapter 6). Click the Settings button for options to have iTunes pick random tracks or select highly rated songs more often. (“Ratings?” you say? Check out Chapter 5 for the details.)
After you Autofill for the first time, when you return for another batch of songs, you can turn on the checkbox next to “Replace all items when Autofilling” to have iTunes wipe the first batch of songs off your iPod and substitute new tracks.
Once iTunes fills up your iPod, you see an “iPod sync is complete” message at the top of the screen. Click the Eject button next to your iPod’s icon, and then unplug the player from the computer.
Manually Load Your iPod Shuffle
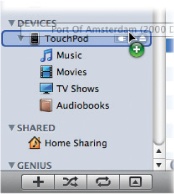
If you want to decide what goes onto your Shuffle, opt for manual updating instead of letting iTunes choose. As with any other iPod on manual control, you drag songs and playlists you want on your ‘Pod from your iTunes library and drop them on the Shuffle’s icon in the Source list.
When you click the Shuffle’s icon and it displays your song list, feel free to re-arrange individual songs in the order you want to hear them—just drag them up or down. The info down at the bottom of the iTunes window tells you how much space you’ve got left on your Shuffle if you’re looking to fill it to the rim. To delete songs from the Shuffle, select one or more tracks and then press the Delete key on your keyboard.
You can also mix and match your song-loading methods. Start by dragging a few favorite playlists over to the Shuffle, and then click Autofill to finish the job. Just make sure the “Replace all items when Autofilling” checkbox isn’t turned on or iTunes will wipe off the tracks you personally added.
Note
Earlier versions of the iPod Shuffle used to be rather monogamous—that is, they only wanted to work with one iTunes library at a time and would threaten to erase and replace their contents if you added music from a different computer. The free-spirited iPod Shuffles of 2009, however, let you manually add music from multiple computers, just as you can with any other ol’ iPod.
Get Stuff on the iPod Touch: The Quick Way
As with every iPod model that’s come before it, the iPod Touch offers the simple and effective autosync feature. Autosyncing automatically puts a copy of every song, podcast, and video in your iTunes library right onto your player. In fact, the first time you connect your iPod Touch to your computer, the iPod Setup Assistant offers to copy all the music in your iTunes library over to your new player. If you opt to do that, your iPod is already set for autosync.
If you’ve added more music since that first encounter, the steps for loading the new goods onto your Touch couldn’t be easier:
Plug the USB cable into your Windows PC or Macintosh.
Plug the flat end of that same cable into the bottom of the iPod Touch.
Sit back and let iTunes leap into action, syncing away and doing all that heavy lifting for you.

You can tell the sync magic is working because iTunes gives you a progress report at the top of its window that says “Syncing iPod Touch…” (or whatever you’ve named your player). When iTunes tells you the iPod’s update is complete, you’re free to unplug your Touch and take off.
Autosync is a beautiful thing, but it’s not for everyone—especially if you have more than 8, 32, or 64 gigabytes worth of stuff in your iTunes library. (That may sound like a lot of room for music, but once you start adding hefty video files, that space disappears fast.) If that’s the case, iTunes fits what it can on the iPod.
If autosync isn’t for you, jump over to the next page to read about more selective ways to load up your Touch.
Manually Load Your iPod Touch
If you opt out of autosyncing your iPod Touch, you now need to go ahead and choose some songs for it. Until you do, the Touch just sits there empty and forlorn in your iTunes window, waiting for you to give it something to play with.
Manual Method #1
Manual Method #1
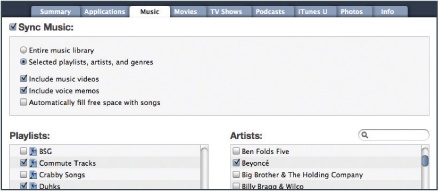
Click the iPod Touch icon on the left side of the iTunes window. This opens up a world of syncing preferences for getting stuff on your iPod.
Click the Music tab, then turn on the “Sync Music” checkbox.
Click the button next to “Selected playlists, artists, and genres” and check off the items you want to copy to your iPod. (No playlists yet? See Chapter 6.)
Click the Apply button at the bottom of the iTunes window.
Manual Method #2
This one’s for those into fine-grained picking and choosing: Click the Summary tab and turn on “Manually manage music and videos.” Now you can click the songs, albums, or playlists you want and drag them to the Touch icon in the iTunes Source pane.
Manual Method #3
Every item in your iTunes library has a checkmark next to its name when you first import it. Clear that checkmark next to whatever you don’t want on the Touch. (If you have a big library, hold down the Control [⌘] key while clicking any title; that performs the nifty trick of removing all checkmarks. Then go and check the stuff you do want.)
Click the iPod Touch icon under “Devices” in the Source list, and then click the Summary tab.
At the bottom of the Summary screen, turn on the checkbox next to “Sync only checked songs and videos” and then click the Sync button.
Disconnect Your iPod from Your Computer
Got iTunes installed? Check.
Got music in the iTunes library? Check.
Got the iPod connected and the music you want copied onto it? Check.
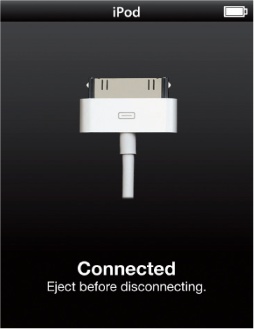
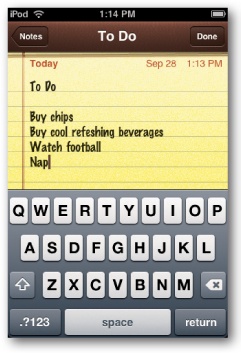
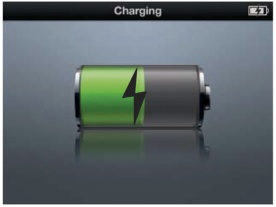
Next up: Disconnect the iPod from your computer so you can enjoy your tunes. Resist the impulse to yank the USB cable out of the iPod without checking it first. If you can see menus or the battery icon on your ‘Pod, you can safely unplug it.
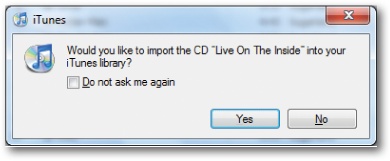
But if you see the image shown at left, you need to manually eject the iPod from your computer. iTunes gives you two easy ways to do that:
Click the little Eject icon next to the name of your iPod in the iTunes Source list.
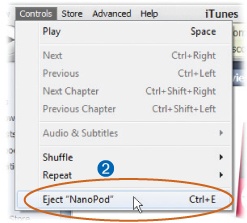
If your iPod’s already selected in the Source list, choose Control→Eject iPod or press Ctrl+E (⌘-E).
With either method, the iPod’s screen announces it’s ejecting and displays an “OK to Disconnect” progress bar as it breaks its connection with the computer. Once all the gray screens go away and you see the regular menus again, you can safely liberate your iPod.
Charge Your iPod the First Time
Right out of the box, your iPod’s battery probably has enough juice to run for a little while without you having to charge it up. Eventually, though, you’ll need to go in for an electrical fill-up. All you need to do is plug the iPod back into your computer with the USB cable (the iPod charges itself by drawing from your PC or Mac’s power). Just make sure you have your computer turned on and that it isn’t asleep.
It takes only a few hours to fully charge your iPod’s battery, and even less time to do what Apple calls a fast charge, which fills up 80 percent of the battery’s capacity. That should be plenty of gas in your iPod’s tank for a quick spin.
Here’s how much time each iPod needs for both a fast and a full charge:
Fast Charge | Full Charge | |
iPod Nano | 1.5 hours | 3 hours |
iPod Touch | 2 hours | 4 hours |
iPod Classic | 2 hours | 4 hours |
iPod Shuffle | 2 hours | 3 hours |
If you’re traveling and don’t want to drag your laptop with you just to charge your iPod, you can buy an AC adapter for it. Chapter 2 has more information on that.
Control the iPod Nano or Classic with the Click Wheel
Smack in the iPod’s belly is the click wheel, your way around the iPod’s contents. It’s called a click wheel because you can actually click down on the four buttons evenly arranged around the ring. And the iPod’s on-screen menus spin by as you move your thumb around the circle. There’s also a big button in the wheel’s center, which you’ll push a lot as you tell your iPod to do your bidding. Here’s what each button does, going clockwise from the top.
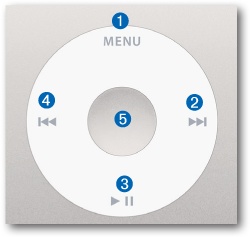
Menu. Tap this button to return to any screen you just viewed. For example, if you visited Music→Playlists→My Top Rated, you’d press Menu twice to return to the Music menu. If you keep tapping Menu, you eventually wind up on the iPod’s main menu.
Next/Fast-Forward. Press this button to jump to the next song in a play-list (Chapter 6), or hold it down to advance quickly within a song.
Play/Pause. Just like on a CD player, this button starts a song; push it again to pause the music.
Previous/Rewind. Press this button to play the song directly before the current track, or hold it down to “rewind” within a song.
Select. Like clicking a mouse button, press Select to choose a highlighted menu item. When a song title is highlighted, the Select button begins playback.
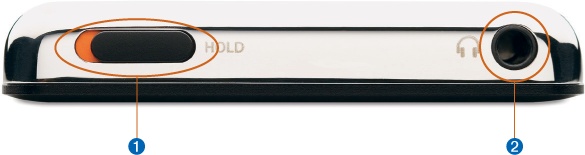
Other iPod Ports and Switches
On the outside, the iPod isn’t a very complicated device. There’s really just a Hold switch and two jacks to plug in cords. Here’s what you do with ‘em.
Hold Switch. At the top of the Classic, over on the left side, is a little sliding switch marked Hold. This is a control that deactivates all the iPod’s front buttons. Turning on the Hold switch stops your iPod from popping on if the buttons accidentally get bumped. The Nano’s tiny Hold button is also on the top-left edge; the Touch doesn’t have a Hold button, since it locks its screen when you press its Sleep/Wake button on top.
Headphone Jack. Your new iPod comes with its own bright white headphones, and they plug in right here. If you don’t like Apple’s headphones, you can use another style or brand, as long as the other headphones use the standard 3.5-millimeter stereo miniplug.
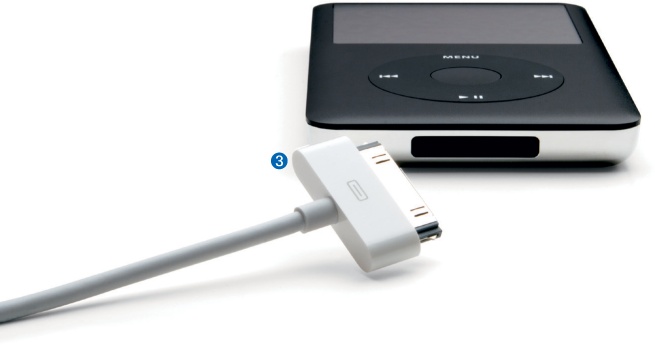
Dock Connector. The flat port on the iPod’s bottom is called the Dock Connector. This is where you plug in the USB cable so you can connect your iPod to a computer for battery-charging and music and video fill-ups. (The Nano’s headphone jack is also on the bottom.)
Basic Finger Moves for the iPod Touch Screen
Until the iPod Touch and the iPhone arrived on the scene, iPods were controlled by a wheel or control ring on the front of the player. The Classic and the Nano still work that way, but if you have an iPod Touch, you don’t need a steering wheel to get around the iPod—you just tap the icons and menus directly on the screen to navigate around the device.
There are four moves you’ll use most often when navigating the Touch screen:
Tap. Just take the tip of your finger and directly touch the icon, song title, or control you see on the screen. The iPod Touch isn’t a crusty old calculator, so you don’t have to push very hard. A gentle press will do.
Drag. Keep your fingertip pressed down on the screen and slide it around to scroll to different parts of the screen. You can do things like move volume sliders on music tracks or scoot over to different parts of a photo by dragging.
Flick. Lightly and quickly whip your finger up or down a vertical list of songs on the iPod Touch screen, and watch them whiz by in the direction you flicked. The faster you flick that finger, the faster the text on-screen scrolls by. You can also flick side-to-side in Cover Flow view (Chapter 3) or in a photo album to see images parade triumphantly across your screen.
Slide. A slide is sort of like a drag, but you use it mainly when your iPod presents you with a special on-screen button, such as when you need to unlock the iPod Touch’s main screen when you first turn it on.

Note
The iPod Touch relies on the human touch—skin-on-glass contact—to work. If you have really long fingernails, a Band-Aid on the tip of your finger, or happen to be wearing gloves, you’re going to have problems working the iPod Touch. You can’t use a pencil eraser or pen tip, either. You can, however, find a special stylus to work with the Touch; for example, Pogo (tenonedesign.com) makes one for $15.
Special Buttons on the iPod Touch
The iPod Touch has the same headphone port on top and dock-connector jack on the bottom as other iPods. But because most of its controls are behind its sensitive screen, the Touch has only a couple of physical buttons on the outside.
One of these is the volume rocker on the left side. Pressing the top nib increases the sound on either the tiny little external speaker or an attached pair of headphones; the bottom nib lowers the volume.
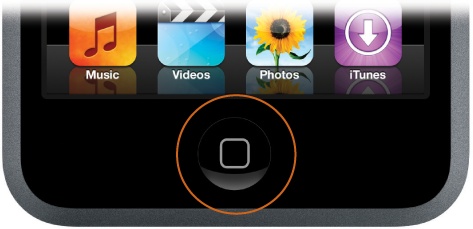
For your pushing pleasure, the Touch comes with two other buttons:
Home. Forget clicking your heels together three times—just push this indented button on the bottom of the Touch and you’ll always return home. The iPod’s Home screen is where all your tappable icons for Music, Photos, Safari Web browsing, and more hang out. If you ever wander deep into the iPod and don’t know how to get out, push the Home button to escape. You can also push it to wake up the iPod Touch from sleep.
Sleep/Wake. Press the thin black button on top of the Touch to put it to sleep and save some battery power. If you’ve got a song playing, no problem: a sleeping Touch still plays—it’s just the display that goes dark.

Find the Music on Your iPod—and Play It
Now that you’ve got some songs on your iPod, you’re ready to listen to them. Plug your headphones into the headphone jack and press any button on the front of the iPod if you need to turn it on.
Find Music on Your Nano or Classic
After you pick a language, the first menu you see says “iPod” at the top of the screen. Here’s how to start playing your tunes:
On the iPod menu, highlight the Music menu. Run your thumb over the scroll wheel to move the blue highlight bar up and down.
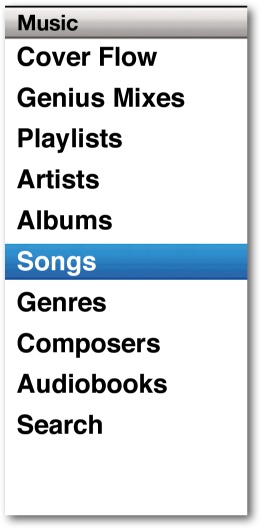
Press the round center button to select Music.
On the Music menu, scroll to whichever category you want to find your song. Your can select musc by artist, album, song, genre, and so on. Scroll to the one you want and press the center button to see your songs sorted by your chosen method.
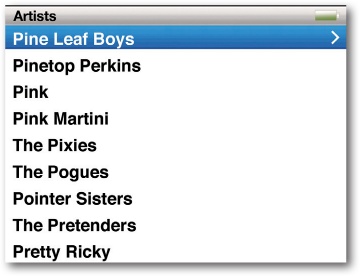
Scroll through the list on the iPod’s screen. Say you decided to look for music by artist. You now see a list of all the singers and bands stored on your iPod. Scroll down to the one you want and press the center button. You’ll see a list of all the albums you have from that artist.
Scroll to the album you want to hear. Press the Select or Play/Pause button to start playing the album.
You can find anything on your iPod by scrolling around and pressing the center button to select the item you want to hear, watch, read, or play. If you end up on a screen where you don’t want to be, press the Menu button to retrace your steps. In fact, you can keep pressing the Menu button to reverse course and go all the way back to the iPod’s main menu.
Press the Play/Pause button to pause a song that’s playing. If a song’s not playing and you don’t touch the iPod’s buttons for a few minutes, it automatically puts itself to sleep to save battery power.
Find Music on Your iPod Touch
“Hey!” you say, “I have an iPod Touch! How do I find my music since I don’t have a scroll wheel?” Here’s what you do.
Tap the Music button on the Home screen.
You see five tappable buttons at the bottom of the Music screen. These let you see your music sorted by Genius Mix, playlists, artists, or songs. (There’s also a More button at the end that lets you sort by album, genre, and other categories.)
Tap the Songs button and then scroll (by flicking your finger) down to the song you want to play. You can also hold down the alphabet bar on the right and then slide your finger slowly to better control the scroll. Tap the song’s title to hear it play.

Get iPod: The Missing Manual, 8th Edition now with the O’Reilly learning platform.
O’Reilly members experience books, live events, courses curated by job role, and more from O’Reilly and nearly 200 top publishers.

