It’s time to meet the key player in Rails applications. Controllers are the components that determine how to respond to user requests and coordinate responses. They’re at the heart of what many people think of as “the program” in your Rails applications, though in many ways they’re more of a switchboard. They connect the different pieces that do the heavy lifting, providing a focal point for application development. The model is the foundation of your application’s data structures, which will let you get information into and out of your databases.
Controllers are Ruby objects. They’re stored in the app/controllers directory of your application. Each controller has a name, and
the object inside of the controller file is called nameController.
Demonstrating controllers without getting tangled in all of Rails’ other components is difficult, so for an initial tour, the application will be incredibly simple. (You can see the first version of it in ch04/guestbook001.) Guestbooks were a common (if kind of annoying) feature on early websites, letting visitors “sign in” so that the site could tell who’d been there. (The idea has since evolved into much more sophisticated messaging, like Facebook’s “wall.”)
Note
If you've left any Rails applications from earlier chapters running under script/server, it would be wise to turn them off before
starting a new application.
To get started, create a new Rails application, as we did in Chapter 1. If you’re working from the command line, type:
rails guestbook
Rails will create the usual pile of files and folders. Next, you’ll want to change to the guestbook directory and create a controller:
cd guestbookruby script/generate controller entriesexists app/controllers/ exists app/helpers/ create app/views/entries exists test/functional/ create app/controllers/entries_controller.rb create test/functional/entries_controller_test.rb create app/helpers/entries_helper.rb
If you then look at app/controllers/entries_controller.rb, which is the main file we’ll work with here, you’ll find:
class EntriesController < ApplicationController
end
This doesn’t do very much. However, there’s an important relationship in
that first line. Your EntriesController inherits from
ApplicationController. The ApplicationController object lives in app/controllers/application.rb, and it also
doesn’t do very much initially, but if you ever need to add functionality that is
shared by all of the controllers in your application, you can put it into the ApplicationController object.
To make this controller actually do something, we’ll add a method. For right now,
we’ll call it sign_in, creating the very simple
object in Example 4-1.
Example 4-1. Adding an initial method to an empty controller
class EntriesController < ApplicationControllerdef sign_inendend
We’ll also need a view, so that Rails has something it can present to visitors. You can create a sign_in.html.erb file in the app/views/entries/ directory, and then edit it, as shown in Example 4-2.
Note
You may remember from Chapter 2 that you could have had Rails create a method in the controller as well as a basic view at the same time that it created the controller, by typing:
ruby script/generate controller entries sign_in
You can work either way, letting Rails generate as much (or as little) code as you like.
Example 4-2. A view that lets users see a message and enter their name
<html> <head><title>Hello <%=h @name %></title></head> <body> <h1>Hello <%=h @name %></h1><% form_tag :action => 'sign_in' do %><p>Enter your name:<%= text_field_tag 'visitor_name', @name %></p><%= submit_tag 'Sign in' %><% end %></body> </html>
Example 4-2 has a lot of new pieces to it because it’s using helper methods to create a basic form. Helper methods take arguments and return text, which in this case is HTML that helps build your form. The following particular helpers are built into Rails, but you can also create your own:
The
form_tagmethod takes the name of our controller method,sign_in, as its:actionparameter.The
text_field_tagmethod takes two parameters and uses them to create a form field on the page. The first,visitor_name, is the identifier that the form will use to describe the field data it sends back to the controller, while the second is default text that the field will contain. If the user has filled out this form previously, and our controller populates the@namevariable, it will list the user’s name. Otherwise, it will be blank.The last helper method,
submit_tag, provides the button that will send the data from the form back to the controller when the user clicks it.
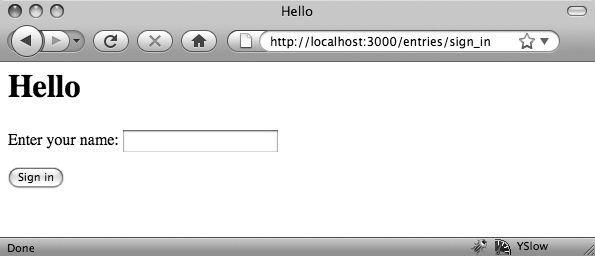
If you start up the server and visit http://localhost:3000/entries/sign_in, you’ll see a simple form like Figure 4-1.
Note
If you get an error message about a database not being found, you may want to explore the option described at the end of Chapter 1 in “Turning Off Databases, For Now.” You’ll need to turn them on again later in this chapter, though.
Now that we have a way to send data to our controller, it’s time to update the controller so that it does something with that information. In this very simple case, it just means adding a line, as shown in Example 4-3.
Example 4-3. Making the sign_in method do something
class EntriesController < ApplicationController

  def sign_in
    @name = params[:visitor_name]
  end

end
The extra line gets the visitor_name parameter from
the request header sent back by the client and puts it into @name. (If there wasn’t a visitor_name parameter, as would be normal the first time this page is loaded,
@name will just be blank.)
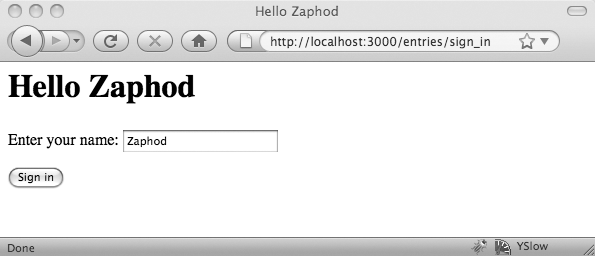
If you enter a name into the form, you’ll now get a pretty basic hello message back as shown in Figure 4-2. The name will also be sitting in the form field for another round of greetings.
Warning
If, instead of Figure 4-2, you get a
strange error message about “wrong number of arguments (1 for 0),” check
your code carefully. You’ve probably added a space between params and [, which produces a syntax
error whose description isn’t exactly clear.
This isn’t incredibly exciting, admittedly, but it’s a start. The controller is now receiving information from the user and passing it to a view, which can then pass more information.
There is one other minor point worth examining before we move on, though: how did Rails convert the http://localhost:3000/entries/sign_in URL into a call to the sign_in method of the entries
controller? If you look in the config directory of your
application, you’ll find the routes.rb
file, which contains two default rules for choosing what gets called when a
request comes in:
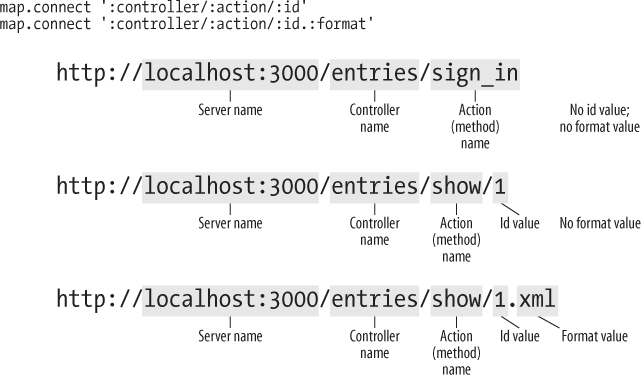
map.connect ':controller/:action/:id'
map.connect ':controller/:action/:id.:format'
In this case, entries mapped to :controller, and sign_in
mapped to :action. Rails used this simple mapping to
decide what to call. We don’t have an :id or a
:format—yet. (And as Chapter 2 demonstrated, if there hadn’t been an :action, Rails would have defaulted to an :action named index.) Figure 4-3 shows how Rails breaks down a URL to
decide where to go.
Get Learning Rails: Live Edition now with the O’Reilly learning platform.
O’Reilly members experience books, live events, courses curated by job role, and more from O’Reilly and nearly 200 top publishers.

