Chapter 4. Creating a More Advanced Simulation
So far, you’ve been introduced to the basics of simulation and the basics of synthesis. It’s time to dive in a bit further and do some more simulation. Back in Chapter 2, we built a simple simulation environment that showed you how easy it is to assemble a scene in Unity and use it to train an agent.
In this chapter, we’re going to build on the things you’ve already learned and create a slightly more advanced simulation using the same fundamental principles. The simulation environment we’re going to build is shown in Figure 4-1.
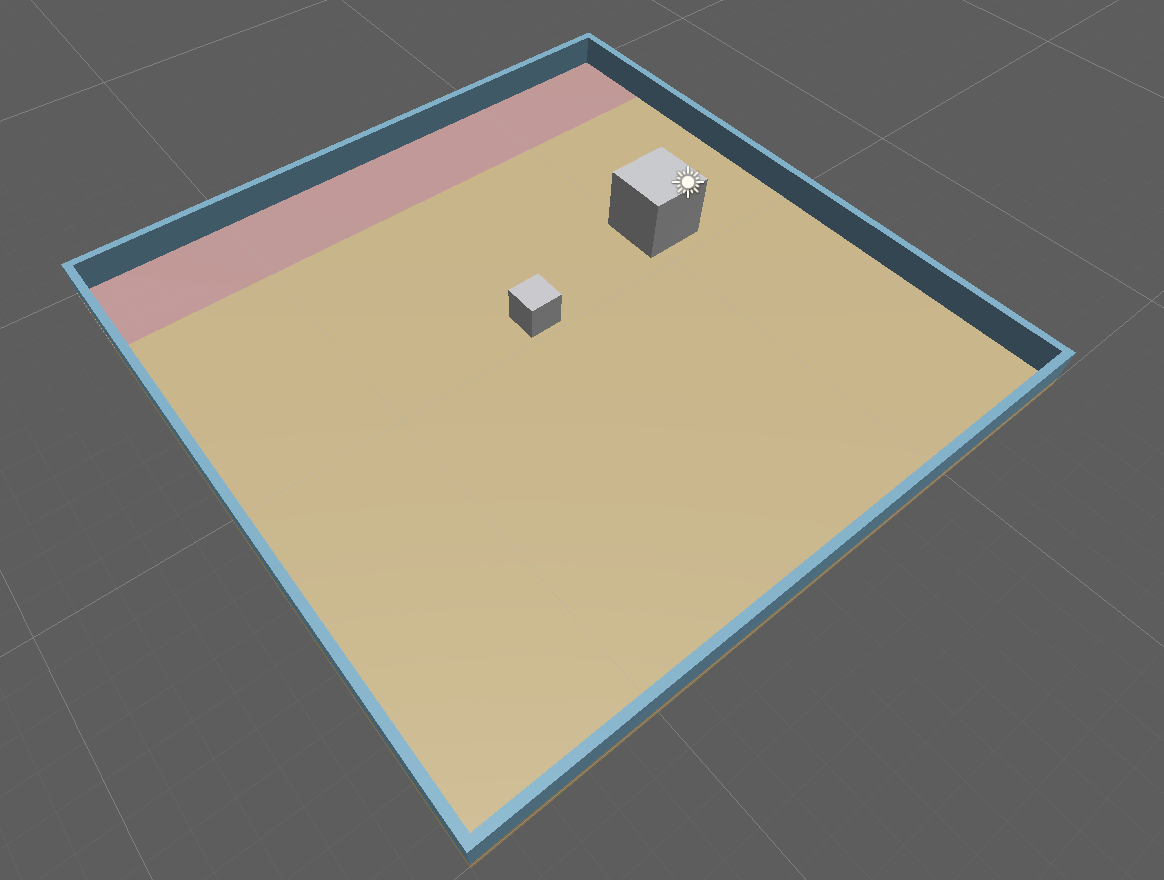
Figure 4-1. The simulation we’ll be building
This simulation will consist of a cube, which will again serve as our agent. The agent’s goal will be to push a block into a goal area as quickly as possible.
By the end of this chapter, you’ll have continued to solidify your Unity skills for assembling simulation environments, and have a better handle on the components and features of the ML-Agents Toolkit.
Setting Up the Block Pusher
For a full rundown and discussion of the tools you’ll need for simulation and machine learning, refer back to Chapter 1. This section will give you a quick summary of the bits and pieces you’ll need to accomplish this particular activity.
Specifically, here we will do the following:
-
Create a new Unity project and set it up for use with ML-Agents.
-
Create the environment for our block pusher in a scene in that Unity project.
-
Implement the necessary code to make our block pushing agent function in the environment and be trainable using reinforcement learning.
-
And finally, train our agent in the environment and see how it runs.
Creating the Unity Project
Once again, we’ll be creating a brand-new Unity project for this simulation:
-
Open the Unity Hub and create a new 3D project. We’ll name ours “BlockPusher.”
-
Install the ML-Agents Toolkit package. Refer back to Chapter 2 for instructions.
That’s all! You’re ready to go ahead and make the environment for the block pusher agent to live in.
The Environment
With our empty Unity project ready to go with ML-Agents, the next step is to create the simulation environment. In addition to the agent itself, our simulation environment for this chapter has the following requirements:
-
A floor for the agent to move around on
-
A block for the agent to push around
-
A set of outer walls to prevent the agent from falling into the void
-
A goal area for the agent to push the block into
In the following few sections, we’ll create each of these pieces in the Unity Editor.
The Floor
The floor is where our agent and the block it pushes will live. The floor is very similar to the one created in Chapter 2, but here we’ll also be building walls around it. With the new Unity project open in the editor, we’ll create a new scene and create the floor for our agent (and the block it pushes) to live on:
-
Open the GameObject menu → 3D Object → Cube. Click on the cube that you’ve created in the Hierarchy view, and as before set its name to “Floor” or something similar.
-
With the new floor selected, set its position to something suitable, and its scale to
(20, 0.35, 20)or something similar, so that it’s a big flat floor with a bit of thickness to it, as shown in Figure 4-2.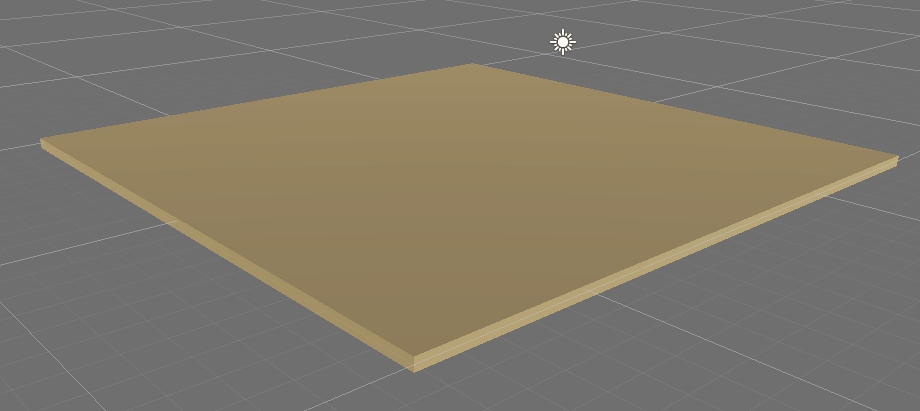
Figure 4-2. The floor for our simulation
Tip
The floor is the center of existence for this world. By centering the world on the floor, the floor’s position doesn’t really matter.
We want our floor to have a little more character this time, so we’re going to give it some color:
-
Open the Assets menu → Create → Material to create a new material asset in the project (you can see it in the Project view). Rename the material to “Material_Floor” or something similar by right-clicking and selecting Rename (or pressing Return while the material is selected).
-
Ensure that the new material is selected in the Project view and use the Inspector to set the albedo color to something fancy. We recommend a nice orange color, but anything is fine. Your Inspector should look something like Figure 4-3.
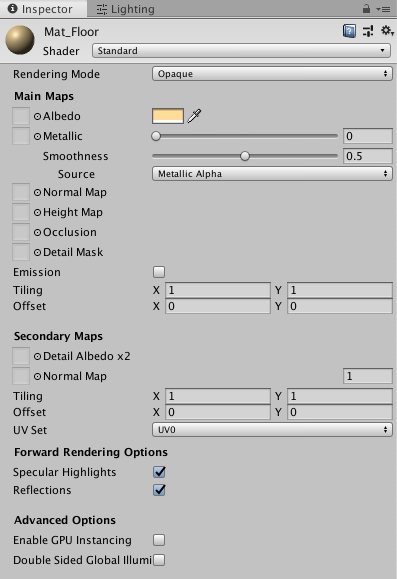
Figure 4-3. The floor material
-
Select the floor in the Hierarchy view and drag the new material from the Project view directly onto either the floor’s entry in the Project view, or the empty space at the bottom of the floor’s Inspector. The floor should change color in the Scene view, and the Inspector for the floor should have a new component, as shown in Figure 4-4.
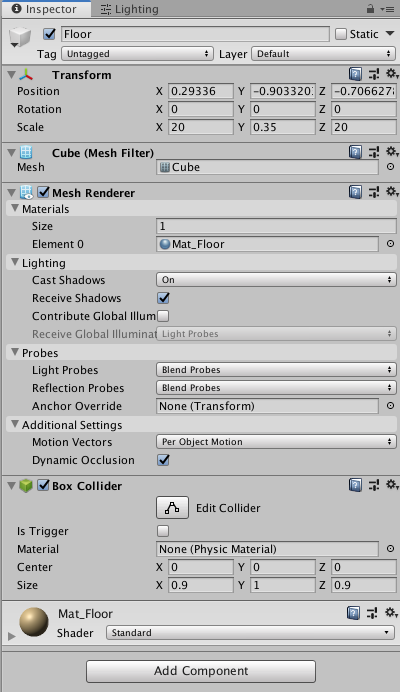
Figure 4-4. The Inspector for the floor, showing the new Material component
That’s it for the floor! Make sure you save the scene before continuing.
The Walls
Next, we need to create some walls around the floor. Unlike in Chapter 2, we don’t want the agent to ever have the possibility of falling off the floor.
To create walls, we’ll once again be using our old, versatile friend, the cube. Back in the Unity scene where you made the floor a moment ago, do the following:
-
Create a new cube in the scene. Make it the same scale on the x-axis as the floor (so probably about
20),1unit high on the y-axis, and around0.25on the z-axis. It should look something like Figure 4-5.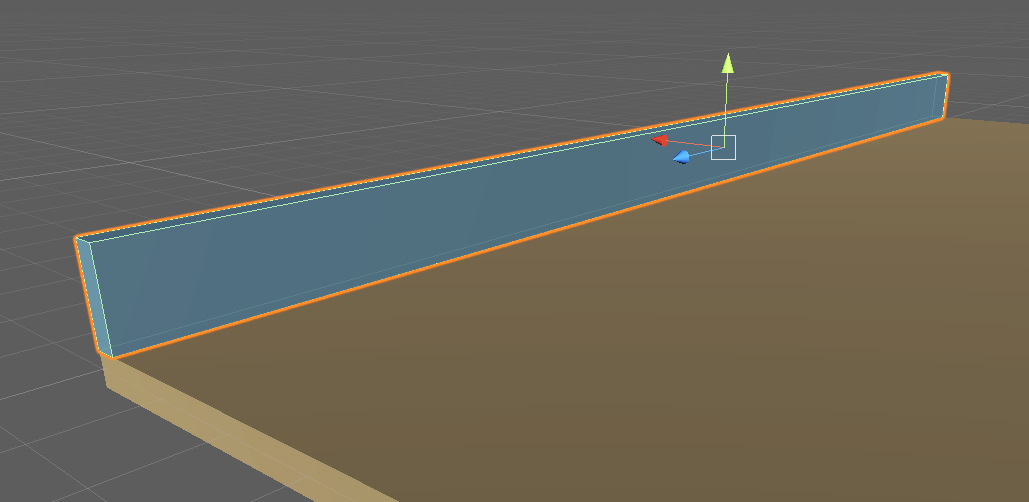
Figure 4-5. The first wall
-
Create a new material for the walls, give it a nice color, and apply it to the wall you’ve created. Ours is shown in Figure 4-6.
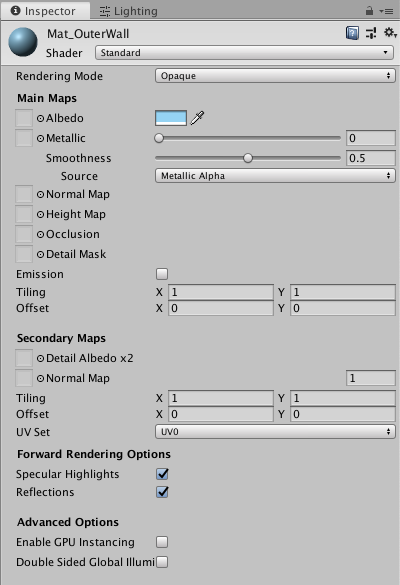
Figure 4-6. The new wall material
-
Rename the cube “Wall” or something similar, and duplicate it once. These will be our walls on one axis. Don’t worry about moving them to the right position just yet.
-
Duplicate one of the walls again and, using the Inspector, rotate it
90degrees on the y-axis. Once it’s there, duplicate it.Tip
You can switch to the move tool by pressing the W key on your keyboard.
-
Position the walls by using the move tool while each wall is selected (in either the Scene view or the Hierarchy view) and holding the V key on your keyboard to enter vertex snapping mode. While the V key is held, mouse over the different vertices in the wall’s mesh. Mouse over one of the outer bottom-corner vertices of a wall, and then click and drag on the move handle to snap it to the appropriate upper-corner vertex on the floor. This process is shown in Figure 4-7.
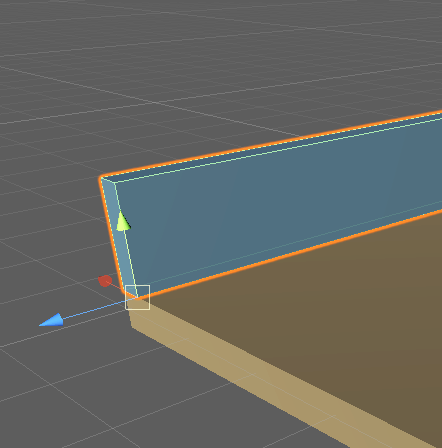
Figure 4-7. Vertex-snapping on the corner
Tip
You can switch between different views in the Scene view using the widget in the upper-right corner, shown in Figure 4-8.
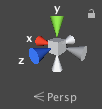
Figure 4-8. The scene widget
-
Repeat this for each wall segment. Some of the wall segments will overlap and intersect each other, and that’s fine.
When you’re done, your walls should look like Figure 4-9. As always, save your scene before you continue.
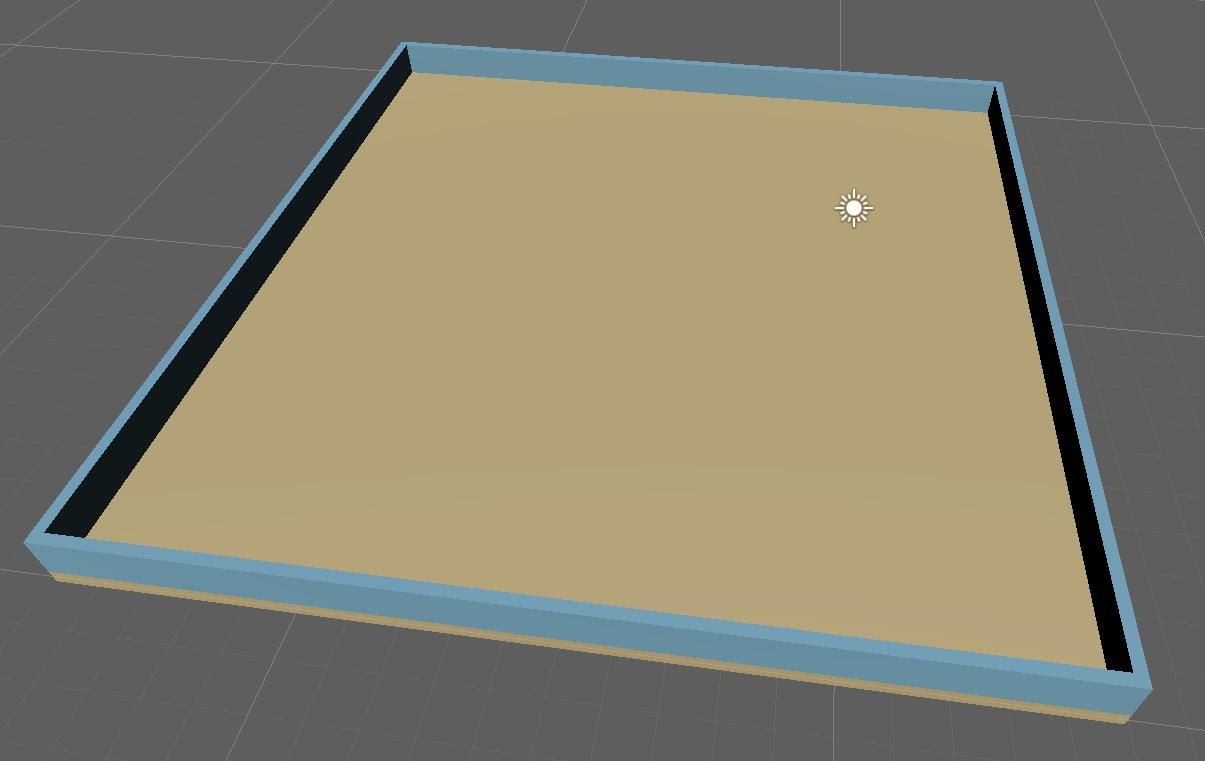
Figure 4-9. The four final walls
The Block
The block, at this phase, is the simplest element that we need to create in the editor. Like many of us, it exists to be pushed around (in this case, by the agent). We’ll add the block in the Unity scene:
-
Add a new cube to the scene, and rename it “Block.”
-
Use the Inspector to add a Rigidbody component to the agent, setting its mass to
10and its drag to4, and freezing its rotation on all three axes, as shown in Figure 4-10.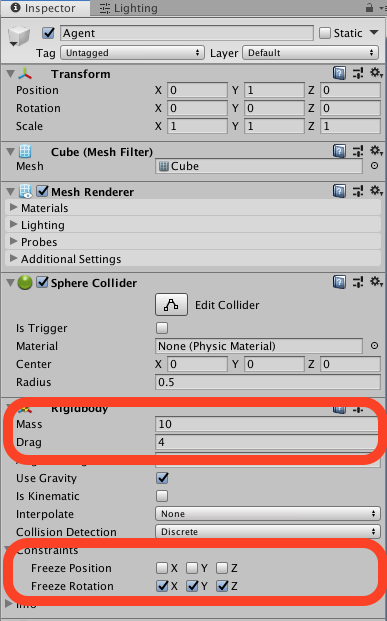
Figure 4-10. The block’s parameters
-
Position the block somewhere on the floor. Anywhere is fine.
Tip
If you’re having trouble positioning the block precisely on the floor, you can use the move tool in vertex snapping mode, like you did for the walls, and snap the agent to one of the corners of the floor (where it will be intersecting with the walls). Then use the directional move tool (by clicking and dragging on the arrows coming out of the agent while it’s in move mode) or the Inspector to move it to the desired location.
The Goal
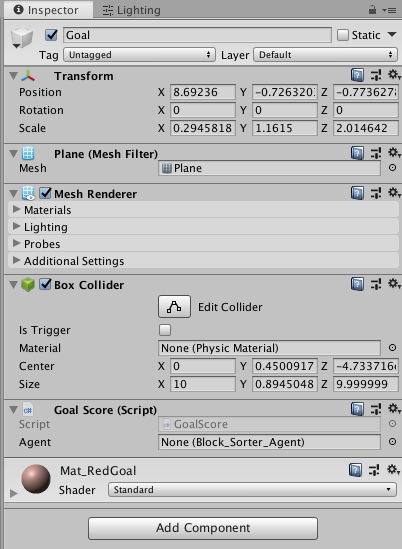
The goal is the location in the scene where the agent needs to push the block. It’s less of a physical thing and more of a concept. But concepts can’t be represented in video game engines, so how do we implement it? That’s a great question, dear reader! We make a plane—a flat area—that we set to a specific color so that the watching human (i.e., us) can tell where the goal area is. The color won’t be used by the agent at all, it’s just for us.
The agent will use the collider we add, which is a big volume of space that exists above the colored ground area, and using C# code, we can know when something is inside that volume (hence the name “collider”).
Follow these steps to create the goal and its collider:
-
Create a new plane in the scene and rename it “Goal” or something similar.
-
Create a new material for the goal and apply it. We recommend you use a color that will stand out, since this is the goal area that we want the agent to push the cube into. Apply the new material to the goal.
-
Use the same trick with vertex snapping that you used earlier in “The Walls” to position the goal using the Rect tool (accessible using T on your keyboard) or via the tools selector, shown in Figure 4-11. Position the goal roughly as shown in Figure 4-12.

Figure 4-11. The tool selector
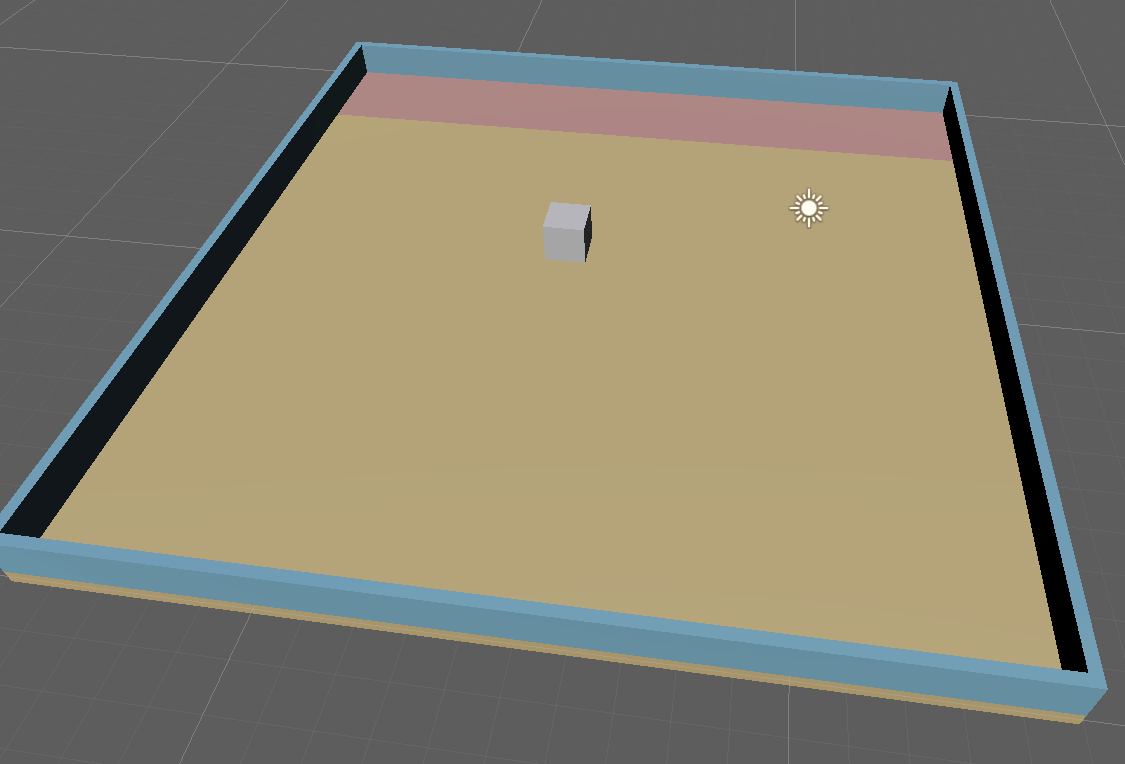
Figure 4-12. The goal in position
-
Using the inspector, remove the Mesh Collider component from the goal, and use the Add Component button to add a Box Collider component instead.
-
With the goal selected in the Hierarchy, click the Edit Collider button in the Box Collider component of the goal’s Inspector (shown in Figure 4-13.)
-
Use the small green square handles to size the collider of the goal so that it encompasses more of the environment’s volume, so if the agent enters the collider it will be detected. Ours is shown in Figure 4-14, but this is not a science; you just need to make it big! You might find it easier just to increase the Box Collider component’s size on its y-axis using the Inspector.

Figure 4-14. Our large collider, showing the handles
The Agent
Finally (almost), we need to create the agent itself. Our agent is going to be a cube, with the appropriate script (which we’ll also create) attached to it, just like we did with the ball agent in Chapter 2.
Still in the Unity Editor, do the following in your scene:
-
Create a new cube and name it “Agent” or something similar.
-
In the agent’s Inspector, select the Add Component button and add a new script. Name it something like “BlockSorterAgent.”
-
Open the newly created script and add the following import statements:
usingUnity.MLAgents;usingUnity.MLAgents.Actuators;usingUnity.MLAgents.Sensors; -
Update the class to be a child of
Agent. -
Now you need some properties, starting with a handle for the floor and environment (we’ll get back to assigning these shortly). These go inside the class, before any methods:
publicGameObjectfloor;publicGameObjectenv; -
You also need something to represent the bounds of the floor:
publicBoundsareaBounds; -
And you need something to represent the goal area and the block that needs to be pushed to the goal:
publicGameObjectgoal;publicGameObjectblock; -
Now add some
Rigidbodys to store the body of the block and the agent:RigidbodyblockRigidbody;RigidbodyagentRigidbody;
When the agent is initialized, we need to do a few things, so the first thing we’ll make is the Initialize() function:
-
Add the
Initialize()function:publicoverridevoidInitialize(){}
-
Inside, get a handle on the agent and block’s
Rigidbodys:agentRigidbody=GetComponent<Rigidbody>();blockRigidbody=block.GetComponent<Rigidbody>(); -
And finally, for the
Initialize()function, get a handle on the bounds of the floor:areaBounds=floor.GetComponent<Collider>().bounds;
Next, we want to be able to randomly position the agent within the floor when it spawns (and for each training run), so we’ll make a GetRandomStartPosition() method. This method is entirely ours, and isn’t implementing a required piece of ML-Agents (like the methods we override):
-
Add the
GetRandomStartPosition()method:publicVector3GetRandomStartPosition(){}We’ll call this method whenever we want to position something randomly within the floor that’s in our simulation. It will return a random usable position on the floor.
-
Inside
GetRandomStartPosition(), get a handle on the bounds of the floor and the goal:BoundsfloorBounds=floor.GetComponent<Collider>().bounds;BoundsgoalBounds=goal.GetComponent<Collider>().bounds; -
Now create someplace to store the new point on the floor (we’ll return to this in a bit):
Vector3pointOnFloor; -
Now, make a timer so that you can see if this process takes too long for some reason:
varwatchdogTimer=System.Diagnostics.Stopwatch.StartNew(); -
Next, add a variable to store a margin. We’ll use this to add and remove a small buffer from the random position that is picked:
floatmargin=1.0f; -
Now start a
do-whilethat continues picking a random point if it picks one that is inside the goal’s bounds:do{}while(goalBounds.Contains(pointOnFloor)); -
Inside the
do, check if the timer has gone on too long, and throw an exception if it did:if(watchdogTimer.ElapsedMilliseconds>30){thrownewSystem.TimeoutException("Took too long to find a point on the floor!");} -
Then, still inside the
do, but below theifstatement, pick a point on the top face of the floor:pointOnFloor=newVector3(Random.Range(floorBounds.min.x+margin,floorBounds.max.x-margin),floorBounds.max.y,Random.Range(floorBounds.min.z+margin,floorBounds.max.z-margin));Add and remove the
marginso that the box is always on the floor, and not in the walls or in space. -
After the
do-while,returnthepointOnFloorthat you created:returnpointOnFloor;
That’s it for GetRandomStartPosition(). Next, we need a function to call when the agent gets the block to the goal. We’ll use this function to reward the agent for doing the right thing, reinforcing the policy that we want:
-
Create the
GoalScored()function:publicvoidGoalScored(){} -
Add a call to
AddReward():AddReward(5f); -
And add a call to
EndEpisode():EndEpisode();
Next, we’ll implement OnEpisodeBegin(),the function that’s called when each training or inference episode begins:
-
First, we’ll put the function in place:
publicoverridevoidOnEpisodeBegin(){} -
And we’ll get a random rotation and angle:
varrotation=Random.Range(0,4);varrotationAngle=rotation*90f; -
Now we’ll get a random start position for the block, using the function we created:
block.transform.position=GetRandomStartPosition(); -
We’ll set the block’s velocity and angular velocity, using its
Rigidbody:blockRigidbody.velocity=Vector3.zero;blockRigidbody.angularVelocity=Vector3.zero; -
We’ll get a random start position for the agent:
transform.position=GetRandomStartPosition(); -
And we’ll set the agent’s velocity and angular velocity, using its
Rigidbodyas well:agentRigidbody.velocity=Vector3.zero;agentRigidbody.angularVelocity=Vector3.zero; -
Finally, we’ll rotate the whole environment. We do this so that the agent doesn’t learn the side that always has the goal:
//env.transform.Rotate(new Vector3(0f, rotationAngle, 0f));
And that’s it for the OnEpisodeBegin() function. Save your code.
Next, we’re going to implement the Heuristic() function so that we can manually control the agent if we want to:
-
Create the function
Heuristic():publicoverridevoidHeuristic(inActionBuffersactionsOut){}Note
Manual control of the agent here is entirely unrelated to the training process. It just exists so that we can verify the agent can move in the environment appropriately.
-
Get a handle on the actions that the Unity ML-Agents Toolkit sends, and set the action to
0so that you know you’ll always end up with a valid action or0by the end of the call toHeuristic():vardiscreteActionsOut=actionsOut.DiscreteActions;discreteActionsOut[0]=0; -
Then, for each key—D, W, A, and S—check if it’s being used, and send the appropriate action:
if(Input.GetKey(KeyCode.D)){discreteActionsOut[0]=3;}elseif(Input.GetKey(KeyCode.W)){discreteActionsOut[0]=1;}elseif(Input.GetKey(KeyCode.A)){discreteActionsOut[0]=4;}elseif(Input.GetKey(KeyCode.S)){discreteActionsOut[0]=2;}Tip
These numbers are totally arbitrary. As long as they stay consistent and don’t overlap, it doesn’t matter what they are. One number consistently represents one direction (which corresponds to a keypress when under human control).
And that’s all for the Heuristic() function.
Next, we need to implement the MoveAgent() function, which will allow the ML-Agents framework to control the agent for both training and inference purposes:
-
First, we’ll implement the function:
publicvoidMoveAgent(ActionSegment<int>act){} -
Then, inside, we’ll zero out the direction and rotation that will be used for the movement:
vardirection=Vector3.zero;varrotation=Vector3.zero; -
And we’ll assign the action coming in from the Unity ML-Agents Toolkit to something a little more readable:
varaction=act[0];
-
Now we’ll switch on that action and set the direction or rotation appropriately:
switch(action){case1:direction=transform.forward*1f;break;case2:direction=transform.forward*-1f;break;case3:rotation=transform.up*1f;break;case4:rotation=transform.up*-1f;break;case5:direction=transform.right*-0.75f;break;case6:direction=transform.right*0.75f;break;} -
Then, outside the
switch, we’ll act on any rotation:transform.Rotate(rotation,Time.fixedDeltaTime*200f); -
And we’ll also act on any direction, by applying a force to the agent’s
Rigidbody:agentRigidbody.AddForce(direction*1,ForceMode.VelocityChange);
And that’s all for MoveAgent(). Again, save your code.
Finally, for now, we need to implement the OnActionReceived() function, which doesn’t do much more than pass the received action on to our MoveAgent() function:
-
Create the function:
publicoverridevoidOnActionReceived(ActionBuffersactions){} -
Call your own
MoveAgent()function, passing in the discrete actions:MoveAgent(actions.DiscreteActions); -
And punish the agent by setting a negative reward based on the step:
SetReward(-1f/MaxStep);This negative reward will hopefully encourage the agent to economize its movement and take as few moves as possible in order to maximize its reward and achieve the goal we want from it.
That’s everything for now. Make sure your code is saved before you continue.
The Environment
We need to do a little more administrative work in setting up the environment before we continue, so switch back to your scene in the Unity Editor. We’ll start by creating a GameObject to hold the walls in, just to keep the Hierarchy clean:
-
Right-click on the Hierarchy view and choose Create Empty. Rename the empty GameObject “Walls,” as shown in Figure 4-15.
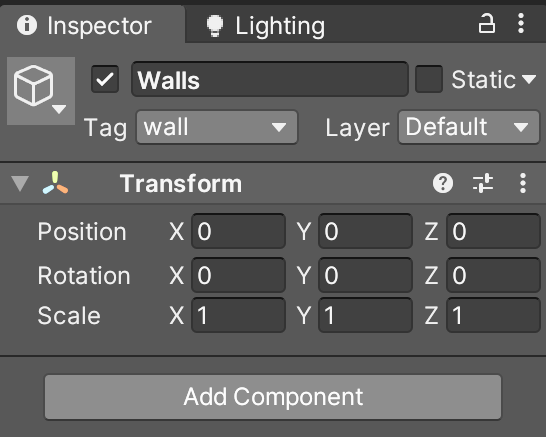
Figure 4-15. The walls object, named
-
Select all four walls (you can hold your Shift key and click them one by one, or hold Shift after clicking the first one and then click the last one) and drag them under the new walls object. It should look like Figure 4-16.
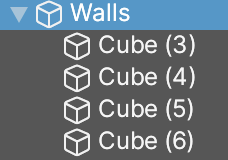
Figure 4-16. The walls are nicely encapsulated
Now we’ll create an empty GameObject in which to hold the entire environment:
-
Right-click in the Hierarchy view and choose Create Empty. Rename the empty GameObject “Environment.”
-
In the Hierarchy view, drag the walls object we just made, plus the agent, floor, block, and goal, into the new environment object. It should look like Figure 4-17 at this point.
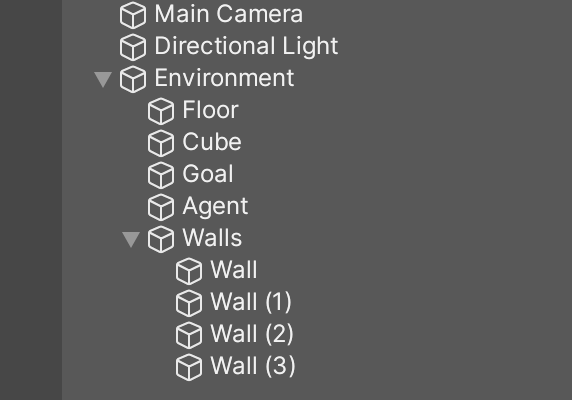
Figure 4-17. The environment, encapsulated
Next, we need to configure some things on our agent:
-
Select the agent in the Hierarchy view, and scroll down to the script you added in the Inspector view. Drag the floor object from the Hierarchy view into the Floor slot in the Inspector.
-
Do the same for the overall environment GameObject, the goal, and the block. Set the Max Steps to
5000in the editor so that the agent doesn’t take forever to push a block to the goal. Your Inspector should look like Figure 4-18.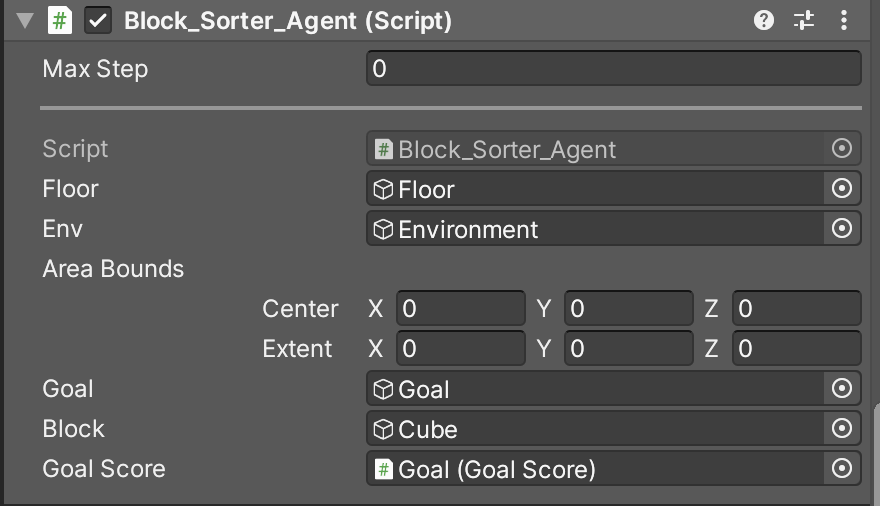
Figure 4-18. The agent script properties
-
Now, using the Add Component button in the Inspector for the agent, add a DecisionRequester script and set its Decision Period to 5, as shown in Figure 4-19.

Figure 4-19. The Decision Requester component, added to the agent and appropriately configured
-
Add two Ray Perception Sensor 3D components, each with three detectable tags: block, goal, and wall, with the settings shown in Figure 4-20.
Back in “Letting the Agent Observe the Environment”, we said you can add observations via code or via components. There we did it all via code. Here we’re going to do it all via components. The components in question are the Ray Perception Sensor 3D components that we just added.
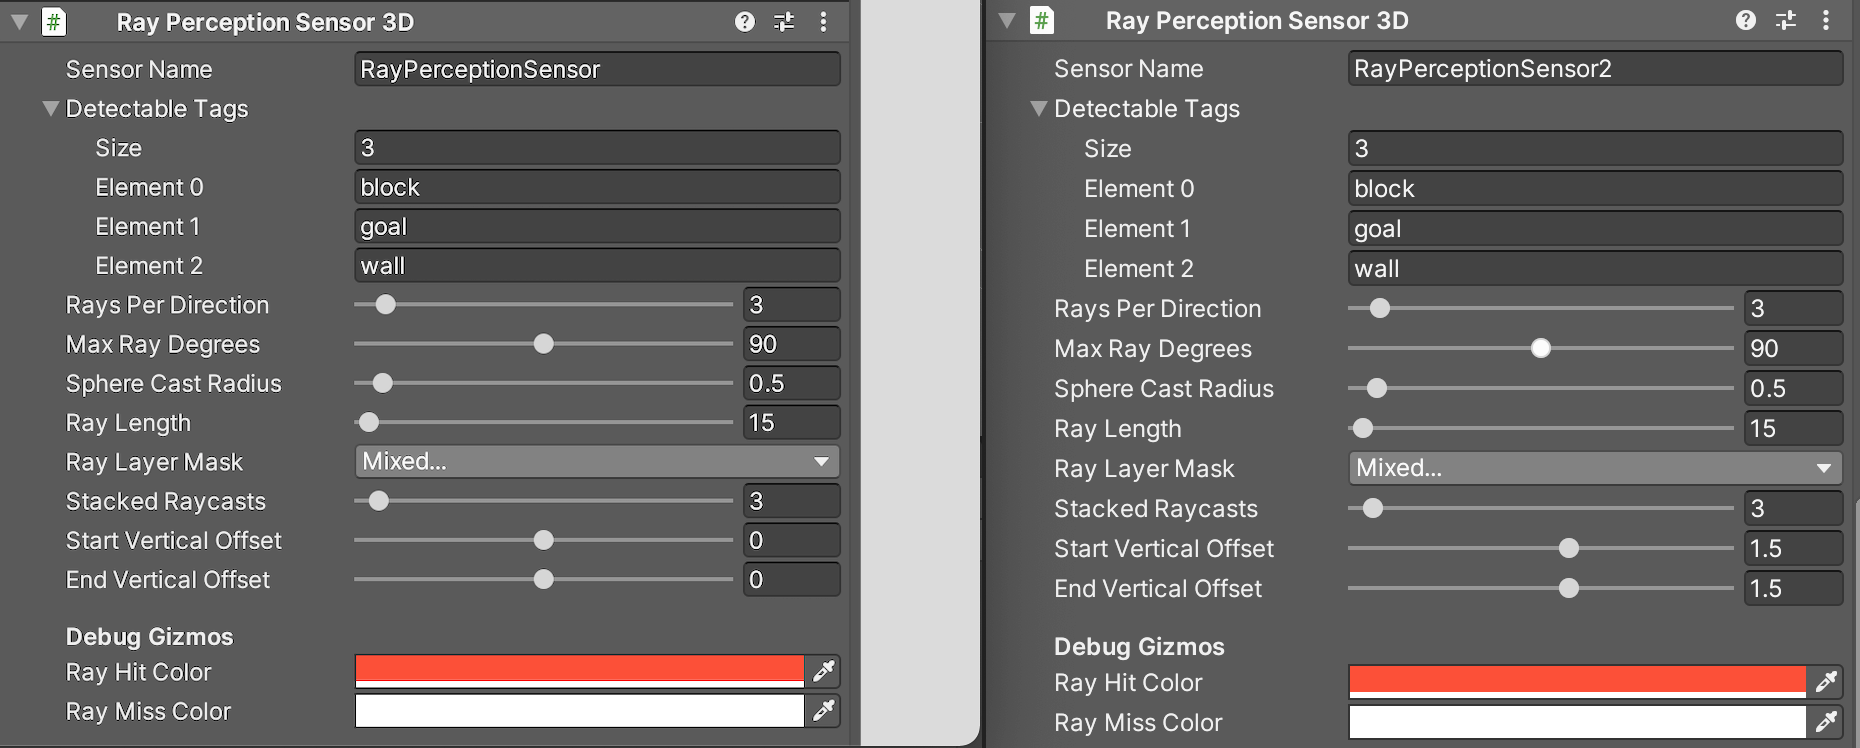
Figure 4-20. The two Ray Perception sensors
Tip
We don’t even have a
CollectObservationsmethod in our agent this time, because all the observations are collected via the Ray Perception Sensor 3D components that we add in the editor. -
We’ll need to add the tags we just used to the objects we actually want to tag. The tags allow us to refer to objects based on what they’re tagged with, so if something is tagged with “wall,” we can treat it as a wall, and so on. Select the block in the Hierarchy, and use the Inspector to add a new tag, as shown in Figure 4-21.
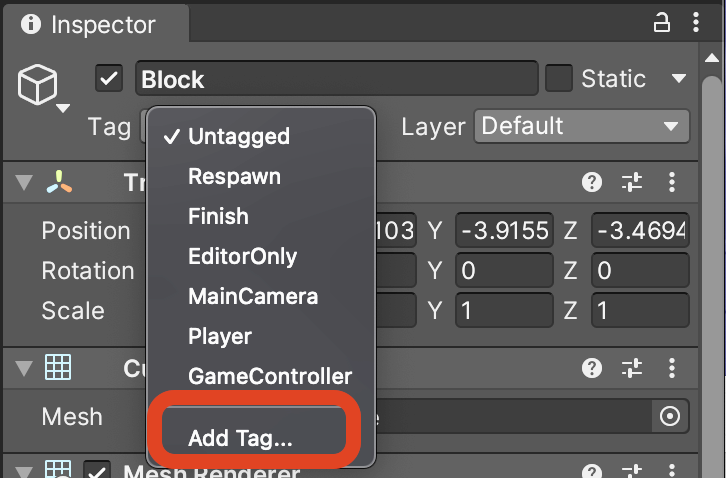
Figure 4-21. Adding a new tag
-
Name the new tag “block,” as shown in Figure 4-22.
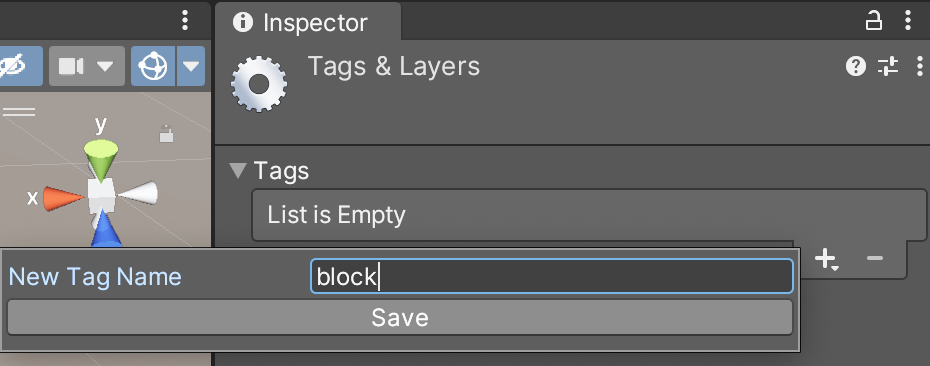
Figure 4-22. Naming a new tag
-
And finally, attach the new tag to the block, as shown in Figure 4-23.

Figure 4-23. Attaching the tag to an object
-
Repeat this for the goal, using a “goal” tag, and for all the wall components, using a “wall” tag. With these in place, the Ray Perception Sensor 3D components we added will only “see” things tagged with “block,” “goal,” or “wall.” As shown in Figure 4-24, we’ve added two layers of Ray Perception sensors, which case a line out from the object they’re attached to and report back on the first thing that line hits (in this case, only if it’s a wall, a goal, or a block). We’ve added two that are staggered at different angles. They’ll only be visible in the Unity Editor.
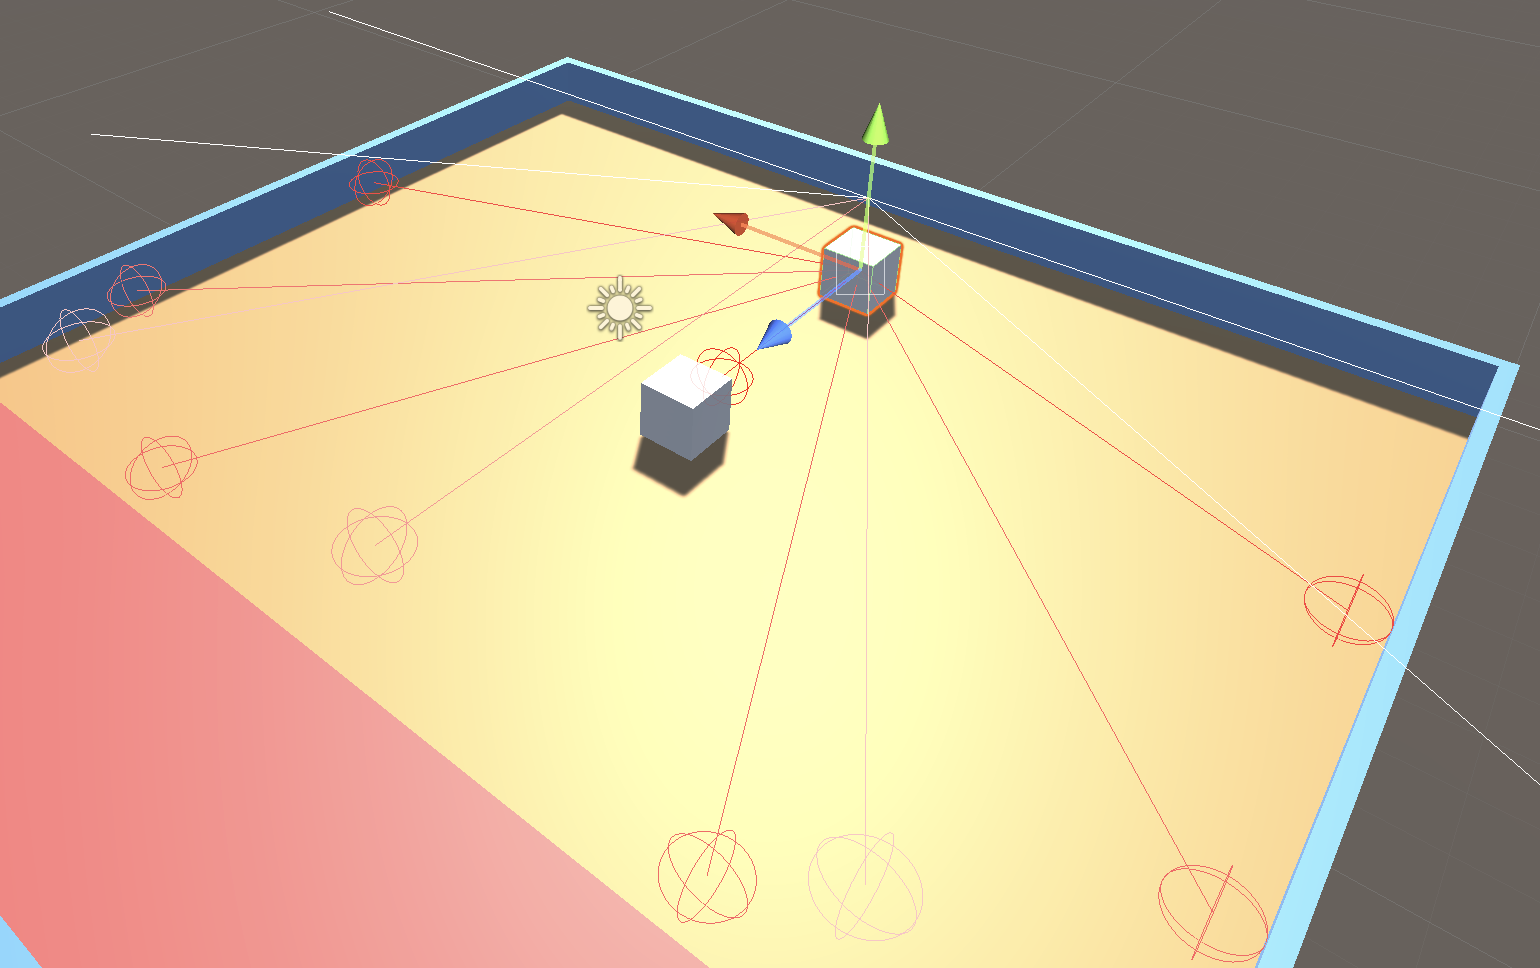
Figure 4-24. The Ray Perception Sensor 3D components
-
Finally, add a Behavior Parameters component, using the Add Component button. Name the behavior “Push” and set the parameters as shown in Figure 4-25.
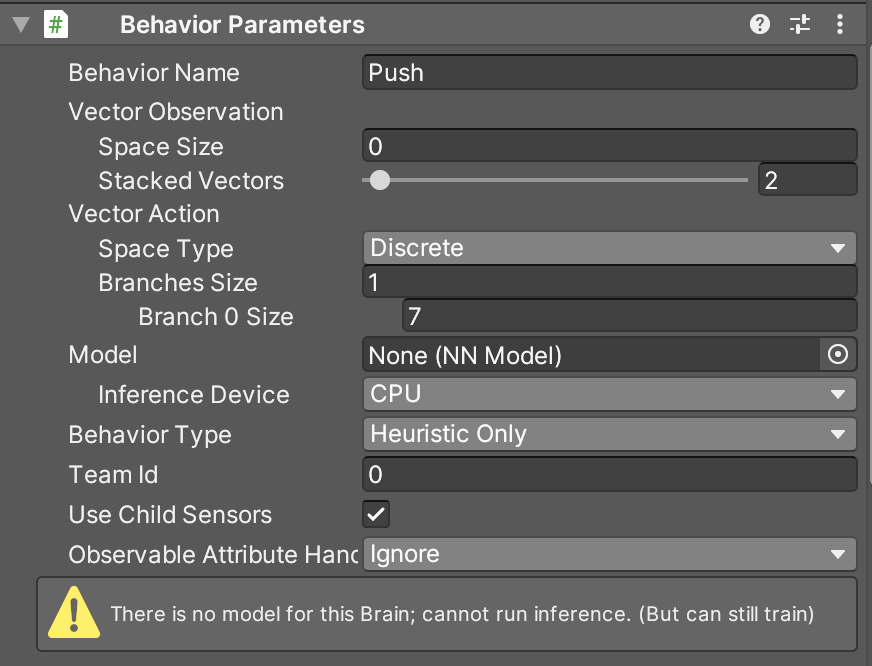
Figure 4-25. The Behavior Parameters for the agent
Save your scene in the Unity Editor. Now we’ll do some configuration on our block:
-
Add a new script to the block, named something like “GoalScore.”
-
Open the script, and add a property to refer to the agent:
publicBlock_Sorter_Agentagent;The type of the property you create here should match the class name for the class attached to the agent.
Tip
You don’t need to change the parentage to
Agentor import any ML-Agents components this time, as this script isn’t an agent. It’s just a regular script. -
Add an
OnCollisionEnter()function:privatevoidOnCollisionEnter(Collisioncollision){} -
Inside
OnCollisionEnter(), add the following code:if(collision.gameObject.CompareTag("goal")){agent.GoalScored();} -
Save the script and return to Unity, and with the block selected in the Hierarchy, drag the agent from the Hierarchy into the Agent slot in the new GoalScore script. This is shown in Figure 4-26.

Figure 4-26. The GoalScore script
Training and Testing
With everything built in both Unity and C# scripts, it’s time to train the agent and see how the simulation works. We’ll be following the same process we followed in “Training with the Simulation”: creating a new YAML file to serve as the hyperparameters for our training.
Here’s how to set up the hyperparameters:
-
Create a new YAML file to serve as the hyperparameters for the training. Ours is called Push.yaml and includes the following hyperparameters and values:
behaviors:Push:trainer_type:ppohyperparameters:batch_size:10buffer_size:100learning_rate:3.0e-4beta:5.0e-4epsilon:0.2lambd:0.99num_epoch:3learning_rate_schedule:linearnetwork_settings:normalize:falsehidden_units:128num_layers:2reward_signals:extrinsic:gamma:0.99strength:1.0max_steps:500000time_horizon:64summary_freq:10000 -
Next, inside the
venvwe created earlier in “Setting Up”, fire up the training process by running the following command in your terminal:mlagents-learn _config/Push.yaml_ --run-id=PushAgent1
Note
Replace
config/Push.yamlwith the path to the configuration file you just created.
-
Once the command is up and running, you should see something that looks like Figure 4-27. At this point, you can press the Play button in Unity.
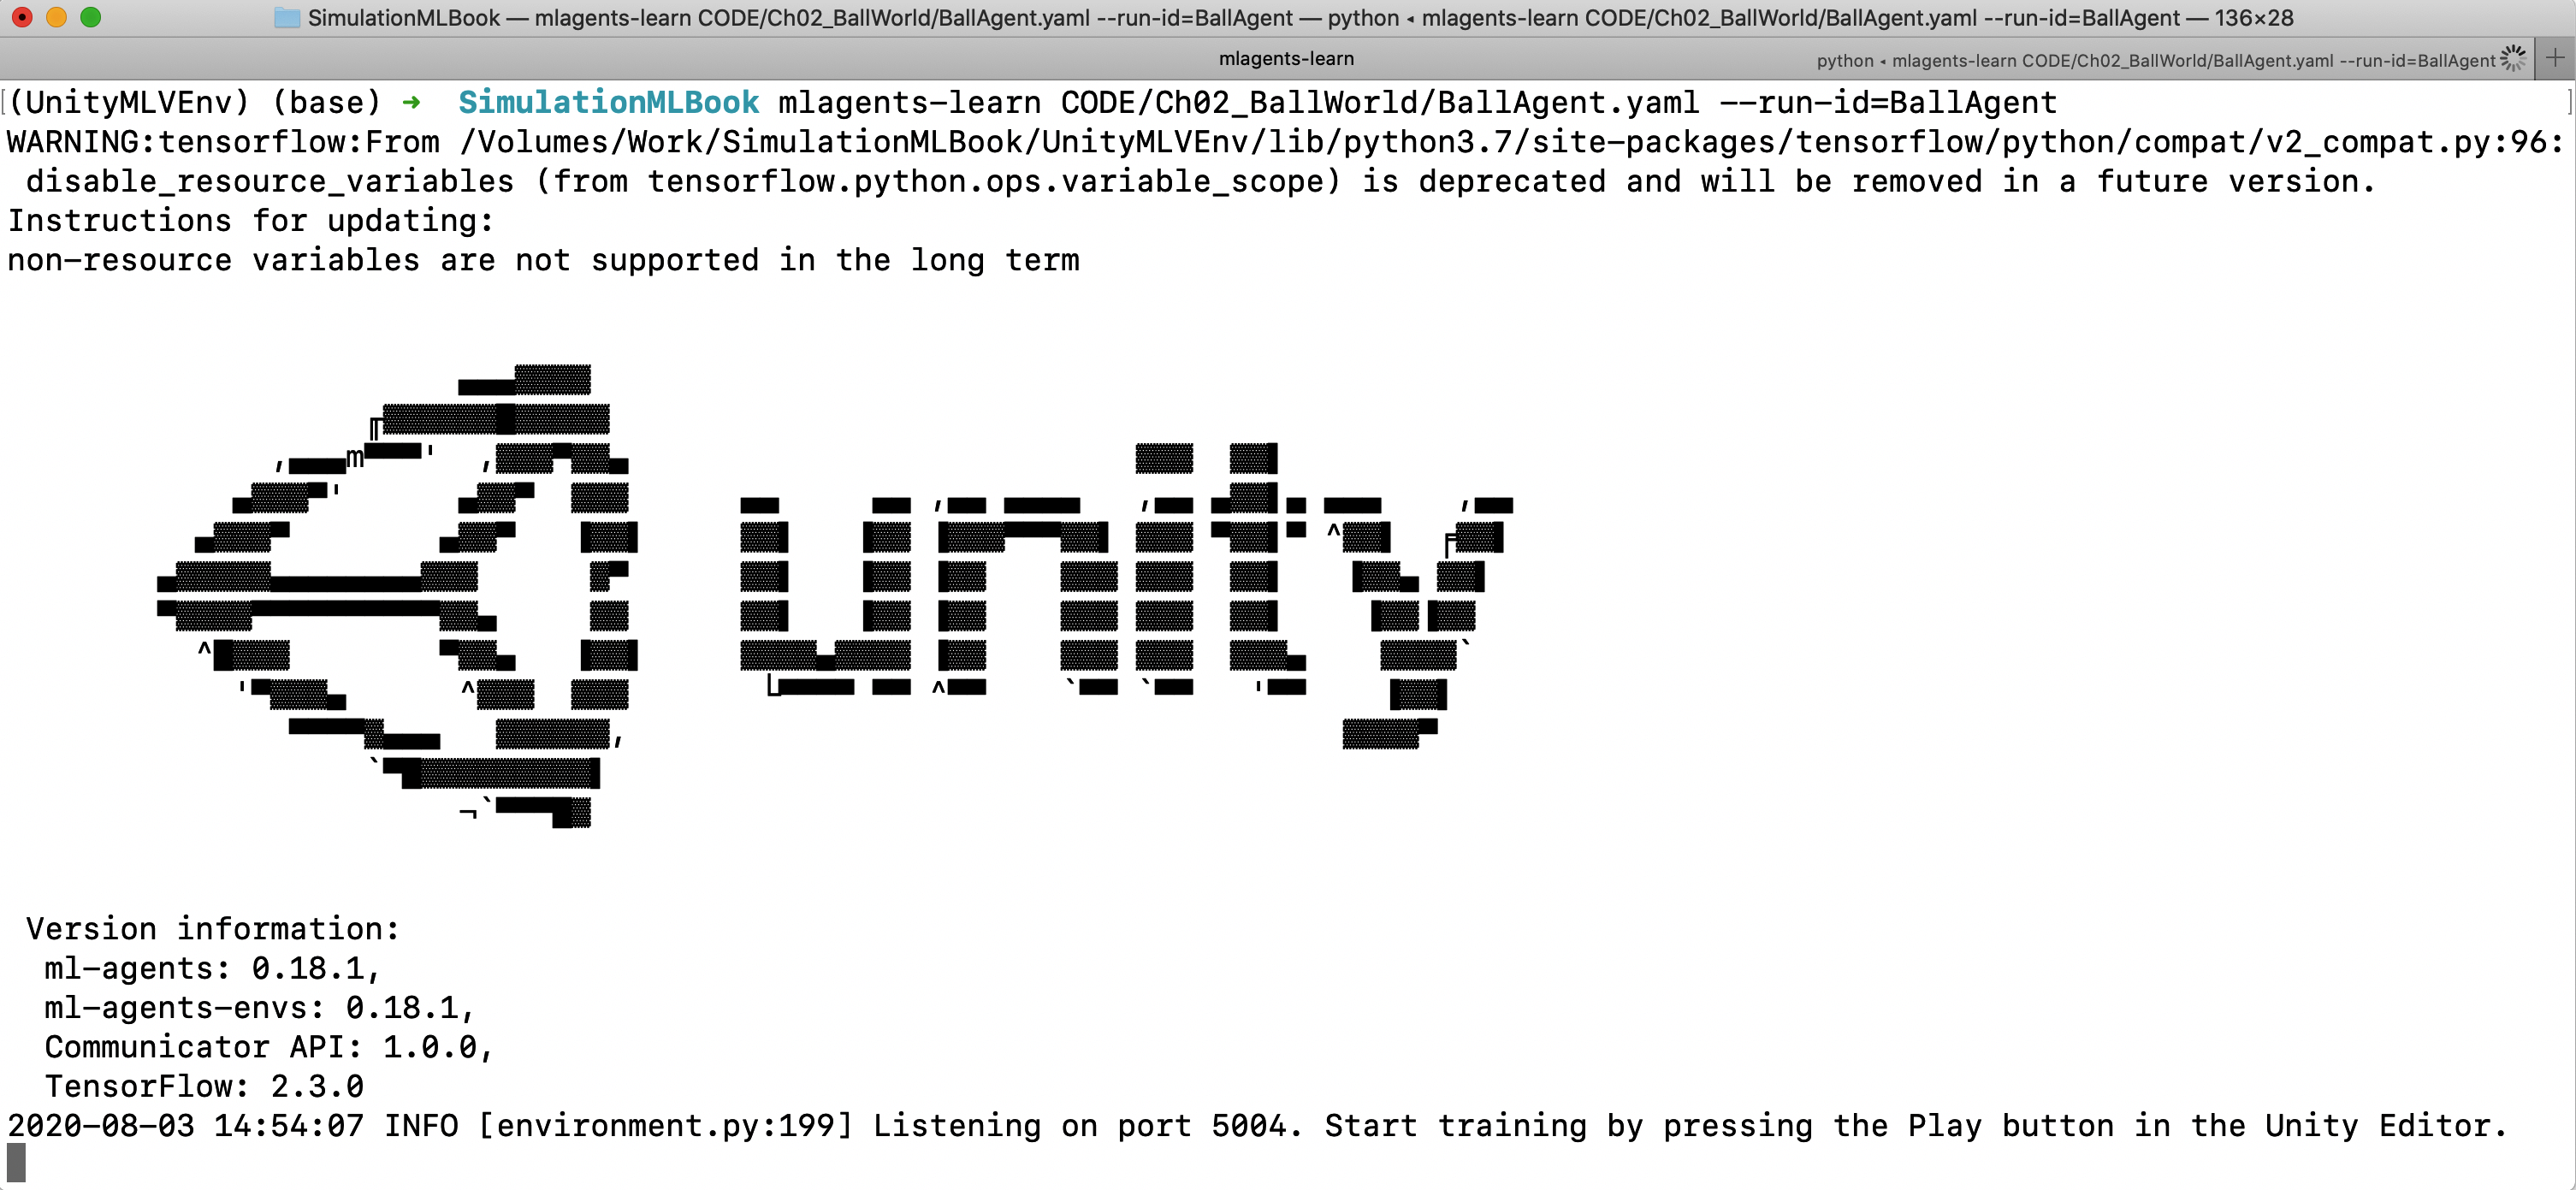
Figure 4-27. The ML-Agents process begins training
You’ll know the training process is working when you see output that looks like Figure 4-28.

Figure 4-28. The ML-Agents process during training
When the training is complete, refer back to “When the Training Is Complete” for a refresher on how to fine the .nn or .onnx file that’s been generated.
Get Practical Simulations for Machine Learning now with the O’Reilly learning platform.
O’Reilly members experience books, live events, courses curated by job role, and more from O’Reilly and nearly 200 top publishers.
