June 2016
Beginner to intermediate
508 pages
9h 40m
English
Although the Raspberry Pi can use a monitor or TV as a display, it is often nice to use a smaller, more specialized display with it. In this chapter, you will explore a range of different displays that can be attached to a Raspberry Pi.
Some of the recipes require the use of a solderless breadboard and male-to-female jumper wires (see Recipe 9.8).
Be sure to check out the accompanying video for this recipe at http://razzpisampler.oreilly.com.
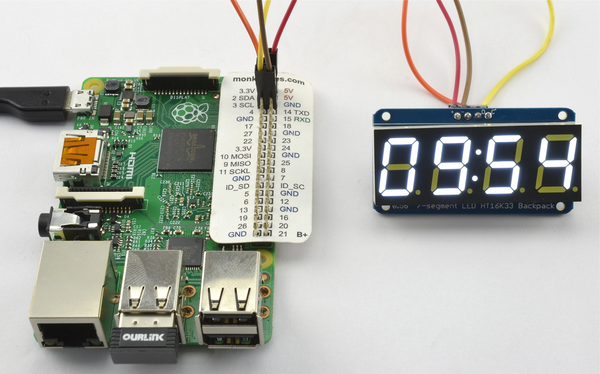
You want to display a four-digit number in an old-fashioned, seven-segment LED display.
Use an I2C LED module, such as the model shown in Figure 14-1, to a Raspberry Pi using female-to-female jumper wires.
To make this recipe, you need:
Four female-to-female jumper wires (see “Prototyping Equipment”)
Adafruit 4×7-segment LED with I2C backpack (see “Modules”)
The connections between the Raspberry Pi and the module are as follows:
Note that Adafruit also supplies a jumbo-sized LED display. This can be ...
Read now
Unlock full access


