Chapter 1. Zero to Sixty: Introducing Rails
Rails may just be the most important open source project to be introduced in the past 10 years. It’s promoted as one of the most productive web development frameworks of all time and is based on the increasingly important Ruby programming language. What has happened so far?
By December 2006, you’re likely to see more published books on Rails than any of Java’s single flagship frameworks, including JSF, Spring, or Hibernate.
The Rails framework has been downloaded at least 500,000 times in only its second year, as of May 2006. These statistics compare favorably with the most popular open source frameworks in any language.[*]
The Rails community mailing lists get hundreds of notes a day, compared to dozens on the most popular web development frameworks in other languages.
The Rails framework has caused an explosion in the use of the Ruby programming language, which has been relatively obscure until recently.
The Rails buzz generates increasingly hot debates on portals that focus on other programming languages. The Java community in particular has fiercely debated the Rails platform.
You don’t have to go far to find great overviews of Rails. You can watch several educational videos that show Rails in action, narrated by the founder David Heinemeier Hansson. You can watch him build simple working applications, complete with a backing database and validation, in less than 10 minutes. But unlike the many quick-and-dirty environments you’ve seen, Rails lets you keep the quick and leave the dirty behind. It lets you build clean applications based on the model-view-controller philosophy. Rails is a special framework.
Sure, Rails has its limitations. Ruby has poor support for object-relational mapping (ORM) for legacy schemas; the Rails approach is less powerful than Java’s approach, for example.[*] Ruby does not yet have flagship integrated development environments. Every framework has limitations, and Rails is no different. But for a wide range of applications, the strengths of Rails far outpace its weaknesses.
Rails Strengths
As you go through this book, you’ll learn how Rails can thrive without all of the extensive libraries required by other languages. Ruby’s flexibility lets you extend your applications in ways that might have been previously unavailable to you. You’ll be able to use a Rails feature called scaffolding to put database-backed user interfaces in front of your customers quickly. Then, as you improve your code, the scaffolding melts away. You’ll be able to build database-backed model objects with just a couple of lines of code, and Rails will fill in the tedious details.
The most common programming problem in today’s typical development project involves building a web-based user interface to manage a relational database. For that class of problems, Rails is much more productive than any other web development framework either of us has ever used. The strengths aren’t limited to any single groundbreaking invention; rather, Rails is packed with features that make you more productive, with many of the following features building on one other:
- Metaprogramming
Metaprogramming techniques use programs to write programs. Other frameworks use extensive code generation, which gives users a one-time productivity boost but little else, and customization scripts let the user add customization code in only a small number of carefully selected points. Metaprogramming replaces these two primitive techniques and eliminates their disadvantages. Ruby is one of the best languages for metaprogramming, and Rails uses this capability well.[†]
- Active Record
Rails introduces the Active Record framework, which saves objects to the database. Based on a design pattern cataloged by Martin Fowler, the Rails version of Active Record discovers the columns in a database schema and automatically attaches them to your domain objects using metaprogramming. This approach to wrapping database tables is simple, elegant, and powerful.
- Convention over configuration
Most web development frameworks for .NET or Java force you to write pages of configuration code. If you follow suggested naming conventions, Rails doesn’t need much configuration. In fact, you can often cut your total configuration code by a factor of five or more over similar Java frameworks just by following common conventions.
- Scaffolding
You often create temporary code in the early stages of development to help get an application up quickly and see how major components work together. Rails automatically creates much of the scaffolding you’ll need.
- Built-in testing
Rails creates simple automated tests you can then extend. Rails also provides supporting code called harnesses and fixtures that make test cases easier to write and run. Ruby can then execute all your automated tests with the
rakeutility.- Three environments: development, testing, and production
Rails gives you three default environments: development, testing, and production. Each behaves slightly differently, making your entire software development cycle easier. For example, Rails creates a fresh copy of the Test database for each test run.
There’s much more, too, including Ajax for rich user interfaces, partial views and helpers for reusing view code, built-in caching, a mailing framework, and web services. We can’t get to all of Rails’ features in this book; however, we will let you know where to get more information. But the best way to appreciate Rails is to see it in action, so let’s get to it.
Putting Rails into Action
You could manually install all of the components for Rails, but Ruby has something called gems.
The gem installer accesses a web site, Ruby Forge, and downloads an application unit, called a gem, and all its dependencies. You can install Rails through gems, requesting all dependencies, with this command:[*]
gem install rails --include-dependencies
That’s it—Rails is installed. There’s one caveat: you also need to install the database support for your given database. If you’ve already installed MySQL, you’re done. If not, go to http://rubyonrails.org for more details on Rails installation. Next, here’s how to create a Rails project:
>rails chapter-1
      create
      create  app/controllers
      create  app/helpers
      create  app/models
      create  app/views/layouts
      create  config/environments
      create  components
      create  db
      create  doc
      create  lib

...
      create  test/mocks/development
      create  test/mocks/test
      create  test/unit
      create  vendor
...
      create  app/controllers/application.rb
      create  app/helpers/application_helper.rb
      create  test/test_helper.rb
      create  config/database.yml
...
We truncated the list, but you get the picture.
Organization
The directories created during installation provide a place for your code, scripts to help you manage and build your application, and many other goodies. Later, we’ll examine the most interesting directories in greater detail. For now, let’s take a quick pass through the directory tree in the project we created:
- app
This application organizes your application components. It’s got subdirectories that hold the view (views and helpers), controller (controllers), and the backend business logic (models).
- components
This directory holds components—tiny self-contained applications that bundle model, view, and controller.
- config
This directory contains the small amount of configuration code that your application will need, including your database configuration (in database.yml), your Rails environment structure (environment.rb), and routing of incoming web requests (routes.rb). You can also tailor the behavior of the three Rails environments for test, development, and deployment with files found in the environments directory.
- db
Usually, your Rails application will have model objects that access relational database tables. You can manage the relational database with scripts you create and place in this directory.
- doc
Ruby has a framework, called RubyDoc, that can automatically generate documentation for code you create. You can assist RubyDoc with comments in your code. This directory holds all the RubyDoc-generated Rails and application documentation.
- lib
You’ll put libraries here, unless they explicitly belong elsewhere (such as vendor libraries).
- log
Error logs go here. Rails creates scripts that help you manage various error logs. You’ll find separate logs for the server (server.log) and each Rails environment (development.log, test.log, and production.log).
- public
Like the public directory for a web server, this directory has web files that don’t change, such as JavaScript files (public/javascripts), graphics (public/images), stylesheets (public/stylesheets), and HTML files (public).
- script
This directory holds scripts to launch and manage the various tools that you’ll use with Rails. For example, there are scripts to generate code (generate) and launch the web server (server). You’ll learn much more about using these scripts throughout this book.
- test
The tests you write and those Rails creates for you all go here. You’ll see a subdirectory for mocks (mocks), unit tests (unit), fixtures (fixtures), and functional tests (functional). We comprehensively cover testing in Chapter 7.
- tmp
Rails uses this directory to hold temporary files for intermediate processing.
- vendor
Libraries provided by third-party vendors (such as security libraries or database utilities beyond the basic Rails distribution) go here.
Except for minor changes between releases, every Rails project will have the same structure, with the same naming conventions. This consistency gives you a tremendous advantage; you can quickly move between Rails projects without relearning the project’s organization. The Rails framework itself also relies on this consistency because the different Rails frameworks will often discover files solely on naming conventions and directory structure. For example, later in this example, you’ll see the controller invoke views without any custom code.
The Web Server
Now that we’ve got a project, let’s start a server. Type cd chapter-1 to change to your project directory. Use the script/server script to start an instance of the WEBrick server, configured for development. If you’re running Windows, preface each call to a script with ruby, and you can use either forward or backward slashes. If you’re using a Unix derivative, you can omit the ruby keyword:
> ruby script/server
=> Booting WEBrick...
=> Rails application started on http://0.0.0.0:3000
=> Ctrl-C to shutdown server; call with --help for options
[2006-05-11 07:32:08] INFO  WEBrick 1.3.1
[2006-05-11 07:32:08] INFO  ruby 1.8.4 (2005-12-24) [i386-mswin32]
[2006-05-11 07:32:08] INFO  WEBrick::HTTPServer#start: pid=94884 port=3000
Notice a couple of details:
The server started on port 3000. You can change the port by editing the script/server script. See the sidebar "Configuring the Server" for more configuration options.
We started an instance of WEBrick, a pure Ruby server.
Ruby will also let you use a backward slash as a path delimiter on the command line, but on Unix you must use the forward slash. Some prefer the backslash because it allows you to use the tab completion feature in the MS-DOS command prompt.
Point your browser to http://127.0.0.1:3000/ or http://localhost:3000/. You’ll see the Rails welcome screen pictured in Figure 1-1. Don’t worry about the details of the request yet; for now, know that Rails is running and working correctly.

So far, you’ve only typed a few words, and you’ve already set up the build environment and the web server, and verified that the server is running. In the development environment, you’ll normally leave the server up, rebooting only to change the database configuration.
Choosing a Server
Rails will run on many different web servers. Most of your development will be done using WEBrick, but you’ll probably want to run production code on one of the alternative servers. Let’s look briefly at the available servers.
WEBrick
WEBrick, the default server for Rails, is written entirely in Ruby. It supports the standards you’ll need—HTTP for communications, HTML for web pages, and RHTML for embedding Ruby code into web pages for dynamic content. WEBrick has some important advantages:
It comes with Ruby, so it’s free and is always available for your use or for packaging with your projects.
It’s built into Rails, so you don’t have to go through any special effort for integration.
It can make direct calls to your Rails application because they are both written in Ruby.
It’s simple to use.
Apache
Although WEBrick is the most convenient choice, it’s not the most scalable or flexible choice. The Apache web server is the most widely deployed web server in the world. You can choose from an incredible array of plug-ins to run dozens of programming languages or serve other kinds of dynamic content. Apache scales well, with outstanding caching plug-ins and good support for load balancers and sprayers (machines that efficiently spread requests across multiple web servers). If you’re looking for a safe solution, look no further than the Apache web server.
lighttpd
Apache is a good general-purpose web server, but it’s not the most specialized server. lighttpd is a lightweight web server that’s built for one thing: speed. It serves static content such as HTML web pages and images very quickly, and supports applications through an application interface called FastCGI. lighttpd does not have nearly as many flexible plug-ins or the marketing clout of the Apache web server, but if you’re looking for a specialized server to serve static content and Rails applications quickly, lighttpd could be your answer. It’s fairly young, but it has a great reputation for speed among Rails enthusiasts.
Mongrel
Although Apache and lighttpd are very fast and scalable production servers, configuring them to serve your Rails application can sometimes be challenging, and it is never as simple as WEBrick. A new web server, Mongrel, may just change all of that. Mongrel combines the advantages of WEBrick (because it’s written in Ruby) and lighttpd (because it’s written for speed). This combination could make Mongrel an excellent choice for both development and production. It’s even younger than lighttpd, but it looks so promising that it has already received backing from a major corporation to speed its development.
Other web servers
Theoretically, any web server that supports CGI can serve a Rails application. Unfortunately, CGI with Rails is dead slow, so it is really not suitable for production. However, if you are running in a specialized environment that has its own web server, you can probably get it to serve your Rails application using the FastCGI or SCGI interfaces. Do a web search first because it’s very likely that someone else has already done it and posted instructions. For example, if you must deploy your Rails application on Microsoft’s IIS, you will find that many developers have done this already, and the instructions are easy to find. You’ll probably see other web servers rapidly move to support Rails.
Now that your server is up, it’s time to write some code. We’ll focus on simple controllers and views in the rest of this chapter.
Creating a Controller
You’ve seen that Rails organizes applications into pieces with a model, view, and controller. We’ll start with the controller. Use the generate script (see the sidebar "script/generate“) to create a controller. We’ll specify the type of object to create first and then the name of the new controller. Type:
> ruby script/generate controller Greeting
      exists  app/controllers
/
      exists  app/helpers/
      create  app/views/greeting
      exists  test/functional/
      create  app/controllers/greeting_controller.rb
      create  test/functional/greeting_controller_test.rb
      create  app/helpers/greeting_helper.rb
You might not have expected to see so much activity. Rails created your expected controller--greeting_controller.rb. But you also got a few other files as well:
- application.rb
There is not yet a controller for the whole application, so Rails created this one. It will come in handy later as a place to anchor application-wide concerns, such as security.
- views/greeting
Rails knows that controllers and views usually come in pairs, so it created a directory called views/greeting.
- greeting_controller_test.rb
Rails also created a test for your new controller because most Rails developers build automated unit tests to make it easy to build in and maintain quality.
- greeting_helper.rb
Rails helpers provide a convenient place to prevent repetition or tedious code from cluttering your views.
Ruby developers created Rails to solve their own problems before generalizing and releasing the tool to solve your problems too. You’re seeing an example of excellent experience-based design. Early Rails users noticed that right after creating a controller, they usually needed additional layers of the application, and so they modified the controller generator to save themselves a few keystrokes. Rails inventors eat their own dog food.
Running the Controller
Let’s run the application; point your browser to http://127.0.0.1:3000/greeting. You’ll get an error message telling you that index is an unknown action. Let’s find out why. Edit the new controller at the path app/controller/greeting_controller.rb:
    class GreetingController < ApplicationController
endYou haven’t told Rails to do anything yet, so getting some kind of error seems logical. Still, you’ll need a little more background before you can fix that problem. Figure 1-2 shows how Rails controllers work.

Rails uses the Action Pack framework to manage controllers. Web browsers communicate with servers by sending requests over the HTTP protocol. For our greeting application, the request was simply to load a URL. The first part of a URL identifies a machine, and the second part identifies a web resource. In the Action Pack, the resource has at least three parts: a controller, some action to perform on a controller, and an identifier of a resource. Actions map directly onto controller methods. For example, for this URL:
http://www.spatulas.com/shopping_cart/total/45
http://www.spatulas.com/ identifies the web server, shopping_cart identifies the controller, total identifies the action, and 45 identifies a resource—probably a cart. The web server routes incoming requests to a Ruby script in the Rails framework called the dispatcher.
Rails has one dispatcher per web server. Next, the Rails dispatcher parses the URL and invokes the appropriate action on the appropriate controller. The controller action may then call the model and ultimately invokes a view.
By default, if you call a controller without specifying an action, Rails calls the index action. Now, the error makes more sense. When we specified the URL app/controller/greeting, we supplied a controller without an action, so Rails defaulted to a nonexistent index action. You can fix the problem by adding a method called index to GreetingController. Let’s keep things simple by making the index method print out HTML directly, as shown in Example 1-1.
class GreetingController < ApplicationController
def index
render :text => "<h1>Welcome to your first Rails application<h1>"
end
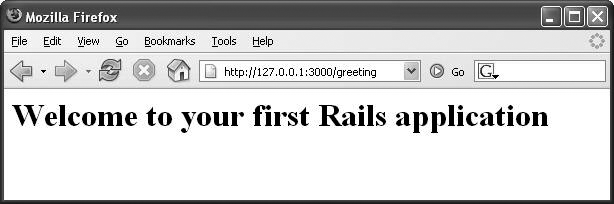
endSave your code and reload your browser—you’ll get the web page in Figure 1-3. Even though you changed some code, you didn’t have to restart the server, redeploy your application, or do anything but reload your browser. This quick turnaround time, called a rapid feedback loop, is a hallmark of Ruby and Rails. Often, new Rails developers point to the rapid feedback loop as the feature that affected their productivity more than anything else.
Building a View
You now have a controller that renders text, but this design can take you only so far. If you want to follow Rails MVC conventions, you should render text in a separate view instead of a controller. The sloppy design is easy enough to fix. Instead of printing raw text in a controller, render it in a view. As with many web frameworks, Rails can use a template strategy for the view. For Rails, a template is simply an HTML page with Ruby code mixed in. The Ruby code executes on the server, adding dynamic content to the HTML page.
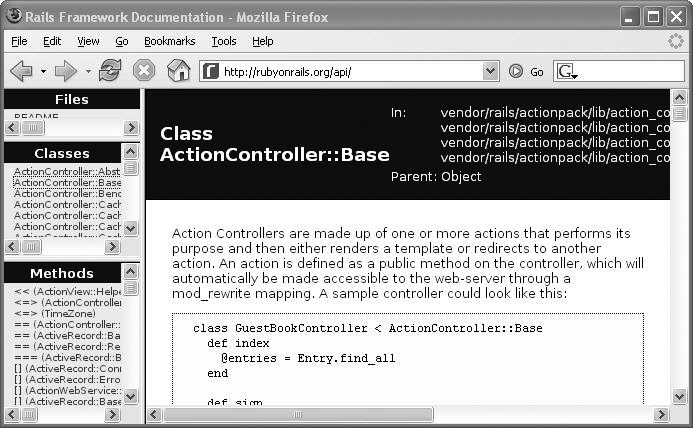
Unlike many open source projects, Rails has excellent documentation. You can find it all at http://api.rubyonrails.com. You’ll find overviews, tutorials, and even movies. You can always find the API document for the latest version of Ruby on Rails at the site, with a full set of documents for every class in the Rails API. You can also find it with your Rails installation.
The excellent Rails documentation is not an accident. Like Java, Ruby comes with a utility called RubyDoc that generates documentation from source code and comments that you provide within the source code. When you install a gem, it also installs the documentation for the gem. Figure 1-4 shows the documentation for a controller.
With Rails, you can generate the view and some helpers that the view will need. Type the generate command to generate a new controller, greeting, with a view, index. (You do this to tie the view and controller together.) When it asks you whether to overwrite the controller, type n for no:
>rubyscript/generate controller Greeting indexexists app/controllers/ exists app/helpers/ exists app/views/greeting exists test/functional/ overwrite app/controllers/greeting_controller.rb? [Ynaq]nskip app/controllers/greeting_controller.rb overwrite test/functional/greeting_controller_test.rb? [Ynaq]aforcing controller force test/functional/greeting_controller_test.rb force app/helpers/greeting_helper.rb create app/views/greeting/index.rhtml
The generator created the view, index.rhtml, with helper and test files. Keep the index method, so Action Pack can find the action, but take the rest of the code out of the index method:
class GreetingController < ApplicationController
   def index
   end
end
Unlike most MVC frameworks, you didn’t specify a view. If your controller doesn’t render anything, Rails uses naming conventions to find the right view. The controller’s name determines the view’s directory, and the controller’s method name determines the name of the view. In this case, Action Pack fires the view in app/view/greeting/index.rhtml. You didn’t have to edit any XML files or type any additional code. You provide consistent naming conventions, and Rails infers your intent.
Now, edit the view. You’ll find this data:
<h1>Greeting#index</h1>
<p>Find me in app/views/greeting/index.rhtml</p>
Reload your browser to see the previous message in HTML. Rails tells you where to find the file, should you ever render an unimplemented view. Rails is full of nice finishing touches like these.
Tying the Controller to the View
In MVC, the view usually renders model data provided by the controller. Let’s set an instance variable in the controller and render it in the view. First, add an instance variable called @welcome_message to the controller:
class GreetingController < ApplicationController
   def index
      @welcome_message = "Welcome to your first Rails application"
   end
end
Now, display the new message in the view by adding a Ruby expression between <%= and %> tags. Rails renders the value of the expression within these tags, just as if the value of the expression had been printed in place. Here’s a view that prints your welcome message as a level one heading:
<h1><%= @welcome_message %></h1>
Reload. You’ll see the same output you got in Example 1-1, though the structure of the application is different. In Example 1-1, you rendered your view within the controller. Here, you built an RHTML template. Your HTML tags provided static structure and style, and your Ruby code provided dynamic content; in this case, a variable set within the controller.
Expressions and Scriptlets
When you’re embedding Ruby code, you’ve got two options. Scriptlets are Ruby code, placed between <% and %> tags. Scriptlets rely on side effects, or the output of the Ruby code. Expressions are Ruby expressions
placed between <%= and %> tags. The expression presents the value returned by the Ruby code.
You can experiment with the interaction between the controller and view. We’ve changed the controller and view for greeting to show a few examples of expressions and scriptlets in action. First, we’ll set a few values in the controller:
class GreetingController < ApplicationController
  def index
    @age=8
    @table={"headings" => ["addend", "addend", "sum"],
            "body"     => [[1, 1, 2], [1, 2, 3], [ 1, 3, 4]]
           }
  end
end
Next, here’s the view showing expressions and scriptlets, with both interacting with values set in the controller:
<h1>Simple expression</h1>
<p>Tommy is <%= @age %> years old.</p>
Now, display the value of the instance variable @age, which was set in the controller:
<h1>Iteration using scriptlets</h1>
<% for i in 1..5 %>
  <p>Heading number <%= i %> </p>
<% end %>
Iterate with a scriptlet and show the current count with an expression:
<h1>A simple table</h1>

<table>
  <tr>
    <% @table["headings"].each do |head| %>
      <td>
        <b><%= head %></b>
      </td>
    <% end %>
  </tr>

  <% @table["body"].each do |row| %>
    <tr>
      <% row.each do |col| %>
        <td>
           <%= col %>
        </td>
      <% end %>
    </tr>
  <% end %>

</table>
Finally, use both techniques to display the contents of @table.
You’ll get the results shown in Figure 1-5.

Under the Hood
As shown earlier, each time you submit a URL, you’re creating an HTTP request, which fires a controller action. Any MVC framework designer needs to decide between reusing the same controller for each request and creating a new controller copy per request. Rails does the latter strategy, which it calls request scope. Each HTTP request results in a new controller instance, meaning that you’ll also get a new set of instance variables for each HTTP request. That’s going to affect you in at least two different ways:
On the plus side, you don’t need to worry about threading in your controllers because each request gets a private copy of the controller’s instance data.
On the minus side, it will be harder for you to share instance data between requests. Specifically, if you set instance variables in one controller action method, don’t expect to be able to use them in later HTTP requests. You’ll need to share them in a session.
What’s Next?
You’ve created a Rails project. You’ve created a controller and invoked it from a browser. You’ve also created a view and learned how views can interact with controllers and with the Ruby language. That’s a good foundation, but you’ve seen only two pieces of the model-view-controller design pattern. In the next chapter, you’ll learn how models work. We’ll create a database schema and let Rails use the schema to generate our model for us. We’ll then use a Rails framework to help manage relationships between the different parts of the application.
[*] The number 500,000 is actually a conservative estimate. Download statistics for a popular delivery vehicle, called gems, make it easy to track the number of Rails distributions by gems, but many other distributions exist, such as the Locomotive distribution on Mac OS X. The real download statistics could easily be twice this number.
[*] For example, Hibernate supports three kinds of inheritance mapping, but Rails supports only single-table inheritance. Hibernate supports composite keys, but Rails is much more limited.
[†] Rails also uses code generation but relies much more on metaprogramming for the heavy lifting.
[*] If you want to code along with us, make sure you’ve installed Ruby and gems. Appendix A contains detailed installation instructions.
Get Ruby on Rails: Up and Running now with the O’Reilly learning platform.
O’Reilly members experience books, live events, courses curated by job role, and more from O’Reilly and nearly 200 top publishers.

