Chapter 4. Using JavaScript with Flash for SEO
JavaScript can greatly enhance both the user experience and search engine optimization (SEO) for the Flash content in your websites. Using some third-party JavaScript, you can have an incredible amount of control over what users see when they visit your site without Flash, and you can even create deep links to your applications in any of their states. In this chapter, we’ll look at how to use JavaScript in conjunction with Flash to add these enhancements.[1]
Prerequisite JavaScript Experience
You may be wondering how much JavaScript you’ll need to know to make it through this chapter. Fortunately for those who aren’t familiar with JavaScript, the code we’re going to use is very simple to implement in a site, especially if you’re already familiar with ActionScript.
JavaScript is an ECMAScript language, meaning it’s compliant with certain standards (see http://www.ecma-international.org/publications/standards/Ecma-262.htm). ActionScript is also an ECMAScript language, so it has many similarities to JavaScript. Since ActionScript 3.0 is based on a different ECMAScript version than JavaScript, there are a few important differences between the two languages. The version of ActionScript that most resembles JavaScript is ActionScript 1.0, but if you’re familiar with ActionScript 2.0 or ActionScript 3.0, JavaScript should be pretty easy for you to learn.
A detailed study of JavaScript is beyond the scope of this book. However, as with the other code we’ve used up to this point, we’ll discuss all of the JavaScript code we write.
Essential Flash SEO JavaScript
When using JavaScript for SEO, you’ll need to become familiar with
two essential code libraries: SWFObject and SWFAddress. Adding the capabilities of these
libraries to your applications will dramatically increase the usability
and SEO of your sites.
SWFObject
SWFObject is the generally accepted standard of using Flash
content on the Web, for several reasons. Aside from it being
standards-compliant, all major browsers (Firefox, Internet Explorer,
Safari, Opera, etc.) support JavaScript, and therefore SWFObject, and it’s extremely easy to
use.
The latest version of SWFObject, which was originally developed by
Geoff Stearns (http://blog.deconcept.com/), was
created with help from other developers such as Michael Williams and
Bobby Van Der Sluis (http://www.bobbyvandersluis.com/).
Benefits of SWFObject
Using the SWFObject library
for Flash SEO offers many benefits. Here are some of the most
prominent benefits:
Standards-compliant
Supported by all major browsers on all major operating systems
Easy to use
Uses JavaScript to override “click to activate” messages in Internet Explorer
No more worrying about browser-specific markup (
<object>and<embed>tags) being interpreted differently by browsersSEO-friendly way to provide alternative content
Though Flash writes HTML with version detection for you with
effectively one click (File→Publish), using SWFObject is worth the added effort. For
SEO and usability, there are very few reasons
not to use SWFObject (like when embedding Flash
content on a social networking site, for example) for all of the
Flash content you create.
Note
For full documentation of SWFObject, including a full list of
features and benefits, see its section in Google Code at http://code.google.com/p/swfobject/wiki/documentation.
Downloading SWFObject
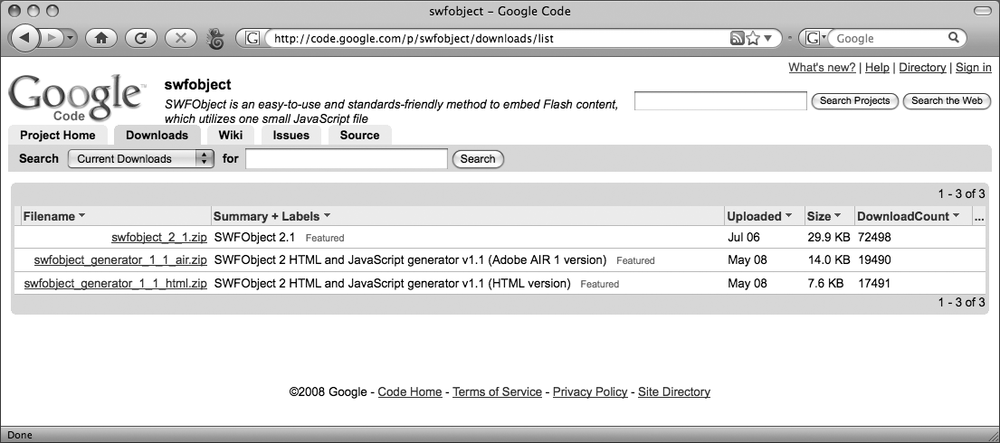
The official site for SWFObject is at Google Code, http://code.google.com/p/swfobject/. From there, you
can download the necessary code files for the latest version of
SWFObject from the Downloads
page, at http://code.google.com/p/swfobject/downloads/list,
shown in Figure 4-1.
Once you’ve downloaded SWFObject, unzip the file and you’ll find
a folder called swfobject. The
swfobject folder contains some
demo files, source files, and the main file you’ll need: swfobject.js. Whenever you use SWFObject, you’ll need to copy swfobject.js into a directory that’s
accessible by the HTML file that’ll house your Flash content.
Using SWFObject in a Flash application
You can publish SWFObject
content via two methods: the static publishing method and the
dynamic publishing method. The method you choose depends on your
specific needs for a project.
Using the static publishing method
The static publishing method uses standards-compliant HTML markup to embed both Flash content and alternative content. Static publishing has two key advantages: standards-compliant markup, and JavaScript is not required to embed Flash content. In other words, even if someone viewing the page doesn’t have JavaScript enabled, he can still see the Flash content if he has the appropriate Flash Player version.
Here’s an example of using SWFObject (pasted from the SWFObject documentation page):
<!DOCTYPE html PUBLIC "-//W3C//DTD XHTML 1.0 Strict//EN"
"http://www.w3.org/TR/xhtml1/DTD/xhtml1-strict.dtd">
<html xmlns="http://www.w3.org/1999/xhtml" lang="en" xml:lang="en">
  <head>
    <title>SWFObject - step 3</title>
    <meta http-equiv="Content-Type" content="text/html; charset=
    iso-8859-1" />
    <script type="text/javascript" src="swfobject.js"></script>

    <script type="text/javascript">
    swfobject.registerObject("myId", "9.0.0", "expressInstall.swf");
    </script>

  </head>
  <body>
    <div>

      <object id="myId" classid="clsid:D27CDB6E-AE6D-11cf-96B8-444553540000"
width="780" height="420">

        <param name="movie" value="myContent.swf" />
        <!--[if !IE]>-->
        <object type="application/x-shockwave-flash" data="myContent.swf"
width="780" height="420">
        <!--<![endif]-->
          <p>Alternative content</p>
        <!--[if !IE]>-->
        </object>
        <!--<![endif]-->
      </object>
    </div>
  </body>
</html>
Let’s walk through this code, starting with the outer <object> tag. Note its attributes: id, classid, width, and height. Also note the <param> element. This element and
these attributes are necessary for using SWFObject. Here’s what the values
represent:
idThe
idattribute is the identifier for the<object>element, which JavaScript uses inSWFObjectto reference this element.classidThe
classidattribute corresponds to the type of content the<object>element will hold. For Flash content, this value will always beD27CDB6E-AE6D-11cf-96B8-444553540000.widthThe
widthattribute refers to the pixel width of the Flash content.weightThe
heightattribute refers to the pixel height of the Flash content.paramThe
<param>element holds name and value pairs with information for the<object>element, including the location of the SWF file, as shown in the preceding code.
Note
Internet Explorer interprets the outer <object> element, and the other
web browsers read the inner <object> element (as defined by
the !IE conditional statement).
There are two object elements because Internet Explorer reads
<object> tags differently
from other web browsers. Other browsers use the type attribute to tell the browser to
expect Flash, whereas Internet Explorer uses the clsid attribute which, like the type attribute in the inner <object> element, will always have
the same value for Flash content.
Within the outer <object> element, you’ll notice some
HTML conditional statements that look like the following
code:
<!--[if !IE]>-->
<!--<![endif]-->
These statements are used to run blocks of HTML code that meet certain conditions, just like conditional statements in ActionScript. The code in this example will run the code within the two lines only if the browser is not Internet Explorer.
The inner <object> element contains syntax
acceptable by non-Internet Explorer browsers. All four attributes in
this element are required, and they correspond to the attributes and
elements in the outer, Internet Explorer <object> element. The width and height attributes represent pixel values
for width and height, just like the outer <object> tag. Here’s what the other
values represent:
All alternative content is contained within the inner <object> tag, and all browsers can
read it. This is where you may want to place a title and description
for your Flash content, as well as any other information about it
that you’d like. This alternative content is
indexed, so make sure to use your HTML SEO skills to properly
communicate your Flash content to the search engines.
To use SWFObject, you’ll
need a link to swfobject.js in
a <script> element, shown
in the following code:
<script type="text/javascript" src="swfobject.js"></script>
Once you have a link to swfobject.js, you can create a separate
script block in your HTML file and run the swfobject.registerObject() method to
register your Flash content with SWFObject. The swfobject.registerObject() method accepts
three string-valued parameters, the third of which is optional.
First, the method accepts the id
of the outer <object>
element; second, the minimum version of Flash Player required to
view the Flash content; and third, the file for a customized Flash
Player Express Install version. Here’s what the swfobject.registerObject() method looks like
in code:
<script type="text/javascript">
    swfobject.registerObject("myId", "9.0.0", "expressInstall.swf");
</script>
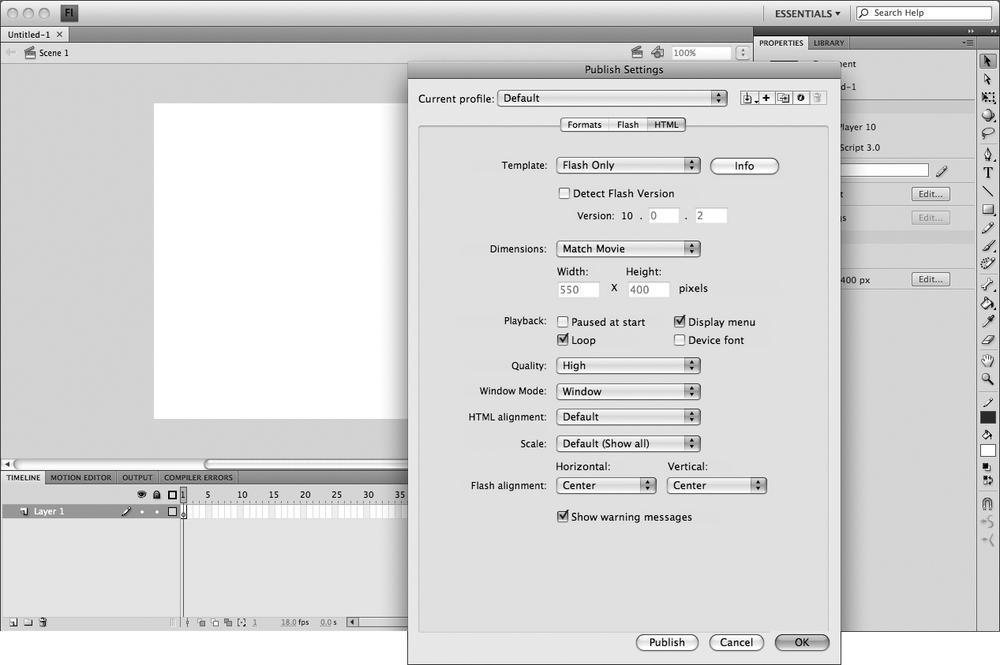
You can find the version of Flash Player that you’re publishing to in the Publish Settings window of Flash. In the Publish Settings window, click the HTML tab, and you’ll see the Flash Player version under the Detect Flash Version checkbox (shown in Figure 4-2).
Flash Player Express Install upgrades an installation of Flash Player if someone visiting your site has an earlier version of that which is required to view your Flash content. You can find more information about Flash Player Express Install at http://kb.adobe.com/selfservice/viewContent.do?externalId=6a253b75&sliceId=1.
Using the dynamic publishing method
The dynamic publishing method for SWFObject provides two key features:
excellent integration with scripted applications, and removal of
“click to activate” controls in Internet Explorer. Also, dynamic
publishing uses less code than static publishing.
Dynamic publishing is dependent on JavaScript to work properly. If someone views your content in a browser that has poor JavaScript support (such as the Sony PSP), she won’t see the Flash content even if she has the appropriate Flash Player version. Though most browsers have JavaScript support, and most people browse the Web with JavaScript enabled, you may prefer to use static publishing if you know some people will be viewing your content without sufficient JavaScript power.
Dynamic publishing is primarily JavaScript-driven, and thus
requires less markup code to write. Here’s an example of dynamic
publishing (pasted from SWFObject’s documentation page):
<!DOCTYPE html PUBLIC "-//W3C//DTD XHTML 1.0 Strict//EN"
"http://www.w3.org/TR/xhtml1/DTD/xhtml1-strict.dtd">
<html xmlns="http://www.w3.org/1999/xhtml" lang="en" xml:lang="en">
  <head>
    <title>SWFObject dynamic embed - step 3</title>
    <meta http-equiv="Content-Type" content="text/html; charset=
iso-8859-1" />
    <script type="text/javascript" src="swfobject.js"></script>

    <script type="text/javascript">
    swfobject.embedSWF("myContent.swf", "myContent", "300", "120", "9.0.0");
    </script>

  </head>
  <body>
    <div id="myContent">
      <p>Alternative content</p>
    </div>
  </body>
</html>
First off, you’ll notice that dynamic publishing requires
significantly less markup code. This is because SWFObject does all the JavaScript work to
replace your alternative content with the HTML necessary for Flash
content, if the user has the appropriate version of Flash
Player.
Let’s review the code. Notice that the alternative content is
placed inside a <div>
element with an id value of
myContent. With dynamic
publishing, SWFObject writes all of the HTML
<object> tag data.
Like the static publishing method, dynamic publishing requires that you link to the external file, swfobject.js. You then can place the code to use the dynamic publishing method in a script block, and it’ll look similar to the following code:
<script type="text/javascript">
swfobject.embedSWF("myContent.swf", "myContent", "300", "120", "9.0.0");
</script>
The JavaScript method that uses dynamic publishing is called
swfobject.embedSWF(), and it takes
nine parameters, the last four of which are optional. Here are the
parameter names, along with data types accepted, and descriptions
(from the SWFObject
documentation):
swfUrl(String, required)id(String, required)Specifies the
idof the HTML element (containing your alternative content) that you’d like to have replaced by your Flash content.width(String, required)height(String, required)version(String, required)Specifies the Flash Player version for which your SWF is published (the format is “major.minor.release”).
expressInstallSwfurl(String, optional)Specifies the URL of your Express Install SWF and activates Adobe Express Install (http://www.adobe.com/cfusion/knowledgebase/index.cfm?id=6a253b75). Please note that Express Install will fire only once (the first time it’s invoked), that it’s supported only by Flash Player 6.0.65 and later on Windows or Mac platforms, and that it requires a minimal SWF size of 310x137 px.
flashvars(Object, optional)params(Object, optional)Specifies your nested
objectelementparamswith name/value pairs.attributes(Object, optional)
It’s also important to note that you can skip optional
parameters as long as they’re in the same order. Skipped parameters
can take a value of false or
{} (for Object data types such as flashvars).
Using the SWFObject generator
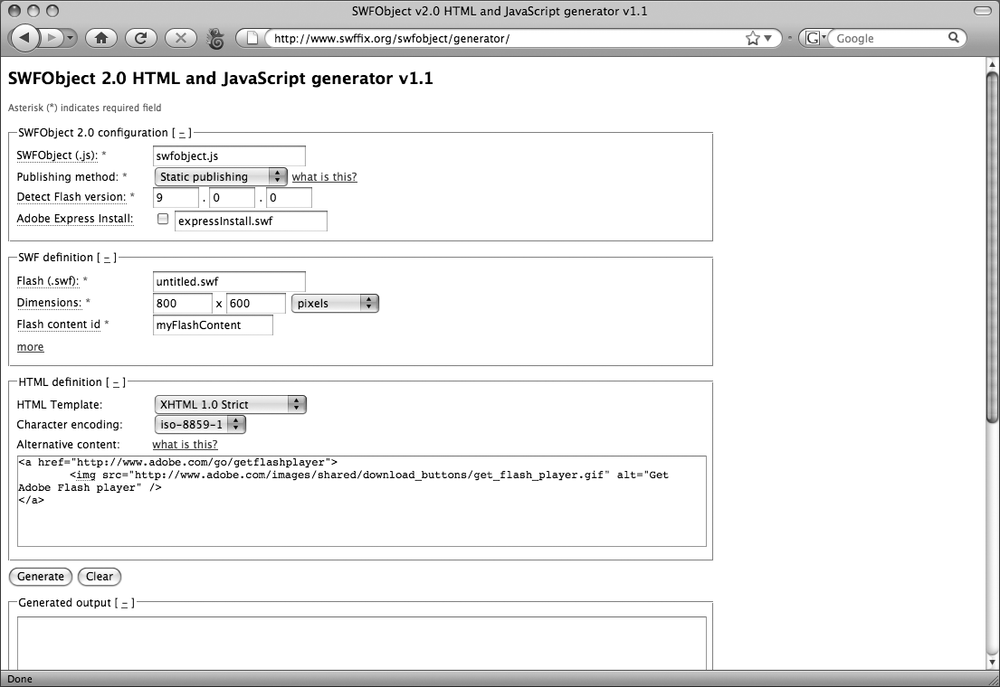
When using SWFObject, one of the options for writing
the code is to use the SWFObject
HTML and JavaScript generator at http://www.bobbyvandersluis.com/swfobject/generator/index.html.
The generator (shown in Figure 4-3) creates the
HTML and JavaScript for either the dynamic or the static publishing
method automatically. Simply fill out the form, click Generate, and
copy and paste the code given.
Here’s an example of code that uses the static publishing method created by the generator:
<!DOCTYPE html PUBLIC "-//W3C//DTD XHTML 1.0 Strict//EN"
"http://www.w3.org/TR/xhtml1/DTD/xhtml1-strict.dtd">
<html xmlns="http://www.w3.org/1999/xhtml" lang="en" xml:lang="en">
    <head>
        <title></title>
        <meta http-equiv="Content-Type" content="text/html; charset=
iso-8859-1" />
        <script type="text/javascript" src="swfobject.js"></script>
        <script type="text/javascript">
            swfobject.registerObject("seoFlashContent", "10.0.0",
"expressInstall.swf");
        </script>
    </head>
    <body>
        <div>
            <object classid="clsid:D27CDB6E-AE6D-11cf-96B8-444553540000"
width="800" height="600" id="seoFlashContent">
                <param name="movie" value="seo.swf" />
                <!--[if !IE]>-->
                <object type="application/x-shockwave-flash" data="seo.swf"
width="800" height="600">
                <!--<![endif]-->
                    <a href="http://www.adobe.com/go/getflashplayer">
                        <img
src="http://www.adobe.com/images/shared/download_buttons/get_flash_player.gif"
alt="Get Adobe Flash player" />
                    </a>
                <!--[if !IE]>-->
                </object>
                <!--<![endif]-->
            </object>
        </div>
    </body>
</html>
If you’re just dropping Flash content into an already created web page, you can copy the code you need from the generator and paste it in your page. There’s no disadvantage to using the generator, so if you prefer code to be written for you, go for it!
SWFObject is an amazing
tool for Flash and SEO, and it can greatly increase your control
over how search engines index your Flash content by allowing you to
provide fully searchable HTML content as an alternative to Flash
content. In this alternative content, you can provide a title,
description, or any other information in your Flash movie that
should be searchable. Make sure to use it whenever you put Flash on
the Web.
Note
A comprehensive study of SWFObject is beyond the scope of this
book. Go to http://code.google.com/p/swfobject/wiki/documentation
to learn more about SWFObject.
SWFAddress
SWFAddress is an outstanding tool for Flash SEO. Using SWFAddress, you can deep-link to any state
of your Flash application, and while navigating through your
application you can update the browser window. This is great for SEO
because it allows you to define links to any state of your
application, and search engines index all of those links.
Benefits of SWFAddress
By using SWFAddress, you
can get pages indexed that search engines wouldn’t otherwise notice.
Also, you can create Rich Internet Applications
(RIA), robust, interactive web applications that have similar
features to desktop applications, without having to completely
compromise SEO. On top of that, SWFAddress allows you to interact with a
browser’s back and forward buttons. Like SWFObject, SWFAddress is invaluable when optimizing
Flash on the Web.
Limitations of SWFAddress
Though SWFAddress can provide excellent
usability for your applications, it’s important to understand that
the SEO potential for SWFAddress ends with search
engines indexing multiple pages for your applications. For example,
your RIA may be on one HTML page, and using
SWFAddress may get multiple URLs indexed for that
page, but that doesn’t mean the search engines will index different
content for each URL. In other words, since the HTML page in each
SWFAddress link for a one-page app is the same,
search engines are basically indexing the same HTML content under
different URLs. This is not to say you shouldn’t use
SWFAddress—just understand that
SWFAddress is much better for usability than for
SEO.
Downloading SWFAddress
You can download SWFAddress from http://www.asual.com/swfaddress/. It’s open source,
and free, but if you feel so inclined you can make a donation. After
downloading and unzipping SWFAddress, locate the ActionScript 3.0
classes SWFAddress and SWFAddressEvent, as well as the necessary
JavaScript file, swfaddress.js.
Using SWFAddress in a Flash application
Before you use SWFAddress,
you need to be aware that it’ll work only on a server, or with
additional configuration to your Flash Player. That means an
ordinary Control→Test Movie command won’t work. Because it’s a best
practice anyway to develop your site in a setting that best mimics a
production environment, we’re going to look at the server method
here. Basically, you’ll either have to upload the files to your web
server for testing, or use a testing server,
software you install on your computer that mimics a production
server environment. If you use a testing server, I recommend
downloading and installing WAMP on Windows and MAMP on Mac.
Note
See the exercises at the end of this chapter for more information about installing a testing server on your computer.
You don’t need to use any JavaScript when using SWFAddress, other than a small addition of
the id attribute in your call to
the swfobject.embedSWF method, which
we’ll discuss soon. Start by linking to the file in your HTML code,
which should look something like this:
<script type="text/javascript" src="swfaddress/swfaddress.js"></script>
To get SWFAddress to work
properly with integrated back button functionality in the web
browser, you’ll need to add some code in your call to the swfobject.embedSWF
method. All you need to do is assign a value for the id attribute of the object element that gets embedded when the
Flash content is inserted. Here’s what the line of code that makes a
call to that method should look like:
swfobject.embedSWF(fileName.swf', 'altContentID', '1024', '660', '10.0.0',
'swfobject/expressinstall.swf', {}, {}, {id:'flashContent'});
The preceding code has three sets of curly braces ({}) for the last three parameter values.
These are JavaScript objects used for defining values for FlashVars, parameters, and attributes, respectively. Here, the
id attribute is assigned a value
of flashContent.
Warning
Assigning some value to the id attribute in the embedSWF
method is essential to make SWFAddress work properly in a web
browser, and you’ll lose much of the functionality of SWFAddress should
you omit it.
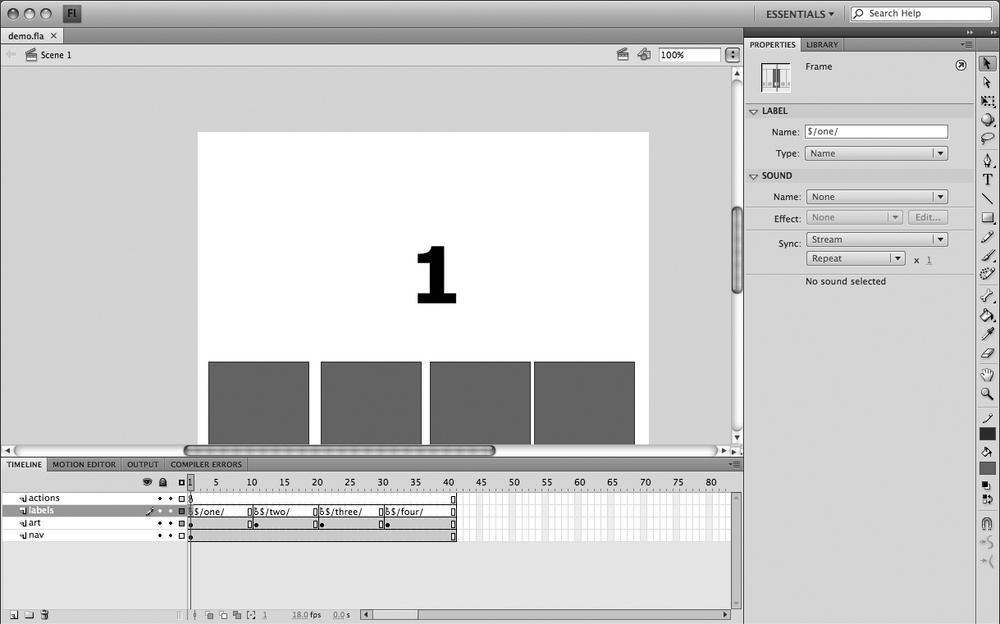
When using SWFAddress,
create navigation frame labels on the main timeline at the frames
you want to navigate to. Name the frame labels beginning with a
dollar sign ($), and use forward slashes (/) at the beginning and
the end of the frame label name (shown in Figure 4-4). Other than
that, you can set up your Flash application normally.
The ActionScript code for using SWFAddress is a little bit more complex
than that for SWFObject, but it’s
fairly straightforward. Here’s an example of using SWFAddress in a simple application.
File: demo.fla (frame 1 in the actions layer)
import SWFAddress;
import SWFAddressEvent;


function formatTitle(newTitle:String):String
{
    var updatedTitle:String = newTitle.replace("$","");
    updatedTitle = updatedTitle.replace("/","");
    updatedTitle = updatedTitle.replace("/","");
    updatedTitle = "SWFAddress Demo | " + updatedTitle;
    return updatedTitle;
}

function buttonClicked(event:MouseEvent):void
{
    var btnName:String = "/" + event.target.name + "/";
    SWFAddress.setValue(btnName);
}

function handleSWFAddress(event:SWFAddressEvent):void
{
    var link:String = event.value;
    if(link == "/")
    {
        link = currentLabels[0].name.replace("$","");
        SWFAddress.setValue(link);
        return;
    }
    gotoAndStop("$" + link);
    SWFAddress.setTitle(formatTitle(link));
}

SWFAddress.addEventListener(SWFAddressEvent.CHANGE, handleSWFAddress);
one.addEventListener(MouseEvent.CLICK, buttonClicked);
two.addEventListener(MouseEvent.CLICK, buttonClicked);
three.addEventListener(MouseEvent.CLICK, buttonClicked);
four.addEventListener(MouseEvent.CLICK, buttonClicked);
stop();
Now, we’ll walk through this code. First, you’ll need to
import the SWFAddress and SWFAddressEvent classes. Make sure to
include them in the same folder as your FLA file:
import SWFAddress;
import SWFAddressEvent;
Next, you will need to register an event listener with
SWFAddress to listen for the
SWFAddressEvent.CHANGE event.
This executes once JavaScript communication is established, and
every time the SWFAddress.setValue() method is
called:
SWFAddress.addEventListener(SWFAddressEvent.CHANGE, handleSWFAddress);
The next four lines add event listeners to the four buttons on the stage, and the line after that stops the movie:
one.addEventListener(MouseEvent.CLICK, buttonClicked);
two.addEventListener(MouseEvent.CLICK, buttonClicked);
three.addEventListener(MouseEvent.CLICK, buttonClicked);
four.addEventListener(MouseEvent.CLICK, buttonClicked);
stop();
The buttonClicked method is
fairly simple. It adds forward slashes to the beginning and end of
the instance name of the button that was clicked (event.target.name)
and passes the string value to the SWFAddress.setValue() method, which
triggers the SWFAddressEvent.CHANGE event, running the
handleSWFAddress() function:
function buttonClicked(event:MouseEvent):void
{
    var btnName:String = "/" + event.target.name + "/";
    SWFAddress.setValue(btnName);
}
The handleSWFAddress()
function defines what happens when the SWFAddressEvent.CHANGE event occurs.
Through the event object, the property named
value holds a value passed in via the SWFAddress.setValue() method. When the
application initializes, the SWFAddressEvent.CHANGE event occurs, and
the value of event.value is
/. At that time, the value of the
link is adjusted to be the first frame label in the application,
without “$”. Then SWFAddress.setValue() is called (mimicking
a button click) and the handleSWFAddress() function stops
executing (return;) and then runs
again from the beginning (because SWFAddress.setValue() triggers the
SWFAddressEvent.CHANGE event).
After the first time handleSWFAddress() runs, it sends the
playhead to the frame label that corresponds to the value of
$, concatenated with event.value. The SWFAddress.setTitle() method is then
called, passing in a formatted version of the value of link:
function handleSWFAddress(event:SWFAddressEvent):void
{
    var link:String = event.value;
    if(link == "/")
    {
        link = currentLabels[0].name.replace("$","");
        SWFAddress.setValue(link);
        return;
    }
    gotoAndStop("$" + link);
    SWFAddress.setTitle(formatTitle(link));
}
All the formatTitle()
function does is adjust the newTitle string passed in, return a
version with no spaces or dollar signs, and add that value to the
end of the main title of the page (“SWFAddress Demo | ”):
function formatTitle(newTitle:String):String
{
    var updatedTitle:String = newTitle.replace("$","");
    updatedTitle = updatedTitle.replace("/","");
    updatedTitle = updatedTitle.replace("/","");
    updatedTitle = "SWFAddress Demo | " + updatedTitle;
    return updatedTitle;
}
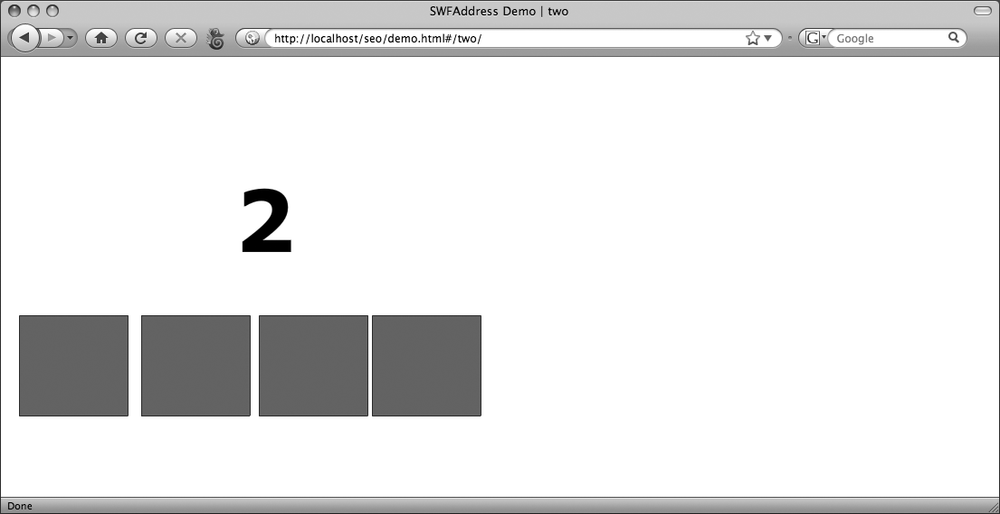
When you test the application in a web browser (using either a testing server or your web server), you can click through the application and watch the title in your browser update (shown in Figure 4-5), and even use your browser’s back button. You can even type URLs directly to different states of your application.
Note
For more details about SWFAddress, see its documentation and
its official site at http://www.asual.com/swfaddress/.
Exchanging Data Between Flash and JavaScript
Earlier in this chapter, you used SWFAddress to communicate between Flash and
JavaScript to update page titles and URLs in the browser window based on
Flash instance names. SWFAddress uses
the ExternalInterface class to
exchange data between Flash and JavaScript. Other methods for sending
data are also available, such as flashvars. When optimizing your site, you may
want to exchange more data than what’s done with SWFAddress, such as HTML code, between
JavaScript and Flash. In this section, we’ll look at using the ExternalInterface class,
as well as flashvars to send data to
and from Flash.
Understanding the ExternalInterface Class
The ExternalInterface class
allows you to call JavaScript functions from Flash, and Flash
functions from JavaScript. This way, you can easily exchange data
that’s uniquely available to JavaScript or to Flash. Like SWFAddress, you’ll also need a web server or
testing server (see the exercise in the next chapter) to see ExternalInterface in action.
Note
Flash Player version 8 and later support the ExternalInterface class, and for the
supported versions it’s the recommended way to exchange JavaScript
and ActionScript data. For earlier versions of Flash Player, use
flashvars, which we’ll discuss
later in this section, or the built-in FSCommand functions.
Reasons to use ExternalInterface
Because nearly all browser information is unavailable to Flash directly and is readily available to JavaScript, it’s often necessary to exchange data between the two. For example, you may want to get the URL of the page a SWF file is on, and use the data in Flash. Or you may want Flash to be notified when a JavaScript event occurs. As for SEO, you may want Flash to display text from its HTML container so that you have to write it only once, and you don’t have to republish the SWF when the content is updated.
Using ExternalInterface to call JavaScript functions
The syntax for the ExternalInterface class is fairly
straightforward. Use the ExternalInterface.call() method, and pass
in the JavaScript function to call as a string and then the
arguments to pass in, separated by commas. Arguments may be any
ActionScript data types, and when sent to JavaScript they’re
converted to JavaScript data types. If you wanted to call a
JavaScript function called myFunction, passing in a value of some string, the code would look like
this:
ExternalInterface.call("myFunction", "some string");Let’s look at an example of ExternalInterface in action. The file
ExternalInterface.fla contains the
following code on frame 1 of the actions layer:
ExternalInterface.call("showAlert","Hello from Flash!");Now we’ll look at the HTML file. It’s called ExternalInterface.html, and it was
created using SWFObject’s dynamic
publishing method.
<!DOCTYPE html PUBLIC "-//W3C//DTD XHTML 1.0 Strict//EN"
"http://www.w3.org/TR/xhtml1/DTD/xhtml1-strict.dtd">
<html xmlns="http://www.w3.org/1999/xhtml" lang="en" xml:lang="en">
    <head>
        <title>External Interface Test</title>
        <meta http-equiv="Content-Type" content="text/html; charset=
iso-8859-1" />
        <script type="text/javascript" src="swfobject/swfobject.js">
</script>
        <script type="text/javascript">
            swfobject.embedSWF("ExternalInterface.swf",
"myAlternativeContent", "550", "400", "10.0.0", false, {}, {},
{id:"flashContent"});
        </script>
        <script>
        function showAlert(a)
        {
            window.alert(a);
        }
        </script>
    </head>
    <body>
        <div id="myAlternativeContent">
            <p>This is just a test of ExternalInterface.</p>
        </div>
    </body>
</html>
Notice in the third <script> block, a function I created
that matches the showAlert() function called from
Flash that runs the JavaScript method window.alert(), passing in the value
received from Flash. To see this in action, view this file using
your testing server, making sure to include the swfobject folder containing swfobject.js and the ExternalInterface.swf file. When you view
the file with your testing server, you should see the data passed in
from Flash showing up as a JavaScript alert (shown in Figure 4-6).
Using returned JavaScript data
With ExternalInterface, you can not only send
data from Flash to JavaScript, but also receive data returned from
JavaScript in Flash. The method ExternalInterface.call()returns
whatever data is returned from the JavaScript function called, and
you can use that data however you like.
For an example, you can look at ExternalInterfaceReturn.fla. The file has
a dynamic text field, data_txt,
on the main timeline and the following code in the first keyframe of
the actions layer:
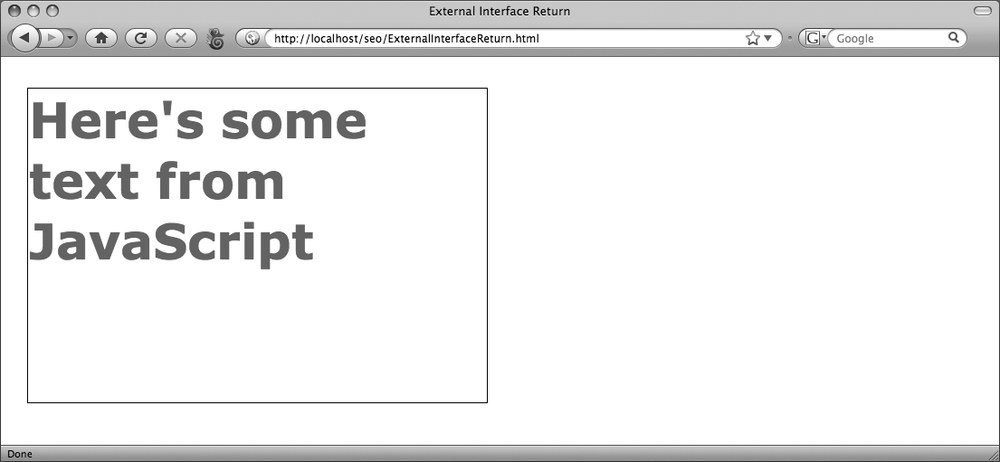
if(ExternalInterface.call("getText"))
{
    data_txt.text = ExternalInterface.call("getText");
}
Here, the code checks to see whether the JavaScript getText() function returns a value. If so,
that value is placed inside data_txt.
Note
It’s not necessary here to check whether getText() returns a value before setting
the text, but the code will return an error without it if you’re
just testing the movie from Flash. This is because unless you run
this code on the Web or on a testing server, ExternalInterface.call() doesn’t return
anything (or rather, it returns null), which isn’t an acceptable
value for the text property of
a text field.
The HTML and JavaScript code is contained in the file ExternalInterfaceReturn.html, and it is pretty straightforward:
<!DOCTYPE html PUBLIC "-//W3C//DTD XHTML 1.0 Strict//EN"
"http://www.w3.org/TR/xhtml1/DTD/xhtml1-strict.dtd">
<html xmlns="http://www.w3.org/1999/xhtml" lang="en" xml:lang="en">
    <head>
        <title>External Interface Return</title>
        <meta http-equiv="Content-Type" content="text/html; charset=
iso-8859-1" />
        <script type="text/javascript" src="swfobject/swfobject.js">
</script>
        <script type="text/javascript">
            swfobject.embedSWF("ExternalInterfaceReturn.swf",
"myAlternativeContent", "550", "400", "10.0.0", false, {}, {},
{id:'flashContent'});
        </script>
        <script>
        function getText()
        {
            return "Here's some text from JavaScript";
        }
        </script>
    </head>
    <body>
        <div id="myAlternativeContent">
            <p>This is just a test of ExternalInterface.</p>
        </div>
    </body>
</html>
You’ll notice that the getText() function within the third
<script> block simply
returns "Here's some text from
JavaScript". If you test this file on your testing server,
or on the Web, you should see the JavaScript text appear in Flash
(see Figure 4-7).
Calling Flash functions from JavaScript
When you use ExternalInterface, you can also call Flash
functions from JavaScript. To enable a Flash function to be called
from JavaScript, you need to use the ExternalInterface.addCallback() method,
passing in the name of the function JavaScript can use in the form
of a string, and the ActionScript function that will be called in
the form of a function. The general code looks like this:
ExternalInterface.addCallback("myFunction", myFunction);Note
Although you can give different names for the JavaScript function and the Flash function, you may avoid some confusion by giving the functions the same name.
Here’s an example from the first keyframe of the actions layer
in the file FromJavaScript.fla, which contains a
text field called data_txt:
ExternalInterface.addCallback("showText",showText);

function showText(msg:String):void
{
    data_txt.text = msg;
}
When the showText()
function is called in JavaScript, the Flash version of showText() will run, accepting a message
to show in the text field data_txt.
The JavaScript code required to send data to Flash is a little more complex than the examples we’ve looked at so far, but it’s still relatively simple. Here’s the HTML and JavaScript from FromJavaScript.html:
<!DOCTYPE html PUBLIC "-//W3C//DTD XHTML 1.0 Strict//EN"
"http://www.w3.org/TR/xhtml1/DTD/xhtml1-strict.dtd">
<html xmlns="http://www.w3.org/1999/xhtml" lang="en" xml:lang="en">
    <head>
        <title>From JavaScript</title>
        <meta http-equiv="Content-Type" content="text/html; charset=
iso-8859-1" />
        <script type="text/javascript" src="swfobject/swfobject.js"></script>
        <script type="text/javascript">
            var flashvars = {};
            var params = {};
            var attributes = {id:"fromJS",name:"fromJS"};
            swfobject.embedSWF("FromJavaScript.swf", "myAlternativeContent",
"550", "400", "10.0.0", false,flashvars,params,attributes);
            window.onload = windowLoaded;
            function windowLoaded()
            {
                document.getElementById("fromJS").showText("Hello from
JavaScript!");
            }
        </script>
    </head>
    <body>
        <div id="myAlternativeContent">
            <p>This is just a test of ExternalInterface.</p>
        </div>
    </body>
</html>
First, notice the three variables at the top of the second
<script> block—flashvars, params, and attributes:
var flashvars = {};
var params = {};
var attributes = {id:"fromJS",name:"fromJS"};
These variables are object data types, written in shorthand
notation, just like object shorthand notation in Flash. The attributes object is the only one that
contains data, with id and
name values of "fromJS". These values will be added as
attributes to the <object>
element containing the loaded Flash content. By giving the element a
name and ID, you have a method of communicating with the element
through JavaScript to call the Flash function you’re going to
use.
Next, look at the swfobject.embedSWF() method:
swfobject.embedSWF("FromJavaScript.swf", "myAlternativeContent", "550",
"400", "10.0.0", false,flashvars,params,attributes);
Notice that the last three values passed in correspond to the
variables created earlier: flashvars, params, and attributes. This is the order in which
these parameters must be passed into swfobject.embedSWF().
The rest of the code is connected. The window.onload event triggers the windowLoaded()
function:
window.onload = windowLoaded;
function windowLoaded()
{
    document.getElementById("fromJS").showText("Hello from JavaScript!");
}
To communicate to the function within the Flash content, you
need to wait until the Flash content is loaded and ready for
communication. By the time the window.onload event occurs, the Flash
content is available. The windowLoaded() function uses the
Document Object Model, or
DOM, to communicate to the Flash content. The
document.getElementById() method
returns the element with the name specified by the ID string passed
in, which in this case is "fromJS". From there, the Flash functions
added using the ExternalInterface.addCallback()
method are available. The showText() function you created in Flash
is called and "Hello from
JavaScript!" is passed in.
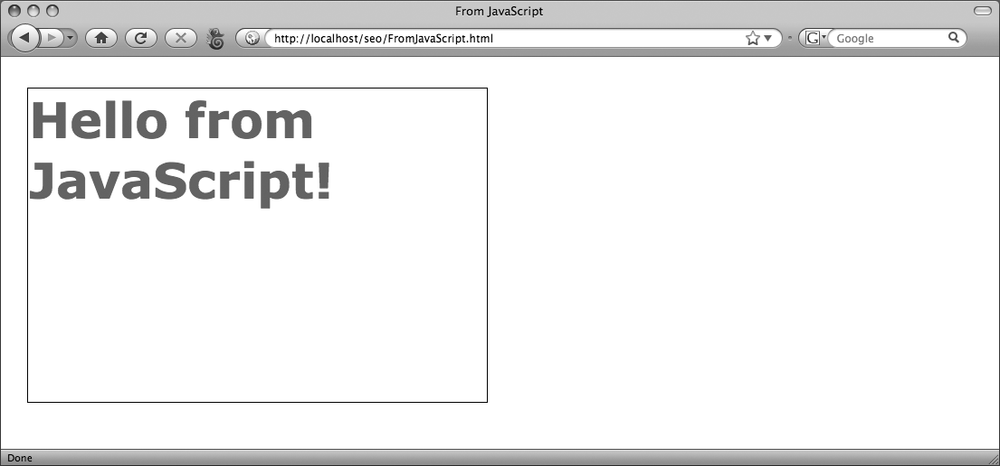
When you test this file using a testing server or web server, you should see the message from JavaScript appearing in the Flash text field (see Figure 4-8).
Using data returned from Flash with JavaScript
Just like using data returned from JavaScript in Flash, you can use data returned from Flash in JavaScript. To do that, all you have to do is make your Flash function return a value, and in JavaScript the data is usable as the returned value of the Flash function.
Here’s the code from the actions layer in frame 1 in the file FromJavaScriptReturn.fla:
ExternalInterface.addCallback("getNewTitle",getNewTitle);

function getNewTitle():String
{
    data_txt.text = "Title updated";
    return "This is the new page title!";
}
This code adds a callback for the getNewTitle() function. When the function
runs, data_txt will display
notification of the updated title, and the new title name will be
returned to JavaScript.
Here’s the HTML and JavaScript code from FromJavaScriptReturn.html:
<!DOCTYPE html PUBLIC "-//W3C//DTD XHTML 1.0 Strict//EN"
"http://www.w3.org/TR/xhtml1/DTD/xhtml1-strict.dtd">
<html xmlns="http://www.w3.org/1999/xhtml" lang="en" xml:lang="en">
    <head>
        <title>From JavaScript Return</title>
        <meta http-equiv="Content-Type" content="text/html; charset=
iso-8859-1" />
        <script type="text/javascript" src="swfobject/swfobject.js"></script>
        <script type="text/javascript">
            var flashvars = {};
            var params = {};
            var attributes = {id:"fromJS",name:"fromJS"};
            swfobject.embedSWF("FromJavaScriptReturn.swf",
"myAlternativeContent", "550", "400", "10.0.0", false,flashvars,
params,attributes);
            window.onload = windowLoaded;
            function windowLoaded()
            {
                document.title = document.getElementById("fromJS").
                getNewTitle();
            }
        </script>
    </head>
    <body>
        <div id="myAlternativeContent">
            <p>This is just a test of ExternalInterface.</p>
        </div>
    </body>
</html>
This code is pretty similar to what we looked at in the last
example, except in the windowLoaded() function the value of
document.title is being set to
the returned value of the Flash function getNewTitle():
function windowLoaded()
{
    document.title = document.getElementById("fromJS").getNewTitle();
}
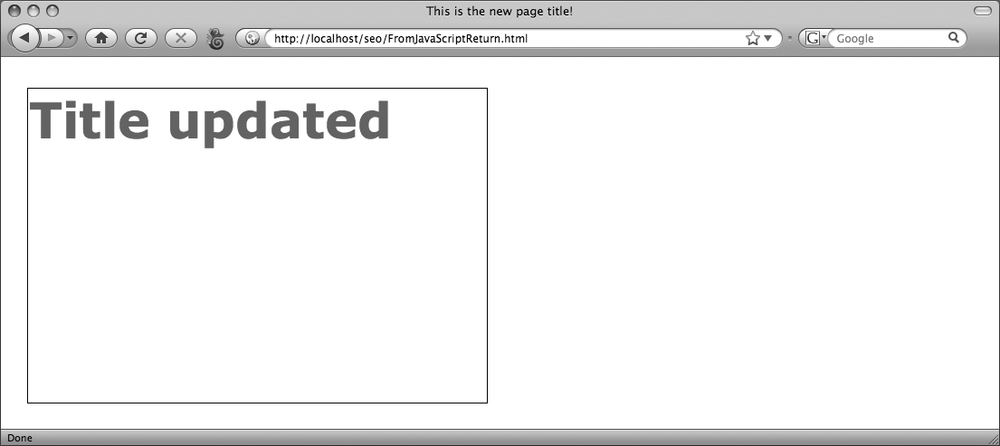
If you test this using your testing or web server, you should see the Flash text field update and the document title at the top of your browser window change (shown in Figure 4-9).
Other Methods of Flash and JavaScript Communication
As I mentioned earlier in this chapter, the ExternalInterface class isn’t the only
method of working with data between JavaScript and Flash. You can
exchange data in several ways, but the ExternalInterface class is the recommended
method for Flash Player 8 and later. Before Flash Player 8, and even
for later versions, another method of data exchange you can use is
flashvars.
Note
Some other methods for getting data in Flash Player 7 and earlier were the getURL() function and fscommand(). See Flash Help for more
information about these methods.
Working with flashvars
flashvars are name/value pairs that you can use to send values
from the HTML document into Flash. Without SWFObject, you add flashvars as the attribute value for
name in a <param> element inside the <object> element. The value of the
flashvars param is a URL-encoded
string with name/value pairs separated by ampersands (&), which
can be tedious to write and hard to read without some additional
utilities and classes. With SWFObject, you can simply pass the
property and value pairs into a JavaScript object and send that
value into the swfobject.embedSWF() method, which is easy
to both read and write.
Here’s an example of some HTML and JavaScript code that uses
flashvars in a file called
FlashVars.html:
<!DOCTYPE html PUBLIC "-//W3C//DTD XHTML 1.0 Strict//EN"
"http://www.w3.org/TR/xhtml1/DTD/xhtml1-strict.dtd">
<html xmlns="http://www.w3.org/1999/xhtml" lang="en" xml:lang="en">
    <head>
        <title>FlashVars</title>
        <meta http-equiv="Content-Type" content="text/html; charset=
iso-8859-1" />
        <script type="text/javascript" src="swfobject/swfobject.js"></script>
        <script type="text/javascript">
            var flashvars = {title:document.title,anotherVar:"Some Value"};
            swfobject.embedSWF("FlashVars.swf", "myAlternativeContent",
"550", "400", "10.0.0", false,flashvars);
        </script>
    </head>
    <body>
        <div id="myAlternativeContent">
            <p>This is just a test of flashvars.</p>
        </div>
    </body>
</html>
All of the flashvars
information is contained in the flashvars variable in the second <script> block, and is passed in
after the Express Install URL, which in this case is false, in the swfobject.embedSWF() method:
<script type="text/javascript">
    var flashvars = {title:document.title,anotherVar:"Some Value"};
    swfobject.embedSWF("FlashVars.swf", "myAlternativeContent", "550",
"400", "10.0.0", false,flashvars);
</script>
Notice that the data type is object, and the names and values are
written in shorthand, as in ActionScript. The values are title, which represents the title of the
document, which in this case is “FlashVars,” and anotherVar with a value of "Some Value". You can add as many
properties to the flashvars
object as you’d like.
In ActionScript 3.0, you access the flashvars through the parameters property of the loaderInfo property of any display object
on the stage, and the stage itself. The parameters property is an object data type
(conveniently, just like the JavaScript version), which contains all
of the name/value pairs you specified in HTML or JavaScript. You can
access the name/value pairs just like any other object. Here’s an
example, from FlashVars.fla,
that outputs all the flashvars using a for..in loop:
var parameters:Object = this.loaderInfo.parameters;
data_txt.text = "";
for(var p:String in parameters)
{
    data_txt.appendText(p + ":" + parameters[p] + "\n");
}
The for..in loop iterates
through the properties of an object (in this case, parameters is the object). In this
example, the names from flashvars
(held in the p variable) are
appended to the text field data_txt, along with a colon, the value of
the flashvars parameter (parameters[p]), and a newline character
(\n).
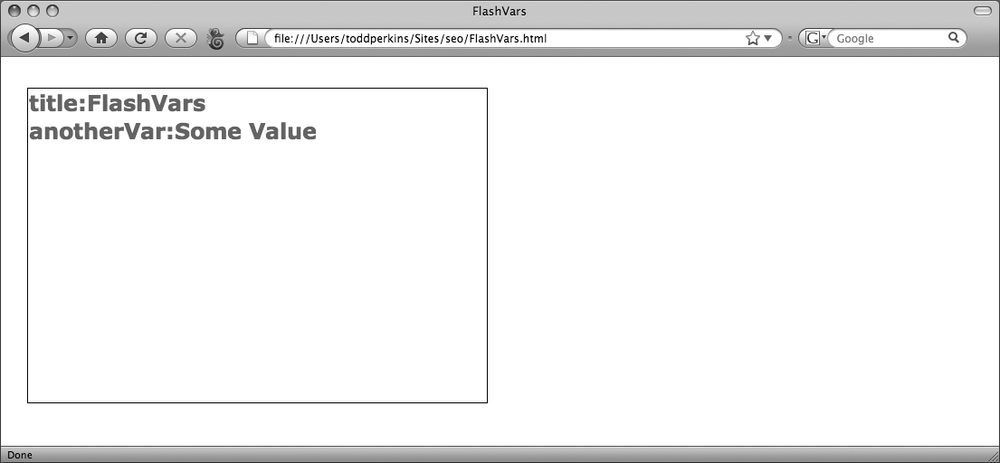
If you open the HTML file, FlashVars.html, in a web browser, you
should see the data passed from flashvars into Flash. That will display
the names and values of the flashvars in the text field, data_txt (shown in Figure 4-10).
Exercises
Now that we’ve discussed the theory behind working with JavaScript and Flash, we’ll go through some exercises to practice these techniques.
Exercise 4-1: Optimizing with SWFObject
In this exercise, you’ll take a web page that was
published using Flash and modify its HTML code to use SWFObject.
File: xylophone-master.html
Open the HTML file, xylophone-master.html, in a text editor to view the HTML code.
Save the file as xylophone-master-swfobject.html in the same folder.
In the
<head>tag, find the line of code that links to AC_RunActiveContent.js and change the value of thesrcattribute to link to swfobject.js instead. After being modified, the code should look like this:<script src="swfobject.js" type="text/javascript"></script>
Right below the
<script>block you just modified, create another<script>block.<script type="text/javascript"> </script>
Inside the
<script>block you just created, use theswfobject.embedSWF()method to embed the SWF file xylophone-master.swf using the dynamic publishing method. For the ID name, usealtContent. Pass in790for width,610for height,7.0.0for minimum Flash Player version, andfalsefor the URL value. When you’re finished, the script block should match the following code:<script type="text/javascript"> swfobject.embedSWF("xylophone-master.swf", "altContent", "790", "610", "7.0.0", false); </script>Next, you’ll modify the HTML code created by Flash. Find the
<div>element with an ID ofgame. The element should look like this:<div id="game"> <p> <script language="JavaScript" type="text/javascript"> AC_FL_RunContent( 'codebase','http://download.macromedia.com/pub/shockwave/cabs/flash/ swflash.cab#version=7,0,0,0','width','790','height','610','id','Xylophone Master','align','middle','src','xylophone- master','quality','high','bgcolor','#000000','name','Xylophone Master','allowscriptaccess','sameDomain','allowfullscreen','false', 'pluginspage', 'http://www.adobe.com/go/getflashplayer','movie','xylophone-master' ); //end AC code </script> <noscript> <object classid="clsid:d27cdb6e-ae6d-11cf-96b8-444553540000" codebase="http://download.macromedia.com/pub/shockwave/cabs/flash/ swflash.cab#version=7,0,0,0" width="790" height="610" id="Xylophone Master" align="middle"> <param name="allowScriptAccess" value="sameDomain" /> <param name="allowFullScreen" value="false" /> <param name="movie" value="xylophone-master.swf" /> <param name="quality" value="high" /> <param name="bgcolor" value="#000000" /> <embed src="xylophone-master.swf" quality="high" bgcolor="#000000" width="790" height="610" name="Xylophone Master" align="middle" allowScriptAccess="sameDomain" allowFullScreen="false" type="application /x-shockwave-flash" pluginspage="http://www.adobe.com/go/getflashplayer" /> </object> </noscript> </p> </div>Delete all the content inside the
<div>element so that it matches this code:<div id="game"> </div>
Inside the
<div>element, create another<div>element with an ID ofaltContent.<div id="game"> <div id="altContent"> <div> </div>
Within the
altContent
            <div>
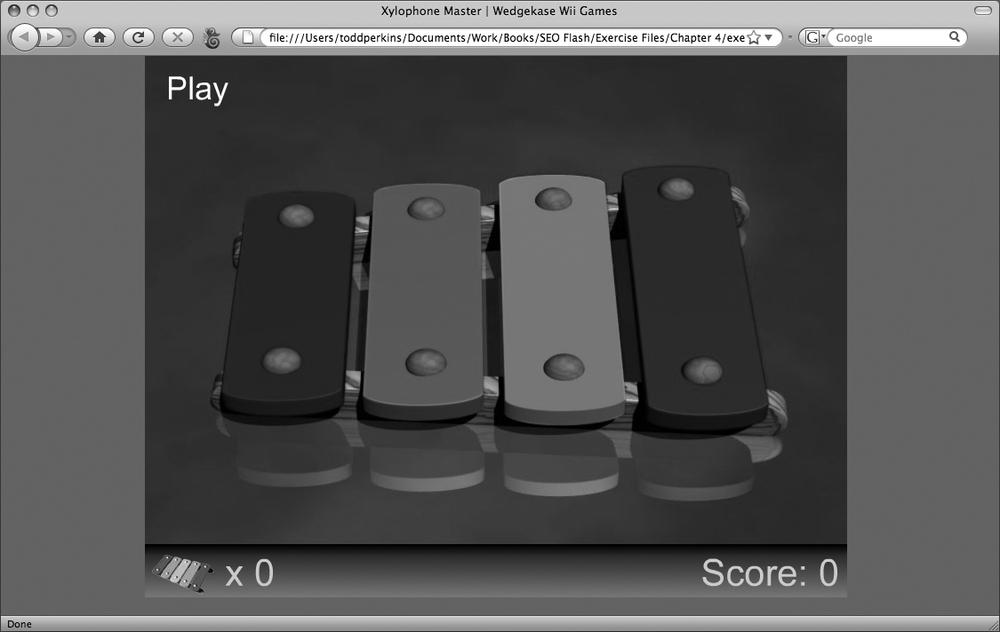
element, write a title and description of the game. Your code should be similar to this:<div id="game"> <div id="altContent"> <h1>Xylophone Master Game</h1> <p>Move your mouse or WiiMote up and down to hit the keys on the xylophone in thesame order that the xylophone master plays them. Prove your coolness to your friends by getting to the highest level!</p> <div> </div>
Save the file, and open it in a web browser to test it (see Figure 4-11).
Exercise 4-2: Deep Linking with SWFAddress
Now, you’ll use SWFAddress to add deep linking to a
previously created Flash application.
File: SWFAddress.fla
Open SWFAddress.fla in the exercise 2 folder.
Notice the layout of the file—the frames, labels, and instance names of the buttons on the left side. Note that the instance names of the buttons correspond to the frame labels in the timeline. For example, the button
Fun_Runwill end up being connected to the label$/Fun_Run/via ActionScript.Select the first keyframe of the actions layer and open the Actions panel.
In the Actions panel, import the
SWFAddressandSWFAddressEventclasses:import SWFAddress; import SWFAddressEvent;
Below the code you just wrote, add an event listener to
SWFAddressto listen for theSWFAddressEvent.CHANGEevent. Then, add event listeners to the three buttons on the stage,Meteor_Blaster,Set_the_Clock, andFun_Run, to listen forMouseEvent.CLICKand react with a function calledbuttonClicked(). Then stop the timeline.SWFAddress.addEventListener(SWFAddressEvent.CHANGE, handleSWFAddress); Meteor_Blaster.addEventListener(MouseEvent.CLICK, buttonClicked); Set_the_Clock.addEventListener(MouseEvent.CLICK, buttonClicked); Fun_Run.addEventListener(MouseEvent.CLICK, buttonClicked); stop();
Above the code you just wrote, and below the import statements, define the
buttonClicked()function:function buttonClicked(event:MouseEvent):void { }In the
buttonClicked()function, create a variable callednewURLthat has a value of the instance name of the button that was clicked, wrapped in forward slashes. Then, pass that value into theSWFAddress.setValue()method:function buttonClicked(event:MouseEvent):void { var newURL:String = "/" + event.target.name + "/"; SWFAddress.setValue(newURL); }Next, define the
handleSWFAddress()function:function handleSWFAddress(event:SWFAddressEvent):void { }Inside the
handleSWFAddress()function, create a variable calledlinkand assign it the value of the event object’svalueproperty. Then create a conditional statement that checks whether the value oflinkis only a forward slash. If so, set the value oflinkto be the first frame label without the dollar sign, and pass the new link value into theSWFAddress.setValue()method. Next, stop the function from running by using thereturnkeyword:function handleSWFAddress(event:SWFAddressEvent):void { var link:String = event.value; if(link == "/") { link = currentLabels[0].name.replace("$",""); SWFAddress.setValue(link); return; } }Below the conditional statement you just wrote, make the timeline
gotoAndStop()at the appropriate frame label—a dollar sign and then the value oflink. Then, call theSWFAddress.setTitle()method, passing in the returned value of a function calledformatTitle()(defined in the next step), which itself should receive the value oflink:function handleSWFAddress(event:SWFAddressEvent):void { var link:String = event.value; if(link == "/") { link = currentLabels[0].name.replace("$",""); SWFAddress.setValue(link); return; } gotoAndStop("$" + link); SWFAddress.setTitle(formatTitle(link)); }Next, define the
formatTitle()function:function formatTitle(newTitle:String):String { }The
formatTitle()function should take the value passed in, remove the dollar sign and forward slashes, and replace the underscores with spaces. After that, append the text," | Wedgekase Wii Games", to the updated title and return the value of the updated title. Your code should look like this:function formatTitle(newTitle:String):String { var updatedTitle:String = newTitle.replace("$",""); updatedTitle = updatedTitle.replace(/\//g,""); updatedTitle = updatedTitle.replace(/_/g," "); updatedTitle += " | Wedgekase Wii Games"; return updatedTitle; }
Test the movie (Control→Test Movie) to publish the SWF file.
Open the HTML file, index.html, to view its contents. Note that it’s using
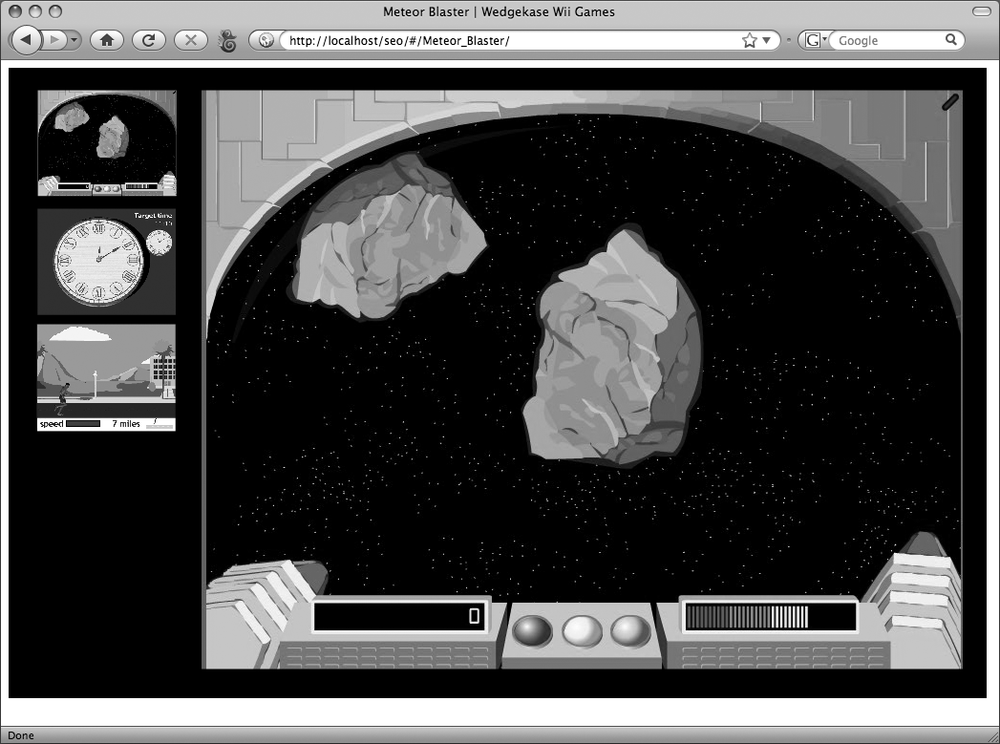
SWFObjectto embed the Flash content, and it contains a link to swfaddress.js:<!DOCTYPE html PUBLIC "-//W3C//DTD XHTML 1.0 Strict//EN" "http://www.w3.org/TR/xhtml1/DTD/xhtml1-strict.dtd"> <html xmlns="http://www.w3.org/1999/xhtml" lang="en" xml:lang="en"> <head> <title>Wedgekase Wii Games</title> <meta http-equiv="Content-Type" content="text/html; charset= utf-8" /> <script type="text/javascript" src="swfobject/swfobject.js"> </script> <script type="text/javascript" src="swfaddress/swfaddress.js"> </script> <script type="text/javascript"> swfobject.embedSWF('SWFAddress.swf', 'website', '1024', '660', '10.0.0', 'swfobject/expressinstall.swf', {}, {}, {id:'flashContent'}); </script> </head> <body> <div id="website"> <p>In order to view this page you need Flash Player 10+ support!</p> <p><a href="http://www.adobe.com/go/getflashplayer"><img src="http://www.adobe.com/images/shared/download_buttons/ get_flash_player.gif" alt="Get Adobe Flash player" /></a></p> </div> </body> </html>Open this HTML file using your testing server or your web server (making sure to include all linked files), and click the buttons on the left side to watch the page title and addresses update (see Figure 4-12).
Exercise 4-3: Flash/JavaScript Communication with ExternalInterface
In this exercise, you’ll use the ExternalInterface class to send data to
JavaScript. The application you’ll be working with is made to capture
mouse clicks, and to output that data to see what users are clicking
in an application.
Note
Capturing user mouse-click input is a common web design tactic for finding what
content people are viewing in a site. Using ExternalInterface, you can capture and
save a Flash application’s mouse-click data.
File: ExternalInterface.fl
Open the file ExternalInterface.fla in the exercise 3 folder. Notice that its contents are identical to the file in Exercise 2, except for one line of code added to the
handleClick()function. The last line of code in the function calls a JavaScript function calledregisterClick(), passing in the name of the button instance that was clicked:function buttonClicked(event:MouseEvent):void { var newURL:String = "/" + event.target.name + "/"; SWFAddress.setValue(newURL); ExternalInterface.call("registerClick",event.target.name); }Now we’ll look at the JavaScript and HTML that control this application. Open index.html in the exercise 3 folder and view its contents:
<!DOCTYPE html PUBLIC "-//W3C//DTD XHTML 1.0 Strict//EN"
"http://www.w3.org/TR/xhtml1/DTD/xhtml1-strict.dtd">
<html xmlns="http://www.w3.org/1999/xhtml" lang="en" xml:lang="en">
    <head>
        <title>Wedgekase Wii Games</title>
        <meta http-equiv="Content-Type" content="text/html; charset=
utf-8" />
        <script type="text/javascript" src="swfobject/swfobject.js">
</script>
        <script type="text/javascript" src="swfaddress/swfaddress.js">
</script>
        <script type="text/javascript">
            swfobject.embedSWF('SWFAddress.swf', 'website', '1024',
'660', '10.0.0',
                'swfobject/expressinstall.swf', {}, {},
{id:'flashContent'});
        </script>
        <script type="text/javascript">
        function registerClick(obj)
        {
            document.getElementById("clicks").innerHTML += obj + ", ";
        }
        </script>
    </head>
    <body>
        <div id="website">
            <p>In order to view this page you need Flash Player 10+
support!</p>
            <p><a href="http://www.adobe.com/go/getflashplayer"><img
src="http://www.adobe.com/images/shared/download_buttons/
get_flash_player.gif"
alt="Get Adobe Flash player" /></a></p>
        </div>
        <p id="clicks"></p>
    </body>
</html>
This file has some important changes from Exercise 2. First, notice the
<p>element with the ID value ofclickstoward the bottom of the code. This is the element that JavaScript will write to in order to save the click data:<p id="clicks"></p>
Next, notice the fourth
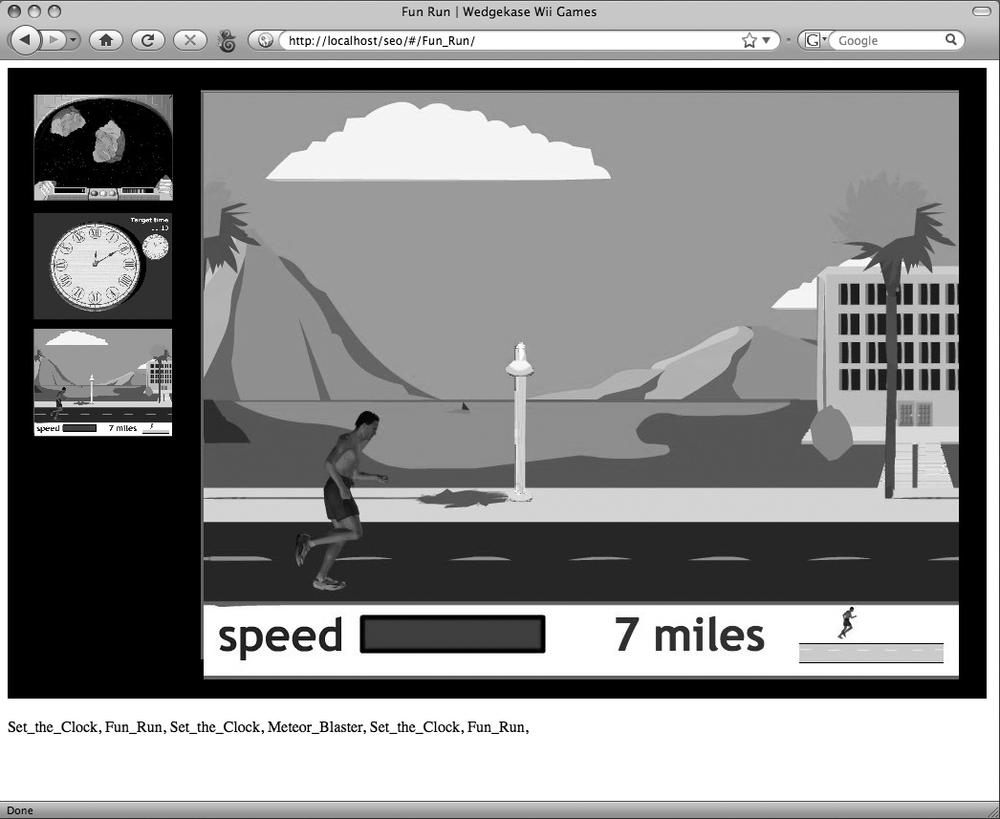
<script>block. This block contains theregisterClick()function, which uses the DOM to reference the<p>element calledclicks, and appends to the string value of its inner HTML. The value appended is whatever is passed in from Flash, plus a comma and a space to separate values:<script type="text/javascript"> function registerClick(obj) { document.getElementById("clicks").innerHTML += obj + ", "; } </script>Copy the swfobject, swfaddress, HTML, and SWF files to your testing or web server and browse to the HTML file there. Then, click the buttons in Flash and watch the instance name values appear in the text field below the Flash content (see Figure 4-13).
Note
Remember that you can pass more data from Flash than
just instance names. You can include any information you like when
sending data via ExternalInterface. Also, instead of
showing the data in a text field, you could use a server-side
language such as PHP to save all of the click data to a file, or a
database.
Exercise 4-4A: Installing a Testing Server (Windows XP and Windows Vista)
To use some of the techniques in this chapter, including
SWFAddress and ExternalInterface,
you’ll need to test your applications using a web server or a testing
server. This exercise shows you how to set up a testing server if
you’re on a Windows computer.
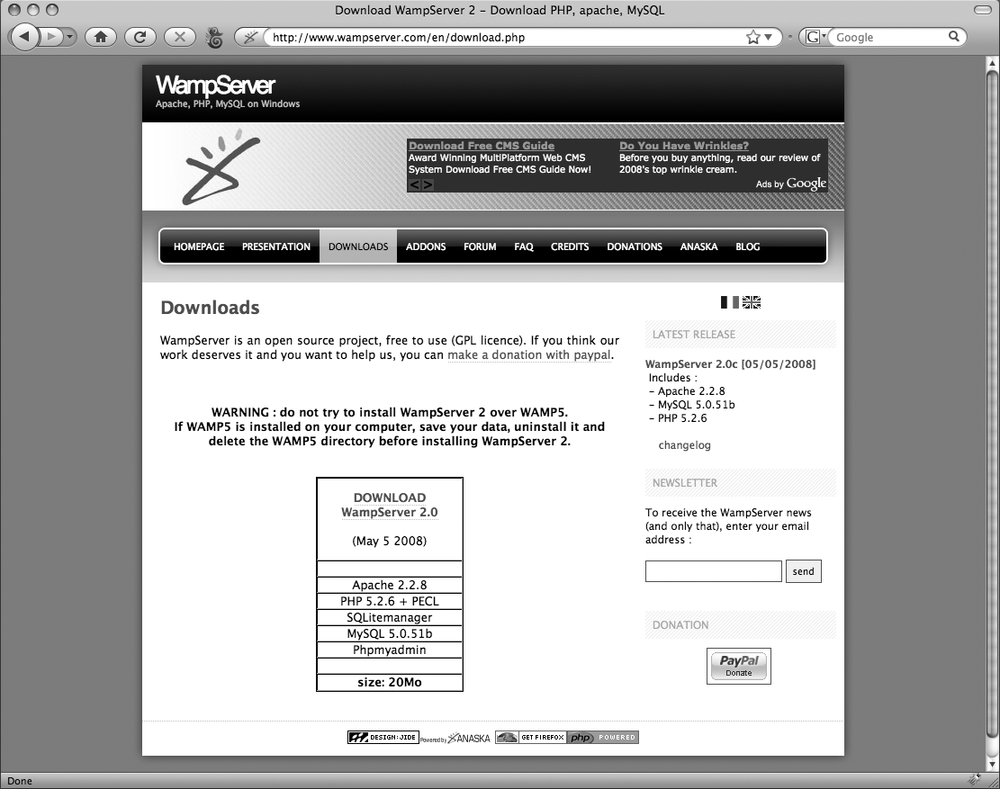
Go to www.wampserver.com/en/download.php (see Figure 4-14) and click the download link to download the latest version of WAMP.
Once you’ve downloaded WAMP, launch its setup application to set up the software.
During WAMP setup, you can choose which features you’d like to install if you need customized features. Otherwise, the default install should be all you’ll need for what we’re doing.
After WAMP is installed, you can begin to run WAMP services through either the Windows task bar or the Program menu.
To make sure WAMP is working properly, browse to http://localhost in your web browser. You should see some text and an image telling you that WAMP is running properly. If you see an error message, check to make sure WAMP is running, and then reload the page.
Once WAMP is working, you can put the files you want to test in the www folder, or in a subdirectory of that folder.
Now you’ll do a simple test of the testing server. In your www directory, create a directory called exint (short for ExternalInterface).
Within the exint directory, copy the finished files from Exercise 4-3 in this chapter.
In your web browser, browse to the finished file at http://localhost/exint/. You should then see
ExternalInterfaceworking in your web browser.
Exercise 4-4B: Installing a Testing Server (Mac OS X)
This exercise shows you how to set up a testing server if you’re on a Mac.
In System Preferences, under the Sharing category, make sure Web Sharing is turned off.
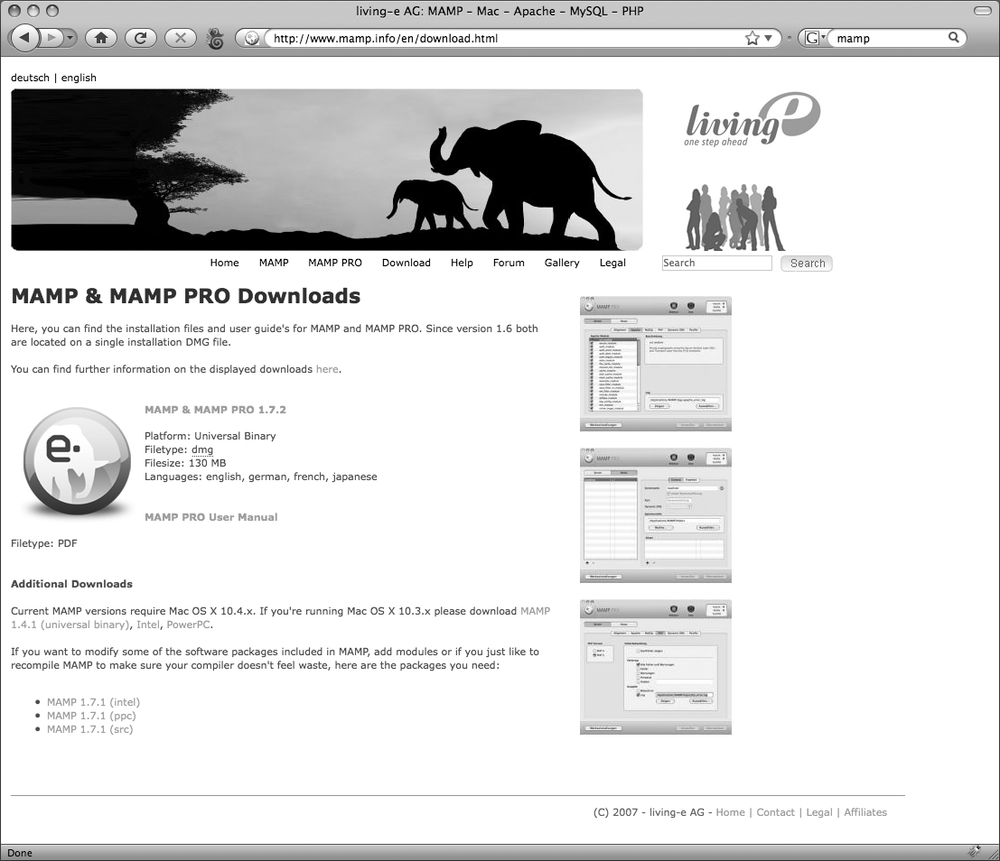
Visit www.mamp.info/en/download.html (see Figure 4-15) to download MAMP.
Open the MAMP installer file to begin installing MAMP.
For this exercise, you’ll need only a default install, so you can go through the installer without changing anything (i.e., you won’t need MAMP Pro). Feel free to customize any of the options if you need additional features.
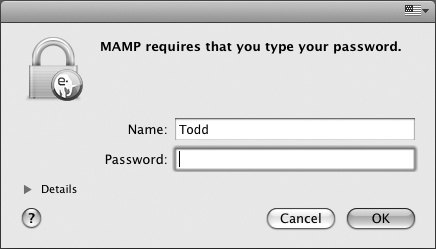
Once MAMP is installed, launch MAMP, using your user credentials to log in (see Figure 4-16).
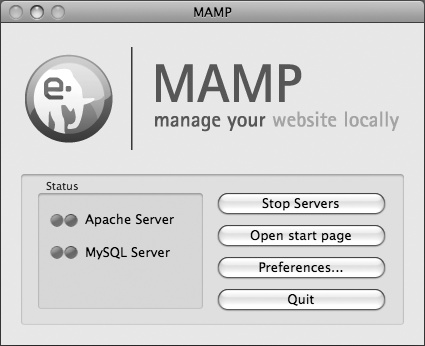
After MAMP launches, you should see that MAMP’s services are running properly (see Figure 4-17), as indicated by green lights.
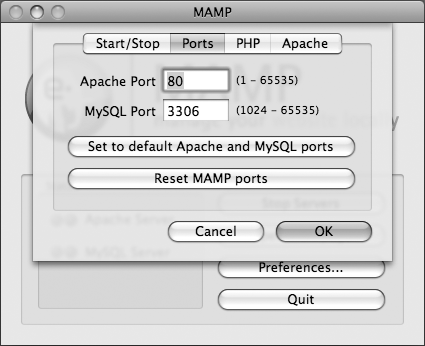
Click the Preferences button to open MAMP preferences, and then click the Ports tab.
In the Ports tab, click the “Set to default Apache and MySQL ports” button to make sure the ports are assigned to where you’ll use them. Your screen should match Figure 4-18.
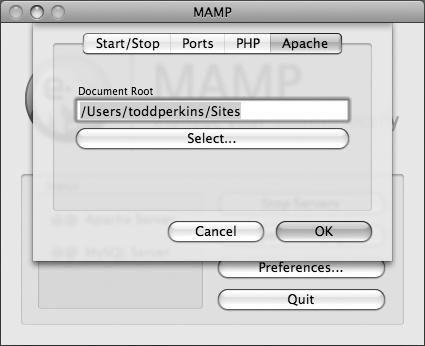
Click the Apache button to go to Apache settings.
Make sure your document root folder is set to /Users/YOUR USERNAME/Sites, as shown in Figure 4-19. If not, click the Select button to set it correctly.
Click OK to accept the changes made to MAMP preferences. Authenticate using your username and password if necessary.
To make sure MAMP is working properly, browse to http://localhost in your web browser. You should see your computer’s default web page in your /Users/<YOUR USERNAME>/Sites folder.
Once MAMP is working, you can put the files you want to test in the Sites folder, or in a subdirectory of that folder.
Now you’ll conduct a simple test of the testing server. In your Sites directory, create a directory called exint (short for ExternalInterface).
Within the exint directory, copy the finished files from Exercise 4-3 in this chapter.
In your web browser, browse to the finished file at http://localhost/exint/. You should then see
ExternalInterfaceworking in your web browser.
Key Terms Used in This Chapter
Table 4-1 contains the terms that were introduced in this chapter and gives you their definitions.
[1] The SWFAddress code referenced in this chapter is Copyright (c) 2006-2007 Rostislav Hristov, Asual DZZD and is used with permission. The SWFObject code referenced in this chapter is Copyright (c) 2007–2008 Geoff Stearns, Michael Williams, and Bobby van der Sluis and is used with permission.
Get Search Engine Optimization for Flash now with the O’Reilly learning platform.
O’Reilly members experience books, live events, courses curated by job role, and more from O’Reilly and nearly 200 top publishers.
