To get the very best out of using your computer, you will want to install apps and programs. These can be anything from games to file and photo sharing and technical or financial apps, which are all now found in the new Windows Store. You can access the Store from the Start screen.
It is the strength and variety of apps and programs that make Windows flexible and powerful, and can allow people to use their computers for whatever tasks they wish from entertainment to work.
While your Windows 8 computer comes with some great apps, including Mail, Photos, Music, and Messaging, you will probably want to install more apps onto it, and even programs that run on the Windows desktop, especially if you already have software from a previous PC that you want to use and that you are comfortable with at this time.
Windows 8 makes it easier than ever before to find software with the new Store, which can be launched from the Start screen. All Windows 8 apps can be found here; you can’t get them from anywhere else. Not only does this make apps simple to find, but it also makes the process of paying for them and downloading them much more secure because Microsoft scans all apps for malware.
The Windows Store is the central and safe place to find apps and programs.
You can drag and rearrange Tiles and icons on the Start screen to make them easier to find and organize.
You can view apps and desktop programs side by side, which can make working easier.
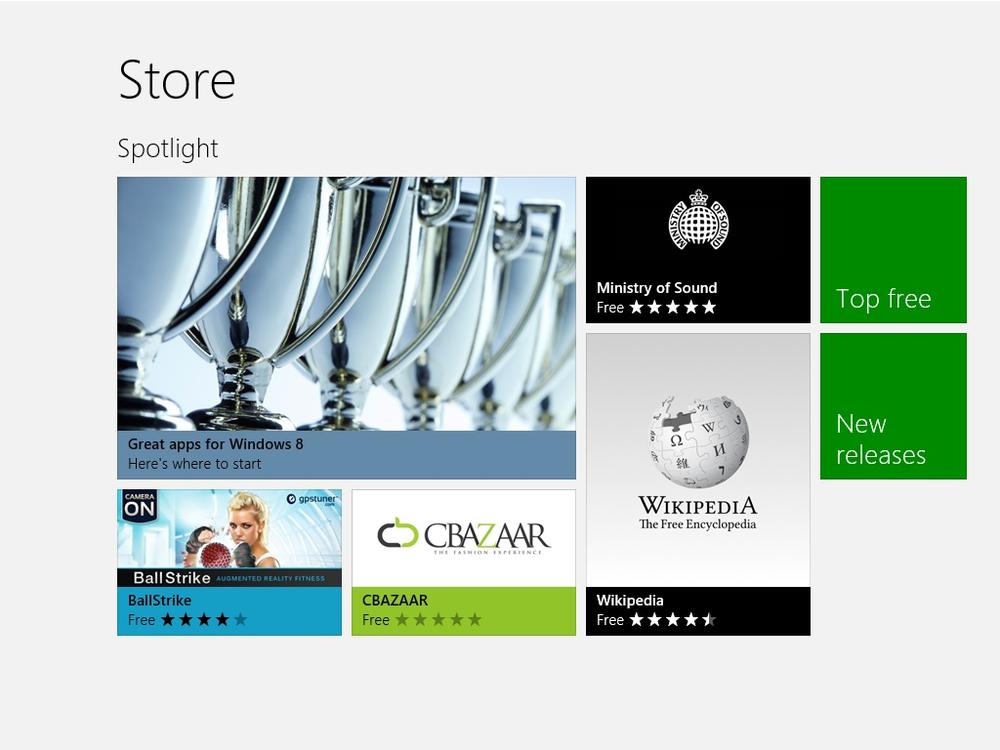
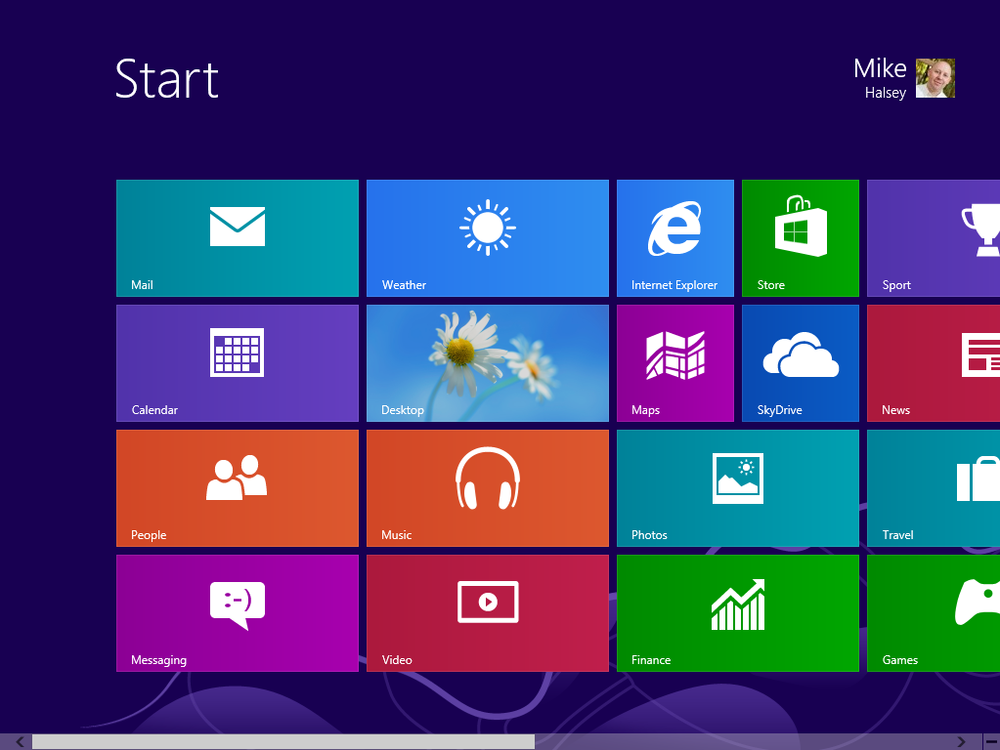
You open the Windows Store by clicking the Store icon on the Start screen. It is arranged into app categories including Games, Entertainment, and Books & Reference. There are also quick links for the most popular and highest-rated apps (Figure 4-1).
You can find out more information on an app by clicking it. Here you will see the main information about the app in a panel on the left, and on the right, links to view the app’s Overview, Details, and Reviews.
On the bottom left, you will see a section called “This app has permission to use,” where the Store will tell what personal information on your computer, if any, the app will want access to. Why is this important? Your personal information is of great economic value to companies. They want to know more about you so that they can directly target advertising at you and they may sell the information they hold about you to other companies.
If you allow an app access to information such as your email or Facebook account, you are potentially giving it huge volumes of very private information about you that you would otherwise not share. Always be careful in choosing apps, and do not install any that request access to information they should not ordinarily need.
Below this is an age rating for the app. This can be especially useful if you have young children who use your computer to play games.
You can install an app by clicking/touching the Install button, though you will have to register a credit or debit card with the Store to buy any apps that are not free.
At all stages while browsing apps, a back button will appear in the top left corner of your screen so you can return to the Store main page. You can also return to the main store page by clicking/touching Home from the App Bar.
Tip
You can often find extra options and controls in an app by opening the Charms menu and clicking/tapping the Settings icon. If available in that app, extra options will appear in the top right of your screen.
Occasionally, the apps you install on your Windows 8 computer will be updated with new features and fixes. The Windows Store will inform you of this by displaying the number of current updates on the Store Live Tile (Figure 4-2).
When updates are available for apps and when you open the Store app, you will see a notification in the top right of your screen concerning how many updates are available. Clicking this notification will allow you to install all the updates quickly and simply.
It is usually a good idea to install app updates because some might be security related and fix flaws that could make you vulnerable to criminals or that could make your copy of Windows unstable. Some may also add new features to the app.
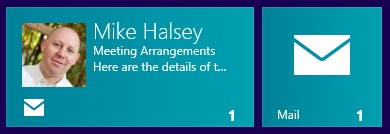
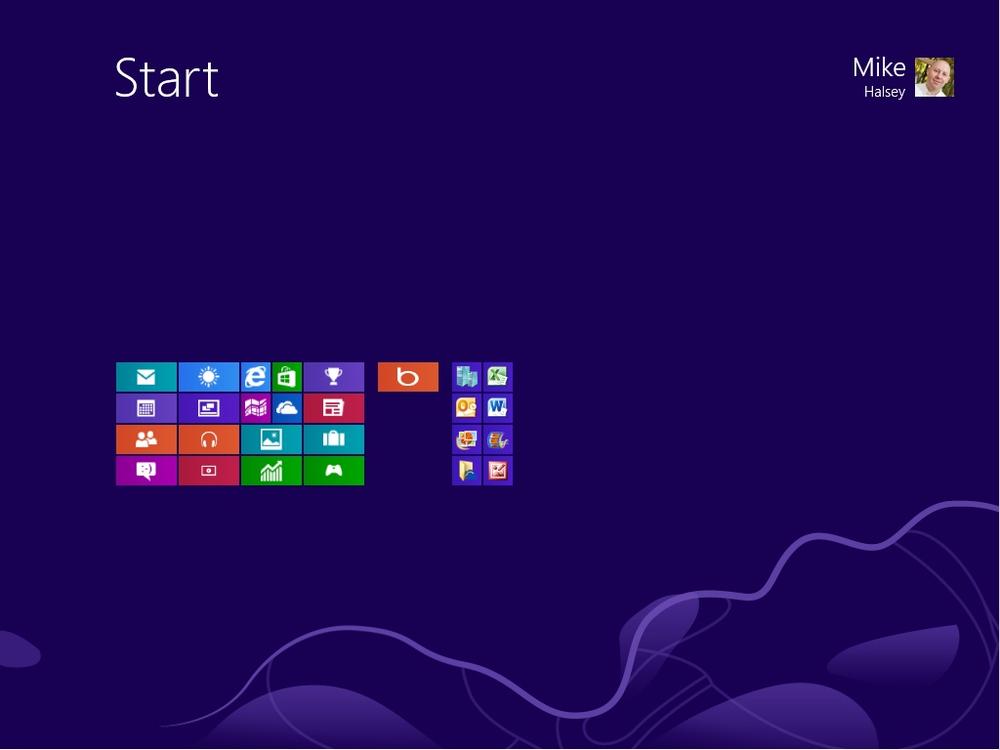
Some Tiles can be made larger and smaller, to display less or more information. You might want to make the Mail tile smaller, for example, so that it only shows you the number of new emails and not the senders and subjects (if perhaps other people can read over your shoulder), or you may have a news Tile that when made larger shows you additional information about current events (you can see an example of different sizes of Tile in Figure 4-3).
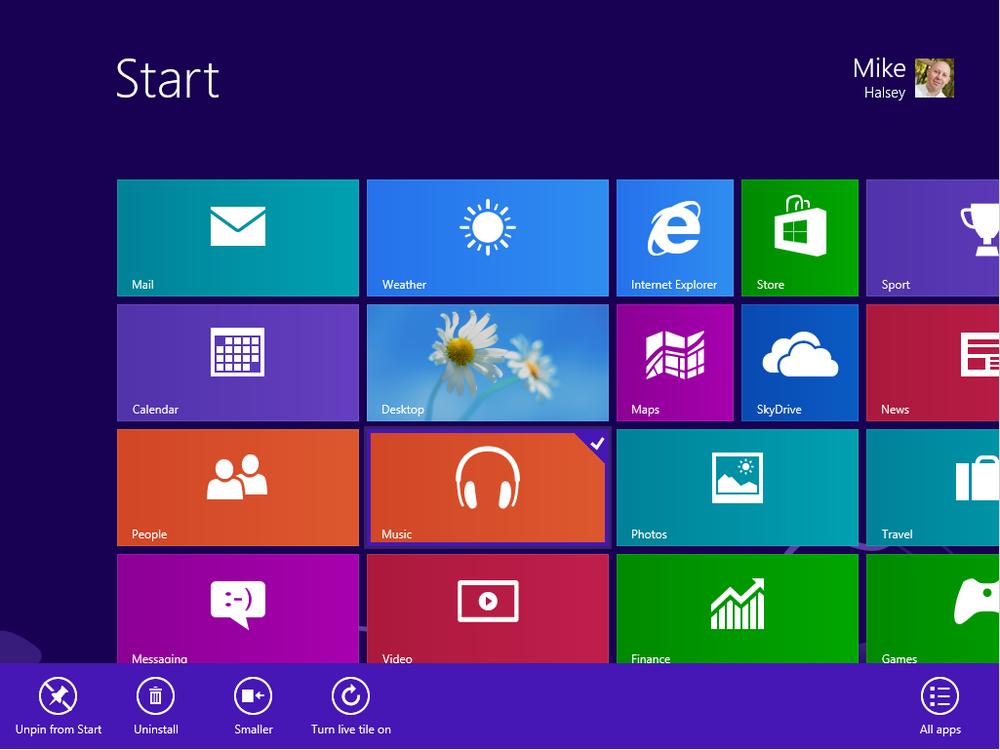
You can make a Tile larger or smaller by touching it and dragging downwards with your finger or right-clicking it with your mouse. From the App Bar, you can then click/touch the Smaller or Larger button. If you do not see a smaller or larger option, then the tile you have selected cannot be resized.
You can also turn the Live Tile off for an app completely, perhaps for privacy reasons, by selecting Turn Live Tile Off from the App Bar when you have selected it. This prevents the Tile from displaying information such as details of emails, photos, or calendar appointments.
When you install new apps on your Windows 8 computer, or create an Internet Favorite in the Internet Explorer App, these will all appear as tiles on the far right of the Start screen. This can cause your Start screen to become cluttered quite quickly, making it very difficult to find what you are looking for. As you add Tiles to the Start screen, it expands to the right and can get very large.
You can move these Tiles around to organize them, and even hide them completely from the main view to help keep them organized.
If you are using a mouse, remember to look for the scroll bar at the bottom of your screen. You can drag this to move left and right on the Start screen. You can also use your mouse scroll wheel to pan left and right on the Start screen.
You might want to reorganize the tiles on your Start screen so that all the apps, websites, and programs you use regularly have their Tiles on the far left of your screen, to make them easier to access. You might also install software such as Microsoft Office and want to hide the extra programs it installs, such as the Office Picture Viewer.
To arrange your apps, websites, and programs on the Start screen (see Figure 4-4), follow these quick steps:
Click/Touch and then hold, drag, and drop tiles around the Start screen to rearrange them using either your finger or your mouse.
Hold a tile between groups to create a new group again using either your finger or your mouse. Drop it on the vertical bar that appears.
Remove a tile from the Start screen by touching it and dragging downwards, or right-clicking with your mouse, and then click/touch Unpin from Start from the App Bar.
If you unpin a Tile from the Start screen, it will be removed, but you will still be able to access it when you want to. I will show you how to do this later in this chapter.
I mentioned previously that you can create new groups of Tiles by dragging a Tile to the space between groups and, when you see a vertical bar appear, dropping the Tile. You can also name and rearrange whole groups of Tiles simply and quickly.
You can give groups of Tiles names by zooming out of the Start screen (see Figure 4-5). You can do this in one of three ways:
Make an outward pinch zoom gesture with your fingers
Click with your mouse in the very bottom right corner of the Start screen
Hold the Ctrl key on your keyboard and use your mouse wheel to zoom out
You can now drag and rearrange whole groups of tiles to arrange them how best suits you. You can also give groups names, such as “Websites” or perhaps “Desktop Programs” by right-clicking on or touching and dragging downwards on an app group.
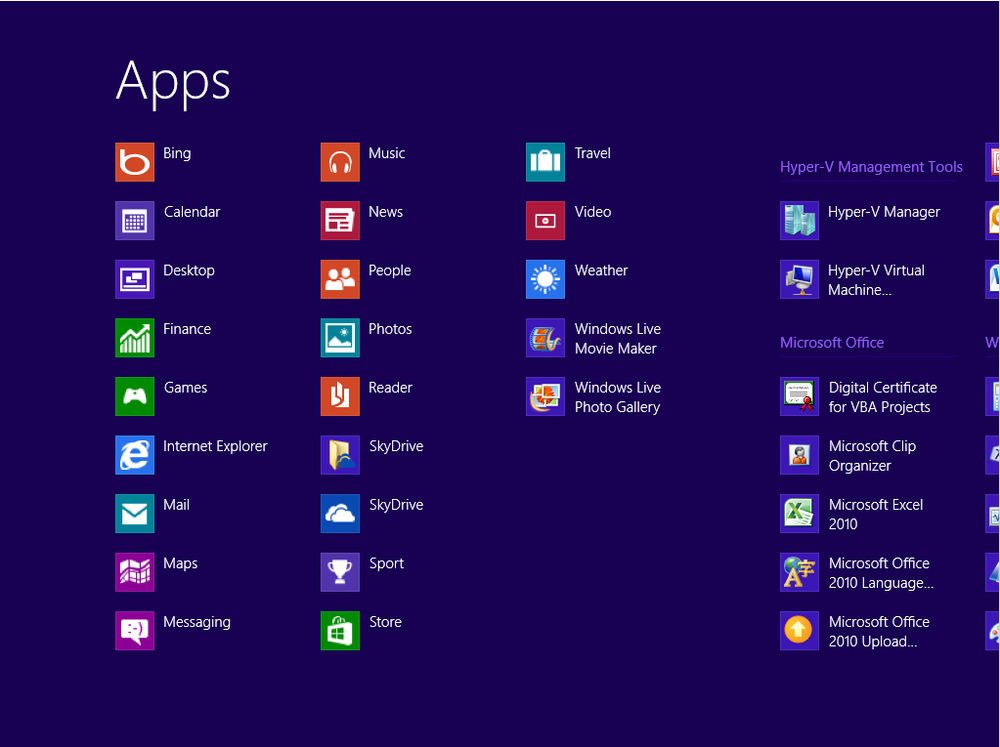
I showed you earlier how you can hide apps and programs from your Start screen. But surely if you hide them, then you can’t use them? Fortunately, it’s easy to see all of the apps and programs that you have installed on your computer at any time.
To see hidden apps and programs, open the app bar from the Start screen and click/touch the All Apps button. Here, you will be able to see all the apps and programs that are installed on your computer (Figure 4-6). Programs are organized into groups as you would see in the Start Menu in previous versions of Windows.
You cannot rearrange apps and programs in the All Apps view into different groups, but it is easy to see all the software you have installed. Remember, this view can also expand outward to the right, so you may need to swipe left and right to view everything. Again, if you are using a mouse, a scroll bar will appear at the bottom of the screen.
Apps in Windows 8 run full screen by default, but you will want to switch between them and use more than one at a time. There are several different ways to switch between running apps and programs on your computer. If you are using touch, then dragging your finger in from the left of your screen will drag the previously seen app onto the screen.
With your keyboard, you can use the WindowsKey+Tab keypress to switch between running apps or the Alt+Tab key combination to switch between all running app and desktop programs. The WindowsKey is in the bottom right of your keyboard with the Windows logo on it, and Tab can be found near the top left of the keyboard.
To switch between apps using the keyboard, hold down the Alt or Windows Key and keep pressing Tab until you get to the program you want. The currently running apps and programs will appear as thumbnail images at either the left side of the screen or in the center of the screen.
You can also view apps (and even the desktop) side by side on your screen. To view apps side by side, grab the app at the top of the screen with your finger or mouse and drag it toward the center of the screen. You will see that it changes to a thumbnail image. When you drag this thumbnail to the left or right of the screen, you will see a vertical bar appear; this signifies that dropping the app there will dock it in a panel to that side of the window (Figure 4-7).
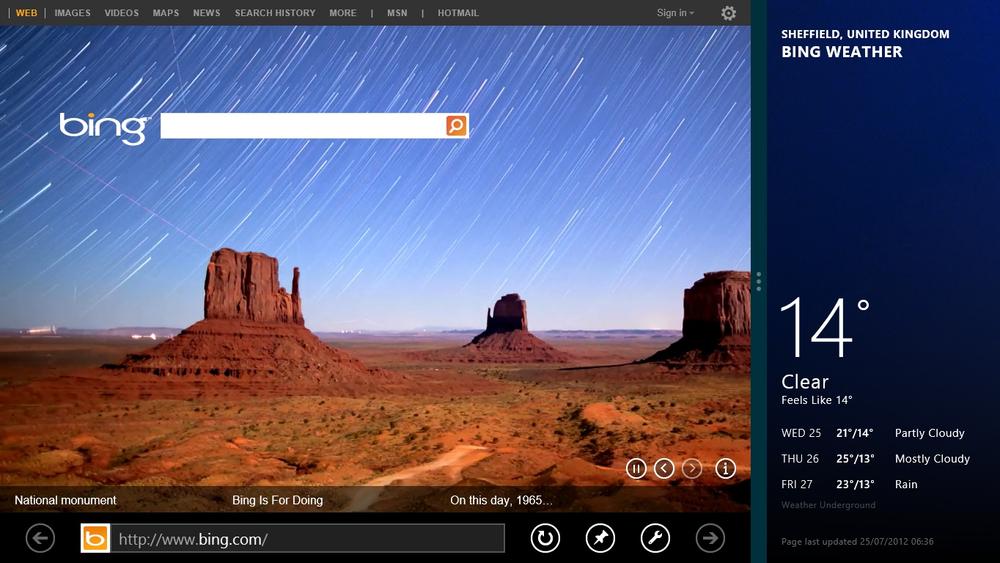
You can now return to the Start screen and run another app. This second app will appear, filling the main portion of the screen with your docked app sitting at the left or right of it.
Tip
You can also select another running app by holding down the WindowsKey on your keyboard and pressing the Tab key to cycle through thumbnail images of running apps. For desktop programs, use the key combination Shift+Tab instead.
You can change which app fits the small window and which takes the main focus of your screen by dragging the bar that separates them left and right. You can also drag this bar to the far edge of the screen to remove the smaller app from view completely.
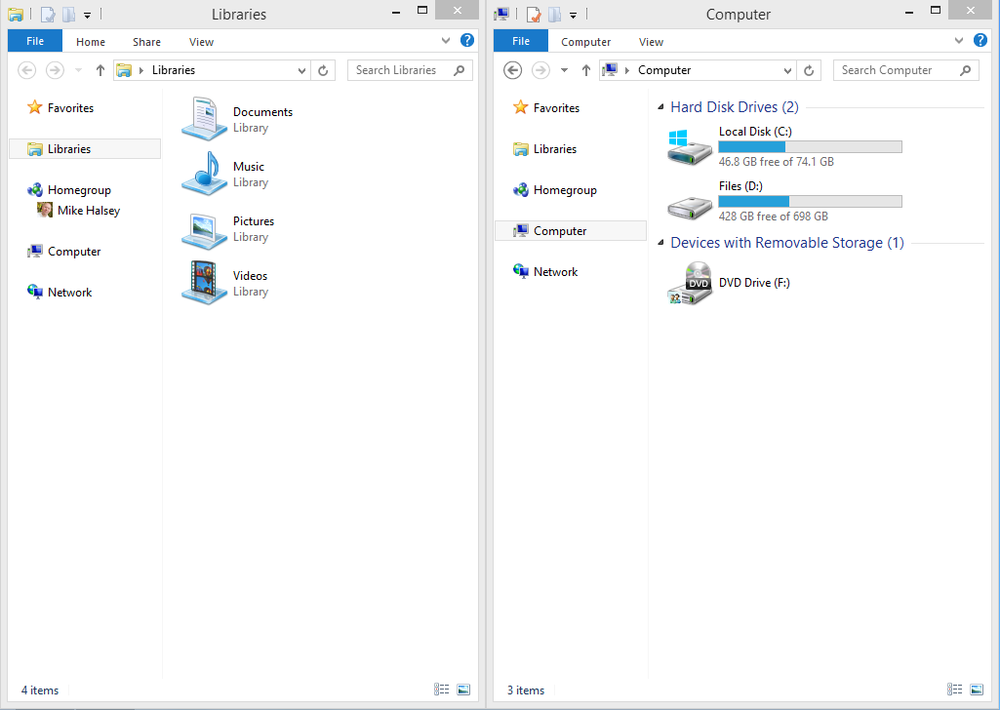
You can also view desktop programs side by side (Figure 4-8). This can be very useful for comparing two documents or web pages. To do this, click/touch or touch and hold the top of the desktop program window and drag it to the far left or right of your screen. You will see a shadow appear when your mouse touches the screen edge to show you that the program will be resized to fill exactly half of your screen’s width and docked to one side of the screen.
Drag your other program to the opposite side of the screen and it will fill the other half of your screen’s width. You can return them to their original shape and size by dragging them away from the side of the screen in the same way that you put them there.
To compare two web pages side by side when you have multiple tabs open in the desktop version of Internet Explorer, drag an individual tab out of the window and it will then appear in its own Internet Explorer Window. These can then be snapped to the left and right of the screen.
You won’t always want to have every app or program installed forever. You may, for example, have installed something just to try it out or because you thought it was what you were looking for, only to discover later that it is an app or program you don’t want to keep.
You can uninstall any app or program from the Start screen or the All Apps view by touching it and dragging downwards or right-clicking on it. In the app bar, you will see an uninstall option.
If you are uninstalling a desktop program, you will be taken to the Programs and Features window on the desktop. Here, you should click the program you wish to uninstall and on the toolbar near the top of the window, you will see an option to uninstall the program.
There are many cool ways to work with apps and programs in Windows 8, and the new Windows Store will help keep malware off your computer as well as making it much simpler to find the software you want. Security is still important, though, and I will show you how to keep your computer safe in Chapter 10.
It’s well worth spending some time arranging your apps and programs into groups on the Start screen, because this will make it much easier to find things later on.
Now that I’ve shown you how to use and work with apps and programs in Windows 8, in Chapter 5, I’ll show you how you can enjoy playing your music and videos.
Get Windows 8: Out of the Box now with the O’Reilly learning platform.
O’Reilly members experience books, live events, courses curated by job role, and more from O’Reilly and nearly 200 top publishers.

