By nature, it is difficult to create short and interesting sounds, especially button sounds less than two seconds in length. With a two-second sound, there is not enough time for musical or rhythmic elements. The key to making a good short sound is to blend several layers of audio together to create a rich complex texture or mixture of sounds. The process of mixing and blending sounds together produces a rich sound that is more effective than using a single sound. Avoid using simple touch-tone beep sounds for rollover buttons.
Both of the sounds shown earlier in Figure 1-2 and Figure 1-3 were created by mixing three or more sounds together in a multitrack digital audio editing application. You can audition both of these sounds at http://www.designingwebaudio.com. The intro sound effect was created for a swirling water animation. That sound was created by blending various elements from a sound effects library: wind, flushing water, and a jet engine. The button sound was created by copying a segment of the original introductory audio clip. The point here is that you can often recycle portions of existing sounds to use as sound effects for other segments of your web site. To make your own button sounds using a multitrack digital editor, follow these steps:
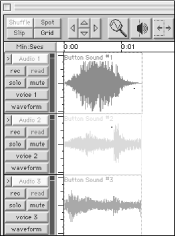
Import several sounds that may sound interesting together, such as a piano note, a telephone beep, and a “synth” sound, as shown in Figure 1-18. Remember you are only going to use a brief portion of any given sound clip. Try using sounds that you might not ordinarily associate with a button noise, such as a train engine or industrial machinery. With button sounds, the emphasis is on trying to find compelling sound textures. The quick fade-in and fade-out necessary in a button sound will render the other qualities of the sound unrecognizable.
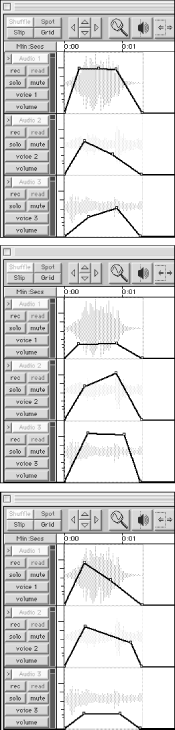
Once you have imported several sounds, try alternating volume settings for each track to determine the best combination of sounds, as shown in Figure 1-19. Try making the piano sound the loudest and the telephone beep the softest. Then reverse the volume settings and listen to the difference.
After you have settled on a pleasing combination of sounds, “bounce” or mix-down the tracks to a mono file.
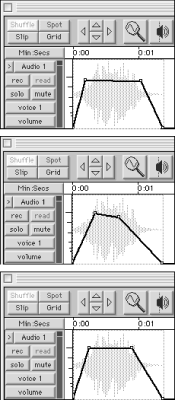
Now fine-tune the fade-in and fade-out of the mono button sound file. Experiment with subtle adjustments to the timing of the fade-in and the decay of the sound as shown in Figure 1-20. A button sound will have a more rapid fade-in and slightly longer decay than other sound effects. Bounce the sound to disk with the final volume and fade settings in place.
Now that you have a master button sound, you can create several variations as needed by shifting the pitch, as shown in Figure 1-21. First, from your master button audio file make several duplicate copies. Next, shift the pitch of each sound up or down three or five semitones. For example, pitch-shift one sound from C up to E or another from C down to A, as shown in Figure 1-22. Keep pitch-shifting the rest of the sounds until each one is of a unique pitch (this is how you create telephone beep sounds).
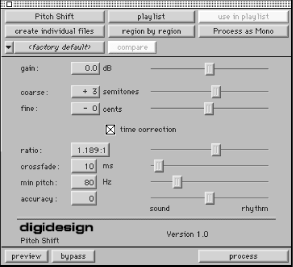
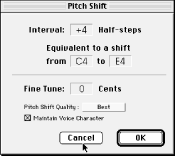
Make sure you have the time correction feature checked on to ensure that each button sound remains the same length. Although they may use different names for it, most digital editors have some form of time correction such as “maintain voice character” in SoundEdit 16. Pitch-shifting changes the length of the sound file. Specifying “time correction” (as in Pro Tools) preserves the file’s original length.
Get Designing Web Audio & CD-ROM now with the O’Reilly learning platform.
O’Reilly members experience books, live events, courses curated by job role, and more from O’Reilly and nearly 200 top publishers.

