October 2004
Intermediate to advanced
352 pages
13h 46m
English
The second project in this chapter covers the same basic process as the first project, but this time we'll create our own menu in Photoshop instead of using one of the template menus.
For the second project, you'll need to import the following files from the Chapter 1 folder:
volcano.m2v
volcano.AC3
mainmenu.psd
chaptermenu.psd
You'll probably want to switch to the Extended layout for this project. Press F2 or use the Window → Configurations menu. You should end up with a screen similar to Figure 1-29.
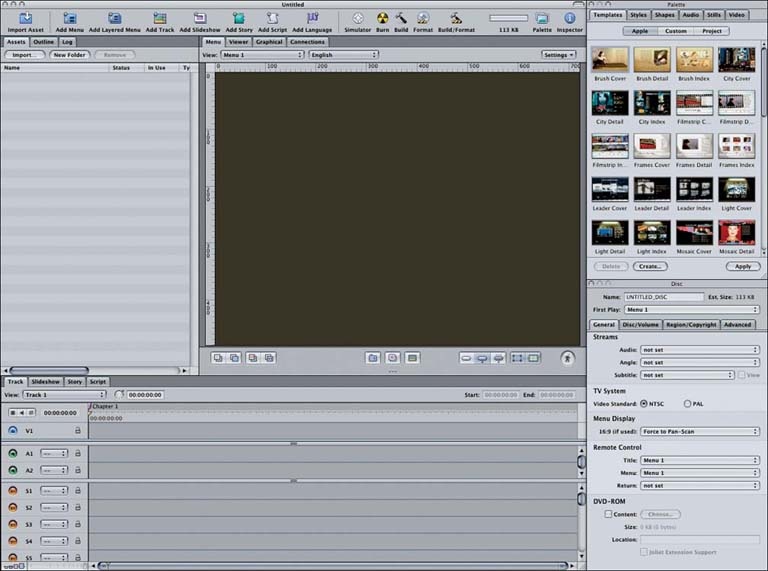
Figure 1-29. The Extended layout you'll use for the next project
Usually you don't have to do much work to add a movie clip to your DVD projects. In most cases, you can just drag the movie clip from the Assets tab to one of the editors and drop it. Occasionally you'll have to set the chapter markers manually. You'll probably also want to specify where to go after finishing the clip—back to the main menu, for example.
For this project, we set the chapters while editing the video in Final Cut Pro (which, incidentally, was very easy to do), ...
Read now
Unlock full access


