Chapter 1. Set Up Your iPad

image with no caption

You’ll learn to:

  • Activate your iPad or iPad Mini

  • Wirelessly sync media to your tablet

  • Use iTunes to manage your iPad’s contents

  • Charge up the iPad’s battery

  • Stretch battery life

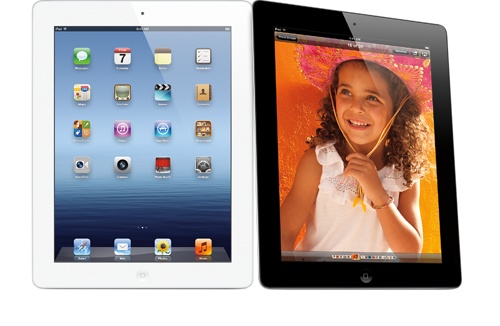
SINCE ITS ARRIVAL JUST a few years ago, Apple’s tablet computer has been adopted by millions of people, and adapted in countless ways, including as a gaming arcade, a laptop substitute, and a battery-powered media machine that can both play—and make—movies. In November 2012, the 10-inch iPad got a sibling in the form of the iPad Mini, the little iPad that can do everything its big brother can, except take up as much space.

Whether it’s showcasing your vacation photos, plotting your position on a 3D map, or describing faraway lands in travel apps like 1,000 Places to See Before You Die, an iPad can whisk you away to new worlds. But before you can take off with your new tablet, you need to set it up for the first time, learn a few basic controls, charge its battery, and stock it with media. That’s where this chapter comes in.

It’s said that a journey of a thousand miles starts with a single step. So let your first step be turning on your new iPad. To learn how to do that, turn the page.

Meet the iPad

image with no caption

THE FIRST IPAD APPEARED in the spring of 2010 and it’s been so popular, Apple has updated the product three times since then, making the screen sharper, the processor faster, and the syncing more seamless. After the original iPad, Apple debuted the iPad 2 in 2011 and the third-gen iPad in March 2012.

In October 2012, after 100 million iPads had been snapped up around the world, Apple introduced its fourth-generation tablet, called the iPad with Retina display. That same day, Apple introduced a smaller version of the big iPad, called the iPad Mini; skip to Meet the iPad Mini to read about its capabilities.

Today, you can choose from three iPad models at Apple and other outlets: the iPad with Retina display, the iPad 2 (kept around as an entry-level option at a lower price), and the iPad Mini. Older, used iPads continue to float around as well, for sale by their owners on eBay and refurbished electronics stores. The good news is that this book covers all the iPad models.

The iPad With Retina Display vs. the iPad 2

What’s the difference between the two big iPads, the Retina display and the iPad 2? Basically, it’s a matter of screen and speed. The fourth-generation iPad sports a robust A6X processor; a pixel-packing, high-definition Retina display; and a 5-megapixel back camera. This iPad can record video at 1080p resolution with the rear camera and in 720p with the front FaceTime camera; both resolutions qualify as high-definition. The Retina model is available in four storage capacities: 16 gigabytes (GB), 32 GB, 64 GB, and 128 GB. All four sizes come in either WiFi-only or Wi-Fi + Cellular models. Cellular-capable iPads can connect to zippy 4G LTE networks to get online when there’s no WiFi signal around.

The iPad 2, on the other hand, cruises along on a slower A5 processor and has a screen that’s half the resolution of the Retina display, though it’s still crisp. It has a rear camera with around 1 megapixel resolution for still photos (which isn’t very sharp), but can record video at a resolution of 720p. New iPad 2s are only available with a 16 GB drive, but they come in both Wi-Fi and Wi-Fi + 3G models; the latter gets online via a wireless network or by tapping into the slower 3G cellular networks from AT&T or Verizon. With its more modest specs, the iPad 2 is the cheapest 10-inch iPad, but it still runs all the apps and media in your life.

What’s in the Box

No matter which iPad you bought, big or small, you get the same components inside its glossy white box. Beyond the tablet itself, here’s what awaits you when you shred the shrinkwrap:

  • A white USB cable. The Retina display iPad and the Mini use the smaller Lightning connector on one end, while the iPad 2 uses the big Dock Connector plug.

  • A square-shaped USB power adapter for charging the iPad’s battery.

  • A little card of basic quick-start information that’s not nearly as fun or as colorful as this book.

image with no caption

Note

If you have a Wi-Fi + Cellular iPad (AT&T, Sprint, or Verizon) or an iPad with 3G service from AT&T, you’ll find a tiny piece of wire that looks like a paperclip stuck to the pamphlet that came with your iPad. This highly technical piece of gear serves one purpose: to open the micro-SIM card tray on a 4G/3G iPad (Verizon iPad 2 models don’t use SIM cards). You insert the pin into a tiny hole on the left edge of the iPad and pop open the tray. SIM cards (short for Subscriber Identity Module) store information about your cellular account. The Mini’s card is so tiny it’s called a nano-SIM card, but you may wonder why you need to eject the card in the first place. Usually, you don’t—unless the iPad has 4G/3G troubles and you need to replace the card, or if you travel internationally and want to pop in a card from a local carrier for service. See Travel Internationally with the iPad for more on global iPad travel.

Meet the iPad Mini

image with no caption

WHEN THE ORIGINAL IPAD debuted in 2010, Apple executives said the 10-inch screen and general form factor worked best for the tablet experience and that the company had no plans to make a smaller model. Still, that didn’t stop the rumor blogs from speculating that a smaller iPad would be along eventually—especially as 7-inch tablets from Amazon, Google, and Samsung began to take a big chomp out of Apple’s tablet market share and juicy profits.

Finally, after years of rumors, leaks, and blogger wishes swirling around every press conference, Apple announced a smaller version of the iPad in October 2012. The new model was officially dubbed the iPad Mini.

In a way, Apple’s broadened iPad line repeats the company’s history with its iPod music players. The original player arrived in 2001 and then, in 2004, Apple released a smaller version called the iPod Mini. The iPod Mini did pretty much everything the regular iPod could do, all while being smaller and more colorful.

Just as the iPod Mini ran the same operating system as its big brother’s, played the same music, and had the same buttons and switches, so does the iPad Mini. This smaller edition of the iPad runs the same internal software as its big brother (iOS 6), plays all the same media files and apps, and has the same arrangement of buttons, ports, and switches as the fourth-generation iPad.

In fact, the iPad and iPad Mini are so similar, this book often refers to everything in Apple’s tablet line as “iPad.”

But while the two types of iPads work exactly the same way, they do have some internal differences (aside from the precise screen size, which, for those keeping score at home, happens to be 9.7 inches for the iPad versus 7.9 inches for the Mini). Inside its aluminum-and-glass casing, the iPad Mini actually has more in common with the iPad 2 than it does with the fourth-generation iPad.

For example, the smaller screen doesn’t use Apple’s high-resolution Retina display—the Mini’s screen has the same number of pixels as the original iPad and the iPad 2’s screen. But even though the screen’s smaller, you get more pixels per inch on the mighty Mini: its 7.9-inch display stuffs its 1,024 x 768 screen resolution with 163 pixels per inch resolution, compared to the iPad 2’s 132 pixels per inch.

Both the Mini and the iPad 2 use Apple’s older dual-core A5 processor. It’s a chip with zip, but not the turbo engine that powers the fourth-gen iPad, which screams along on a dual-core A6X processor with quad-core graphics for superbly rendered games, photos, and videos on its Retina display.

But like the latest iPad, the Mini uses the smaller 8-pin Lightning connector port, has the same FaceTime HD front camera and 5-megapixel rear camera for high-definition video (Chapter 15), and can use the Siri personal assistant software (Command Your iPad with Siri). Both these newer iPads come in 16-gigabyte (GB), 32 GB, and 64 GB capacities for storing your videos, photos, apps, games, and other stuff. You can also choose between a white or black model.

Like the big iPads, the Mini comes in a Wi-Fi model for use with wireless networks, and in a more expensive Wi-Fi + Cellular model that lets you jump online through the same 4G LTE data networks that smartphones use. Chapter 4 explains all the ways to get online with your iPad, no matter its size.

Make no mistake—the smaller size and lighter weight of this petite iPad (less than seven-tenths of a pound) is huge for many people. The Mini’s size makes it easier to tote around and that, coupled with its lower price, means it’s a more attractive option for schools and people who need to stay online but want something bigger than a smartphone screen—but smaller than the regular iPad.

image with no caption

The Mini fits in the palms of (most) adult hands. It runs the same operating system as its older sibling, it runs the same apps, and it accepts the same Lightning adapters and accessories. Perhaps Apple itself said it best: “The iPad Mini is every inch an iPad.”

Turn the iPad On and Off

THINK OF APPLE’S IMAC, iPhone, and iPod Touch. In addition to starting with “i,” all these products are sleek gadgets with a minimum of buttons to disrupt their smooth skin. The iPad and the iPad Mini are no exception.

Run your finger along the tablet’s top edge and you’ll find a small black button on the right (circled). It’s got a long name: On/Off, Sleep/Wake.

image with no caption

Here’s what it does:

  • It turns the iPad off and on. To turn your iPad off completely—so that it gobbles no power at all—press and hold down this button until you see an on-screen arrow asking you to confirm your request. Touch the arrow with your finger and slide it along the screen from left to right. If you’re not going to use your ’Pad for a few days, this total shutdown is the way to conserve as much battery life as possible.

    image with no caption

    To turn the iPad back on, press the On/Off button again for a second or two, until you see the Apple logo. After a minute or so of boot-up gyrations, you’re back in business.

  • It puts the iPad to sleep and wakes it up. Tap the button briefly to turn off the iPad’s screen and put it in power-saving Sleep (standby) mode. To wake the iPad from its power nap, quickly press the button again. (You may also need to wake your iPad if you leave it untended for more than a few minutes, because it goes to sleep all by itself to save power. To change its nod-off settings, see General.)

Whenever you turn your iPad on or wake it from its electronic slumber, you end up on a locked Home screen (unless you have one of Apple’s Smart Covers; see Protect Your iPad). To get to the iPad’s goodies, swipe your finger along the slider in the direction of the arrow. Why does the Home screen lock itself? Because on a touchscreen device, one unintended tap when the ’Pad is in your briefcase or bag can turn on a program without you knowing it, and poof, there goes that battery charge.

image with no caption

Find the Home Button and Cameras

THERE’S ONLY ONE SWITCH on the front of the iPad: the Home button (circled below). This round, gently indented switch sits in the bottom-center of the iPad’s black or white picture frame (known as a bezel in geek-speak). You’ll probably use this button more than any other in your iPad adventures.

image with no caption

The Home button may seem like a humble little control, but it has a wider range of powers than you might expect. Use the Home Button gives you the lowdown on its versatile role, which changes depending on what screen you’re on and how many times you press it. For now, though, think of the Home button as another way to wake up your iPad—gently press it to wake a sleeping tablet.

Every iPad (except the original model) comes with two tiny cameras built into the tablet’s front and back. The camera on the front, which looks like a small pinhole, is smack dab in the middle of the bezel’s top edge. This is the camera you use for FaceTime chats and wacky Photo Booth self-portraits (Chapter 16).

The rear camera is, naturally, on the back of the iPad. It’s the small round lens below the Sleep/Wake switch. You use it to take still pictures and shoot videos—which you can then edit right on the tablet. See Chapter 15 for information about videos and Chapter 16 for details on snapping still shots with the iPad.

Note

The third-and fourth-generation iPad models, the iPad 2, and the iPad Mini each have a built-in gyroscope, an orientation sensor that tells the tablet which way you’re holding and moving it. Games (Chapter 10) that incorporate the gyroscope can be thrilling to play since they move with you.

Activate and Set Up Your iPad Over WiFi

BEFORE OCTOBER 2011, IPAD OWNERS had it rough. To set up their tablets so they could move music and other media from their computers to their slabs, they had to link the two with a USB cable and then use iTunes to broker the deal (see the Note opposite for a summary of iTunes’ role in the iPad’s life).

Those were the old days. Owners of brand-new iPads and Minis can now rip open the Apple packaging, flip on the device, and set it up wirelessly, without having to go through iTunes. (You do, however, need a WiFi network nearby. If you don’t have one, learn how to set up and sync via USB cable on Activate and Set Up Your iPad via USB.)

Here’s how you set up your ’Pad—providing, of course, the tablet retained its charge on the trip from China (if power is running low, see Charge the iPad Battery):

image with no caption
  1. Press the iPad’s Home button. You see a gray screen with the word “iPad” in the middle of it and a right-pointing arrow under it. Put your finger on the arrow and slide it to the right.

  2. Tap your language for iPad screens and menus. “English” is the default for U.S. iPads, but tap the arrow for more choices.

  3. Pick your country or region. The United States is the default, but if you’re not there, tap Show More.

  4. Decide whether you want to turn on Location Services. Location Services lets the iPad physically locate you using its built-in GPS or WiFi signals. It’s great for the Maps app, but not so much for your privacy. If you leave Location Services off now, you can turn it on later by tapping Home→Settings→Privacy→Location Services→On.

  5. Choose your WiFi network. If you’re at home, find your personal network in the list the iPad presents you, tap it to select it, and then type in your network’s password. (If you’re in range of a public network, you can connect to the Internet, but be leery of typing in any personal information, like a credit card number, to set up an iTunes account.) When the iPad connects to the Internet, it takes a few minutes to activate itself through Apple’s servers.

  6. Set up the iPad. Once you activate your iPad, it’s time for the setup phase to begin. You can set up your tablet as a new iPad, or set it up using the backup files from a previous iPad. If you opt for the latter, tap the location of your old iPad’s backup files, either on iCloud or in iTunes. Restoring a previous iPad’s files to your new iPad transfers the settings and content to your new tablet, leaving you with little else to do. But if you chose Set Up as New iPad, keep calm and carry on.

  7. Create an Apple ID. Now you’re asked to sign in with or create an Apple ID. Your Apple ID (Set Up an Apple ID) is the user name and password you use to buy apps, music, books, videos, and podcasts from the iTunes and App Stores. If you already have an Apple ID, sign in with it here. If not, tap “Create a new Apple ID” to go to the next screen, where you can base your new ID on an existing email address or set up a spiffy new—and free—iCloud account (see below). If you don’t want to deal with this Apple ID stuff now, tap Skip This Step at the bottom of the screen.

  8. Set up iCloud. On this screen, you can turn on Apple’s free iCloud service, where you can back up all your apps, contacts, calendars, and more to Apple’s online servers—and restore them later. (Chapter 17 covers iCloud.)

    image with no caption
  9. Set up your email account. You can compose, send, and receive email on your tablet, but first you have to introduce your iPad to your email account(s) or sign up for a free iCloud account. (If you have an account associated with an old Apple ID, the iPad adds it.) Later, in Settings→Mail, Contacts, Calendars, you can easily set up accounts from most major services, like Gmail and Yahoo, but you may need to get the account info from your Internet service provider (ISP) to add an ISP-based account, like those from Comcast or RoadRunner. Chapter 6 covers email.

  10. Finish up. Decide if you want to use the Find My iPad service (for lost iPads; see Find a Lost iPad), Messaging (Send Messages), and the Siri assistant (Command Your iPad with Siri). You can also opt to share anonymous iPad diagnostic info with Apple. On the next screen, register your iPad with Apple so they have a record of it. Finally, when the Thank You screen appears, tap the “Start using iPad” button. You land on the iPad’s Home screen, where you can see all its built-in apps. Your Home Screen Apps tells you what each of those does.

Note

You don’t need iTunes to set up your iPad, but it can be command central for managing your media on the slab. In addition to keeping copies of all your files, iTunes coordinates the transfer of those files from your desktop computer to your iPad. Of course, you can also sync files wirelessly—sans iTunes—as Sync Your iPad with iTunes explains.

Activate and Set Up Your iPad via USB

AS LONG AS YOU have a wireless Internet connection within reach, you can get your iPad set up, activated, and working like a charm—all without connecting it to a computer. But if you don’t have a WiFi connection nearby—or if you want to set up your tablet through iTunes because you have a lot of music and movies, and USB transfers go faster than WiFi transfers—setting up and activating your iPad by way of iTunes still works. Your computer just needs a Net connection.

To activate your new iPad with iTunes, you need to:

  1. Install iTunes 11 on your Windows PC or Mac. Apple’s media manager (and portal to its online stores) is free. If you don’t have iTunes on your computer already, point your web browser to www.itunes.com/downloads. Make sure your computer meets the requirements listed and then click Download Now. When iTunes lands on your computer, double-click the installer to set it up. (If you already have iTunes on your computer, make sure you have the latest version. In Windows, go to Start→Apple Software Update; on a Mac, go to →Software Update.)

  2. Use the iPad’s USB cable to connect the tablet to the computer. Plug the Lightning or Dock Connector end into the matching jack on the bottom edge of your iPad. Plug the small, rectangular end into an available USB 2.0 (or later) port on your Windows PC or Mac.

  3. In iTunes, follow the steps on-screen. Once you plug in the USB cable, iTunes should recognize your new iPad (if it doesn’t, see Appendix B on page 360 for troubleshooting tips). If this is your first iPad ever (or first time setting this one up), you should see the screen below. Click Continue.

    image with no caption

    If you’ve had an iPad connected to this computer before, iTunes offers to set up the tablet as a new iPad or restore the content from a previous iPad backup. If you want to start with a fresh, empty tablet, pick the first option. To transfer all your stuff from a previous iPad onto this one, pick the second option. Then click Continue.

  4. Activate, register, and sync your iPad. Once you decide how you want to set up your new tablet, iTunes takes over. It walks you through the activation and registration process, signing up for an Apple ID (Set Up an Apple ID), and selecting the content you may already have in iTunes that you’d like to copy over to your new iPad. Although iTunes 11 doesn’t automatically copy the contents of your library over by default, you can dump everything there if you want to, as Automatically Sync the iPad describes—or you can selectively move music, videos, apps, books, photos, and more over to the tablet, as the Manually Sync Your iPad explains.

    image with no caption

    Don’t want your iPad to be chained to the computer every time you want to sync with iTunes? See Sync Your iPad with iTunes to find out about wireless syncing.

  5. Disconnect your iPad. You can unplug your iPad from the USB cable and be on your way any time it’s not actively syncing with iTunes. If the iTunes status window (below) says you’re still in the middle of a sync, do not unplug the USB cable until iTunes finishes. (To cancel a sync-in-progress because you need to leave, click the in the iTunes status window.) When iTunes finishes syncing, it displays the Apple logo () or the name of the song currently playing in the status window, too.

image with no caption

Sync Your iPad with iTunes

EVEN IF YOU ACTIVATED and set up your iPad over WiFi and didn’t come near your Windows PC or Mac during the process, iTunes is still your iPad’s buddy. It’s the program you use to organize your music, video, apps, and other content on your iPad or iPad Mini.

Syncing your iPad with iTunes doesn’t mean you’re going to be forever lashed to the computer with a USB cable. Thanks to wireless syncing, the cord has been cut! Well, not physically snipped, but, you know, made mostly unnecessary.

Why “mostly”? Because even if you set up wireless syncing, there are at least two occasions when you need the USB cable that came with your iPad. The first is so you can plug the iPad into your computer to turn on iTunes Wi-Fi Sync in the first place. The second, covered in Appendix B (Start Over: Restore Your iPad’s Software), is when you need to fully reinstall the iPad’s system software.

To sync your iPad wirelessly, your computer and iPad need to be on the same WiFi network. That means that you can’t sync the iPad from a hotel WiFi network in Philadelphia when your laptop is back home on your kitchen counter in Pittsburgh. And if your home network is a mix of WiFi and wired Ethernet connections, you can usually get iTunes to sync either way—with a computer wirelessly connected to your home network or with one connected via Ethernet cable—as long as the wired machine is part of your WiFi network.

Once you have everything on the same network, connect your computer to the tablet with the USB cable. Click the iPad icon when it appears in iTunes, and then click the Summary tab at the top of the window. In the Options area, turn on the checkbox next to “Sync with this iPad over Wi-Fi” (circled below) and click the Apply button. Click Sync to seal the deal. Feel free to unplug your iPad.

image with no caption

You can now sync content between iTunes and your iPad whenever both devices are on the same network and iTunes is open on your computer. You can tell your iPad is set for wireless syncing because its icon remains in the button bar at the top of the iTunes 11 window—even after you unplug the USB cable.

If you’re set for manual syncing (Manually Sync Your iPad), you can just drag songs, videos, and other content onto iTunes’ iPad icon to add it to your device, no matter where around the house you left the tablet.

Although syncing and backup occurs automatically at least once a day, you can also manually fire off a syncing session from either the computer or iPad:

image with no caption
  • On the computer. Start iTunes if it’s not open, click the iPad icon at the top of the window, and then click Sync at the bottom of the next screen. When you do, iTunes acts as it would if it had a USB connection and syncs away. You can see the syncing progress in the status window at the top of the screen.

  • On the iPad. Tap Home→Settings→General→iTunes Wi-Fi Sync→Sync Now. The iPad’s screen (right) shows your syncing progress and offers a Cancel Sync button if you change your mind.

Even if you accidentally click the Eject button () next to the iPad icon in the iTunes window and disconnect the two, the icon returns when you restart iTunes or sync from the iPad.

If you decide wireless syncing isn’t for you, you can always reverse course. In iTunes, turn off wireless syncing by turning off the Wi-Fi sync checkbox (circled on the opposite page).

USB or Wi-Fi Sync?

While iTunes Wi-Fi Sync is incredibly liberating, it’s not always the best way to move your stuff around. As previously mentioned, you need to cable up if you want to sync when iTunes and your iPad aren’t on the same WiFi network. Also, your WiFi network may be slow or overloaded, and the trusty USB cable is just plain faster—especially when you have a lot of videos to copy over.

But you can have it both ways, too. Even if you set up your iPad to sync over the WiFi-scented air, you can still jack it into iTunes with the faithful USB cable any time you want. To learn more about what you can sync ’twixt iTunes and iPad, visit Chapter 12.

Tour iTunes

ITUNES NOT ONLY LETS you decide which songs, books, and videos from your computer end up on your iPad, it also helps you keep your iPad’s internal software up to date, shows you how much space you have left on your tablet, and lets you change your music, video, and podcast syncing options.

When you connect your iPad to your computer, it shows up in the row of buttons along the top of the iTunes window. Click its icon to go to the iPad’s own screen full of controls, as shown below. Like the main iTunes window, the iPad’s settings screen also has a row of clickable tabs along the top part of the window. Each tab lets you control a different kind of content, like music or books.

You start out on the Summary tab, whose screen tells you:

  1. Your iPad’s storage capacity and its serial number.

  2. Whether your iPad has the latest software on it (and if you’re having problems with your iPad, you get the chance to reinstall the software).

    image with no caption
  3. Whether you set the iPad to back up its settings and data to iCloud or to your computer, and how that happens (Use iPad Backup Files has more on iPad backup).

  4. As you scroll down into the Options area, you can also decide if you want iTunes to automatically synchronize all files between your computer and iPad, or whether you’d prefer to update the iPad’s contents manually, so you can specify what goes on it. Other boxes iTunes offers in the Options area let you convert large song files to smaller ones so they don’t hog space, choose standard-definition videos over their heftier HD counterparts, and configure the Universal Access features for visually and hearing-impaired iPadders. Don’t want to be chained to iTunes by a USB cable every time you want to sync? The Options area also includes a setting that lets you sync your iPad over a WiFi connection (see Sync Your iPad with iTunes if you skipped that part).

  5. To see what’s on your iPad at the moment, click the button at the top of the screen on the far right, logically called On This iPad. On this screen, iTunes lists your iPad’s media libraries along the left side of the window. Click a category name, like Music or TV Shows, to see all the items of that type currently residing on your iPad. Any playlists you made and added to the iPad appear in the list as well. (Chapter 13 has information for making and adding playlists to your tablet.)

  6. The On This iPad screen also shows the different media types filling up your tablet. This info comes in the form of a bar at the bottom of the window, as shown below. Here, iTunes color-codes your media types (blue for audio, purple for videos, and so on) and reveals the space each takes up using the appropriate color in the bar. Move your mouse cursor over a color segment to see a box of media stats that lists the number of items you have and the amount of drive space they take up.

image with no caption

So that’s what you find on the Summary and the On This iPad tabs. Later in this book, you’ll learn how to transfer different types of media to your iPad using iTunes’ other tabs, and how to watch, listen to, and read that media on your tablet.

For example, Chapter 14 is all about playing your favorite music on the iPad, Chapter 15 covers syncing and playing videos, while Chapter 16 explains copying your photos from computer to iPad (which makes a great handheld picture frame to show off your shots).

To learn more about how iTunes works and what it can do for your iPad, take a trip to Chapter 12. And if you want to explore the virtual shelves of the iTunes App Store so you can load up your tablet with the coolest new games and iPad programs, skip on over to Chapter 8.

Charge the iPad Battery

MANY APPLE DEVICES SHIP with enough power to run for a short while. But as you poke and prod your new gadget, that charge won’t last long, so you’ll want to get the iPad connected to a power source to refill its battery. You can charge your iPad in one, maybe two, ways:

image with no caption
  • Charge by AC adapter. Look! Another charger for your collection! Both the iPad and the Mini come with a little square AC adapter ready to keep your tablet charged up. It has a USB port on one side and a plug on the other. To boost your battery, plug the flat end of the iPad’s USB cable into the cube’s USB port. Then plug the cube’s pronged end into an electrical outlet. Hitch up the USB cable’s Lightning connector (Dock Connector on the iPad 2) to the bottom of your iPad and charge away. (Older, smaller adapters from iPhones and older iPods may work if you turn the iPad screen off to direct the full stream of juice to the iPad’s battery, but their low flow will likely charge the iPad much more slowly than its native adapter.)

    image with no caption
  • Charge by computer. Unlike iPhones and iPods, charging the iPad over your computer’s USB port isn’t a sure thing anymore. While USB ports on some newer computers—like late-model iMacs—have enough juice, many older ones don’t. To see for sure, grab the USB cable and plug your iPad into your computer’s USB port. If you see a “Not Charging” message in the top corner of your iPad (right), you know the port is underpowered. (The USB port will probably “trickle charge” if the iPad screen is off, but very slowly.)

    image with no caption

You can fully gas up your iPad in only a few hours. It displays a translucent battery that fills up with green power as you recharge. A smaller, black-and-white battery icon up in the iPad’s status bar displays a lightning bolt along with the battery’s current charge (as a percentage of its total charge).

The iPad is fully charged when the battery icon in the menu bar shows 100%. Apple says a full iPad battery charge lasts up to 10 hours for web browsing, videos, and listening to music. Your results may vary.

Extend Battery Life

APPLE POSTS VARIOUS RECOMMENDATIONS on its iPad website to ensure a longer battery life for hard-working iPads:

  • Don’t expose your iPad to extreme hot or cold temperatures—keep it between 32 and 95 degrees Fahrenheit. (In other words, don’t leave it in a hot, parked car, and don’t expect it to operate on Mt. Everest.)

  • Use your iPad regularly (not that you wouldn’t). And be sure to charge it at least once a month to keep that battery chemistry peppy.

  • Put the iPad to sleep to save power (press the Sleep/Wake button.)

    image with no caption
  • Take the iPad out of any heat-trapping cases before you charge it up.

  • Manually close any apps you’re not using, as described on Use the Home Button to Switch Apps.

  • Dim the screen when you don’t need it at total brightness (see Sounds).

  • When you see the Low Battery icon or message, plug your iPad into an electrical outlet using the AC adapter. The iPad battery indicator shows roughly how much charge the battery has left.

  • Features like the music equalizer—or jumping around within your media library—can drain your battery faster, as can using big, uncompressed file formats, like AIFF (see Change Import Settings for Better Audio Quality). To cut back on the equalizer, see Improve Your Tunes with the Graphic Equalizer. Apps that stream content, like radio shows and live TV, can take their toll on the battery’s power, too, so use them sparingly if you’re low on juice.

  • That wireless chip inside the iPad saps power even if you’re not trawling the Web. Save energy by turning it off when you don’t need it; go to Settings→Wi-Fi and tap Off. Lower the frequency with which you check email or have data pushed to the iPad to save some energy as well; go to Settings→Mail, Contacts, Calendars. Bluetooth and Location Services also take their toll, and you can turn them off by visiting the Settings icon.

Get iPad: The Missing Manual, 5th Edition now with the O’Reilly learning platform.

O’Reilly members experience books, live events, courses curated by job role, and more from O’Reilly and nearly 200 top publishers.