Changing the Color of an Object
In Chapter 4, you saw one way to change the color of an object—select it and use the Hue and Saturation sliders in Quick Fix. Elements also gives you some other ways to do this: You can use an Adjustment layer, the Replace Color command, or the Color Replacement tool.
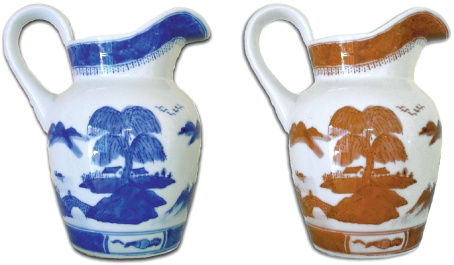
The method you choose depends to some extent on your photo and to some extent on your own preference. Using an Adjustment layer gives you the most flexibility if you want to make other changes later on. Replace Color is the fastest way to change one color that's widely scattered throughout your whole image, and the Color Replacement tool lets you quickly brush a replacement color over the color you want to change. Whichever method you choose, Figure 9-16 shows the kind of complex color change you can make in a jiffy using any one of these methods.

Figure 9-16. What if you have a blue and white jug, but what you really want is a brown and white one? Just call up the Replace Color tool. Elements actually gives you several ways to make a complicated color substitution like this one, all of which are covered in this section.
Using an Adjustment Layer
You can use a Hue/Saturation Adjustment layer to make the same kind of changes to the color that you saw on Using the Hue/Saturation Dialog Box. The advantage of the Adjustment layer is that later on, you can change the settings or the area affected ...
Get Photoshop Elements 6: The Missing Manual now with the O’Reilly learning platform.
O’Reilly members experience books, live events, courses curated by job role, and more from O’Reilly and nearly 200 top publishers.

