Every programmer needs to know how to debug his programs. It is an easy task with plain Perl: just invoke the program with the -d flag to invoke the debugger. Under mod_perl, however, you have to jump through a few hoops.
In this chapter we explain how to correctly handle server, program, and user errors and how to keep your user loyal to your service by displaying good error messages.
We also demonstrate how you can peek at what is going on in a
mod_perl-enabled server while it is running: for example, monitoring
the value of a global variable, seeing what database connections are
open, tracing what modules were loaded and their paths, checking the
value of @INC, and much more.
It’s been said that there’s always one more bug in any given program. Bugs that show symptoms during the development cycle are usually easily found. As their number diminishes, the bugs become harder to find. Subtle interactions between software components can create bugs that aren’t easily reproduced. In such cases, tools and techniques that can help track down the offending code come in handy.
The Perl interpreter
distinguishes
between warnings and errors. Warnings are
messages that the Perl interpreter prints to
STDERR (or to Apache’s error log
under mod_perl). These messages indicate that Perl thinks there is a
problem with your code, but they do not prevent the code from
running. Errors are output in the same way as
warnings, but the program terminates after an error. For example,
errors occur if your code uses invalid syntax. If a die(
) occurs outside of any exception-handling
eval, it behaves just like an error, with a
message being output and program execution terminating.
For someone new to Perl programming, the warning and error messages output by Perl can be confusing and worrysome. In this section we will show you how to interpret Perl’s messages, and how to track down and solve the problems that cause them.
Just like errors, Perl’s optional warnings, if they are enabled, go to the error_log file. You have enabled them in your development server, haven’t you? We discussed the various techniques to enable warnings in Chapter 4 and Chapter 6, but we will repeat them in this section.
The code you write lives a dual life. In the first life it is written, tested, debugged, improved, tested, debugged, rewritten, retested, and debugged again. In the second life it’s just used.
A significant part of the script’s first life is spent on the developer’s machine. The second life is spent on the production server, where the code is supposed to be perfect.
When you develop the code you want all the help you can get to spot possible problems. By enabling warnings you will ensure that Perl gives you all the help it can to identify actual or potential problems in your code. Whenever you see an error or warning in the error_log, you must try to get rid of it.
But why bother, if the program runs and seems to work?
The Perl interpreter issues warnings because it thinks that something’s wrong with your code. The Perl interpreter is rarely wrong; if you ignore the warnings it provides, you may well encounter problems later, perhaps when the code is used on the production server.
If each invocation of a script generates any superfluous warnings, it will be very hard to catch real problems. The warnings that seem important will be lost amongst the mass of “unimportant” warnings that you didn’t bother to fix. All warnings are important, and all warnings can be dealt with.
On the other hand, on a production server, you really want to turn warnings off. And there are good reasons for this:
There is no added value in having the same warning showing up, again and again, triggered by thousands of script invocations. If your code isn’t very clean and generates even a single warning per script invocation, on the heavily loaded server you will end up with a huge error_log file in a short time.
The warning-elimination phase is supposed to be a part of the development process and should be done before the code goes live.
In any Perl script, not just under mod_perl, enabling runtime warnings has a performance impact.
mod_perl provides a very simple solution to handling warnings, so you should avoid enabling warnings in the scripts themselves unless you really have to. Let mod_perl control this mode globally. All you need to do is put the directive:
PerlWarn On
in httpd.conf on your development machine and the directive:
PerlWarn Off
on the live machine.
If there is a piece of code that generates warnings and you want to
disable them only in that code, you can do that too. The Perl special
variable $^W
allows you to
dynamically turn warnings mode on
and off.
{
local $^W = 0;
# some code that generates innocuous warnings
}Don’t forget to localize the
setting
inside a block. By localizing the variable you switch warnings off
only within the scope of the block and ensure that the original value
of $^W is restored upon exit from the block.
Without localization, the setting of $^W will
affect all the requests handled by the Apache
child process that changed this variable, for
all the scripts it executes—not just the
one that changed $^W!
Starting from Perl 5.6.0 you can use the
warnings
pragma:
{
no warnings;
# some code that generates innocuous warnings
}The diagnostics pragma can shed more light on
errors and warnings, as we will see in the following sections.
This pragma extends the terse diagnostics normally emitted during the compilation and runtime phases and augments them with the more verbose and endearing descriptions found in the perldiag manpage.
Like any other pragma, diagnostics is invoked with
use, by placing:
use diagnostics;
in your program. This also turns warnings mode on for the scope of the program.
This pragma is especially useful when you are new to Perl and want a better explanation of the errors and warnings. It’s also helpful when you encounter some warning you’ve never seen before—e.g., when a new warning has been introduced in an upgraded version of Perl.
You may not want to leave diagnostics mode on for your production server. For each warning, diagnostics mode generates about ten times more output than warnings mode. If your code generates warnings that go into the error_log file, with the diagnostics pragma you will use disk space much faster.
Diagnostics mode adds a large performance overhead in comparison with just having the warnings mode on. You can see the benchmark results in Chapter 9.
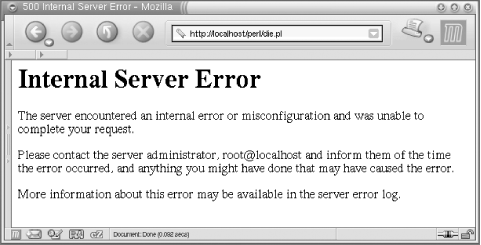
Say you’ve just installed a new script, and when you try it out you see the grey screen of death saying “Internal Server Error” (Figure 21-1). Or even worse, you’ve had a script running on a production server for a long time without problems, when the same grey screen starts to show up occasionally for no apparent reason.
How can you find out what the problem is, before you actually attempt to solve it?
The first problem is determining the location of the error message.
You have been coding in Perl for years, and whenever an error occurred in the past it was displayed in the same terminal window from which you started the script. But when you work with a web server, the errors do not show up in a terminal. In many cases, the server has no terminal to which to send the error messages.
Actually, the error messages don’t disappear; they
end up in the
error_log
file.
Its location is specified by the
ErrorLog
directive in httpd.conf. The default setting is:
ErrorLog logs/error_log
where logs/error_log is appended to the value of
the ServerRoot directive.
If you’ve followed the convention
we’ve used in this book and your
ServerRoot is:
ServerRoot /home/httpd/httpd_perl
the full path to the file will be /home/httpd/httpd_perl/logs/error_log.
Whenever you see “Internal Server Error” in a browser it’s time to look at this file.
There are cases when errors don’t go to the
error_log file. This can happen when the server
is starting and hasn’t gotten as far as opening the
error_log file for writing before it needs to
write an error message. In that case, Apache writes the messages to
STDERR
. If you have entered a
nonexistent directory path in your ErrorLog
directive in httpd.conf, the error message will
be printed to STDERR. If the error happens when
the server executes a PerlRequire,
PerlModule, or other startup-time directive you
might also see output sent to STDERR. If you
haven’t redirected Apache’s
STDERR, then the messages are printed to the
console (tty, terminal) from which you started the server.
Note that when you’re running the server in single-process mode (httpd -X), the usual startup message:
Apache/1.3.24 (Unix) mod_perl/1.26 configured
won’t appear in the error_log file. Also, any startup warnings will be printed to the console, since in this mode the server redirects its STDERR stream to the error_log file only at a later stage.
The first problem is solved: we know where the error messages are.
The second problem is, how useful is the error message?
The usefulness of the error message depends to some extent on the programmer’s coding style. An uninformative message might not help you spot and fix the error.
For example, let’s take a function that opens a file passed to it as a parameter for reading. It does nothing else with the file. Here’s the first version of the code:
my $r = shift;
$r->send_http_header('text/plain');
sub open_file {
my $filename = shift;
die "No filename passed" unless defined $filename;
open FILE, $filename or die;
}
open_file("/tmp/test.txt");Let’s assume that /tmp/test.txt
doesn’t exist, so the open( )
call will fail to open the file. When we call this script from our
browser, the browser returns an “Internal Server
Error” message and we see the following error
appended to error_log:
Died at /home/httpd/perl/test.pl line 9.
We can use the hint Perl kindly gave to us to find where in the code
die(
)
was called. However, we still
won’t necessarily know what filename was passed to
this subroutine to cause the program termination.
If we have only one function call, as in the example above, the task
of finding the problematic filename is trivial. Now
let’s add one more open_file( )
function call and assume that of the two, only the file
/tmp/test.txt exists:
open_file("/tmp/test.txt");
open_file("/tmp/test2.txt");
When you execute the above call, you will see:
Died at /home/httpd/perl/test.pl line 9.
Based on this error message, can you tell what file your program failed to open? Probably not. Let’s improve it by showing the name of the file that failed:
sub open_file {
    my $filename = shift;
    die "No filename passed" unless defined $filename;
    open FILE, $filename or die "failed to open $filename";
}

open_file("/tmp/test2.txt");
When we execute the above code, we see:
failed to open /tmp/test2.txt at
    /home/httpd/perl/test.pl line 9.
which obviously makes a big difference, since now we know what file we failed to open.
By the way, if you append a newline to the end of the message you
pass to die( ), Perl won’t report
the line number at which the error has happened. If you write:
open FILE, $filename or die "failed to open $filename\n";
the error message will be:
failed to open /tmp/test2.txt
which gives you very little to go on. It’s very hard to debug with such uninformative error messages.
The warn( )
function outputs an error message in the
same way as die( ), but whereas die(
) causes program termination, execution continues normally
after a warn( ). Just like with die(
), if you add a newline to the end of the message, the
filename and the line number from which warn( )
was called won’t be logged.
You might want to use warn( ) instead of
die( ) if the failure isn’t
critical. Consider the following code:
if (open FILE, $filename) {
    # do something with the file
    close FILE;
}
else {
    warn "failed to open $filename";
}
# more code here...
However, unless you have a really good reason to do otherwise, you
should generally die( ) when your code encounters
any problem whatsoever. It can be very hard to catch a problem that
manifests itself only several hundred lines after the problem was
caused.
A different approach for producing useful warnings and error messages
is to print the
function call stack
backtrace. The Carp
module comes to our aid with its cluck(
)
function. Consider the script in Example 21-1.
Example 21-1. warnings.pl
#!/usr/bin/perl -w

use strict;
use Carp ( );
local $SIG{_ _WARN_ _} = \&Carp::cluck;

correct( );
incorrect( );

sub correct   { print_value("Perl"); }
sub incorrect { print_value( ); }

sub print_value {
  my $var = shift;
  print "My value is $var\n";
}
Carp::cluck( ) is assigned as a warnings signal
handler. Whenever a warning is triggered, this function will be
called. When we execute the script, we see:
My value is Perl
Use of uninitialized value at ./warnings.pl line 15.
  main::print_value( ) called at ./warnings.pl line 11
  main::incorrect( ) called at ./warnings.pl line 8
My value is
Take a moment to understand the stack trace in the warning. The
deepest calls are printed first. So the second line tells us that the
warning was triggered in print_value( ) and the
third line tells us that print_value( ) was called
by the subroutine incorrect( ):
script -> incorrect( ) -> print_value( )
When we look at the source code for the function incorrect(
), we see that we forgot to pass the variable to the
print_value( ) function. Of course, when you write
a subroutine like print_value( ),
it’s a good idea to check the passed arguments
before starting execution. We omitted that step to contrive an easily
debuggable example.
You can also call Carp::cluck( ) directly in your
code, and it will produce the call-stack backtrace for you. This is
usually very useful during the code development phase.
Carp::confess( )
is like Carp::cluck(
), but it acts as a die( ) function
(i.e., terminates the program) and prints the call-stack backtrace.
The functions Carp::carp(
)
and Carp::croak( )
are two other equivalents of
warn( ) and die( ),
respectivily, but they report about the caller of the function in
which they are used, rather the function itself.
In some cases the built-in caller(
)
function can be useful as well, but it
can be a bit cumbersome to use when you need to peek several levels
up the call stack.
When using the warn( ) and die(
) functions, be aware of the following pitfall. Here the
message passed to die( ) is printed with no
problems, assuming the file /does_not_exist
actually doesn’t exist:
panic% perl -e 'open F, "/does_not_exist" or die "cannot open the file"'
But now try the same code using the equivalent ||
operator:
panic% perl -e 'open F, "/does_not_exist" || die "cannot open the file"'
Nothing happens! The pitfall lies in the precedence of the
|| operator. The above call is equal to:
panic% perl -e 'open F, ("/does_not_exist" || die "cannot open the file")'where the left part returns true, and makes this call equivalent to:
panic% perl -e 'open F, "/does_not_exist"'
So the die( ) part has effectively disappeared.
Make sure you always use the low-precendence logical OR operator
or in this situation. Alternatively, you can use
parentheses, but this is less visually appealing:
panic% perl -e 'open(F, "/does_not_exist") || die("cannot open the file")'Only the first pair of parentheses is really needed here, but to be consistent we use them through the whole statement.
Now let’s return to improving the warning and error
messages. The failing code reports the names of the problematic
files, but we still don’t know the real reason for
the failure. Let’s try to improve the warn(
) example. The -r operator tests whether
the file is readable:
if (-r $filename) {
    open FILE, $filename;
    # do something with file
}
else {
    warn "Couldn't open $filename - doesn't exist or is not readable";
}
Now if we cannot read the file we do not even try to open it. But we still see a warning in error_log:
Couldn't open /tmp/test.txt - doesn't exist or is not readable
at /home/httpd/perl/test.pl line 9.
The warning tells us the reason for the failure, so we don’t have to go to the code and check what it was trying to do with the file.
It could be quite a coding overhead to explain all the possible
failure reasons that way, but why reinvent the wheel? We already have
the reason for the failure stored in the $!
variable. Let’s go back to the open_file(
) function:
sub open_file {
    my $filename = shift;
    die "No filename passed" unless defined $filename;
    open FILE, $filename or die "failed to open $filename: $!";
}

open_file("/tmp/test.txt");
This time, if open( ) fails we see:
failed to open /tmp/test.txt: No such file or directory
at /home/httpd/perl/test.pl line 9.
Now we have all the information we need to debug these problems: we
know what line of code triggered die( ), we know
what file we were trying to open, and we also know the reason,
provided by Perl’s $! variable.
Note that there’s a big difference between the following two commonly seen bits of Perl code:
open FILE, $filename or die "Can't open $filename: $!";
open FILE, $filename or die "Can't open $filename!";
The first bit is helpful; the second is just rude. Please do your part to ease human suffering, and use the first version, not the second.
To show our useful error messages in action, let’s cause an error. We’ll create the file /tmp/test.txt as a different user and make sure that it isn’t readable by Apache processes:
panic% touch /tmp/test.txt
panic% chmod 0600 /tmp/test.txt # -rw-------
Now when we execute the latest version of the code, we see:
failed to open /tmp/test.txt: Permission denied
at /home/httpd/perl/test.pl line 9.
Here we see a different reason: we created a file that doesn’t belong to the user the server runs as (usually nobody). It does not have permission to read the file.
Now you can see that it’s much easier to debug your
code if you validate the return values of the system calls and
properly code arguments to die( ) and
warn( ) calls. The open( )
function is just one of the many system calls Perl provides.
Second problem solved: we now have useful error messages.
So now you can code and see error messages from mod_perl scripts and modules as easily as if they were plain Perl scripts that you execute from a shell.
It’s a good idea to
keep the error_log open all the time in a
dedicated terminal using tail -f:
panic% tail -f /home/httpd/httpd_perl/logs/error_log
or less -S:
panic% less -S /home/httpd/httpd_perl/logs/error_log
You can use whichever one you prefer (the latter allows you to navigate around the file, search, etc.). This will ensure that you see all the errors and warnings as they happen.
Another tip is to create a shell alias, to make it easier to execute the above commands. In a C-style shell, use:
panic% alias err "tail -f /home/httpd/httpd_perl/logs/error_log"
In a Bourne-style shell, use:
panic% alias err='tail -f /home/httpd/httpd_perl/logs/error_log'
From now on, in the shell you set the alias in, executing:
panic% err
will execute tail -f /home/httpd/httpd_perl/logs/error_log. If you are using a C-style shell, put the alias into your ~/.cshrc file or its equivalent. For setting this alias globally to all users, put it into /etc/csh.cshrc or similar. If you are using a Bourne-style shell, the corresponding files are usually ~/.bashrc and /etc/profile.
If you spend a lot of time browsing the Internet, you will see many error messages, ranging from generic but useless messages like “An error has happened” to the cryptic ones that no one understands. If you are developing a user-friendly system, it’s important to understand that the errors are divided into at least two major groups: user related and server related. When an error happens, you want to notify either a user or a server administrator, according to the category of the error. In some cases you may want to notify both.
If you set a file-upload limit to 1 MB and a user tries to upload a file bigger than the limit, it is a user error. You should report this error to the user, explain why the error has happened, and tell the user what to do to resolve the problem. Since we are talking about the Web, the error should be sent to the user’s browser. A system administrator usually doesn’t care about this kind of error, and therefore probably shouldn’t be notified, but it may be an indication of an attempt to compromise the server, so that may be a reason to notify the administrator.
If the user has successfully uploaded a file, but the server has failed to save this file for some reason (e.g., it ran out of free disk space), the error should be logged in error_log if possible and the system administrator should be notified by email, pager, or similar means. Since the user couldn’t accomplish what she was trying to do, you must tell her that the operation failed. The user probably doesn’t care why the operation has failed, but she would want to know how to resolve it (e.g., in the worst case, tell her to try again later). The actual reason for the error probably shouldn’t be displayed—if you do, it will probably only confuse the user. Instead, you should nicely explain that something went wrong and that the system administrator has been notified and will take care of the problem as soon as possible. If the service is very mission-critical, you probably need to provide the user with some problem tracking number and a way to contact a human, so she will be able to figure out when the problem has been resolved. Alternatively, you may want to ask for the user’s email address and use this to follow up on the problem.
Some applications use:
use CGI::Carp qw(fatalsToBrowser);
which sends all the errors to the browser. This
module might be useful in development, if you have a problem
accessing your server using an interactive session, so you can see
the contents of the error_log file. But please
don’t leave this line in the production version of
your code. Instead, trap the errors and decide what to do about each
error separately. To trap
errors, you can use the eval(
) exception-handling mechanism:[1]
eval {
# do something
};
if ($@) {
# decide what to do about the error stored in $@
}which is equivalent to the C++/Java/other languages concept of:
try {
# do something
}
catch {
# do something about errors
}There are also CPAN modules, such as
Error and Exception::Class,
that use the same approach but provide a special interface for doing
exception handling (and also provide additional functionality).
Another technique is to assign a signal handler:
$SIG{_ _DIE_ _} = sub {
print STDERR "error: ", join("\n", @_), "\n";
exit;
};When die( ) is called, this anonymous function
will be invoked and the argument list to die( )
will be forwarded to it. So if later in the code you write:
die "good bye, cruel world";
the code will print to STDERR (which under
mod_perl usually ends up in error_log):
error: good bye, cruel world
and the normal program flow will be aborted, since the handler has
called exit( ).
If you don’t localize this setting as:
local $SIG{_ _DIE_ _} = sub {...};it affects the whole process. It also interferes with
Perl’s normal exception mechanism, shown earlier; in
fact, it breaks Perl’s exception handling, because a
signal handler will be called before you get the chance to examine
$@ after calling the eval
block.
You can attempt to work around this problem by checking the value of
$^S, which is true when the code is running in the
eval block. If you are using
Apache::Registry or a similar module, the code is
always executed within an eval block, so this is
not a good solution.
Since the signal handler setting is global, it’s
possible that some other module might try to assign its own signal
handler for _ _DIE_ _, and therefore there will be
a mess. The two signal handlers will conflict with each other,
leading to unexpected behavior. You should avoid using this
technique, and use Perl’s standard
eval exception-handling mechanism instead. For
more information about exception handling, see
http://perl.apache.org/docs/general/perl_reference/perl_reference.html#Exception_Handling_for_mod_perl.
Normally, Apache
runs one parent
process and several children. The parent starts new child processes
as required, logs errors, kills off child processes that have served
MaxRequestsPerChild, etc. But it is the child
processes that serve the actual requests from web browsers. Because
the multiprocess model can get in your way when
you’re trying to find a bug, sometimes running the
server in single-process mode (with -X) is very
important for testing during the development phase.
You may want to test that your application correctly handles global variables, if you have any. It is best to have as few globals as possible—ideally none—but sometimes you just can’t do without them. It’s hard to test globals with multiple servers executing your code, since each child has a different set of values for its global variables.
Imagine that you have a random( ) subroutine that
returns a random number, and you have the following script:
use vars qw($num); $num ||= random( ); print ++$num;
This script initializes the variable $num with a
random value, then increments it on each request and prints it out.
Running this script in a multiple-server environment will result in
something like 1, 9,
4, 19 (a different number each
time you hit the browser’s reload button), since
each time your script will be served by a different child. But if you
run in httpd -X single-server mode, you will get
6, 7, 8,
9... assuming that random( )
returned 6 on the first call.
But do not get too obsessive with this mode—working in single-server mode sometimes hides problems that show up when you switch to normal (multiple-server) mode.
Consider an application that allows you to change the configuration at runtime. Let’s say the script produces a form to change the background color of the page. This isn’t good design, but for the sake of demonstrating the potential problem we will assume that our script doesn’t write the changed background color to the disk—it simply stores it in memory, like this:
use CGI;
my $q = CGI->new( );
use vars qw($bgcolor);
$bgcolor ||= "white";
$bgcolor = $q->param('bgcolor') if $q->param('bgcolor');where $bgcolor is set to a default
"white" if it’s not yet set
(otherwise, the value from the previous setting is used). Now if a
user request updates the color, the script updates the global
variable.
So you have typed in "yellow" for the new
background color, and in response, your script prints back the HTML
with the background color yellow—you think
that’s it! If only it was so simple.
If you keep running in single-server mode you will never notice that
you have a problem. However, if you run the same code in normal
server mode, after you submit the color change you will get the
result as expected, but when you call the same URL again (not via
reload!) the chances are that you will get back the original default
color (white, in this case). Only the child that processed the
color-change request has its $bgcolor variable set
to "yellow“; the rest still have
"white“. This shows that the design is
incorrect—the information is stored in only one process,
whereas many may be running.
Remember that children can’t share information directly, except for data that they inherited from their parent when they were created and that hasn’t subsequently been modified.
There are many solutions to this example problem: you could use a hidden HTML form variable for the color to be remembered, or store it in some more permanent place on the server side (a file or database), or you could use shared memory, and so on.
Note that when the server is running in single-process mode, and the
response includes HTML with <img> tags, the
loading of the images will take a long time for browsers that try to
take an advantage of the KeepAlive feature (e.g.,
Netscape). These browsers try to open multiple connections and keep
them open. Because there is only one server process listening, each
connection has to finish before the next can start. Turn off
KeepAlive in httpd.conf to
avoid this effect. Alternatively (assuming that the image-size
parameters are included, so that a browser will be able to render the
rest of the page) you can press Stop after a few seconds.
In addition, you should be aware that when running with -X you will not see the status messages that the parent server normally writes to the error_log file (“Server started”, “Server stopped”, etc.). Since httpd -X causes the server to handle all requests itself, without forking any children, there is no controlling parent to write the status messages.
Most
Unix-style operating systems offer a
“tracing utility” that intercepts
and records the system calls that are called by a process and the
signals that are received by a process. In this respect it is similar
to gdb. The name of each system call, its
arguments, and its return value are printed to
STDERR or to the specified file.
The tracing utility is a useful diagnostic, instructional, and debugging tool. You can learn a lot about the underlying system while examining traces of the running programs. In the case of mod_perl, tracing improves performance by enabling us to spot and eliminate redundant system calls. It also useful in cases of problem debugging—for example, when some process hangs.
Depending on your operating system, you should have available one of the utilities strace, truss, tusc, ktrace, or similar. In this book we will use the Linux strace utility.
There are two ways to get a trace of the process with strace. One way is to tell strace to start the process and do the tracing on it:
panic% strace perl -le 'print "mod_perl rules"'
Another way is to tell strace to attach to a process that’s already running:
panic% strace -p PID
Replace PID with the process number you want to
check on.
Many other useful arguments are accepted by strace. For example, you can tell it to trace only specific system calls:
panic% strace -e trace=open,write,close,nanosleep \
perl -le 'print "mod_perl rules"'In this example we have asked strace to show us
only the calls to open( ), write( ),
close( ), and nanosleep( ),
which reduces the output generated by strace,
making it simpler to understand—providing you know what you are
looking for.
The generated traces are too long (unless filtered with
trace=tag) to be presented here completely. For
example, if we ask for only the write( ) system
calls, we get the following output:
panic% strace -e trace=write perl -le 'print "mod_perl rules"' write(1, "mod_perl rules\n", 15mod_perl rules ) = 15
The output of the Perl one-liner gets mixed with the trace, so the actual trace is:
write(1, "mod_perl rules\n", 15) = 15
Note that the newline was automatically appended because of the -l option on the Perl command line.
Each line in the trace contains the system call name, followed by its
arguments in parentheses and its return value. In the last example, a
string of 15 characters was written to STDOUT,
whose file descriptor is 1. And we can see that they were all
successfully written, since the write( ) system
call has returned a value of 15, the number of characters written.
The strace manpage provides a comprehensive explanation of how to interpret all parts of the traces; you may want to refer to this manpage to learn more about it.
When we are interested in mod_perl-level events, it’s quite hard to use system-level tracing, both because of the system trace’s verbosity and because it’s hard to find the boundary between events. Therefore, we need to do mod_perl-level tracing.
To enable mod_perl debug tracing, configure mod_perl with the
PERL_TRACE
option:
panic% perl Makefile.PL PERL_TRACE=1 ...
The trace levels can then be enabled via the
MOD_PERL_TRACE
environment
variable which can contain any combination of the following options.
- c
Trace directive handling during Apache (non-mod_perl) configuration-directive handling
- d
Trace directive handling during mod_perl directive processing during configuration read
- s
Trace processing of
<Perl>sections
- h
Trace Perl handler callbacks during the processing of incoming requests and during startup (
PerlChildInitHandler)- g
Trace global variable handling, interpreter construction,
ENDblocks, etc.
Alternatively, setting the environment variable to
all will include all the options listed above.
One way of setting this variable is by adding this directive to httpd.conf:
PerlSetEnv MOD_PERL_TRACE all
For example, if you want to see a trace of the
PerlRequire and PerlModule
directives as they are executed, use:
PerlSetEnv MOD_PERL_TRACE d
You can also use the command-line environment, setting:
panic% setenv MOD_PERL_TRACE all panic% ./httpd -X
If running under a Bourne-style shell, you can set the environment variable for only the duration of a single command:
panic% MOD_PERL_TRACE=all ./httpd -X
If using a different shell, you should try using the env utility, which has a similar effect:
panic% env MOD_PERL_TRACE=all ./httpd -X
For example, if you want to trace the processing of the
Apache::Reload setting during startup and you want
to see what happens when the following directives are processed:
PerlModule Apache::Reload PerlInitHandler Apache::Reload PerlSetVar ReloadAll Off PerlSetVar ReloadModules "Apache::* Book::*"
do:
panic% setenv MOD_PERL_TRACE d panic% ./httpd -X PerlModule: arg='Apache::Reload' loading perl module 'Apache::Reload'...ok loading perl module 'Apache'...ok loading perl module 'Tie::IxHash'...not ok init `PerlInitHandler' stack perl_cmd_push_handlers: @PerlInitHandler, 'Apache::Reload' pushing `Apache::Reload' into `PerlInitHandler' handlers perl_cmd_var: 'ReloadAll' = 'Off' perl_cmd_var: 'ReloadModules' = 'Apache::* Book::*'
We have removed the rest of the trace and separated the output trace into four groups, each equivalent to the appropriate setting from our configuration example. So we can see that:
PerlModule Apache::Reload
loads the Apache::Reload and
Apache modules but fails to load
Tie::IxHash, since we don’t have
it installed (which is not a fatal error in the case of
Apache::Reload).
The following initializes the PerlInitHandler
stack, as it wasn’t yet used, and pushes
Apache::Reload there:
PerlInitHandler Apache::Reload
The last two directives call perl_cmd_var( ) to
set the Perl variables that can be retrieved in the code with
dir_config( ), as explained in Chapter 4:
PerlSetVar ReloadAll Off PerlSetVar ReloadModules "Apache::* Book::*"
Now let’s look at the trace of the handlers called during the execution of this code:
use strict;
my $r = shift;
$r->send_http_header("text/plain");
$r->print("Hello");We set MOD_PERL_TRACE to trace handler calls with
h:
panic% setenv MOD_PERL_TRACE h
panic% ./httpd -X &
panic% tail -f /home/httpd/httpd_perl/logs/error_log
running 1 server configured stacked handlers for /perl/test.pl...
calling &{PerlInitHandler->[0]} (1 total)
&{PerlInitHandler->[0]} returned status=0
`PerlInitHandler' push_handlers( ) stack is empty
PerlInitHandler handlers returned 0
running 1 server configured stacked handlers for /perl/test.pl...
calling &{PerlPostReadRequestHandler->[0]} (1 total)
&{PerlPostReadRequestHandler->[0]} returned status=0
`PerlPostReadRequestHandler' push_handlers( ) stack is empty
PerlPostReadRequestHandler handlers returned 0
`PerlTransHandler' push_handlers( ) stack is empty
PerlTransHandler handlers returned -1
`PerlInitHandler' push_handlers( ) stack is empty
PerlInitHandler handlers returned -1
`PerlHeaderParserHandler' push_handlers( ) stack is empty
`PerlAccessHandler' push_handlers( ) stack is empty
PerlAccessHandler handlers returned -1
`PerlTypeHandler' push_handlers( ) stack is empty
PerlTypeHandler handlers returned -1
running 1 server configured stacked handlers for /perl/test.pl...
calling &{PerlFixupHandler->[0]} (1 total)
registering PerlCleanupHandler
&{PerlFixupHandler->[0]} returned status=-1
`PerlFixupHandler' push_handlers( ) stack is empty
PerlFixupHandler handlers returned -1
running 1 server configured stacked handlers for /perl/test.pl...
calling &{PerlHandler->[0]} (1 total)
&{PerlHandler->[0]} returned status=0
`PerlHandler' push_handlers( ) stack is empty
PerlHandler handlers returned 0
`PerlLogHandler' push_handlers( ) stack is empty
PerlLogHandler handlers returned -1
running registered cleanup handlers...
perl_call: handler is a cached CV
`PerlCleanupHandler' push_handlers( ) stack is empty
PerlCleanupHandler handlers returned -1You can see what handlers were registered to be executed during the processing of this simple script. In our configuration we had these relevant directives:
PerlInitHandler Apache::Reload PerlPostReadRequestHandler Book::ProxyRemoteAddr PerlFixupHandler Apache::GTopLimit
And you can see that they were all called:
calling &{PerlInitHandler->[0]} (1 total)
&{PerlInitHandler->[0]} returned status=0
calling &{PerlPostReadRequestHandler->[0]} (1 total)
&{PerlPostReadRequestHandler->[0]} returned status=0
calling &{PerlFixupHandler->[0]} (1 total)
registering PerlCleanupHandler
&{PerlFixupHandler->[0]} returned status=-1In addition, when Apache::GTopLimit was running,
it registered a PerlCleanupHandler, which was
executed at the end:
running registered cleanup handlers... perl_call: handler is a cached CV
Since we were executing an Apache::Registry
script, the PerlHandler was executed as well:
running 1 server configured stacked handlers for /perl/test.pl...
calling &{PerlHandler->[0]} (1 total)
&{PerlHandler->[0]} returned status=0
`PerlHandler' push_handlers( ) stack is empty
PerlHandler handlers returned 0So if you debug your handlers, you can see what handlers were called, whether they have registered some new handlers on the fly, and what the return status from the executed handler was.
It’s a known fact that programmers spend a lot of time debugging their code. Sometimes we spend more time debugging code than writing it. The lion’s share of the time spent on debugging is spent on finding the cause of the bug and trying to reproduce the bug at will. Usually it takes little time to fix the problem once it’s understood.
A typical Perl program relies on many other modules written by other developers. Hence, no matter how good your code is, often you have to deal with bugs in the code written by someone else. No matter how hard you try to avoid learning to debug, you will have to do it at some point. And the earlier you acquire the skills, the better.
There are several levels of debugging complexity. The basic level is when Perl terminates the program during the compilation phase, before it tries to run the resulting byte code. This usually happens because there are syntax errors in the code, or perhaps because a used module is missing. Sometimes it takes quite an effort to solve these problems, since code that uses Apache core modules generally won’t compile when executed from the shell. Later we will learn how to solve syntax problems in mod_perl code quite easily.
Once the program compiles and starts to run, various runtime errors
may happen, usually when Perl tries to interact with external
resources (e.g., trying to open a file or to open a connection to a
database). If the code validates whether such external resource calls
succeed and aborts the program with die( ) if they
do not (including a useful error message, as we explained at the
beginning of the chapter), there is nothing to debug here, because
the error message gives us all the needed information. These are not
bugs in our code, and it’s expected that they may
happen. However, if the error message is incomplete (e.g., if you
didn’t include $! in the error
message when attempting to open a file), or the program continues to
run, ignoring the failed call, then you have to figure out where the
badly written code is and correct it to abort on the failure,
properly reporting the problem.
Of course, there are cases where a failure to do something is not fatal. For example, consider a program that tries to open a connection to a database, and it’s known that the database is being stopped every so often for maintenance. Here, the program may choose to try again and again until the database becomes available and aborts itself only after a certain timeout period. In such cases we hope that the logic is properly implemented, so it won’t lead to mysterious, hard-to-detect bugs.
If the running program is properly handling external resource calls,
it may still be prone to internal logical errors—i.e., when the
program doesn’t do what you thought you had
programmed it to do. These are somewhat harder to solve than simple
syntax errors, especially when there is a lot of code to be inspected
and reviewed, but it’s just a matter of time. Perl
can help a lot; typos can often be found simply by enabling warnings.
For example, if you wanted to compare two numbers, but you omitted
the second = character so that you had something
like if ($yes = 1) instead of if
($yes
= = 1), with warnings enabled,
Perl will warn you that you may have meant = =.
The next level is when the program does what it’s
expected to do most of the time, but occasionally misbehaves. Often
you’ll find that print( )
statements or the Perl debugger can help, but inspection of the code
generally doesn’t. Sometimes it’s
easy to debug with print( ), dumping your data
structures to a log file at some point, but typing the debug messages
can become very tedious. That’s where the Perl
debugger comes into its own.
While print( ) statements always work, running the
Perl debugger for CGI-style scripts might be quite a challenge. But
with the right knowledge and tools handy, the debugging process
becomes much easier. Unfortunately, there is no one easy way to debug
your programs, as the debugging depends entirely on your code. It can
be a nightmare to debug really complex and obscure code, but as your
style matures you can learn ways to write simpler code that is easier
to debug. You will probably find that when you write simpler, clearer
code it does not need so much debugging in the first place.
One of the most difficult cases to debug is when the process just terminates in the middle of processing a request and aborts with a “Segmentation fault” error (possibly dumping core, by creating a file called core in the current directory of the process that was running). Often this happens when the program tries to access a memory area that doesn’t belong to it. This is something that you rarely see with plain Perl scripts, but it can easily happen if you use modules whose guts are written in C or C++ and something goes wrong with them. Occasionally you will come across a bug in mod_perl itself (mod_perl is written in C and makes extensive use of XS macros).
In the following sections we will cover a selection of problems in detail, thoroughly discussing them and presenting a few techniques to solve them.
While developing code, we sometimes make syntax errors, such as forgetting to put a comma in a list or a semicolon at the end of a statement.
One approach to locating syntactically incorrect code is to execute the script from the shell with the -c flag:
panic% perl -c test.pl
This tells Perl to check the syntax but not to run the code
(actually, it will execute BEGIN blocks,
END blocks, and use( ) calls,
because these are considered as occurring outside the execution of
your program, and they can affect whether your program compiles
correctly or not).[2]
When checking syntax in this way it’s also a good idea to add the -w switch to enable warnings:
panic% perl -cw test.pl
If there are errors in the code, Perl will report the errors and tell you at which line numbers in your script the errors were found. For example, if we create a file test.pl with the contents:
@list = ('foo' 'bar');and do syntax validation from the command line:
panic% perl -cw test.pl
String found where operator expected at
test.pl line 1, near "'foo' 'bar'"
(Missing operator before 'bar'?)
syntax error at test.pl line 1, near "'foo' 'bar'"
test.pl had compilation errors.we can learn from the error message that we are missing an operator
before the 'bar' string, which is of course a
comma in this case. If we place the missing comma between the two
strings:
@list = ('foo', 'bar');and run the test again:
panic% perl -cw test.pl Name "main::list" used only once: possible typo at test.pl line 1. test.pl syntax OK
we can see that the syntax is correct now. But Perl still warns us that we have some variable that is defined but not used. Is this a bug? Yes and no—it’s what we really meant in this example, but our example doesn’t actually do anything, so Perl is probably right to complain.
The next step is to execute the script, since in addition to syntax errors there may be runtime errors. These are usually the errors that cause the “Internal Server Error” response when a page is requested by a client’s browser. With plain CGI scripts (running under mod_cgi) it’s the same as running plain Perl scripts—just execute them and see if they work.
The whole thing is quite different with scripts that use
Apache::* modules. These can be used only from
within the mod_perl server environment. Such scripts rely on other
code, and an environment that isn’t available if you
attempt to execute the script from the shell. There is no Apache
request object available to the code when it is executed from the
shell.
If you have a problem when using Apache::*
modules, you can make a request to the script from a browser and
watch the errors and warnings as they are logged to the
error_log file. Alternatively, you can use the
Apache::FakeRequest module, which tries to emulate
a request and makes it possible to debug some scripts outside the
mod_perl environment, as we will see in the next
section.
Apache::FakeRequest
is
used to set up an empty Apache request object that can be used for
debugging. The Apache::FakeRequest methods just
set internal variables with the same names as the methods and returns
the values of the internal variables. Initial values for methods can
be specified when the object is created. The print( )
method prints to STDOUT.
Subroutines for Apache constants are also defined so that you can use
Apache::Constants while debugging, although the
values of the constants are hardcoded rather than extracted from the
Apache source code.
Example 21-2 is a very simple module that prints a brief message to the client’s browser.
Example 21-2. Book/Example.pm
package Book::Example;
use Apache::Constants qw(OK);
sub handler {
my $r = shift;
$r->send_http_header('text/plain');
print "You are OK ", $r->get_remote_host, "\n";
return OK;
}
1;You cannot debug this module unless you configure the server to run it, by calling its handler from somewhere. So, for example, you could put in httpd.conf:
<Location /ex>
SetHandler perl-script
PerlHandler Book::Example
</Location>Then, after restarting the server, you could start a browser, request the location http://localhost/ex, and examine the output. Tedious, no?
With the help of Apache::FakeRequest, you can
write a little
script that will emulate
a request and return the output (see Example 21-3).
Example 21-3. fake.pl
#!/usr/bin/perl
use Apache::FakeRequest ( );
use Book::Example ( );
my $r = Apache::FakeRequest->new('get_remote_host'=>'www.example.com');
Book::Example::handler($r);When you execute the script from the command line, you will see the following output as the body of the response:
You are OK www.example.com
As you can see, when Apache::FakeRequest was
initialized, we hardcoded the Apache method get_remote_host(
) with a static value.
At the time of this writing, Apache::FakeRequest
is far from being complete, but you may still find it useful.
If while developing your code you have to switch back and forth between the normal and fake modes, you may want to start your code in this way:
use constant MOD_PERL => $ENV{MOD_PERL};
my $r;
if (MOD_PERL) {
$r = Apache->request;
} else {
require Apache::FakeRequest;
$r = Apache::FakeRequest->new;
}When you run from the command line, the fake request will be used; otherwise, the usual method will be used.
The universal
debugging tool across nearly
all platforms and programming languages is printf(
) (or equivalent output functions). This function can send
data to the console, a file, an application window, and so on. In
Perl we generally use the print( ) function. With
an idea of where and when the bug is triggered, a developer can
insert print( ) statements into the source code to
examine the value of data at certain stages of execution.
However, it is rather difficult to anticipate all the possible
directions a program might take and what data might cause trouble. In
addition, inline debugging code tends to add bloat and degrade the
performance of an application and can also make the code harder to
read and maintain. Furthermore, you have to comment out or remove the
debugging print( ) calls when you think that you
have solved the problem, and if later you discover that you need to
debug the same code again, you need at best to uncomment the
debugging code lines or, at worst, to write them again from scratch.
The constant
pragma helps
here. You can leave some debug printings in production code, without
adding extra processing overhead, by using constants. For example,
while developing the code, you can define a constant
DEBUG whose value is 1:
package Foo; use constant DEBUG => 1; ... warn "entering foo" if DEBUG; ...
The warning will be printed, since DEBUG returns
true. In production you just have to turn off the constant:
use constant DEBUG => 0;
When the code is compiled with a false DEBUG
value, all those statements that are to be executed if
DEBUG has a true value will be removed on the fly
at compile time, as if they never existed. This
allows you to keep some of the important debug statements in the code
without any adverse impact on performance.
But what if you have many different debug categories and you want to be able to turn them on and off as you need them? In this case, you need to define a constant for each category. For example:
use constant DEBUG_TEMPLATE => 1; use constant DEBUG_SESSION => 0; use constant DEBUG_REQUEST => 0;
Now if in your code you have these three debug statements:
warn "template" if DEBUG_TEMPLATE; warn "session" if DEBUG_SESSION; warn "request" if DEBUG_REQUEST;
only the first one will be executed, as it’s the only one that has a condition that evaluates to true.
Let’s look at a few examples where we use
print( ) to debug some problem.
In one of our applications, we wrote a function that returns a date from one week ago. This function (including the code that calls it) is shown in Example 21-4.
Example 21-4. date_week_ago.pl
print "Content-type: text/plain\n\n";
print "A week ago the date was ",date_a_week_ago( ),"\n";
# return a date one week ago as a string in format: MM/DD/YYYY
sub date_a_week_ago {
my @month_len = (31, 28, 31, 30, 31, 30, 31, 31, 30, 31, 30, 31);
my($day, $month, $year) = (localtime)[3..5];
for (my $j = 0; $j < 7; $j++) {
$day--;
if ($day = = 0) {
$month--;
if ($month = = 0) {
$year--;
$month = 12;
}
# there are 29 days in February in a leap year
$month_len[1] =
($year % 400 = = 0 or ($year % 4 = = 0 and $year % 100))
? 29 : 28;
# set $day to be the last day of the previous month
$day = $month_len[$month - 1];
}
}
return sprintf "%02d/%02d/%04d", $month, $day, $year+1900;
}This code is pretty straightforward. We get today’s date and subtract 1 from the value of the day we get, updating the month and the year on the way if boundaries are being crossed (end of month, end of year). If we do it seven times in a loop, at the end we should get a date from a week ago.
Note that since localtime( ) returns the year as a
value of current_year-1900 (which means that we
don’t have a century boundary to worry about), if we
are in the middle of the first week of the year 2000, the value of
$year returned by localtime( ) will be
100 and not 0, as one might
mistakenly assume. So when the code does $year--
it becomes 99, not -1. At the
end, we add 1900 to get back the correct four-digit year format. (If
you plan to work with years before 1900, add 1900 to
$year before the for loop.)
Also note that we have to account for leap years, where there are 29 days in February. For the other months, we have prepared an array containing the month lengths. A specific year is a leap year if it is either evenly divisible by 400 or evenly divisible by 4 and not evenly divisible by 100. For example, the year 1900 was not a leap year, but the year 2000 was a leap year. Logically written:
print ($year % 400 = = 0 or ($year % 4 = = 0 and $year % 100))
? 'Leap' : 'Not Leap';Now when we run the script and check the result, we see that
something is wrong. For example, if today is 10/23/1999, we expect
the above code to print 10/16/1999. In fact, it
prints 09/16/1999, which means that we have lost a
month. The above code is buggy!
Let’s put a few debug print( )
statements in the code, near the $month variable:
sub date_a_week_ago {
my @month_len = (31, 28, 31, 30, 31, 30, 31, 31, 30, 31, 30, 31);
my($day, $month, $year) = (localtime)[3..5];
print "[set] month : $month\n"; # DEBUG
for (my $j = 0; $j < 7; $j++) {
$day--;
if ($day = = 0) {
$month--;
if ($month = = 0) {
$year--;
$month = 12;
}
print "[loop $i] month : $month\n"; # DEBUG
# there are 29 days in February in a leap year
$month_len[1] =
($year % 400 = = 0 or ($year % 4 = = 0 and $year % 100))
? 29 : 28;
# set $day to be the last day of the previous month
$day = $month_len[$month - 1];
}
}
return sprintf "%02d/%02d/%04d", $month, $day, $year+1900;
}When we run it we see:
[set] month : 9
This is supposed to be the number of the current month
(10). We have spotted a bug, since the only code
that sets the $month variable consists of a call
to localtime( ). So did we find a bug in Perl?
Let’s look at the manpage of the localtime(
) function:
panic% perldoc -f localtime
Converts a time as returned by the time function to a 9-element array with the time
analyzed for the local time zone. Typically used as follows:
# 0 1 2 3 4 5 6 7 8
($sec,$min,$hour,$mday,$mon,$year,$wday,$yday,$isdst) = localtime(time);
All array elements are numeric, and come straight out of a struct tm. In particular
this means that $mon has the range 0..11 and $wday has the range 0..6 with Sunday as
day 0. Also, $year is the number of years since 1900, that is, $year is 123 in year
2023, and not simply the last two digits of the year. If you assume it is, then you
create non-Y2K-compliant programs--and you wouldn't want to do that, would you?
[more info snipped]This reveals that if we want to count months from 1 to 12 and not 0
to 11 we are supposed to increment the value of
$month. Among other interesting facts about
localtime( ), we also see an explanation of
$year, which, as we’ve mentioned
before, is set to the number of years since 1900.
We have found the bug in our code and learned new things about
localtime( ). To correct the above code, we just
increment the month after we call localtime( ):
my($day, $month, $year) = (localtime)[3..5]; $month++;
Other places where programmers often make mistakes are conditionals and loop statements. For example, will the block in this loop:
my $c = 0;
for (my $i=0; $i <= 3; $i++) {
$c += $i;
}be executed three or four times?
If we plant the print( ) debug statement:
my $c = 0;
for (my $i=0; $i <= 3; $i++) {
$c += $i;
print $i+1,"\n";
}and execute it:
1 2 3 4
we see that it gets executed four times. We could have figured this
out by inspecting the code, but what happens if instead of
3, there is a variable whose value is known only
at runtime? Using debugging print( ) statements
helps to determine whether to use < or
<= to get the boundary condition right.
Using idiomatic Perl makes things much easier:
panic% perl -le 'my $c=0; $c += $_, print $_+1 for 0..3;'
Here you can plainly see that the loop is executed four times.
The same goes for conditional statements. For example, assuming that
$a and $b are integers, what is
the value of this statement?
$c = $a > $b and $a < $b ? 1 : 0;
One might think that $c is always set to zero,
since:
$a > $b and $a < $b
is a false statement no matter what the values of
$a and $b are. But
C$ is not set to zero—it’s
set to 1 (a true value) if $a >
$b; otherwise, it’s set to
undef (a false value). The reason for this
behavior lies in operator precedence. The operator
and (AND) has lower precedence than the operator
= (ASSIGN); therefore, Perl sees the statement
like this:
($c = ($a > $b) ) and ( $a < $b ? 1 : 0 );
which is the same as:
if ($c = $a > $b) {
$a < $b ? 1 : 0;
}So the value assigned to $c is the result of the
logical expression:
$a > $b
Adding some debug printing will reveal this problem. The solutions are, of course, either to use parentheses to explicitly express what we want:
$c = ($a > $b and $a < $b) ? 1 : 0;
or to use a higher-precedence AND operator:
$c = $a > $b && $a < $b ? 1 : 0;
Now $c is always set to 0 (as
presumably we
intended).[3]
Sometimes
we need to peek into complex data
structures, and trying to print them out can be tricky.
That’s where Data::Dumper comes
to the rescue. For example, if we create this complex data structure:
$data = {
array => [qw(apple banana clementine damson)],
hash => {
food => "vegetables",
drink => "juice",
},
};how do we print it out? Very easily:
use Data::Dumper; print Dumper $data;
What we get is a pretty-printed $data:
$VAR1 = {
'hash' => {
'food' => 'vegetables',
'drink' => 'juice'
},
'array' => [
'apple',
'banana',
'clementine',
'damson'
]
};Suppose while writing this example we made a mistake and wrote:
array => qw(apple banana clementine damson),
instead of:
array => [qw(apple banana clementine damson)],
When we pretty-printed the contents of $data we
would immediately see our mistake:
$VAR1 = {
'banana' => 'clementine',
'damson' => 'hash',
'HASH(0x80cd79c)' => undef,
'array' => 'apple'
};That’s not what we want—we have spotted the bug and can easily correct it.
You can use:
print STDERR Dumper $data;
or:
warn Dumper $data;
instead of printing to STDOUT, to have all the debug messages in the error_log file. This makes it even easier to debug your code, since the real output (which should normally go to the browser) is not mixed up with the debug output when the code is executed under mod_perl.
Don’t strive for elegant, clever code. Try to develop a good coding style by writing code that is concise, yet easy to understand. It’s much easier to find bugs in concise, simple code, and such code tends to have fewer bugs.
The “one week ago” example from the previous section is not concise. There is a lot of redundancy in it, and as a result it is harder to debug than it needs to be. Here is a condensed version of the main loop:
for (0..6) {
next if --$day;
$year--, $month=12 unless --$month;
$day = $month != 2
? $month_len[$month-1]
: ($year % 400 = = 0 or ($year % 4 = = 0 and $year % 100))
? 29
: 28;
}This version may seem quite difficult to understand and even harder to maintain, but for those who are used to reading idiomatic Perl, part of this code is easier to understand.
Larry Wall, the author of Perl, is a linguist. He tried to define the syntax of Perl in a way that makes working in Perl much like working in English. So it’s a good idea to learn Perl’s coding idioms—some of them might seem odd at first, but once you get used to them, you will find it difficult to understand how you could have lived without them. We’ll present just a few of the more common Perl coding idioms here.
You should try to write code that is readable and avoids redundancy. For example, it’s better to write:
unless ($i) {...}than:
if ($i = = 0) {...}if you want to just test for truth.
Use a concise, Perlish style:
for my $j (0..6) {...}instead of the syntax used in some other languages:
for (my $j=0; $j<=6; $j++) {...}It’s much simpler to write and comprehend code like this:
print "something" if $debug;
than this:
if ($debug) {
print "something";
}A good style that improves understanding and readability and reduces the chances of having a bug is shown below, in the form of yet another rewrite of our “one week ago” code:
for (0..6) {
$day--;
next if $day;
$month--;
unless ($month){
$year--;
$month=12
}
if($month = = 2){ # February
$day = ($year % 400 = = 0 or ($year % 4 = = 0 and $year % 100))
? 29 : 28;
} else {
$day = $month_len[$month-1];
}
}This is a happy medium between the excessively verbose style of the first version and the very obscure second version.
After debugging this obscure code for a while, we came up with a much simpler two-liner, which is much faster and easier to understand:
sub date_a_week_ago {
my($day, $month, $year) = (localtime(time-7*24*60*60))[3..5];
return sprintf "%02d/%02d/%04d", $month+1, $day, $year+1900;
}Just take the current date in seconds since
epoch as time( ) returns,
subtract a week in seconds (7661 × 24 × 60
× 60),[4] and feed the result to localtime(
). Voilà—we have the date of one week ago!
Why is the last version important, when the first one works just fine? Not because of performance issues (although this last one is twice as fast as the first), but because there are more chances to have a bug in the first version than there are in the last one.
Of course, instead of inventing the date_a_week_ago(
) function and spending all this time debugging it, we
could have just used a standard module from CPAN to provide the same
functionality (with zero debugging time). In this case,
Date::Calc comes to the rescue,[5] and we will write
the code as:
use Date::Calc;
sub date_a_week_ago {
my($year,$month,$day) =
Date::Calc::Add_Delta_Days(Date::Calc::Today, -7);
return sprintf "%02d/%02d/%04d", $month, $day, $year;
}We simply use Date::Calc::Today( ), which returns
a list of three values—year, month, and day—which are
immediately fed into the function
Date::Calc::Add_Delta_Days( ). This allows us to
get the date N days from now in either
direction. We use -7 to ask for a date from one week ago. Since we
are relying on this standard CPAN module, there is not much to debug
here; the function has no complicated logic where one can expect
bugs. In contrast, our original implementation was really difficult
to understand, and it was very easy to make mistakes.
We will use this example once again to stress that it’s better to use standard modules than to reinvent them.
As we saw earlier, it’s almost
always possible to debug code with the help of print(
). However, it is impossible to anticipate all the possible
paths of execution through a program, and difficult to know what code
to suspect when trouble occurs. In addition, inline debugging code
tends to add bloat and degrade the performance of an application,
although most applications offer inline debugging as a compile-time
option to avoid these performance hits. In any case, this information
tends to be useful only to the programmer who added the
print( ) statements in the first place.
Sometimes you must debug tens of thousands of lines of Perl in an
application, and while you may be a very experienced Perl programmer
who can understand Perl code quite well just by looking at it, no
mere mortal can even begin to understand what will actually happen in
such a large application until the code is running. So to begin with
you just don’t know where to add your trusty
print( ) statements to see what is happening
inside.
The most effective way to track down a bug is often to run the program inside an interactive debugger. Most programming languages have such tools available, allowing programmers to see what is happening inside an application while it is running. The basic features of any interactive debugger allow you to:
Stop at a certain point in the code, based on a routine name or source file and line number (this point is called a break point).
Stop at a certain point in the code, based on conditions such as the value of a given variable (this is called a conditional break point).
Perform an action without stopping, based on the criteria above.
View and modify the values of variables at any time.
Provide context information such as stack traces and source views.
It takes practice to learn the most effective ways of using an interactive debugger, but the time and effort will be paid back many times in the long run.
Perl comes with an interactive debugger called perldb. Giving control of your Perl program to the interactive debugger is simply a matter of specifying the -d command-line switch. When this switch is used, Perl inserts debugging hooks into the program syntax tree, but it leaves the job of debugging to a Perl module separate from the Perl binary itself.
We will start by reviewing a few of the basic concepts and commands provided by Perl’s interactive debugger. These examples are all run from the command line, independent of mod_perl, but they will still be relevant when we work within Apache.
It might be useful to keep the perldebug manpage handy for reference while reading this section, and for future debugging sessions on your own.
The interactive debugger will attach to the current terminal and present you with a prompt just before the first program statement is executed. For example:
panic% perl -d -le 'print "mod_perl rules the world"' Loading DB routines from perl5db.pl version 1.0402 Emacs support available. Enter h or `h h' for help. main::(-e:1): print "mod_perl rules the world" DB<1>
The source line shown is the line that Perl is about to execute. To single step—i.e., execute one line at a time—use the next command (or just n). Each time you enter something in the debugger, you must finish by pressing the Return key. This will cause the line to be executed, after which execution will stop and the next line to be executed (if any) will be displayed:
main::(-e:1): print "mod_perl rules the world" DB<1> n mod_perl rules the world Debugged program terminated. Use q to quit or R to restart, use O inhibit_exit to avoid stopping after program termination, h q, h R or h O to get additional info. DB<1>
In this case, our example code is only one line long, so we have finished interacting after the first line of code is executed. Let’s try again with a slightly longer example:
my $word = 'mod_perl'; my @array = qw(rules the world); print "$word @array\n";
Save the script in a file called domination.pl and run it with the -d switch:
panic% perl -d domination.pl main::(domination.pl:1): my $word = 'mod_perl'; DB<1> n main::(domination.pl:2): my @array = qw(rules the world); DB<1>
At this point, the first line of code has been executed and the
variable $word has been assigned the value
mod_perl. We can check this by using the
p (print) command:
main::(domination.pl:2): my @array = qw(rules the world); DB<1> p $word mod_perl
The print
command is similar to
Perl’s built-in print( )
function, but it adds a trailing newline and outputs to the
$DB::OUT file handle, which is normally opened on
the terminal from which Perl was launched. Let’s
continue:
DB<2> n main::(domination.pl:4): print "$word @array\n"; DB<2> p @array rulestheworld DB<3> n mod_perl rules the world Debugged program terminated. Use q to quit or R to restart, use O inhibit_exit to avoid stopping after program termination, h q, h R or h O to get additional info.
Unfortunately, p @array printed
rulestheworld and not rules the
world, as we would prefer, but that’s
absolutely correct. If you print an
array
without expanding it first into a string it will be printed without
adding the content of the $"
variable (otherwise known as $LIST_SEPARATOR, if
the English pragma is being used) between the
elements of the array.
If you type:
print "@array";
the output will be rules the world, since the
default value of the $" variable is a single
space.
You should have noticed by now that there is some valuable information to the left of each executable statement:
main::(domination.pl:4): print "$word @array\n"; DB<2>
First is the current package name (in this case,
main::). Next is the current filename and
statement line number (domination.pl and 4, in
this example). The number presented at the prompt is the command
number, which can be used to recall commands from the session
history, using the ! command followed by this
number. For example, !1 would repeat the first
command:
panic% perl -d -e0 main::(-e:1): 0 DB<1> p $] 5.006001 DB<2> !1 p $]5.006001 DB<3>
where $] is Perl’s version
number. As you can see, !1 prints the value of
$], prepended by the command that was executed.
Notice that the code given to Perl to debug (with
-e) was 0—i.e., a
statement that does nothing. To use Perl as a calculator, and to
experiment with Perl expressions, it is common to enter
perl -de0, and then type in expressions and
p (print) their results.
Things start to get more interesting as the code gets more
interesting. In the script in Example 21-5,
we’ve increased the number of source files and
packages by including the standard Symbol module,
along with an invocation of its gensym( )
function.
Now let’s debug it:
panic% perl -d test_sym.pl main::(test_sym.pl:3): my $sym = Symbol::gensym( ); DB<1> n main::(test_sym.pl:5): print "$sym\n"; DB<1> n GLOB(0x80c7a44)
Note that the debugger did not stop at the first line of the file.
This is because use
... is a
compile-time statement, not a runtime statement. Also notice there
was more work going on than the debugger revealed.
That’s because the next command
does not enter subroutine calls, it steps over.
To step into
subroutine code,
use the step
command (or its abbreviated form,
s):
panic% perl -d test_sym.pl main::(test_sym.pl:3): my $sym = Symbol::gensym( ); DB<1> s Symbol::gensym(/usr/lib/perl5/5.6.1/Symbol.pm:86): 86: my $name = "GEN" . $genseq++; DB<1>
Notice the source line information has changed to the
Symbol::gensym package and the
Symbol.pm file. We can carry on by hitting the
Return key at each prompt, which causes the debugger to repeat the
last step or next command.
It won’t repeat a print
command, though. The debugger will eventually return from the
subroutine back to our main program:
DB<1>
Symbol::gensym(/usr/lib/perl5/5.6.1/Symbol.pm:87):
87: my $ref = *{$genpkg . $name};
DB<1>
Symbol::gensym(/usr/lib/perl5/5.6.1/Symbol.pm:88):
88: delete $$genpkg{$name};
DB<1>
Symbol::gensym(/usr/lib/perl5/5.6.1/Symbol.pm:89):
89: $ref;
DB<1>
main::(test_sym.pl:5): print "$sym\n";
DB<1>
GLOB(0x80c7a44)Our line-by-line debugging approach has served us well for this small program, but imagine the time it would take to step through a large application at the same pace. There are several ways to speed up a debugging session, one of which is known as setting a breakpoint.
The breakpoint
command (b) is used
to tell the debugger to stop at a named subroutine or at any line of
any file. In this example session, at the first debugger prompt we
will set a breakpoint at the Symbol::gensym
subroutine, telling the debugger to stop at the first line of this
routine when it is called. Rather than moving along with
next or step, we give the
continue command (c), which
tells the debugger to execute the script without stopping until it
reaches a breakpoint:
panic% perl -d test_sym.pl main::(test_sym.pl:3): my $sym = Symbol::gensym( ); DB<1> b Symbol::gensym DB<2> c Symbol::gensym(/usr/lib/perl5/5.6.1/Symbol.pm:86): 86: my $name = "GEN" . $genseq++;
Now let’s imagine we are debugging a large
application where Symbol::gensym might be called
from any one of several places. When the subroutine breakpoint is
reached, by default the debugger does not reveal where it was called
from. One way to find out this information is with the stack
Trace
command (T):
DB<2> T $ = Symbol::gensym( ) called from file `test_sym.pl' line 3
In this example, the call stack is only one level deep, so only that
call is printed. We’ll look at an example with a
deeper stack later. The leftmost character reveals the context in
which the subroutine was called. $ represents
scalar context; in other examples you may see @,
which represents list context, or ., which
represents void context. In our case we called:
my $sym = Symbol::gensym( );
which calls the Symbol::gensym( ) in scalar
context.
Now let’s make our test_sym.pl
example a little more complex. First, we add a
Book::World1 package declaration at the top of the
script, so we are no longer working in the main::
package. Next, we add a subroutine named do_work(
), which invokes the familiar
Symbol::gensym, along with another function called
Symbol::qualify, and then returns a hash reference
of the results. The do_work( ) routine is invoked
inside a for loop, which will be run twice. The
new version of the script is shown in Example 21-6.
Example 21-6. test_sym2.pl
package Book::World2;
use Symbol ( );
for (1, 2) {
do_work("now");
}
sub do_work {
my($var) = @_;
return undef unless $var;
my $sym = Symbol::gensym( );
my $qvar = Symbol::qualify($var);
my $retval = {
sym => $sym,
var => $qvar,
};
return $retval;
}
1;We’ll start by setting a few breakpoints, then we’ll use the List command (L) to display them:
panic% perl -d test_sym2.pl
Book::World2::(test_sym2.pl:5): for (1, 2) {
DB<1> b Symbol::qualify
DB<2> b Symbol::gensym
DB<3> L
/usr/lib/perl5/5.6.1/Symbol.pm:
86: my $name = "GEN" . $genseq++;
break if (1)
95: my ($name) = @_;
break if (1)The filename and line number of the breakpoint are displayed just
before the source line itself. Because both breakpoints are located
in the same file, the filename is displayed only once. After the
source line, we see the condition on which to stop. In this case, as
the constant value 1 indicates, we will always
stop at these breakpoints. Later on you’ll see how
to specify a condition.
As we will see, when the continue command is executed, the execution of the program stops at one of these breakpoints, at either line 86 or line 95 of the file /usr/lib/perl5/5.6.1/Symbol.pm, whichever is reached first. The displayed code lines are the first line of each of the two subroutines from Symbol.pm. Breakpoints may be applied only to lines of runtime-executable code—you cannot, for example, put breakpoints on empty lines or comments.
In our example, the List command shows which lines the breakpoints were set on, but we cannot tell which breakpoint belongs to which subroutine. There are two ways to find this out. One is to run the continue command and, when it stops, execute the Trace command we saw before:
DB<3> c
Symbol::gensym(/usr/lib/perl5/5.6.1/Symbol.pm:86):
86: my $name = "GEN" . $genseq++;
DB<3> T
$ = Symbol::gensym( ) called from file `test_sym2.pl' line 14
. = Book::World2::do_work('now') called from file `test_sym2.pl' line 6So we see that this breakpoint belongs to
Symbol::gensym. The other way is to ask for a
listing of a range of lines from the code. For example,
let’s check which subroutine line 86 is a part of.
We use the list (lowercase!) command
(l), which displays parts of the code. The
list
command accepts various arguments; the
one that we want to use here is a range of lines. Since the
breakpoint is at line 86, let’s print a few lines
around that line number:
DB<3> l 85-87
85 sub gensym ( ) {
86= =>b my $name = "GEN" . $genseq++;
87: my $ref = *{$genpkg . $name};Now we know it’s the gensym
subroutine, and we also see the breakpoint highlighted with the
= =>b markup. We could also use the name of the
subroutine to display its code:
DB<4> l Symbol::gensym
85 sub gensym ( ) {
86= =>b my $name = "GEN" . $genseq++;
87: my $ref = *{$genpkg . $name};
88: delete $$genpkg{$name};
89: $ref;
90 }The delete command (d) is used to remove a breakpoint by specifying the line number of the breakpoint. Let’s remove the first one we set:
DB<5> d 95
The Delete (with a capital D) command (D) removes all currently installed breakpoints.
Now let’s look again at the trace produced at the breakpoint:
DB<3> c
Symbol::gensym(/usr/lib/perl5/5.6.1/Symbol.pm:86):
86: my $name = "GEN" . $genseq++;
DB<3> T
$ = Symbol::gensym( ) called from file `test_sym2.pl' line 14
. = Book::World2::do_work('now') called from file `test_sym2.pl' line 6As you can see, the stack trace prints the values that are passed
into the subroutine. Ah, and perhaps we’ve found our
first bug: as we can see from the first character on the second line
of output from the Trace command,
do_work( ) was called in void context, so the
return value was discarded. Let’s change the
for loop to check the return value of
do_work( ):
for (1, 2) {
my $stuff = do_work("now");
if ($stuff) {
print "work is done\n";
}
}In this session we will set a breakpoint at line 7 of
test_sym2.pl, where we check the return value of
do_work( ):
panic% perl -d test_sym2.pl
Book::World2::(test_sym2.pl:5): for (1, 2) {
DB<1> b 7
DB<2> c
Book::World2::(test_sym2.pl:7): if ($stuff) {
DB<2>Our program is still small, but already it is getting more difficult to understand the context of just one line of code. The window command (w)[6] will list a few lines of code that surround the current line:
DB<2> w
4
5: for (1, 2) {
6: my $stuff = do_work("now");
7= =>b if ($stuff) {
8: print "work is done\n";
9 }
10 }
11
12 sub do_work {
13: my($var) = @_;The arrow points to the line that is about to be executed and also
contains a b, indicating that we have set a
breakpoint at this line.[7]
Now, let’s take a look at the value of the
$stuff variable:
DB<2> p $stuff HASH(0x82b89b4)
That’s not very useful information. Remember, the
print command works just like the built-in
print( ) function. The debugger’s
x
command evaluates a given expression
and pretty-prints the results:
DB<3> x $stuff
0 HASH(0x82b89b4)
'sym' => GLOB(0x826a944)
-> *Symbol::GEN0
'var' => 'Book::World2::now'Things seem to be okay. Let’s double check by
calling do_work( ) with a different value and
print the results:
DB<4> x do_work('later')
0 HASH(0x82bacc8)
'sym' => GLOB(0x818f16c)
-> *Symbol::GEN1
'var' => 'Book::World2::later'We can see the symbol was incremented from GEN0 to
GEN1 and the variable later was qualified, as
expected.[8]
Now let’s change the test program a little to
iterate over a list of arguments held in @args and
print a slightly different message (see Example 21-7).
Example 21-7. test_sym3.pl
package Book::World3;
use Symbol ( );
my @args = qw(now later);
for my $arg (@args) {
my $stuff = do_work($arg);
if ($stuff) {
print "do your work $arg\n";
}
}
sub do_work {
my($var) = @_;
return undef unless $var;
my $sym = Symbol::gensym( );
my $qvar = Symbol::qualify($var);
my $retval = {
sym => $sym,
var => $qvar,
};
return $retval;
}
1;There are only two arguments in the list, so stopping to look at each
one isn’t too time-consuming, but consider the
debugging pace if we had a large list of 100 or so entries.
Fortunately, it is possible to customize breakpoints by specifying a
condition. Each time a breakpoint is reached, the condition is
evaluated, stopping only if the condition is true. In the session
below, the window command shows breakable lines.
The = => symbol shows us the line of code
that’s about to be executed.
panic% perl -d test_sym3.pl
Book::World3::(test_sym3.pl:5): my @args = qw(now later);
DB<1> w
5= => my @args = qw(now later);
6: for my $arg (@args) {
7: my $stuff = do_work($arg);
8: if ($stuff) {
9: print "do your work $arg\n";
10 }
11 }
12
13 sub do_work {
14: my($var) = @_;We set a breakpoint at line 7 with the condition $arg eq
'later‘. As we continue, the breakpoint is skipped when
$arg has the value of now but
not when it has the value of later:
DB<1> b 7 $arg eq 'later'
DB<2> c
do your work now
Book::World3::(test_sym3.pl:7): my $stuff = do_work($arg);
DB<2> n
Book::World3::(test_sym3.pl:8): if ($stuff) {
DB<2> x $stuff
0 HASH(0x82b90e4)
'sym' => GLOB(0x82b9138)
-> *Symbol::GEN1
'var' => 'Book::World3::later'
DB<5> c
do your work later
Debugged program terminated. Use q to quit or R to restart,You should now understand enough about the debugger to try many other features on your own, with the perldebug manpage by your side. Quick online help from inside the debugger is available by typing the h command, which will display a list of the most useful commands and a short explanation of what they do.
Some installations of Perl include a readline module that allows you to work more interactively with the debugger—for example, by pressing the up arrow to see previous commands, which can then be repeated by pressing the Return key.
Devel::ptkdb
is
a visual Perl debugger that uses Perl/Tk for the user interface and
requires a windows system like X Windows or Windows to run.
To debug a plain Perl script with Devel::ptkdb,
invoke it as:
panic% perl -d:ptkdb myscript.pl
The Tk application will be loaded. Now you can do most of the debugging you did with the command-line Perl debugger, but using a simple GUI to set/remove breakpoints, browse the code, step through it, and more.
With the help of Devel::ptkdb, you can debug your
CGI scripts running under mod_cgi (we’ll look at
mod_perl debugging later). Be sure that the web
server’s Perl installation includes the Tk package.
To enable the debugger, change your shebang line from:
#!/usr/bin/perl -Tw
to:
#!/usr/bin/perl -Twd:ptkdb
You can debug scripts remotely if you’re using a
Unix-based server and if the machine where you are writing the script
has an X server. The X server can be another Unix workstation, or a
Macintosh or Win32 platform with an appropriate X Windows package.
You must insert the following BEGIN subroutine
into your script:
BEGIN {
$ENV{'DISPLAY'} = "localhost:0.0" ;
}You may need to replace the localhost value with a real DNS or IP address if you aren’t working at the machine itself. You must be sure that your web server has permission to open windows on your X server (see the xhost manpage for more information).
Access the web page with the browser and request the script as usual.
The ptkdb window should appear on the monitor if
you have correctly set the $ENV{'DISPLAY'}
variable (see Figure 21-2). At this point you can
start debugging your script. Be aware that the browser may time out
waiting for the script to run.
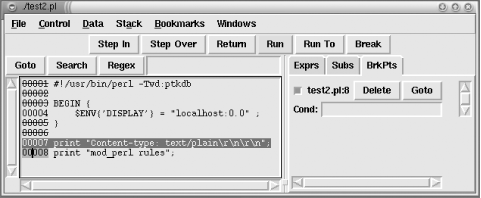
To expedite debugging you may want to set your breakpoints in advance
with a .ptkdbrc
file and use the
$DB::no_stop_at_start variable. For debugging web
scripts, you may have to have the .ptkdbrc file
installed in the server account’s home directory
(e.g., ~httpd) or whatever username the web
server is running under. Also try installing a
.ptkdbrc file in the same directory as the
target script.
ptkdb is available from CPAN: http://www.perl.com/CPAN/authors/id/A/AE/AEPAGE/.
To debug scripts running under mod_perl noninteractively (i.e., to print the Perl execution trace), simply set the usual environment variables that control debugging.
The NonStop
debugger option enables you to get some
decent debugging information when running under mod_perl. For
example, before starting the server:
panic% setenv PERL5OPT -d
panic% setenv PERLDB_OPTS \
"NonStop=1 LineInfo=/tmp/db.out AutoTrace=1 frame=2"Now watch /tmp/db.out for
line:filename information. This is most useful
for tracking those core dumps that normally leave us guessing, even
with a stack trace from gdb, which
we’ll discuss later. db.out
will show you what Perl code triggered the core dump. Refer to the
perldebug manpage for more
PERLDB_OPTS options.
Say we execute a simple Apache::Registry script,
test.pl:
use strict;
my $r = shift;
$r->send_http_header("text/plain");
$r->print("Hello");The generated trace found in /tmp/db.out is too
long to be printed here in its entirety. We will show only the part
that actually executes the handler created on the fly by
Apache::Registry:
entering Apache::ROOT::perl::test_2epl::handler 2: 3: entering Apache::send_http_header exited Apache::send_http_header 4: entering Apache::print exited Apache::print exited Apache::ROOT::perl::test_2epl::handler
You can see how Perl executes this script—first the
send_http_header( ) function is executed, then the
string “Hello” is printed.
Now we’ll
look at how the
interactive debugger is used in a mod_perl environment. The
Apache::DB module available from
CPAN provides a wrapper around
perldb for debugging Perl code running under
mod_perl.
The server must be run in non-forking (single-process) mode to use
the interactive debugger; this mode is turned on by passing the
-X flag to the
httpd
executable. It is
convenient to use an IfDefine section around the
Apache::DB configuration; the example below does
this using the name PERLDB. With this setup,
debugging is turned on only when starting the server with the
httpd -X -DPERLDB command.
This configuration section should be placed before any other Perl
code is pulled in, so that debugging symbols will be inserted into
the syntax tree, triggered by the call to
Apache::DB->init. The
Apache::DB::handler can be configured using any of
the Perl*Handler directives. In this case we use a
PerlFixupHandler
so handlers in the response
phase will bring up the debugger prompt:
<IfDefine PERLDB>
<Perl>
use Apache::DB ( );
Apache::DB->init;
</Perl>
<Location />
PerlFixupHandler Apache::DB
</Location>
</IfDefine>Since we have used
"/" as the
argument to the Location directive, the debugger
will be invoked for any kind of request, but of course it will
immediately quit unless there is some Perl module registered to
handle these requests.
In our first example, we will debug the standard
Apache::Status module, which is configured like
this:
PerlModule Apache::Status
<Location /perl-status>
SetHandler perl-script
PerlHandler Apache::Status
</Location>When the server is started with the debugging flag, a notice will be printed to the console:
panic% ./httpd -X -DPERLDB [notice] Apache::DB initialized in child 950
The debugger prompt will not be available until the first request is
made (in our case, to
http://localhost/perl-status). Once we are at
the prompt, all the standard debugging commands are available. First
we run window to get some of the context for the
code being debugged, then we move to the next statement after a value
has been assigned to $r, and finally we print the
request URI. If no breakpoints are set, the
continue command will give control back to
Apache and the request will finish with the
Apache::Status main menu showing in the browser
window:
Loading DB routines from perl5db.pl version 1.07
Emacs support available.
Enter h or `h h' for help.
Apache::Status::handler(.../5.6.1/i386-linux/Apache/Status.pm:55):
55: my($r) = @_;
DB<1> w
52 }
53
54 sub handler {
55= => my($r) = @_;
56: Apache->request($r); #for Apache::CGI
57: my $qs = $r->args || "";
58: my $sub = "status_$qs";
59: no strict 'refs';
60
61: if($qs =~ s/^(noh_\w+).*/$1/) {
DB<1> n
Apache::Status::handler(.../5.6.1/i386-linux/Apache/Status.pm:56):
56: Apache->request($r); # for Apache::CGI
DB<1> p $r->uri
/perl-status
DB<2> cAll the techniques we saw while debugging plain Perl scripts can be applied to this debugging session.
Debugging
Apache::Registry
scripts is somewhat different, because the handler routine does quite
a bit of work before it reaches your script. In this example, we make
a request for /perl/test.pl, which consists of
the code shown in Example 21-8.
Example 21-8. test.pl
use strict;
my $r = shift;
$r->send_http_header('text/plain');
print "mod_perl rules";When a request is issued, the debugger stops at line 28 of Apache/Registry.pm. We set a breakpoint at line 140, which is the line that actually calls the script wrapper subroutine. The continue command will bring us to that line, where we can step into the script handler:
Apache::Registry::handler(.../5.6.1/i386-linux/Apache/Registry.pm:28):
28: my $r = shift;
DB<1> b 140
DB<2> c
Apache::Registry::handler(.../5.6.1/i386-linux/Apache/Registry.pm:140):
140: eval { &{$cv}($r, @_) } if $r->seqno;
DB<2> s
Apache::ROOT::perl::test_2epl::handler((eval 87):3):
3: my $r = shift;Notice the funny package name—it’s generated
from the URI of the request, for namespace protection. The filename
is not displayed, since the code was compiled via eval(
), but the print command can be used to
show you $r->filename:
DB<2> n
Apache::ROOT::perl::test_2epl::handler((eval 87):4):
4: $r->send_http_header('text/plain');
DB<2> p $r->filename
/home/httpd/perl/test.plThe line number might seem off too, but the window command will give you a better idea of where you are:
DB<4> w
1: package Apache::ROOT::perl::test_2epl;use Apache qw(exit);
sub handler { use strict;
2
3: my $r = shift;
4= => $r->send_http_header('text/plain');
5
6: print "mod_perl rules";
7
8 }
9 ;The code from the test.pl file is between lines
2 and 7. The rest is the Apache::Registry magic to
cache your code inside a handler subroutine.
It will always take some practice and patience when putting together debugging strategies that make effective use of the interactive debugger for various situations. Once you have a good strategy, bug squashing can actually be quite a bit of fun!
As we
saw earlier, we can use the
ptkdb visual debugger to debug CGI scripts running
under mod_cgi. At the time of writing it works partially under
mod_perl as well. It hangs after the first run, so you have to kill
it manually every time. Hopefully it will work completely with
mod_perl in the future.
However, ptkdb won’t work for
mod_perl using the same configuration as used in mod_cgi. We have to
tweak the Apache/DB.pm module to use
Devel/ptkdb.pm instead of
Apache/perl5db.pl.
Open the file in your favorite editor and replace:
require 'Apache/perl5db.pl';
with:
require Devel::ptkdb;
Now when you use the interactive mod_perl debugger configuration from
the previous section and issue a request, the
ptkdb visual debugger will be loaded.
If you are debugging Apache::Registry scripts, as
in the terminal debugging mode example, go to line 140 (or to
whatever line number at which the eval { &{$cv}($r, @_)
} if
$r->seqno; statement is located)
and press the step in button to start debugging
the script itself.
Note that you can use Apache with ptkdb in plain
multi-server mode; you don’t have to start
httpd with the -X option.
When your
application dies with the
“Segmentation fault” error
(generated by the default SIGSEGV signal handler)
and generates a core file, you can analyze the
core file using gdb or a similar debugger to
find out what caused the segmentation fault (or
segfault).
To debug the core file, you may need to recompile Perl and mod_perl so that their executables contain debugging symbols. Usually you have to recompile only mod_perl, but if the core dump happens in the libperl.so library and you want to see the whole backtrace, you will probably want to recompile Perl as well.
For example, sometimes people send this kind of backtrace to the mod_perl list:
#0 0x40448aa2 in ?? ( ) #1 0x40448ac9 in ?? ( ) #2 0x40448bd1 in ?? ( ) #3 0x4011d5d4 in ?? ( ) #4 0x400fb439 in ?? ( ) #5 0x400a6288 in ?? ( ) #6 0x400a5e34 in ?? ( )
This kind of trace is absolutely useless, since you cannot tell where the problem happens from just looking at machine addresses. To preserve the debug symbols and get a meaningful backtrace, recompile Perl with -DDEBUGGING during the ./Configure stage (or with -Doptimize="-g“, which, in addition to adding the -DDEBUGGING option, adds the -g option, which allows you to debug the Perl interpreter itself).
After recompiling Perl,
recompile mod_perl with
PERL_DEBUG=1 during the perl
Makefile.PL stage. Building mod_perl with
PERL_DEBUG=1 will:
Add -g to
EXTRA_CFLAGS, passed to your C compiler during compilation.Turn on the
PERL_TRACEoption.Set
PERL_DESTRUCT_LEVEL=2.Link against
libperldif-e $Config{archlibexp}/CORE/libperld$Config{lib_ext}(i.e., if you’ve compiled perl with -DDEBUGGING).
During make install, Apache strips all the debugging symbols. To prevent this, you should use the Apache —without-execstrip ./configure option. So if you configure Apache via mod_perl, you should do this:
panic% perl Makefile.PL USE_APACI=1 \ APACI_ARGS='--without-execstrip' [other options]
Alternatively, you can copy the unstripped binary manually. For example, we did this to give us an Apache binary called httpd_perl that contains debugging symbols:
panic# cp apache_1.3.24/src/httpd /home/httpd/httpd_perl/bin/httpd_perl
Now the software is ready for a proper debug.
The nex
t stage is to create a package that
aborts abnormally with a segfault, so you will be able to reproduce
the problem and exercise the debugging technique explained here.
Luckily, you can download
Debug::DumpCore
from CPAN, which does a very simple
thing—it segfaults when called as:
use Debug::DumpCore; Debug::DumpCore::segv( );
Debug::DumpCore::segv( ) calls a function, which
calls another function, which dereferences a NULL
pointer, which causes the segfault:
int *p;
p = NULL;
printf("%d", *p); // cause a segfaultFor those unfamiliar with C programming, p is a
pointer to a segment of memory. Setting it to NULL
ensures that we try to read from a segment of memory to which the
operating system does not allow us access, so of course dereferencing
the NULL pointer through *p
causes a segmentation fault. And that’s what we
want.
Of course, you can use Perl’s CORE::dump(
)
function, which causes a core dump,
but you don’t get the nice long trace provided by
Debug::DumpCore, which on purpose calls a few
other functions before causing a segfault.
Now let’s
dump the
core file from within the mod_perl server.
Sometimes the program aborts abnormally via the
SIGSEGV signal (a segfault), but no
core file is dumped. And without the
core file it’s hard to find the
cause of the problem, unless you run the program inside
gdb or another debugger in the first place. In
order to get the core file, the application
must:
Have the same effective UID as the real UID (the same goes for GID). This is the case with mod_perl unless you modify these settings in the server configuration file.
Be running from a directory that is writable by the process at the moment of the segmentation fault. Note that the program might change its current directory during its run, so it’s possible that the core file will need to be dumped in a different directory from the one from which the program was started. For example when mod_perl runs an
Apache::Registryscript, it changes its directory to the one in which the script’s source is located.Be started from a shell process with sufficient resource allocations for the core file to be dumped. You can override the default setting from within a shell script if the process is not started manually. In addition, you can use
BSD::Resourceto manipulate the setting from within the code as well.You can use ulimit for a Bourne-style shell and limit for a C-style shell to check and adjust the resource allocation. For example, inside bash, you may set the core file size to unlimited with:
panic% ulimit -c unlimited
or for
csh:panic% limit coredumpsize unlimited
For example, you can set an upper limit of 8 MB on the core file with:
panic% ulimit -c 8388608
This ensures that if the core file would be bigger than 8 MB, it will be not created.
You must make sure that you have enough disk space to create a big core file (mod_perl core files tend to be of a few MB in size).
Note that when you are running the program under a debugger like
gdb, which traps the SIGSEGV
signal, the core file will not be dumped.
Instead, gdb allows you to examine the program
stack and other things without having the core
file.
First let’s test that we get the core file from the command line (under tcsh):
panic% limit coredumpsize unlimited panic% perl -MDebug::DumpCore -e 'Debug::DumpCore::segv( )' Segmentation fault (core dumped) panic% ls -l core -rw------- 1 stas stas 954368 Jul 31 23:52 core
Indeed, we can see that the core file was
dumped. Let’s write a simple script that uses
Debug::DumpCore, as shown in Example 21-9.
Example 21-9. core_dump.pl
use strict;
use Debug::DumpCore ( );
use Cwd( )
my $r = shift;
$r->send_http_header("text/plain");
my $dir = getcwd;
$r->print("The core should be found at $dir/core\n");
Debug::DumpCore::segv( );In this script we load the Debug::DumpCore and
Cwd modules. Then we acquire the request object
and send the HTTP headers. Now we come to the real part—we get
the current working directory, print out the location of the
core file that we are about to dump, and finally
call Debug::DumpCore::segv( ), which dumps the
core file.
Before we run the script we make sure that the shell sets the core file size to be unlimited, start the server in single-server mode as a non-root user, and generate a request to the script:
panic% cd /home/httpd/httpd_perl/bin
panic% limit coredumpsize unlimited
panic% ./httpd_perl -X
# issue a request here
Segmentation fault (core dumped)Our browser prints out:
The core should be found at /home/httpd/perl/core
And indeed the core file appears where we were
told it would (remember that Apache::Registry
scripts change their directory to the location of the script source):
panic% ls -l /home/httpd/perl/core -rw------- 1 stas httpd 4669440 Jul 31 23:58 /home/httpd/perl/core
As you can see it’s a 4.7 MB core file. Notice that mod_perl was started as user stas, which has write permission for the directory /home/httpd/perl.
First we
start
gdb, with the location of the mod_perl executable
and the core file as the arguments:
panic% gdb /home/httpd/httpd_perl/bin/httpd_perl /home/httpd/perl/core
To see the backtrace, execute the where or bt commands:
(gdb) where
#0 0x4039f781 in crash_now_for_real (
suicide_message=0x403a0120 "Cannot stand this life anymore")
at DumpCore.xs:10
#1 0x4039f7a3 in crash_now (
suicide_message=0x403a0120 "Cannot stand this life anymore",
attempt_num=42) at DumpCore.xs:17
#2 0x4039f824 in XS_Debug_ _DumpCore_segv (cv=0x84ecda0)
at DumpCore.xs:26
#3 0x401261ec in Perl_pp_entersub ( )
from /usr/lib/perl5/5.6.1/i386-linux/CORE/libperl.so
#4 0x00000001 in ?? ( )Notice that only the symbols from the
DumpCore.xs file are available (plus
Perl_pp_entersub from
libperl.so), since by default
Debug::DumpCore always compiles itself with the
-g flag. However, we cannot see the rest of the
trace, because our Perl and mod_perl libraries and Apache server were
built without the debug symbols. We need to recompile them all with
the debug symbols, as explained earlier in this chapter.
Then we repeat the process of starting the server, issuing a request,
and getting the core file, after which we run
gdb again against the executable and the dumped
core file:
panic% gdb /home/httpd/httpd_perl/bin/httpd_perl /home/httpd/perl/core
Now we can see the whole backtrace:
(gdb) bt
#0 0x40448aa2 in crash_now_for_real (
suicide_message=0x404499e0 "Cannot stand this life anymore")
at DumpCore.xs:10
#1 0x40448ac9 in crash_now (
suicide_message=0x404499e0 "Cannot stand this life anymore",
attempt_num=42) at DumpCore.xs:17
#2 0x40448bd1 in XS_Debug_ _DumpCore_segv (my_perl=0x8133b60, cv=0x861d1fc)
at DumpCore.xs:26
#3 0x4011d5d4 in Perl_pp_entersub (my_perl=0x8133b60) at pp_hot.c:2773
#4 0x400fb439 in Perl_runops_debug (my_perl=0x8133b60) at dump.c:1398
#5 0x400a6288 in S_call_body (my_perl=0x8133b60, myop=0xbffff160, is_eval=0)
at perl.c:2045
#6 0x400a5e34 in Perl_call_sv (my_perl=0x8133b60, sv=0x85d696c, flags=4)
at perl.c:1963
#7 0x0808a6e3 in perl_call_handler (sv=0x85d696c, r=0x860bf54, args=0x0)
at mod_perl.c:1658
#8 0x080895f2 in perl_run_stacked_handlers (hook=0x8109c47 "PerlHandler",
r=0x860bf54, handlers=0x82e5c4c) at mod_perl.c:1371
#9 0x080864d8 in perl_handler (r=0x860bf54) at mod_perl.c:897
#10 0x080d2560 in ap_invoke_handler (r=0x860bf54) at http_config.c:517
#11 0x080e6796 in process_request_internal (r=0x860bf54) at http_request.c:1308
#12 0x080e67f6 in ap_process_request (r=0x860bf54) at http_request.c:1324
#13 0x080ddba2 in child_main (child_num_arg=0) at http_main.c:4595
#14 0x080ddd4a in make_child (s=0x8127ec4, slot=0, now=1028133659)
#15 0x080ddeb1 in startup_children (number_to_start=4) at http_main.c:4792
#16 0x080de4e6 in standalone_main (argc=2, argv=0xbffff514) at http_main.c:5100
#17 0x080ded04 in main (argc=2, argv=0xbffff514) at http_main.c:5448
#18 0x40215082 in _ _libc_start_main ( ) from /lib/i686/libc.so.6Reading the trace from bottom to top, we can see that it starts with
Apache functions, moves on to the mod_perl and then Perl functions,
and finally calls functions from the
Debug::DumpCore package. At the top we can see the
crash_now_for_real( ) function, which was the one
that caused the segmentation fault; we can also see that the faulty
code was at line 10 of the DumpCore.xs file. And
indeed, if we look at that line number we can see the reason for the
segfault—the dereferencing of the NULL
pointer:
9: int *p = NULL;
10: printf("%d", *p); /* cause a segfault */In our example, we knew what Perl script had caused the segmentation
fault. In the real world, it is likely that you’ll
have only the core file, without any clue as to
which handler or script has triggered it. The special
curinfo
gdb macro can help:
panic% gdb /home/httpd/httpd_perl/bin/httpd_perl /home/httpd/perl/core (gdb) source mod_perl-1.xx/.gdbinit (gdb) curinfo 9:/home/httpd/perl/core_dump.pl
Start the gdb debugger as before.
.gdbinit, the file with various useful
gdb macros, is located in the source tree of
mod_perl. We use the gdb
source function to load these macros, and when
we run the curinfo macro we learn that the
core was dumped when
/home/httpd/perl/core_dump.pl was executing the
code at line 9.
These are the bits of information that are important in order to
reproduce and resolve a problem: the filename and line number where
the fault occurred (the faulty function is
Debug::DumpCore::segv( ) in our case) and the
actual line where the segmentation fault occurred (the
printf("%d", *p) call in XS code). The former is
important for problem reproducing, since it’s
possible that if the same function was called from a different script
the problem wouldn’t show up (not the case in our
example, where using a dereferenced NULL pointer
will always cause a segmentation fault).
With the help
of
Debug::FaultAutoBT
, you can try to get the backtrace
extracted automatically, without any need for the
core file. As of this writing this CPAN module
is very new and doesn’t work on all platforms.
To use this module we simply add the following code in the startup file:
use Debug::FaultAutoBT; use File::Spec::Functions; my $tmp_dir = File::Spec::Functions::tmpdir; die "cannot find out a temp dir" if $tmp_dir eq ''; my $trace = Debug::FaultAutoBT->new(dir => "$tmp_dir"); $trace->ready( );
This code tries to automatically figure out the location of the
temporary directory, initializes the
Debug::FaultAutoBT object with it, and finally
uses the method ready( ) to set the signal
handler, which will attempt to automatically get the backtrace. Now
when we repeat the process of starting the server and issuing a
request, if we look at the error_log file, it
says:
SIGSEGV (Segmentation fault) in 29072 writing to the core file /tmp/core.backtrace.29072
And indeed the file /tmp/core.backtrace.29072 includes a backtrace similar to the one we extracted before, using the core file.
Sometimes an httpd process might hang in the
middle of processing a request. This may happen because of a bug in
the code, such as being stuck in a while loop. Or
it may be blocked in a system call, perhaps waiting indefinitely for
an unavailable resource. To fix the problem, we need to learn in what
circumstances the process hangs, so that we can reproduce the
problem, which will allow us to uncover its cause.
Sometimes
you can find a process hanging
because of some kind of system problem. For example, if the processes
was doing some disk I/O operation, it might get stuck in
uninterruptible sleep ('D' disk wait in
ps report, 'U' in
top), which indicates either that something is
broken in your kernel or that you’re using NFS.
Also, usually you find that you cannot kill -9
this process.
Another process that cannot be killed with kill
-9 is a zombie process ('Z' disk wait
in ps report, <defunc>
in top), in which case the process is already
dead and Apache didn’t wait on it properly (of
course, it can be some other process not related to Apache).
In the case of disk wait, you can actually get the wait channel from ps and look it up in your kernel symbol table to find out what resource it was waiting on. This might point the way to what component of the system is misbehaving, if the problem occurs frequently.
In Chapter 19, we discussed the concept of deadlock. This can happen when two processes are each trying to acquire locks on the resources held by the other. Neither process will release the lock it currently holds, and thus neither can acquire a lock on the second resource it desires.
This scenario is a very good candidate for code that might lead to a hanging process. Since usually the deadlock cannot be resolved without manual intervention, the two processes will hang, doing nothing and wasting system resources, while trying to acquire locks.
An infinite loop might lead to a hanging process as well. Moreover,
such a loop will usually consume a lot of CPU resources and memory.
You should be very careful when using while and
similar loop constructs that are capable of creating endless loops.
A process relying on some external resource, for example when accessing a file over NFS, might hang if the mounted partition it tries to access is not available. Usually it takes a long time before the request times out, and in the meantime the process may hang.
There are many other reasons that a process might hang, but these are some of the most common.
It’s not so easy to detect hanging processes. There is no way you can tell how long the request is taking to process by using plain system utilities such as ps and top. The reason is that each Apache process serves many requests without quitting. System utilities can tell how long the process has been running since its creation, but this information is useless in our case, since Apache processes normally run for extended periods.
However, there are a few approaches that can help to detect a hanging process. If the hanging process happens to demand lots of resources, it’s quite easy to spot it by using the top utility. You will see the same process show up in the first few lines of the automatically refreshed report. (But often the hanging process uses few resources—e.g., when waiting for some event to happen.)
Another easy case is when some process thrashes the error_log file, writing millions of error messages there. Generally this process uses lots of resources and is also easily spotted by using top.
Two other tools that report the status of Apache processes are the
mod_status
module, which is usually accessed from the
/server_status location, and the
Apache::VMonitor
module, covered in Chapter 5.
Both tools provide counters of requests processed per Apache process. You can watch the report for a few minutes and try to spot any process with an unchanging number of processed requests and a status of W (waiting). This means that it has hung.
But if you have 50 processes, it can be quite hard to spot such a
process.
Apache::Watchdog::RunAway
is a hanging-processes monitor and
terminator that implements this feature and could be used to solve
this kind of problem. It’s covered in Chapter 5.
If you have a really bad problem, where processes hang one after the
other, the time will come when the number of hanging processes is
equal to the value of MaxClients. This means that
no more processes will be spawned. As far as the users are concerned,
your server will be down. It is easy to detect this situation,
attempt to resolve it, and notify the administrator using a simple
crontab
watchdog that periodically requests
some very light script (see Chapter 5).
In the watchdog, you set a timeout appropriate for your service, which may be anything from a few seconds to a few minutes. If the server fails to respond before the timeout expires, the watchdog spots trouble and attempts to restart the server. After a restart an email report is sent to the administrator saying that there was a problem and whether or not the restart was successful.
If you get such reports constantly, something is wrong with your web service and you should review your code. Note that it’s possible that your server is being overloaded by more requests than it can handle, so the requests are being queued and not processed for a while, which triggers the watchdog’s alarm. If this is the case, you may need to add more servers or more memory, or perhaps split a single machine across a cluster of machines.
Given the PID, there are three ways to find out where the server is hanging:
Deploy the Perl calls-tracing mechanism. This will allow you to spot the location of the Perl code that triggers the problem.
Use a system calls-tracing utility such as strace. This approach reveals low-level details about the misbehavior of some part of the system.
Use an interactive debugger such as
gdb. When the process is stuck and you don’t know what it was doing just before it got stuck, usinggdbyou can attach to this process and print its call stack, to reveal where the last call originated. Just like with strace, you see the C function call trace, not the Perl high-level function calls.
To see where an httpd process is spinning, the first step is to add the following to your startup file:
package Book::StartUp;
use Carp ( );
$SIG{'USR2'} = sub {
Carp::confess("caught SIGUSR2!");
};The above code assigns a signal handler for the
USR2 signal. This signal has been chosen because
it’s unlikely to be used by the other server
components.
We can check the registered signal handlers with help of
Apache::Status. Using this code, if we fetch the
URL http://localhost/perl-status?sig we will
see:
USR2 = \&Book::StartUp::_ _ANON_ _
where Book::StartUp is the name of the package
declared in startup.pl.
After applying this server configuration, let’s use
the simple code in Example 21-10, where
sleep(10000) will emulate a hanging process.
Example 21-10. debug/perl_trace.pl
local $|=1;
my $r = shift;
$r->send_http_header('text/plain');
print "[$$] Going to sleep\n";
hanging_sub( );
sub hanging_sub { sleep 10000; }We execute the above script as
http://localhost/perl/debug/perl_trace.pl. In
the script we use $|=1; to unbuffer the STDOUT
stream and we get the PID from the $$ special
variable.
Now we issue the kill command, using the PID we have just seen printed to the browser’s window:
panic% kill -USR2 PID
and watch this showing up in the error_log file:
caught SIGUSR2!
at /home/httpd/perl/startup/startup.pl line 32
Book::StartUp::_ _ANON_ _('USR2') called
at /home/httpd/perl/debug/perl_trace.pl line 6
Apache::ROOT::perl::debug::perl_trace_2epl::hanging_sub( ) called
at /home/httpd/perl/debug/perl_trace.pl line 5
Apache::ROOT::perl::debug::perl_trace_2epl::handler('Apache=SCALAR(0x8309d08)')
called
at /usr/lib/perl5/site_perl/5.6.1/i386-linux/Apache/Registry.pm
line 140
eval {...} called
at /usr/lib/perl5/site_perl/5.6.1/i386-linux/Apache/Registry.pm
line 140
Apache::Registry::handler('Apache=SCALAR(0x8309d08)') called
at PerlHandler subroutine `Apache::Registry::handler' line 0
eval {...} called
at PerlHandler subroutine `Apache::Registry::handler' line 0We can clearly see that the process
“hangs” in the code executed at
line 6 of the
/home/httpd/perl/debug/perl_trace.pl script, and
it was called by the hanging_sub( ) routine
defined at
line 5.
Let’s write another similar mod_perl script that hangs, and deploy strace to find the point at which it hangs (see Example 21-11).
Example 21-11. hangme.pl
local $|=1;
my $r = shift;
$r->send_http_header('text/plain');
print "PID = $$\n";
my $i = 0;
while (1) {
$i++;
sleep 1;
}The reason this simple code hangs is obvious. It never breaks from
the while loop. As you can see, it prints the PID
of the current process to the browser. Of course, in a real situation
you cannot use the same trick—in the previous section we
presented several ways to detect the runaway processes and their
PIDs.
We save the above code in a file and make a request. As usual, we use
$|=1; in our demonstration scripts to unbuffer
STDOUT so we will immediately see the process ID. Once the script is
requested, the script prints the PID and obviously hangs. So we press
the Stop button, but the process continues to hang in this code.
Isn’t Apache supposed to detect the broken
connection and abort the request? Yes and no—you will
understand soon what’s really happening.
First let’s attach to the process and see what it’s doing. We use the PID the script printed to the browser—in this case, it is 10045:
panic% strace -p 10045 [...truncated identical output...] SYS_175(0, 0xbffff41c, 0xbffff39c, 0x8, 0) = 0 SYS_174(0x11, 0, 0xbffff1a0, 0x8, 0x11) = 0 SYS_175(0x2, 0xbffff39c, 0, 0x8, 0x2) = 0 nanosleep(0xbffff308, 0xbffff308, 0x401a61b4, 0xbffff308, 0xbffff41c) = 0 time([940973834]) = 940973834 time([940973834]) = 940973834 [...truncated the identical output...]
It isn’t what we expected to see, is it? These are some system calls we don’t see in our little example. What we actually see is how Perl translates our code into system calls. We know that our code hangs in this snippet:
while (1) {
$i++;
sleep 1;
}so these must be the system calls that represent this loop, since they are printed repeatedly.
Usually the situation is different from the one we have shown. You first detect the hanging process, then you attach to it and watch the trace of calls it does (or observe the last few system calls if the process is hanging waiting for something, as when blocking on a file-lock request). From watching the trace you figure out what it’s actually doing, and probably find the corresponding lines in your Perl code. For example, let’s see how one process hangs while requesting an exclusive lock on a file that is exclusively locked by another process (see Example 21-12).
Example 21-12. excl_lock.pl
use Fcntl qw(:flock); use Symbol; fork( ); # child and parent do the same operation my $fh = gensym; open $fh, ">/tmp/lock" or die "cannot open /tmp/lock: $!"; print "$$: I'm going to obtain the lock\n"; flock $fh, LOCK_EX; print "$$: I've got the lock\n"; sleep 30; close $fh;
The code is simple. The process executing the code forks a second process, and both do the same thing: generate a unique symbol to be used as a file handle, open the lock file for writing using the generated symbol, lock the file in exclusive mode, sleep for 30 seconds (pretending to do some lengthy operation), and close the lock file, which also unlocks the file.
The gensym function is imported from the
Symbol module. The Fcntl module
provides us with a symbolic constant, LOCK_EX.
This is imported via the :flock tag, which imports
this and other flock( ) constants.
The code used by both processes is identical, so we cannot predict
which one will get its hands on the lock file and succeed in locking
it first. Thus, we add print( ) statements to find
the PID of the process blocking (waiting to get the lock) on a lock
request.
When the above code is executed from the command line, we see that one of the processes gets the lock:
panic% perl ./excl_lock.pl 3038: I'm going to obtain the lock 3038: I've got the lock 3037: I'm going to obtain the lock
Here we see that process 3037 is blocking, so we attach to it:
panic% strace -p 3037 about to attach c10 flock(3, LOCK_EX
It’s clear from the above trace that the process is waiting for an exclusive lock. The missing closing parenthesis is not a typo; it means that strace didn’t yet receive a return status from the call.
After spending time watching the running traces of different scripts, you will learn to more easily recognize what Perl code is being executed.
Another
way to see a trace of the running
code is to use a debugger such as gdb (the GNU
debugger). It’s supposed to work on any platform
that supports the GNU development tools. Its purpose is to allow you
to see what is going on inside a program while it executes, or what
it was doing at the moment it failed.
To trace the execution of a process, gdb needs to
know the PID and the path to the binary that the process is
executing. For Perl code, it’s
/usr/bin/perl (or whatever the path to your Perl
is). For httpd processes, it’s
the path to your httpd executable—often
the binary is called httpd, but
there’s really no standard location for it.
Here are a few examples using gdb. First,
let’s go back to our last locking example, execute
it as before, and attach to the process that didn’t
get the lock:
panic% gdb /usr/bin/perl 3037
After starting the debugger, we execute the where command to see the trace:
(gdb) where
#0 0x40209791 in flock ( ) from /lib/libc.so.6
#1 0x400e8dc9 in Perl_pp_flock ( ) at pp_sys.c:2033
#2 0x40099c56 in Perl_runops_debug ( ) at run.c:53
#3 0x4003118c in S_run_body (oldscope=1) at perl.c:1443
#4 0x40030c7e in perl_run (my_perl=0x804bf00) at perl.c:1365
#5 0x804953e in main (argc=3, argv=0xbffffac4, env=0xbffffad4)
at perlmain.c:52
#6 0x4018bcbe in _ _libc_start_main ( ) from /lib/libc.so.6That’s not what we may have expected to see (i.e., a
Perl stack trace). And now it’s a different trace
from the one we saw when we were using strace.
Here we see the current state of the call stack, with main(
) at the bottom of the stack and flock(
) at the top.
We have to find out the place the code was called
from—it’s possible that the code calls
flock( ) in several places, and we
won’t be able to locate the place in the code where
the actual problem occurs without having this information. Therefore,
we again use the curinfo macro after loading it
from the .gdbinit file:
(gdb) source /usr/src/httpd_perl/mod_perl-1.25/.gdbinit (gdb) curinfo 9:/home/httpd/perl/excl_lock.pl
As we can see, the program was stuck at line 9 of /home/httpd/perl/excl_lock.pl and that’s the place to look at to resolve the problem.
When you attach to a running process with gdb, the
program stops executing and control of the program is passed to the
debugger. You can continue the normal program run with the
continue command or execute it step by step with
the next and step commands,
which you type at the gdb prompt.
(next steps over any function calls in the
source, while step steps into them.)
The use of C/C++ debuggers is a large topic, beyond the scope of this
book. The gdb man and info pages are quite good.
You might also want to check ddd (the Data Display
Debugger), which provides a visual interface to
gdb and other debuggers. It even knows how to
debug Perl programs.
For completeness, let’s see the
gdb trace of the httpd
process that’s hanging in the
while(1) loop of the first example in this
section:
panic% gdb /home/httpd/httpd_perl/bin/httpd 1005
(gdb) where
#0 0x402251c1 in nanosleep ( ) from /lib/libc.so.6
#1 0x40225158 in sleep ( ) from /lib/libc.so.6
#2 0x4014d3a6 in Perl_pp_sleep ( ) at pp_sys.c:4187
#3 0x400f5c56 in Perl_runops_debug ( ) at run.c:53
#4 0x4008e088 in S_call_body (myop=0xbffff688, is_eval=0) at perl.c:1796
#5 0x4008dc4f in perl_call_sv (sv=0x82fc75c, flags=4) at perl.c:1714
#6 0x807350e in perl_call_handler (sv=0x82fc75c, r=0x8309eec, args=0x0)
at mod_perl.c:1677
#7 0x80729cd in perl_run_stacked_handlers (hook=0x80d0db9 "PerlHandler",
r=0x8309eec, handlers=0x82e9b64) at mod_perl.c:1396
#8 0x80701b4 in perl_handler (r=0x8309eec) at mod_perl.c:922
#9 0x809f409 in ap_invoke_handler (r=0x8309eec) at http_config.c:517
#10 0x80b3e8f in process_request_internal (r=0x8309eec) at http_request.c:1286
#11 0x80b3efa in ap_process_request (r=0x8309eec) at http_request.c:1302
#12 0x80aae60 in child_main (child_num_arg=0) at http_main.c:4205
#13 0x80ab0e8 in make_child (s=0x80eea54, slot=0, now=981621024)
at http_main.c:4364
#14 0x80ab19c in startup_children (number_to_start=3) at http_main.c:4391
#15 0x80ab80c in standalone_main (argc=1, argv=0xbffff9e4) at http_main.c:4679
#16 0x80ac03c in main (argc=1, argv=0xbffff9e4) at http_main.c:5006
#17 0x401bbcbe in _ _libc_start_main ( ) from /lib/libc.so.6As before, we can see a complete trace of the last executed call. To see the line the program hangs, we use curinfo again:
(gdb) source /usr/src/httpd_perl/mod_perl-1.25/.gdbinit (gdb) curinfo 9:/home/httpd/perl/hangme.pl
Indeed, the program spends most of its time at line 9:
7 : while (1) {
8 : $i++;
9 : sleep 1;
10: }Since while( ) and $i++ are
executed very fast, it’s almost impossible to catch
Perl running either of these
instructions.
So far we have
seen only the use of the
curinfo
gdb macro.
Let’s explore a few more gdb
macros that come with the mod_perl source and might be handy during a
problem debug.
Remember that we are still stuck in the while(1)
loop, and that’s when we are going to run the macros
(assuming of course that they were loaded as per our last example).
The longmess
macro shows us the full Perl
backtrace of the current state:
(gdb) longmess
at /home/httpd/perl/hangme.pl line 9
Apache::ROOT::perl::hangme_2epl::handler
('Apache=SCALAR(0x82ec0ec)') called at
/usr/lib/perl5/site_perl/5.6.1/i386-linux/Apache/Registry.pm
line 143
eval {...} called at
/usr/lib/perl5/site_perl/5.6.1/i386-linux/Apache/Registry.pm
line 143
Apache::Registry::handler('Apache=SCALAR(0x82ec0ec)')
called at (eval 29) line 0
eval {...} called at (eval 29) line 0So we can see that we are inside the
Apache::Registry handler, which was executed via
eval( ), and the program is currently executing
the code on line 9 in the script
/home/httpd/perl/hangme.pl. Internally the macro
uses Carp::longmess( ) to generate the trace. The
shortmess
macro is similar to
longmess, but it prints only the top-level
caller’s package, via Carp::shortmess(
):
(gdb) shortmess
at /usr/lib/perl5/site_perl/5.6.1/i386-linux/Apache/Registry.pm
line 143
Don’t search for shortmess( ) or
longmess( ) functions in the
Carp manpage—you won’t find
them, as they aren’t a part of the public API. The
caller
macro prints the package that called the
last command:
(gdb) caller
caller = Apache::ROOT::perl::hangme_2epl
In our example this is the
Apache::ROOT::perl::hangme_2epl package, which was
created on the fly by Apache::Registry.
Other macros allow you to look at the values of variables and will probably require some level of Perl API knowledge. You may want to refer to the perlxs, perlguts and other related manpages before you proceed with these.
You may find the modules discussed in this section very useful while debugging your code. They will allow you to learn a lot about Perl internals.
Perl optimizes many things away at compile time, which explains why Perl is so fast under mod_perl. If you want to see what code is actually executed at runtime, use the -MO=Deparse Perl option.
For example, if you aren’t sure whether Perl will do what you expect it to, it will show you what Perl is really going to do. Consider this trap we discussed earlier:
open IN, "filename" || die $!;
This looks like perfectly valid code, and indeed it compiles without any errors, but let’s see what Perl is executing:
panic% perl -MO=Deparse -e 'open IN, "filename" || die $!'
open IN, 'filename';
As you can see, the die( ) part was optimized
away. open( ) is a list operator (since it accepts
a list of arguments), and list operators have lower precedence than
the || operator. Therefore, Perl executes the
following:
open IN, ("filename" || die $!);Since in our example we have used "filename“,
which is a true value, the rest of the expression in the parentheses
above is discarded. The code is reduced to:
open IN, "filename";
at compile time. So if the file cannot be opened for some reason, the
program will never call die( ), since Perl has
removed this part of the statement.
To do the right thing you should either use parentheses explicitly to
specify the order of execution or use the low-precedence
or operator. Both examples below will do the right
thing:
panic% perl -MO=Deparse -e 'open(IN, "filename") || die $!'
die $! unless open IN, 'filename';
panic% perl -MO=Deparse -e 'open IN, "filename" or die $!'
die $! unless open IN, 'filename';
As you can see, Perl compiles both sources into exactly the same code.
Notice that if the "filename" argument is not
true, the code gets compiled to this:
panic% perl -MO=Deparse,-p -e 'open IN, "" || die $!'
open(IN, die($!));
which causes the program to die($!) without any
reason in $!:
panic% perl -e 'open IN, "" || die $!'
Died at -e line 1.
while if we do the right thing, we should see the reason for the
open( ) failure:
panic% perl -e 'open IN, "" or die $!'
No such file or directory at -e line 1.
Also consider:
panic% perl -MO=Deparse,-p -e 'select MYSTD || die $!'
select(MYSTD);
Since select( ) always returns a true value, the
right part of the expression will never be executed. Therefore, Perl
optimizes it away. In the case of select( ), it
always returns the currently selected file handle, and there always
is one.
We have used this cool -MO=Deparse technique
without explaining it so far. B::Deparse is a
backend module for the Perl compiler that generates Perl source code,
based on the internal compiled structure that Perl itself creates
after parsing a program. Therefore, you may find it useful while
developing and debugging your code. We will show here one more useful
thing it does. See its manpage for an extensive usage manual.
When you use the -p option, the output also includes parentheses (even when they are not required by precedence), which can make it easy to see if Perl is parsing your expressions the way you intended. If we repeat the last example:
panic% perl -MO=Deparse,-p -e 'open IN, "filename" or die $!'
(open(IN, 'filename') or die($!));
we can see the exact execution precedence. For example, if you are writing constructor code that can serve as a class method and an instance method, so you can instantiate objects in both ways:
my $cool1 = PerlCool->new( );
my $cool2 = $cool1->new( );
and you are unsure whether you can write this:
package PerlCool;
sub new {
    my $self = shift;
    my $type = ref $self || $self;
    return bless {  }, type;
}
or whether you have to put in parentheses:
my $type = ref ($self) || $self;
you can use B::Deparse to verify your assumptions:
panic% perl -MO=Deparse,-p -e 'ref $self || $self'
(ref($self) or $self);
Indeed, ref( ) has a higher precedence than
||, and therefore this code will do the right
thing:
my $type = ref $self || $self;
On the other hand, it might confuse other readers of your code, or even yourself some time in the future, so if you are unsure about code readability, use the parentheses.
Of course, if you forget the simple mathematical operations precedences, you can ask the backend compiler to help you. This one is obvious:
panic% perl -MO=Deparse,-p -e 'print $a + $b * $c % $d'
print(($a + (($b * $c) % $d)));
This one is not so obvious:
panic% perl -MO=Deparse,-p -e 'print $a ** -$b ** $c'
print(($a ** (-($b ** $c))));
B::Deparse tells it all, but you probably
shouldn’t leave such a thing in your code without
explicit parentheses.
Finally, let’s use B::Deparse to
help resolve the confusion regarding the statement we saw earlier:
$c = $a > $b and $a < $b ? 1 : 0;

panic% perl -MO=Deparse -e '$c = $a > $b and $a < $b ? 1 : 0;'
$a < $b ? '???' : '???' if $c = $a > $b;
-e syntax OK
Just as we explained earlier, the and operator has
a lower precendence than the = operator. We can
explicitly see this in the output of B::Deparse,
which rewrites the statement in a less obscure way.
Of course, it’s worth learning the precedences of
the Perl operators from the perlop manpage so
you don’t have to resort to using
B::Deparse.
You can watch your code as it’s being compiled and executed by Perl via the -D runtime option. Perl will generate different output according to the extra options (letters or numbers) specified after -D. You can supply one or more options at the same time. Here are the available options for Perl Version 5.6.0 (reproduced from the perlrun manpage):
1  p  Tokenizing and parsing
2  s  Stack snapshots
4  l  Context (loop) stack processing
8  t  Trace execution
     16  o  Method and overloading resolution
     32  c  String/numeric conversions
     64  P  Print preprocessor command for -P
    128  m  Memory allocation
    256  f  Format processing
    512  r  Regular expression parsing and execution
   1024  x  Syntax tree dump
   2048  u  Tainting checks
   4096  L  Memory leaks (needs -DLEAKTEST when compiling Perl)
   8192  H  Hash dump -- usurps values( )
  16384  X  Scratchpad allocation
  32768  D  Cleaning up
  65536  S  Thread synchronization
Let’s look at some of these options. Consider this one-line example:
panic% perl -le '$_="yafoo"; s/foo/bar/; print'
yabar
which simply substitutes the string
“foo” with the string
“bar” in the variable
$_ and prints out its value. Now
let’s see how Perl compiles and executes the regular
expression substitution part of the code. We will use
Perl’s -Dr (or
-D512) option:
panic% perl -Dr -le '$_="yafoo"; s/foo/bar/; print'
Compiling REx `foo'
size 3 first at 1
rarest char f at 0
   1: EXACT <foo>(3)
   3: END(0)
anchored `foo' at 0 (checking anchored isall) minlen 3
Omitting $` $& $' support.

EXECUTING...

Guessing start of match, REx `foo' against `yafoo'...
Found anchored substr `foo' at offset 2...
Starting position does not contradict /^/m...
Guessed: match at offset 2
Matching REx `foo' against `foo'
  Setting an EVAL scope, savestack=3
   2 <ya> <foo>           |  1:  EXACT <foo>
   5 <yafoo> <>           |  3:  END
Match successful!
yabar
Freeing REx: `foo'
As you can see, there are two stages: compilation and execution.
During the compilation stage, Perl records the stages it should go
through when matching the string, notes what length it should match
for, and notes whether one of the $',
$&, or $' special variables
will be used.[9]
During the execution we can see the actual process of matching. In
our example the match was successful.
The trace doesn’t mention the
replace segment of the s///
construct, since it’s not a part of the regular
expression per se.
The -Dx (or -D1024) option tells Perl to print the syntax tree dump. We’ll use some very simple code so the execution tree will not be too long to be presented here:
panic% perl -Dx -le 'print 12*60*60'
{
6   TYPE = leave  =  ==> DONE
    FLAGS = (VOID,KIDS,PARENS)
    REFCNT = 0
    {
1       TYPE = enter  =  ==> 2
    }
    {
2       TYPE = nextstate  =  ==> 3
        FLAGS = (VOID)
        LINE = 1
        PACKAGE = "main"
    }
    {
5       TYPE = print  =  ==> 6
        FLAGS = (VOID,KIDS)
        {
3           TYPE = pushmark  =  ==> 4
            FLAGS = (SCALAR)
        }
        {
4           TYPE = const  =  ==> 5
            FLAGS = (SCALAR)
            SV = IV(43200)
        }
    }
}
This code shows us the tree of opcodes after the compilation process.
Each opcode is prefixed with a number, which then is used to
determine the order of execution. You can see that each opcode is
linked to some other opcode (a number following the = =
=> tag). If you start from the opcode numbered 1, jump
to the opcode it’s linked to (2, in this example),
and continue this way, you will see the execution pass of the code.
Since the code might have conditional branches, Perl cannot
predetermine a definite order at compile time; therefore, when you
follow the execution, the numbers will not necessarily be in
sequence.
Of course, internally Perl uses opcode pointers in memory, not numbers. Numbers are used in the debug printout only for our convenience.
Another interesting fact that we learn from this output is that Perl optimizes everything it can at compile time. For example, when you need to know how many seconds are in 12 hours, you could calculate it manually and use the resulting number. But, as we see from:
SV = IV(43200)
Perl has already done the calculation at compile time, so no runtime
overhead occurs if you say 12*60*60 and not
43200. The former is also more self-explanatory,
while the latter may require an explicit comment to tell us what it
is.
Now let’s bundle a few other options together and see a subroutine argument stack snapshot via s, context stack processing via l, and trace execution via t all at once:
panic% perl -Dtls -le 'print 12*60*60'
    =>
(-e:1)    const(IV(12))
    =>  IV(12)
(-e:1)    const(IV(60))
    =>  IV(12)  IV(60)
(-e:1)    multiply
    =>
(-e:1)    const(IV(720))
    =>  IV(720)
(-e:1)    const(IV(60))
    =>  IV(720)  IV(60)
(-e:1)    multiply
(-e:1)    ENTER scope 2 at op.c:6501
(-e:1)    LEAVE scope 2 at op.c:6811
(-e:0)    LEAVE scope 1 at perl.c:1319
(-e:0)    ENTER scope 1 at perl.c:1327
(-e:0)    Setting up jumplevel 0xbffff8cc, was 0x40129f40
You can see how Perl pushes constants 12 and 60 onto an argument
stack, executes multiply( ), gets a result of 720,
pushes it back onto the stack, pushes 60 again, and executes another
multiplication. The tracing and argument stack options show us this
information. All this happens at compile time.
In addition, we see a number of scope entering and leaving messages, which come from the context stack status report. These options might be helpful when you want to see Perl entering and leaving block scopes (loops, subroutines, files, etc.). As you can see, bundling a few options together gives very useful reports.
Since we have been using command-line execution rather than code placed in the file, Perl uses -e as the code’s filename. Line 0 doesn’t exist; it’s used for special purposes.
Having finished the compilation, now we proceed to the execution part:
EXECUTING...

    =>
(-e:0)    enter
(-e:0)    ENTER scope 2 at pp_hot.c:1535
Entering block 0, type BLOCK
    =>
(-e:0)    nextstate
    =>
(-e:1)    pushmark
                      =>  *
                  (-e:1)    const(IV(43200))
                      =>  *  IV(43200)
                  (-e:1)    print
                  43200
                      =>  SV_YES
(-e:1)    leave
Leaving block 0, type BLOCK
(-e:0)    LEAVE scope 2 at pp_hot.c:1657
(-e:0)    LEAVE scope 1 at perl.c:395
Here you can see what Perl does on each line of your source code. So
basically the gist of this code (bolded in the example) is pushing
the constant integer scalar (const(IV)) onto the
execution stack, and then calling print( ). The
SV_YES symbol indicates that print(
) returns a scalar value. The rest of the output consists
of controlling messages, where Perl changes scopes.
Of course, as the code gets more complicated, the traces will get longer and trickier to understand. But sometimes these traces can be as indispensable as interactive debugging.
You can use the -D[letter|number] techniques
from within mod_perl as well by setting the
PERL5OPT environment variable. For example, using
the bash shell to see the compilation and
execution traces, you can start the server in this way:
panic% PERL5OPT=-Dt ./httpd_perl -X
You will see a lot of output while the server starts. Once it finishes the tracing, open the error_log file and issue a request to your code. The tracing output will show up in this file.
Devel::Peek is
a very useful module for looking at the
Perl internals. It’s especially useful for debugging
XS code. With Devel::Peek we can look at Perl
variables’ data structures. This code:
use Devel::Peek;
my $x = 'mod_perl rules';
Dump $x;
prints:
SV = PV(0x804c674) at 0x80571fc
  REFCNT = 1
  FLAGS = (PADBUSY,PADMY,POK,pPOK)
  PV = 0x805ce78 "mod_perl rules"\0
  CUR = 14
  LEN = 15
We can see that this variable is a scalar, whose reference count is 1
(there are no other variables pointing to it). Its value is the
string “mod_perl rules”, terminated
by \0 (one more character is used for the
string-terminating \0 character, which is handled
behind the scenes, transparently to the user), whose length is 15
characters including the terminating \0 character.
The data structure starts at 0x80571fc, and its
string value is stored starting from the address
0x805ce78.
If you want to look at more complicated structures, such as a hash or
an array, you should create references to them and pass the
references to the Dump( ) function.
The Apache::Peek module is built for use with
mod_perl’s Devel::Peek, so you
can use it to peek at mod_perl’s code internals.
In Chapter 10 we showed a few examples where
Devel::Peek and Apache::Peek
have been found very useful. To learn about Perl
variables’ internals, refer to the
perlguts manpage.
Devel::Symdump
allows us to access
Perl’s symbol table. This package is object
oriented. To instantiate an object, you should provide the name of
the package to traverse. If no package is provided as an argument,
the main package is used. If the object is created
with new( ), Devel::Symdump
analyzes only the packages that are given as arguments; if
rnew( ) is used, nested modules are analyzed
recursively.
Once the object is instantiated, the methods packages(
), scalars( ), arrays(
), hashes( ), functions(
), ios( ), and unknowns(
) can be used. Each method returns an array of fully
qualified symbols of the specified type in all packages that are held
within a Devel::Symdump object, but without the
leading "$“, "@“, or
"%“. In a scalar context, they will return the
number of such symbols. Unknown symbols are usually either formats or
variables that don’t yet have defined values.
For example:
require Devel::Symdump;
@packs = qw(Devel::Symdump);
$obj = Devel::Symdump->new(@packs);
print join "\n", $obj->scalars;

Devel::Symdump::rnew
Devel::Symdump::inh_tree
Devel::Symdump::_partdump
Devel::Symdump::DESTROY
...more symbols stripped
You may find this package useful to see what symbols are defined, traverse trees of symbols from inherited packages, and more. See the package’s manpage for more information.
Apache::Symdump uses
Devel::Symdump to record snapshots of the Perl
symbol table in ServerRoot/logs/symdump.$$.$n.
Here $$ is the process ID and
$n is incremented each time the handler is run.
To enable this module, add the following to httpd.conf:
PerlLogHandler Apache::Symdump
This module is useful for watching the growth of the processes and hopefully, by taking steps against the growth, reducing it. One of the reasons for process growth is the definition of new symbols. You can use the diff utility to compare snapshots and get an idea of what might be making a process grow. For example:
panic% diff -u symdump.1892.0 symdump.1892.1
where 1892 is PID. Normally, new symbols come from modules or scripts
that were not preloaded, the Perl method cache, and so on.
Let’s write a simple script that uses
DB_File, which wasn’t preloaded
(see Example 21-13).
Example 21-13. use_dbfile.pl
use strict;
require DB_File;
my $r = shift;
$r->send_http_header("text/plain");
$r->print("Hello $$\n");
If we issue a few requests and then compare two consecutive request
dumps for the same process, nothing happens. That’s
because the module is loaded on the first request, and therefore from
now on the symbol table will be the same. So in order to help
Apache::Symdump to help us detect the load, we
will require the module only on the second reload (see Example 21-14).
Example 21-14. use_dbfile1.pl
use strict;
use vars qw($loaded);
require DB_File if defined $loaded;
$loaded = 1;
my $r = shift;
$r->send_http_header("text/plain");
$r->print("Hello $$\n");
Running the diff:
panic% diff symdump.9909.1 symdump.9909.2 |wc -l
  301
reveals that there were 301 symbols defined, mostly from the
DB_File and Fcntl packages. We
can also see what new files were loaded, by applying
diff on the incdump.$$.$n
files, which dump the contents of %INC after each
request:
panic% diff incdump.9909.1 incdump.9909.2
1a2
> /usr/lib/perl5/5.6.1/i386-linux/auto/DB_File/autosplit.ix
= /usr/lib/perl5/5.6.1/i386-linux/auto/DB_File/autosplit.ix
21a23
> DB_File.pm = /usr/lib/perl5/5.6.1/i386-linux/DB_File.pm
Remember that Apache::Symdump does not clean up
its snapshot files, so you have to do it yourself:
panic% rm logs/symdump.* logs/incdump.*
Apache::Status also uses
Devel::Symdump to allow you to inspect symbol
tables through your
browser.
This module sends what may be helpful debugging information to the client, rather than to the error_log file.
This module specifies only the dump( ) method:
use Apache::Debug ( );
my $r = shift;
Apache::Debug::dump($r, "some comment", "another comment", ...);
For example, if we take this simple script:
use Apache::Debug ( );
use Apache::Constants qw(SERVER_ERROR);
my $r = shift;
Apache::Debug::dump($r, SERVER_ERROR, "Uh Oh!");
it prints out the HTTP headers as received by server and various request data:
SERVER_ERROR

Uh Oh!

cwd=/home/httpd/perl
$r->method            : GET
$r->uri               : /perl/test.pl
$r->protocol          : HTTP/1.0
$r->path_info         :
$r->filename          : /home/httpd/perl/test.pl
$r->allow_options     : 8
$s->server_admin      : root@localhost
$s->server_hostname   : localhost
$s->port              : 8000
$c->remote_host       :
$c->remote_ip         : 127.0.0.1
$c->remote_logname    :
$c->user              :
$c->auth_type         :

scalar $r->args       :

$r->args:

$r->content:

$r->headers_in:
   Accept       = image/gif, image/x-xbitmap, image/jpeg,
                  image/pjpeg, image/png, */*
   Accept-Charset = iso-8859-1,*,utf-8
   Accept-Encoding = gzip
   Accept-Language = en
   Connection   = Keep-Alive
   Host         = localhost:8000
   Pragma       = no-cache
User-Agent = Mozilla/4.76 [en] (X11; U; Linux 2.2.17-21mdk i686)The following are a few other modules that you may find of use, but in this book we won’t delve deeply into their details:
Apache::DumpHeadersis used to watch an HTTP transaction, looking at the client and server headers.Apache::DebugInfooffers the ability to monitor various bits of per-request data. Similar toApache::DumpHeaders.Devel::StackTraceencapsulates the information that can be found through using thecaller( )function and provides a simple interface to this data.Apache::Symbolprovides XS tricks to avoid a mandatory “Subroutine redefined” warning when reloading a module that contains a subroutine that is eligible for inlining. Useful during development when usingApache::ReloadorApache::StatINCto reload modules.
There are a number of tools that allow you look at the server internals at runtime, through a convenient web interface.
This is a very useful module. It lets you watch what happens to the Perl part of the mod_perl server. You can watch the size of all subroutines and variables, variable dumps, lexical information, opcode trees, and more.
You shouldn’t use it on a production server, as it adds quite a bit of overhead for each request.
This
configuration
enables the Apache::Status module with its minimum
feature set. Add this to httpd.conf:
<Location /perl-status>
    SetHandler perl-script
    PerlHandler Apache::Status
</Location>
If you are going to use Apache::Status
it’s important to put it as the first module in the
startup file, or in httpd.conf:
# startup.pl
use Apache::Status ( );
use Apache::Registry ( );
use Apache::DBI ( );
For example, if you use Apache::DBI and you
don’t load Apache::Status before
Apache::DBI, you will not get the
Apache::DBI menu entry (which allows you to see
persistent connections).
There are several
variables you can use to modify
the behavior of Apache::Status:
-
PerlSetVar StatusOptionsAll On This single directive will enable all of the options described below.
-
PerlSetVar StatusDumper On When you are browsing symbol tables, you can view the values of your arrays, hashes, and scalars with
Data::Dumper.-
PerlSetVar StatusPeek On With this option
Onand theApache::Peekmodule installed, functions and variables can be viewed inDevel::Peekstyle.-
PerlSetVar StatusLexInfo On With this option
Onand theB::LexInfomodule installed, subroutine lexical variable information can be viewed.-
PerlSetVar StatusDeparse On With this option
OnandB::Deparseversion 0.59 or higher (included in Perl 5.005_59+), subroutines can be “deparsed.” Options can be passed toB::Deparse::newlike so:PerlSetVar StatusDeparseOptions "-p -sC"
See the
B::Deparsemanpage for details.-
PerlSetVar StatusTerse On With this option
On, text-based optree graphs of subroutines can be displayed, thanks toB::Terse.-
PerlSetVar StatusTerseSize On With this option
Onand theB::TerseSizemodule installed, text-based optree graphs of subroutines and their sizes can be displayed. See theB::TerseSizedocumentation for more info.-
PerlSetVar StatusTerseSizeMainSummary On With this option
Onand theB::TerseSizemodule installed, a “Memory Usage” submenu will be added to theApache::Statusmain menu. This option is disabled by default, as it can be rather CPU-intensive to summarize memory usage for the entire server. It is strongly suggested that this option be used only with a development server running in -X mode, as the results will be cached.Remember to preload
B::TerseSizein httpd.conf and make sure that it’s loaded afterApache::Status:PerlModule Apache::Status PerlModule B::Terse
-
PerlSetVar StatusGraph On When
StatusDumper(see above) is enabled, another submenu, “OP Tree Graph,” will be present with the dump if this configuration variable is set toOn.This requires the
Bmodule (part of the Perl compiler kit) and theB::Graphmodule, Version 0.03 or higher, to be installed along with thedotprogram.dotis part of the graph-visualization toolkit from AT&T (http://www.research.att.com/sw/tools/graphviz/).WARNING: Some graphs may produce very large images, and some graphs may produce no image if
B::Graph’s output is incorrect.
There is more information about Apache::Status in
its manpage.
Assuming that your mod_perl server is listening on port 81, fetch http://www.example.com:81/perl-status:
Embedded Perl version v5.6.1 for Apache/1.3.17 (Unix) mod_perl/1.25 process 9943, running since Fri Feb 9 17:48:50 2001
All the sections below are links when you view them through /perl-status:
Perl Configuration Loaded Modules Inheritance Tree Enabled mod_perl Hooks Environment PerlRequire'd Files Signal Handlers Symbol Table Dump ISA Tree Compiled Registry Scripts
Here’s what these sections show:
Perl Configuration is the same as the output from perl -V (loaded from Config.pm).
Loaded Modules shows the loaded Perl modules.
Inheritance Tree shows the inheritance tree of the loaded modules.
Enabled mod_perl Hooks shows all mod_perl hooks that were enabled at compile time.
Environment shows the contents of
%ENV.PerlRequire’d Files displays the files that were required via
PerlRequire.Signal Handlers shows the status of all signal handlers (using
%SIG).Symbol Table Dump shows the symbol table dump of all packages loaded in the process—you can click through the symbols and, for example, see the values of scalars, jump to the symbol dumps of specific packages, and more.
ISA Tree shows the ISA inheritance tree.
Compiled Registry Scripts shows
Apache::Registry,Apache::PerlRun, and other scripts compiled on the fly.
From some menus you can move deeper to peek into the internals of the server, to see the values of the global variables in the packages, to see the cached scripts and modules, and much more. Just click around.
Remember that whenever you access /perl-status
you are always inside one of the child processes, so you may not see
what you expect, since this child process might have a different
history of processed requests and therefore a different internal
state. Sometimes when you fetch /perl-status and
look at the Compiled Registry Scripts section
you see no listing of scripts at all.
Apache::Status shows the registry scripts compiled
in the httpd child that is serving your request
for /perl-status; if the child has not yet
compiled the requested script, /perl-status will
just show you the
main menu.
The mod_status module allows a server administrator to find out how well the server is performing. An HTML page is presented that gives the current server statistics in an easily readable form. If required, given a compatible browser, this page can be automatically refreshed. Another page gives a simple machine-readable list of the current server state.
This Apache module is written in C. It is compiled by default, so all you have to do to use it is enable it in your configuration file:
<Location /status>
SetHandler server-status
</Location>For security reasons you will probably want to limit access to it. If you have installed Apache according to the instructions given in this book, you will find a prepared configuration section in httpd.conf. To enable use of the mod_status module, just uncomment it:
ExtendedStatus On
<Location /status>
SetHandler server-status
Order deny,allow
Deny from all
Allow from localhost
</Location>You can now access server statistics by using a web browser to access the page http://localhost/status (as long as your server recognizes localhost).
The details given by mod_status are:
The number of children serving requests
The number of idle children
The status of each child, the number of requests that child has performed and the total number of bytes served by the child
The total number of accesses and the total bytes served
The time the server was last started/restarted and for how long it has been running
Averages giving the number of requests per second, the number of bytes served per second, and the number of bytes per request
The current percentage of the CPU being used by each child and in total by Apache
The current hosts and requests being processed
In Chapter 5 you can read about
Apache::VMonitor, which is a more advanced sibling
of mod_status.
Turning the ExtendedStatus mode on is not
recommended for high-performance production sites, as it adds
overhead to the request response times.
Perl Debugged, by Peter Scott and Ed Wright (Addison Wesley). A good book on how to debug Perl code and how to code in Perl so you won’t need to debug.
Debugging Perl: Troubleshooting for Programmers, by Martin Brown (McGraw Hill). This book tells you pretty much everything you might want to know about Perl debugging.
Programming Perl, Third Edition, by Larry Wall, Tom Christiansen, and Jon Orwant (O’Reilly). Covers Perl Versions 5.005 and 5.6.0. Chapter 20 talks in depth about the Perl debugger.
“Cultured Perl: Debugging Perl with ease, catch the bugs before they bite,” by Teodor Zlatanov: http://www-106.ibm.com/developerworks/library/l-pl-deb.html
This article talks about using the Perl command-line debugger, the GUI
Devel::ptkdb, and a special Perl shell for debugging.The Mythical Man-Month, 20th Anniversary Edition, by Fred P. Brooks (Addison Wesley). A must-read for all programmers. After reading this book, you will at least learn to plan more time for the debug phase of your project.
General software-testing techniques FAQ: http://www.faqs.org/faqs/software-eng/testing-faq/.
[1] Notice the
semicolon after the eval { } block.
[2] Perl 5.6.0 has introduced a new
special variable, $^C, which is set to true when
Perl is run with the -c flag; this provides an
opportunity to have some further control over
BEGIN and END blocks during
syntax checking.
[3] For more traps, refer to the perltrap manpage.
[4] Perl folds the constants at compile time.
[5] See also Class::Date and
Date::Manip.
[6] In Perl 5.8.0 use l instead of w, which is used for watch-expressions.
[7] Note that breakable lines of
code include a colon (:) immediately after the
line number.
[8] You won’t see the symbol printout with Perl 5.6.1, but it works fine with 5.005_03 or 5.8.0
[9] You should avoid using these at all, since they add a performance hit, and once used in any regular expression they will be set in every other regular expression, even if you didn’t ask for them.
Get Practical mod_perl now with the O’Reilly learning platform.
O’Reilly members experience books, live events, courses curated by job role, and more from O’Reilly and nearly 200 top publishers.

