In this chapter, we are going to prepare for some NetKernel action. I will also walk you through the creation of your first NetKernel module.
To follow along, you will need the following:
- A NetKernel instance
NetKernel has to be installed and running. Appendix A explains how to accomplish that.
- A brain
These come in all shapes and sizes. Mine—for example—is not special in any way. Brain flexibility is required though. ROC is not difficult, just different. Remember that, contrary to common belief, new brain cells can be added and new pathways through your brain can be created.[6] And after you’ve worked with ROC for a while, both those statements will become fact!
- A text editor
There are many good plaintext editors. If you’ve written any code at all, you’ll probably have a favorite one. I personally use SciTE because it is lightweight, portable, and very customizable. In the documentation that comes with your NetKernel instance (I’ll show you where you can find that documentation a bit further on), IntelliJ IDEA or Eclipse are suggested. Stick with whatever makes you productive. If your editor has code highlighting for the most common stuff (XML, HTML, CSS, Java, JavaScript, etc.), you’ll be fine. However, if the default Windows Notepad is your top-of-the-line text editor I would strongly suggest that you to follow one of the above suggestions.[7]
Here we take a close look at what the installation put on your system.
In what follows, I’m going to use the [install] label for your NK5 installation location. A forward slash will be used to indicate a directory. I know this is different in Windows.[8] You’ll soon notice however that within NetKernel configuration files (regardless of the operating system), the forward slash is used, and I did not want a mix. So adjust for Windows where necessary. I’m also going to label your running NetKernel as [instance].
Now, when you look into your [install] directory, you’ll see these subdirectories:
- [bin]
startup script and startup configuration files
- [etc]
[instance]-wide configuration files
- [javadoc]
generated documentation
- [lib]
instance-wide libraries
- [log]
loggings
- [modules]
the NetKernel batteries (applications and tools)
There are a couple of others. These are volatile directories for caching and for the H2 database files used by the [instance] itself.
This contains the scripts to manually start a NetKernel instance and the configuration files with the parameters for those scripts.
There’s some interesting stuff here. The kernel.properties file contains the parameters that govern your NetKernel instance. It’s very interesting stuff, but do not touch it unless you have a very good reason and know what you are doing. Besides, you can change all of these parameters from the Backend HTTPFulcrum.
The modules.xml file contains the modules[9] that get loaded. You will modify this file, either manually or through the Backend HTTPFulcrum; this is where you will add your own modules. In case it was not clear yet, you’ll now—by looking at modules.xml—realize that NetKernel is built up from modules that run . . . in NetKernel.
NetKernel is developed in Java.
Java is one of the languages you can use to develop modules in NetKernel.
Right, that’s out of the way! I’m by no means a Java guru (I prefer Python, sorry). The NetKernel developers use Java, and the modules that make up the core of NetKernel are Java modules. The javadocs generated for these modules can be found in the javadoc directory. If you develop your own modules for NetKernel in Java, the javadocs generated for them can go in there as well. If you don’t, NetKernel has a documentation system (which we’ll discuss) for modules that can cater to anybody.
Note
People are always giving me a hard time with the “What is NetKernel?” question. They ask, “Is it an application server?” “Well, no, not really,” I answer. “Oh, then it is an alternative for Java,” they retort and end the discussion; which should actually just start then. For me, this just proves some people should stay as far away from IT as possible.
This directory contains the libraries used to boot the NetKernel instance itself. They provide the actual ROC functionality.
Guess what, this directory contains the loggings of your NetKernel instance. No need to study them here; the Backend HTTPFulcrum contains a very nice logviewer.
It is very hip to say something is batteries included. Python seems to be, and Haskell too. I guess Ruby couldn’t stay behind. But what does it mean? What does it mean to say NetKernel is batteries included?
Well, while having the ROC functionality at your fingertips is surely very nice, it means absolutely nothing to me! I need documentation about it, I need to be able to see it, and I need to be able to use it. Those are the batteries! And that is what the [install]/modules directory contains, applications and tools that use the ROC functionality and open it up to a simple soul like me.
So, if I want to use Python to ROC in NetKernel, I can. Some Saxon for XML processing? No problem! Ant? Sure! Those and many other things are available. Some are installed by default, others can be gotten from the repositories.
This is not in the list. Create
it now. This is where you’ll put your own applications. Using
project-modules
as
directory-name
is not mandatory; you can choose whatever you like, but please do not put blanks in it.
However, I’ll stick with project-modules for the rest of this book.
cd [install]
mkdir project-modules
Creating a module from scratch for the first time can be an intimidating task. Still, I advise you to enter everything manually. Based on Learn . . . The Hard Way[10] experience it is the best way to learn.
The module we are building here is the ROC equivalent of Hello World. However, it would not be fair to compare it to a programming language Hello World or even to a Rails or NodeJS Hello World. In this module, you are being introduced to the ROC paradigm; the actual thing we are implementing is irrelevant.
The procedure I’m following here is that I walk you through directory by directory, file by file. There will be short explanations, and you’ll be able to deduce a lot more. Do not worry if something doesn’t make sense yet; that is what the next chapter is about.
Glossed Over
You—readers of this book—are not stupid. You no doubt noticed that I glossed over a couple of things:
I did not give my own answer to the “What is NetKernel?” question.
I did not explain what ROC functionality means.
I keep refering to wonderful stuff in the Backend HTTPFulcrum, but I do not show any of it.
The reason is that I want you to be able to do something (almost there) before I get to page 100 or so. As for the answer to 1, one of the purposes of this book is to make you able to formulate an answer to that yourself. So bear with me, and all will be explained.
We are going to create a directory for your module underneath
[install]/project-modules. You can name this directory anything you
like. I’m going to follow the URN method used in the
[install]/modules directory. Note that for a directory or file, you
can not use colons. We use points instead. So these could be possible directory-names for
the application:
  urn.org.elbeesee.chapter1.firstmodule-1.0.0
  urn.org.tomgeudens.chapter1.firstmodule-1.0.0
Notice that I also added a version number in the directory name. This too is optional; it just makes it easier if I want to have two versions of the same module running side by side.
My employer would love for you all to use the first option, whereas I would of course love to
become immortal by having a directory with my name in it on your hard drive. But I’ll stay
modest. Create
the directory for your module in [install]/project-modules. I’ll further refer to this directory as
[moduleroot].
cd [install]/project-modules
mkdir urn.org.netkernelbook.chapter1.firstmodule-1.0.0
Important
I’m not differentiating between Windows and Linux when stating the commands. Remember to use the non-superuser dexter, though, to execute the commands in Linux.
In Chapter 2, I take it apart, but in broad terms, here is what goes on: a module definition defines which resources the module handles.
Let us take a look at what that means for the listing I’m going to have you enter in a minute:
Three resource spaces are defined; First Module—Services, First Module—Documentation, and First Module —Unit Test. Each has a unique identifier, a URI.
The first one is dynamically exposed to the world and covers resource requests that look like /firstmodule/helloservice/<anything here>. These resource requests are handled with a DPML program.
The second one plugs the modules’ documentation into the NetKernel documentation system.
The third one pulls the first into the NetKernel unit test system.
In fact, a module definition is pretty much like setting limits. From all (infinite) possible resources, you define the subsets (equal spaces) that you want to handle in your module. These subsets can cover an infinite number of possible resources as well, as is the case in our example.
Example 1-1. [moduleroot]/module.xml
<?xml version="1.0" encoding="UTF-8"?>
<module version="2.0">
  <meta>
    <identity>
      <uri>urn:org:netkernelbook:chapter1:firstmodule</uri>
      <version>1.0.0</version>
    </identity>

    <info>
      <name>First Module</name>
      <description>Netkernelbook Chapter 1 First Module</description>
    </info>
  </meta>

  <system>
    <dynamic/>
  </system>

  <rootspace
    name="First Module - Services"
    public="true"
    uri="urn:org:netkernelbook:chapter1:firstmodule:services">
    <fileset>
      <regex>res:/etc/system/SimpleDynamicImportHook.xml</regex>
    </fileset>
    <mapper>
      <config>
        <endpoint>
          <id>firstmodule:helloEP</id>
          <name>Hello Service</name>
          <description>Hello Service</description>

          <grammar>res:
            <group name="service">/firstmodule/helloservice</group>/
            <group name="value">
              <regex type="anything"/>
            </group>
          </grammar>

          <request>
            <identifier>active:dpml</identifier>
            <argument name="operator">
              res:/resources/endpoints/hello.dpml
            </argument>
            <argument method="as-string" name="value">arg:value</argument>
          </request>
        </endpoint>
      </config>

      <space>
        <fileset>
          <regex>res:/resources/endpoints/.*</regex>
        </fileset>
        <import>
          <uri>urn:org:netkernel:lang:dpml</uri>
        </import>
        <import>
          <uri>urn:org:netkernel:lang:freemarker</uri>
        </import>
      </space>
    </mapper>
  </rootspace>

  <rootspace
    name="First Module - Documentation"
    public="true"
    uri="urn:org:netkernelbook:chapter1:firstmodule:documentation">
    <fileset>
      <regex>res:/etc/system/(Books|Docs).xml</regex>
    </fileset>

    <fileset>
      <regex>res:/resources/documentation/.*</regex>
    </fileset>
  </rootspace>

  <rootspace
    name="First Module - Unit Test"
    public="true"
    uri="urn:org:netkernelbook:chapter1:firstmodule:unittest">
    <fileset>
      <regex>res:/etc/system/Tests.xml</regex>
    </fileset>
    <fileset>
      <regex>res:/resources/unittest/.*</regex>
    </fileset>

    <endpoint>
      <prototype>Limiter</prototype>
      <grammar>res:/etc/
        <regex type="anything"/>
      </grammar>
    </endpoint>

    <import>
      <uri>urn:org:netkernelbook:chapter1:firstmodule:services</uri>
    </import>

    <import>
      <uri>urn:org:netkernel:ext:layer1</uri>
      <private/>
    </import>
  </rootspace>
</module>We’ll discuss dynamic imports in detail later. Here we use them to make our module accessible from outside (outside NetKernel itself, that is, so we can access it in our web browser).
Create an etc directory for your application and a system directory underneath that.
cd [moduleroot]
mkdir etc
mkdir etc/system
While—in accordance with Linux—the [moduleroot]/etc directory will contain your module’s own configuration resources, the NetKernel tools expect your module’s configuration resources (metaresources, in fact) to be contained for them in [moduleroot]/etc/system. So that’s where we’ll find the SimpleDynamicImportHook.xml file:
This is the actual program, written in DPML, NetKernel’s own scripting language. Whenever I can[11] use DPML, I will do so in this book. That way I avoid discussion over which language is best, as well as leveling the playing field.
Create a resources directory for your application and a documentation, a unit test, and an endpoints directory underneath that:
cd [moduleroot]
mkdir resources
mkdir resources/documentation
mkdir resources/endpoints
mkdir resources/unittest
What remains is the program itself:
Example 1-3. [moduleroot]/resources/endpoints/hello.dpml
<?xml version="1.0" encoding="UTF-8"?>
<sequence>
  <request assignment="response">
    <identifier>active:freemarker</identifier>
    <argument name="operator">
      <literal type="string">Input value: ${value}</literal>
    </argument>
    <argument name="value">arg:value</argument>
  </request>
  <log>
    <message>
     <literal type="string">DPML example running with input %1</literal>
    </message>
    <param>arg:value</param>
  </log>
</sequence>NetKernel has to be made aware of our new module. The place to do that is in
[install]/etc/modules.xml. Add
the following entry just before the
</modules> end-tag (the entry has to be on one
line; the split below is due to the limited length in this book):
<module runlevel="7">
  project-modules/urn.org.netkernelbook.chapter1.firstmodule-1.0.0/
</module>
If all went well, NetKernel should have discovered your module now. To verify this:
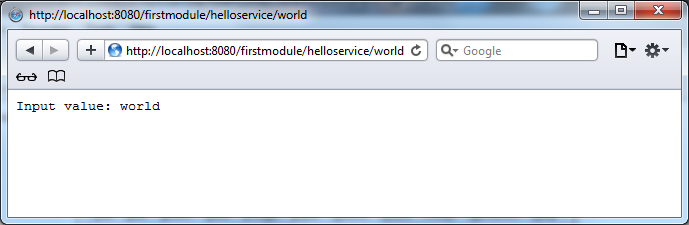
Start your favorite webbrowser.
Browse to http://localhost:8080/firstmodule/helloservice/world. Figure 1-1 shows the result.
Browse to http://localhost:8080/firstmodule/helloservice/Tom%20Geudens.
No, we are not. No application (NetKernel or otherwise) is complete without tests and documentation.[12]And NetKernel has excellent toolkits for both. In fact, you probably noticed that the necessary stuff is already there in our [moduleroot]/module.xml file and that we already created all necessary directories. We just need to flesh things out, starting with a couple of extra files in the [moduleroot]/etc/system directory.
Example 1-4. [moduleroot]/etc/system/Books.xml
<?xml version="1.0" encoding="UTF-8"?>
<books>
  <book>
    <id>book:urn:org:netkernelbook:chapter1:firstmodule</id>
    <title>First Module</title>
    <desc>netkernelbook chapter1 first module documentation</desc>
    <toc>
      <item id="urn:org:netkernelbook:chapter1:firstmodule:guide"/>
      <item id="urn:org:netkernelbook:chapter1:firstmodule:endpoints"/>
    </toc>
  </book>
</books>
Example 1-5. [moduleroot]/etc/system/Docs.xml
<?xml version="1.0" encoding="UTF-8"?>
<docs>
  <doc>
    <id>urn:org:netkernelbook:chapter1:firstmodule:guide</id>
    <title>Guide to First Module</title>
    <desc>first module explained</desc>
    <uri>res:/resources/documentation/doc_guide.txt</uri>
  </doc>
  <doc>
    <id>urn:org:netkernelbook:chapter1:firstmodule:endpoints</id>
    <title>Reference for First Module Endpoints</title>
    <desc>first module use</desc>
    <uri>res:/resources/documentation/doc_endpoints.txt</uri>
  </doc>
</docs>
Example 1-6. [moduleroot]/etc/system/Tests.xml
<?xml version="1.0" encoding="UTF-8"?>
<tests>
  <test>
    <id>test:urn:org:netkernelbook:chapter1:firstmodule</id>
    <name>First Module</name>
    <desc>netkernelbook chapter1 first module unittest</desc>
    <uri>res:/resources/unittest/testlist.xml</uri>
  </test>
</tests>
The actual documentation files go into the resources/documentation directory.
Example 1-7. [moduleroot]/resources/documentation/doc_guide.txt
== Documentation Stub ==
This is a documentation stub.

For more information on editing documentation
see the [doc:sysadmin:guide:doc:editing|Editing Guide].
Example 1-8. [moduleroot]/resources/documentation/doc_endpoints.txt
{endpoint}firstmodule:helloEP{/endpoint}
==Detail==
This hello endpoint simply formats the value argument
it receives and returns it as a string response.

==Resource Identifier Syntax==
The endpoint accepts requests which match the identifier syntax
of '''res:/firstmodule/helloservice/ANY_OTHER_TEXT'''

The '''ANY_OTHER_TEXT''' is captured as the value argument
passed into the endpoint.
And the actual test files go into the resources/unittest directory.
Example 1-9. [moduleroot]/resources/unittest/testlist.xml
<?xml version="1.0" encoding="UTF-8"?>
<testlist>
  <test name="Invoke service by identifier">
    <request>
      <identifier>res:/firstmodule/helloservice/World</identifier>
    </request>
    <assert>
      <stringEquals>Input value: World</stringEquals>
    </assert>
  </test>

  <test name="Invoke service by endpoint">
    <request>
      <identifier>meta:firstmodule:helloEP</identifier>
      <argument name="value">World</argument>
    </request>
    <assert>
      <stringEquals>Input value: World</stringEquals>
    </assert>
  </test>
</testlist>Now we are finished. And you can check that yourself:
Start your favorite webbrowser.
Browse to http://localhost:1060/book/view/book:urn:org:netkernelbook:chapter1:firstmodule/.
Browse to http://localhost:1060/test/view/html/test:urn:org:netkernelbook:chapter1:firstmodule.
Don’t be shy: do try out the tests and through the documentation!
It does seem ridiculous to bring this up here, but this is a good point to set up source version control. Every module you write—even one as small as this one—should have it. If you are not familiar with it, Appendix E will guide you. If you are, use it.
Chapter 1 was aimed at you getting your First Module up and running as quickly as possible. In Chapter 2, we will take the scalpel to the same module and explain it in both ROC terms and technical terms.
The download for this chapter can be found here.
[6] My brain-related knowledge comes from Pragmatic Thinking and Learning—Refactor Your Wetware by Andy Hunt (2008, ISBN 978-1-93435-605-0). This is an excellent (very readable, even for the technically inclined) book on the matter.
[7] No, I will not start a flame war over this. If you are happy with Notepad, kudos to you!
[8] A functional guy in my former company put in a request to our Windows system administration team to adjust all backward slashes to forward slashes. After they recovered their composure, they forwarded the issue to Microsoft Support. No answer has come from Redmond so far.
[9] Module is the generic name for an application or tool within NetKernel.
[10] A great series of books by Zed Shaw: http://learncodethehardway.org/
[12] You will notice throughout this book that I have very definite ideas about application development. Don’t take offense, whatever approach works for you is fine by me—in your own book that is.
Get Resource-Oriented Computing with NetKernel now with the O’Reilly learning platform.
O’Reilly members experience books, live events, courses curated by job role, and more from O’Reilly and nearly 200 top publishers.

