Because Tomcat is written in Java, some people assume that you have to be a Java guru to use it. That is not so! Although you need to know Java to modify the internals of Tomcat or to write your own servlet programs, you do not need to know any Java to use Tomcat or to write or maintain many JavaServer Pages (JSPs). You can have JSPs that use "JavaBeans" or "JSP Custom Tags"; in both cases, you are simply using Java components that a developer has set up for you.
In this chapter, we explain how to install Tomcat, get it running, and test it to make sure that it's functioning properly.
Tip
As of this writing, there are several production-ready versions of Tomcat available, but we strongly suggest you use the latest stable version of the 6.0 branch or whichever is the latest stable version of Tomcat by the time you read this. See the Apache Tomcat home page (http://tomcat.apache.org) to find the latest stable version. For Tomcat versions 5.5 and 6.0, this book provides an abundance of answers and explanations about the general concepts of how Tomcat works, in addition to showing rich detail about how to use these popular versions of Tomcat.
There are several paths to getting Tomcat up and running. The quickest one is to download and run the compiled binary. Tomcat is written in Java, which means you need to have a modern and complete Java runtime installed before you can build or test it. Read Appendix A to make sure you have Java installed properly. Do not skip this step; it is more important than it sounds!
One of the benefits of open source projects is that programmers find and fix bugs and make improvements to the software. If you're not a programmer, there is little or nothing to be gained from recompiling Tomcat from its source code, as you are not interested in this level of interaction. Also, if you're not an experienced Tomcat developer, attempting to build and use your own Tomcat binaries may actually cause problems because it is relatively easy to build Tomcat in ways that quietly disable important features. To get started quickly, you should download an official release binary package for your system.
Tip
If you want some hints on compiling from source, see Chapter 9.
There are two levels of packaging. The Apache Software Foundation publishes binaries in the form of releases and nightly builds. Other organizations rebundle these into RPM packages and other kinds of installers for Linux, "packages" for BSD, and so forth. The best way to install Tomcat depends on your system. We explain the process on several systems: Linux, Solaris, Windows, Mac OS X, and FreeBSD.
Tomcat 6 requires any Java runtime version 1.5 or higher (which Sun's marketing group calls "Java 5"). We suggest that you run Tomcat 6 on Java 1.6 or higher, however, due to the additional features, fixes, and performance improvements that Java 1.6 (or higher) JVMs offer.
Tomcat is available in at least two different binary release forms for Linux users to choose from:
- Multiplatform binary releases
You can download, install, and run any of the binary releases of Tomcat from Apache's web site regardless of the Linux distribution you run. This format comes in the form of gzipped tar archives (tar.gz files) and zip archive files. This allows you to install Tomcat into any directory you choose, and you can install it as any user ID in the system. However, this kind of installation is not tracked by any package manager and will be more difficult to upgrade or uninstall later. Also, it does not come with an
initscript for integration into the system's startup and shutdown.- Distribution native package
If you run Fedora or Red Hat Linux (or another Linux that uses the Red Hat package manager, such as SUSE or Mandriva), you can download a binary RPM package of Tomcat. This allows for easy uninstalls and upgrades via the Red Hat Package Manager, plus it installs a Tomcat
initscript for stopping, starting, and restarting Tomcat from the command line and on reboots. The downside to this method of installation is that you must install the Tomcat RPM package as the root user. As of this writing there are at least two RPM package implementations for you to choose from, each with different features.
Keep in mind, though, that Linux is just the operating system kernel, and the complete operating system is a "distribution." Today, there are many different Linux distributions. Some examples include Fedora, Red Hat, Ubuntu, Mandriva, Gentoo, and Debian. Although any two Linux distributions tend to be similar, there are also usually enough differences that make it difficult for developers to write one script that runs successfully on two. Also, each Linux distribution may primarily use a different native package manager, so each version of a distribution can change any number of things in the operating system, including Java[1] and Tomcat. It is not uncommon for Linux distributions to bundle software written in Java that does not work only because the distribution's own package of it is broken in a subtle way. Distributions also tend to include old versions of Tomcat that are either unstable or less than ideal to run your web site compared to the latest stable version available. For these reasons, it's almost always best to install your own recent stable version of Tomcat.
Because there are so many Linux distributions, and because they are significantly different from each other, giving specific instructions on how best to install Tomcat on each version of each Linux distribution is beyond the scope of this book. Luckily, there is enough similarity between the popular Linux distributions for you to follow more generic Linux installation instructions for installing Tomcat from an Apache binary release archive.
If you run a Fedora or Red Hat Linux distribution, more than one implementation of Tomcat RPM packages exists for you to choose from:
- The Tomcat RPM package that comes with this book
This is a fully relocateable RPM package that can be easily rebuilt via a custom ant build file. It does not build Tomcat itself but instead bundles the official multiplatform Apache release class binaries of the Tomcat 6 version of your choice. This RPM package depends on no other RPM packages, so it can be installed as a single package, but needs to be configured to use an installed Java runtime (JDK or JRE). See Appendix E for the full source listing of the RPM package's scripts.
- The Tomcat RPM package that is available from JPackage.org
This is a nonrelocateable RPM package that installs Tomcat into the /var directory. It rebuilds Tomcat from source code and then packages up the resulting multiplatform class binaries. This RPM package depends on many other RPM packages (each potentially requiring yet more packages) from JPackage.org and must be installed as a graph of RPM packages. As of this writing, JPackage.org does not have a Tomcat 6.0 RPM, only a Tomcat 5.5 RPM.
Each of these RPM packages includes detailed scripts for installing, uninstalling, and upgrading Tomcat, as well as scripts for runtime integration with the operating system. We suggest you try ours first.
If you run Gentoo Linux, there is an ebuild of Tomcat 6 that you can install and use. See the guide for it by William L. Thomson Jr. at http://www.gentoo.org/proj/en/java/tomcat6-guide.xml. Also, see the Tomcat Gentoo ebuild page on the Gentoo Wiki at http://gentoo-wiki.com/tomcat_gentoo_ebuild. In addition to the ebuild, the RPM package from this book is written to install and run on Gentoo; just install the rpm command first.
For security reasons, you should probably create a tomcat user with low privileges and run Tomcat as that user. We suggest
setting that user's login shell to /sbin/nologin and locking the
user's password so that it can't be guessed. Also, it's probably a good idea to make the
tomcat user's primary group the nobody group or another group with similarly low
permissions. You will need to do this as the root user:
# useradd -g 46 -s /sbin/nologin -d /opt/tomcat/temp tomcatIf you do not have root access, you could run Tomcat as your login user, but beware that any security vulnerabilities (which are extremely rare) in Tomcat could be exploited remotely as your user account.
Now download a release archive from the Apache binary release page at http://tomcat.apache.org/download-60.cgi. You should download the latest stable version as listed on the Tomcat home page at http://tomcat.apache.org.
Warning
Even if you intend to install only a subset of the archive files of the Tomcat version you chose, you should download all of the archive files for that version in case you need them later. The Apache Software Foundation does archive releases of Tomcat, but you should store your own copies as well. If you are a heavy user of Tomcat, you should probably also download archives of the source code for your release and store your own copies of them as well so that you may investigate any potential bugs you may encounter in the version you've chosen.
Uncompress the main Tomcat binary release archive. If you downloaded the apache-tomcat-6.0.14.tar.gz archive, for example, uncompress it wherever you want Tomcat's files to reside:
$cd $HOME$tar zxvf apache-tomcat-6.0.14.tar.gz
Before you go any further, you should briefly look at the RELEASE-NOTES text file that resides in the root of your new Tomcat installation. It contains important information for everyone installing Tomcat and can give you details specific to the version you downloaded. Something else that is very important for you to do before proceeding with the installation is to read the online Tomcat changelog for your branch of Tomcat. For example, Tomcat 6.0's online changelog is at http://tomcat.apache.org/tomcat-6.0-doc/changelog.html. Regardless of the version of Tomcat you install and use, you should look at the bugs listed in the changelog because bugs that exist in your version are fixed in newer versions of Tomcat and will show up in the changelog listed under newer versions.
Although Java 1.5.x runtimes work fine with Tomcat 6, it is suggested that you use Java 1.6.x.
If you'll be running Tomcat as user tomcat (or
any user other than the one you log in as), you must install the files so that this user
may read and write those files. After you have unpacked the archives, you must set the
file permissions on the Tomcat files so that the tomcat user has read/write permissions. To do that for a different user
account, you'll need root (superuser) access again. Here's one way to do that from the
shell:
# chown -R tomcat apache-tomcat-6.0.14Tomcat should now be ready to run, although it will not restart on reboots. To learn how to make it run when your server computer boots up, see "Automatic Startup," later in this chapter.
This book contains a production quality example of a Tomcat RPM package for Linux (see Appendix E for the source). It serves as both an elegant way to get Tomcat installed and running on Linux and as an example of how you may build your own custom Tomcat RPM package.
Before you begin, you must install Apache Ant (http://ant.apache.org) version 1.6.2 or higher (but not version 1.6.4—that release was broken), preferably 1.7.x or higher. It must be usable from the shell, like this:
# ant -version
Apache Ant version 1.7.0 compiled on December 13 2006
You must also have the rpmbuild binary available in your shell. In Fedora and Red Hat distributions, this is part of the RPM package named rpm-build. You must use version 4.2.1 or higher (the 4.2.0 version that is included with Red Hat 9 has a bug that prevents rpmbuild from working properly—but that is becoming antiquated!). Just make sure it's installed and you can run the rpmbuild command successfully:
# rpmbuild --version
RPM version 4.3.2
Download this book's examples archive from http://catalog.oreilly.com/examples/ 9780596101060.
Unpack it like this:
$ unzip tomcatbook-examples-2.0.zipChange directory into the tomcat-package directory:
$ cd tomcatbook-examples/tomcat-packageNow, download the binary release archives from the Apache binary releases page at http://tomcat.apache.org/download-60.cgi. You should download the latest stable version as listed on the Tomcat home page at http://tomcat.apache.org. Download all the tar.gz archive files for the version of Tomcat that you've chosen.
Move all the Tomcat binary release archive files into the tomcatbook-examples/tomcat-package/ directory so they can be included in the RPM package set you're about to build:
# cp apache-tomcat-6.0.14*.tar.gz tomcatbook-examples/tomcat-package/Edit the conf/tomcat-env.sh file to match the setup of the machines where you'll deploy your Tomcat RPM packages. At the minimum, you should make sure that JAVA_HOME is an absolute filesystem path to a Java 1.5 or 1.6 compliant virtual machine (either a JDK or a JRE).
Then, invoke ant to build your Tomcat 6 RPM
package set:
$ antThis should build the Tomcat RPM packages, and when the build is complete, you will find them in the dist/ directory:
# ls dist/
tomcat-6.0.14-0.noarch.rpm  tomcat-6.0.14-0-src.tar.gz
tomcat-6.0.14-0.src.rpm     tomcat-6.0.14-0.tar.gz
The Tomcat RPM package builder also builds a Tomcat source RPM package,[2] plus a tar.gz archive of the RPM package as a convenience.
Copy the RPM package to the machine(s) you wish to install it on.
When you're ready to install it, you have two choices:
Here's how to install it to the default path:
# rpm -ivh tomcat-6.0.14-0.noarch.rpm
Preparing...                ########################################### [100%]
   1:tomcat                 ########################################### [100%]
The following error:
error: Failed dependencies:
         /bin/sh is needed by tomcat-6.0.14-0.noarch
usually occurs on operating systems that do not primarily use the RPM package manager, and you are installing this Tomcat RPM package when the RPM package manager's database is empty (no package in the database provides the /bin/sh interpreter). This may happen, for example, if you are installing the Tomcat RPM package on a Debian Linux OS after installing the rpm command.
Try to install it again like this:
# rpm -ivh --nodeps tomcat-6.0.14-0.noarch.rpmIf you get warnings such as these about users and groups:
warning: user tomcat does not exist - using root
warning: group nobody does not exist - using root
you need to add a tomcat user and nobody group by hand using adduser and addgroup. Just make sure
that the tomcat user's primary group is nobody. Also,
make sure that you set user tomcat's home directory
to "/opt/tomcat/temp," and set tomcat's login shell
to something that doesn't actually work, such as /sbin/nologin if you have that:
#groupadd nobody#useradd -s /sbin/nologin -d /opt/tomcat/temp -c 'Tomcat User' \-g nobody tomcat
Once you are done with this, try again to install the tomcat package:
#rpm -e tomcat#rpm -ivh --nodeps tomcat-6.0.14-0.noarch.rpm
Once it's installed, just verify that the JAVA_HOME path set in /opt/tomcat/conf/tomcat-env.sh points to the 1.5 or 1.6 JVM that you want it to. That's it! Tomcat should be ready to run.
With these same RPM packages, you can install Tomcat and relocate it to a different filesystem path, like this:
#rpm -ivh --prefix/usr/localtomcat-6.0.14-0.noarch.rpm
This would install Tomcat, relocating it so that CATALINA_HOME becomes /usr/local/tomcat. You may install the admin and compat packages this way as well.
Tip
As of this writing, JPackage.org does not offer a Tomcat 6 RPM package, but instead offers a Tomcat 5.5 RPM package.
Installing Tomcat from the JPackage.org Linux RPM packages
To download and install the JPackage.org Tomcat RPM packages, visit http://jpackage.org/repos.php. This page discusses how to configure meta package managers, such as yum, apt-rpm, urpmi, and up2date. This is the only reasonable way to install the JPackage.org Tomcat RPM package set due to its large number of installation dependencies. Also, because the details about how to set up the repository configuration for the meta package manager can change at any time, we are not able to show an example of how to do it in this book. See JPackage.org's web site for the details.
Warning
The JPackage.org Tomcat 5.5 RPM creates a
user and group both named tomcat5 and runs Tomcat
with that user and group. The default shell of the tomcat5 user is /bin/sh. Don't try
to change this or Tomcat will stop running correctly.
Before you install a new Tomcat package on Solaris, you should probably inspect your system to find out if there is already one present and decide if you should remove it. By default, no Tomcat package should be installed, at least on Sun's Solaris 10.
Tip
Solaris 9 ships with an older version of Tomcat. Check to see if it's installed:
jasonb$ pkginfo | grep -i tomcat
If this command outputs one or more packages, a version of Tomcat is installed. To
get more information about the package, use pkginfo with the
-l switch. For example, if the preinstalled Tomcat
package name was SUNWtomcat:
jasonb$ pkginfo -l SUNWtomcat
Even if Tomcat is installed, it should not cause problems. To be safe, we suggest that you uninstall an existing Tomcat package only if you're prepared to deal with any breakage that removal may cause. If you're sure the package is causing you problems, as the root user, you can remove it:
# pkgrm SUNWtomcat
To install a Tomcat Solaris package, you need to set your user identity to the root
user or else you will not have sufficient permissions to write the files. Usually, this is
done either with the sudo or su commands. For example:
#su -Password: Sun Microsystems Inc. SunOS 5.10 Generic January 2005 #iduid=0(root) gid=0(root)
Then, you can proceed with the installation.
Solaris already comes standard with Java 1.5.0, but you should make sure to upgrade it to a newer, more robust version. See Appendix A for details on what to get and where to get it.
As of this writing, the only Solaris package of Tomcat that we could find is a Tomcat
5.5 package included in the Blastwave Solaris Community Software (CSW) package set. This
package set is a community supported set of open source packages, analogous to a Linux
distribution's package set. See the Blastwave CSW page about it at http://www.blastwave.org. The CSW package is best installed via the pkg-get command. This command does not come with Solaris, but
it is easy to install.
Install pkg-get from the URL http://www.blastwave.org/pkg-get.php. we were able to use wget to download it like this:
#PATH=/opt/csw/bin:/usr/sfw/bin:/usr/sfw/sbin:$PATH#export PATH#wget http://www.blastwave.org/pkg_get.pkg
If that doesn't work (for example, you don't have wget installed), just use a web browser to download the pkg_get.pkg file to your Solaris machine.
Install the pkg_get package like this:
# pkgadd -d pkg_get.pkgAnd hit enter or answer y at the
prompts.
Now, add the path setting to the system's /etc/default/login file.
First, make it writable by root:
# chmod u+w /etc/default/loginThen, edit /etc/default/login and add this:
PATH=/opt/csw/bin:/usr/sfw/bin:/usr/sfw/sbin:$PATH
export PATH
Then, save the file and put the permissions back:
# chmod u-w /etc/default/loginDo the same with /etc/profile, except you shouldn't need to modify its file permissions. Edit /etc/profile and insert the same lines at the end of the file, and then save it.
Before using pkg-get, update pkg-get's catalog, like this:
# pkg-get -UOnce that's done, you can install packages using pkg-get.
Once you have the pkg-get command installed and
working, you can install Tomcat 5.5. Make sure to switch to the root user; you can install
packages from there. Install Tomcat's package like this:
# pkg-get install tomcat5There is no CSW package for Tomcat 5.0, so the Tomcat 5.5 package is called CSWtomcat5.
If it tells you that some of the scripts must run as the superuser and asks you if you
are sure you want to install the packages, just type y and hit enter.
Tip
Installing the CSWtomcat5 package also starts it. When the installation is complete, you're already running Tomcat! Test it at the URL http://localhost:8080.
Once it is installed, the base install directory is /opt/csw/share/tomcat5, and the init
script is installed as /etc/init.d/cswtomcat5. When
you first get this Tomcat package installed, you should read the comments at the top of
the init script to learn details about your Solaris
Tomcat package. The details can change with each revision of the package.
For Windows systems, Tomcat is available as a Windows-style graphical installer that is available directly from the Apache Software Foundation's Tomcat downloads page. Although you can also install Tomcat from a zipped binary release, the Windows graphical installer does a lot of setup and operating system integration for you as well, and we recommend it. Start by downloading an installer release, such as apache-tomcat-6.0.14.exe (or later; unless there is a good reason not to, use the latest available stable version), from the release page at http://tomcat.apache.org/download-60.cgi.
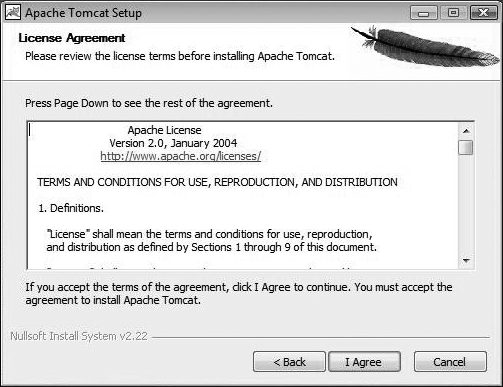
When you download and run this installer program, it will first verify that it can find a JDK and JRE, and then prompt you with a license agreement. This license is the Apache Software License, which allows you to do pretty much anything with the software as long as you give credit where it's due. Accept the license as shown in Figure 1-1.
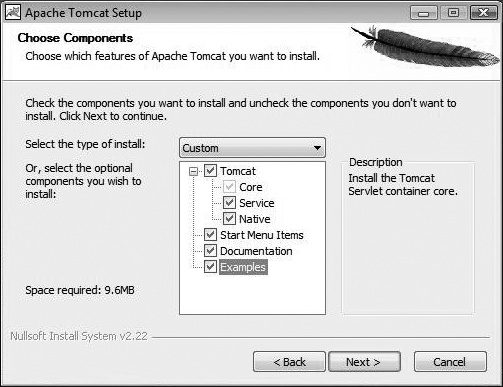
Next, the installer will allow you to select which Tomcat components to install. At
the top of the installer window, there is a handy drop-down list from which you can select
a different typical packaged set of components (see Figure 1-2). To hand select which components to
install, choose Custom in the drop-down list, and you
may select and deselect any component or subcomponent.
If you want to have Tomcat started automatically and be able to control it from the
Services Control Panel, check the box to install the Service software.
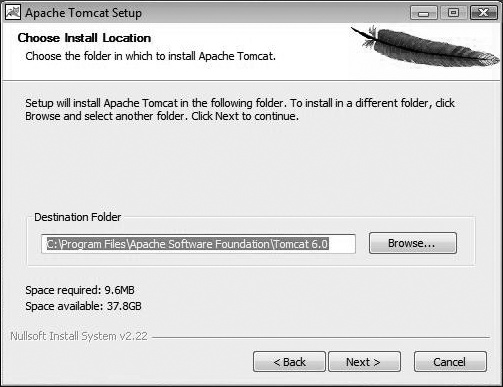
Then, specify where to install Tomcat. The default is in C:\Program Files\Apache Software Foundation\Tomcat 6.0. Change it if you want, as shown in Figure 1-3.
Next, the installer will prompt you for the HTTP/1.1 connector port—this is Tomcat's
web server port. By default it is set to port 8080, but
on Windows feel free to change it to 80 if you want
Tomcat to be your first contact web server (Tomcat does a wonderful job in that role). The
installer also asks for the administrator login username and password to set for Tomcat.
Set the password to something that will not be easily guessed, but don't forget what it
is! That will be your username and password to log into Tomcat's Manager webapp.
The installer then allows you to choose a Java runtime for Tomcat from the runtimes
you have installed at that time. We suggest Java 1.6.x or higher for this. Once you have
configured it with a Java runtime, the Install button
becomes clickable. Click it and the installer will begin installing Tomcat.
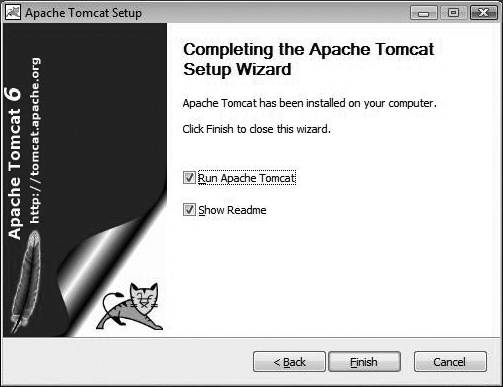
Once the installation completes normally, you should see the message "Completing the Apache Tomcat Setup Wizard" at the end, as shown in Figure 1-4.
From the installer, you can select to start Tomcat and click Finish. Then, in your web browser, type in the URL to your Tomcat, such as http://localhost:8080, and you should see the Tomcat start page as shown in Figure 1-5.
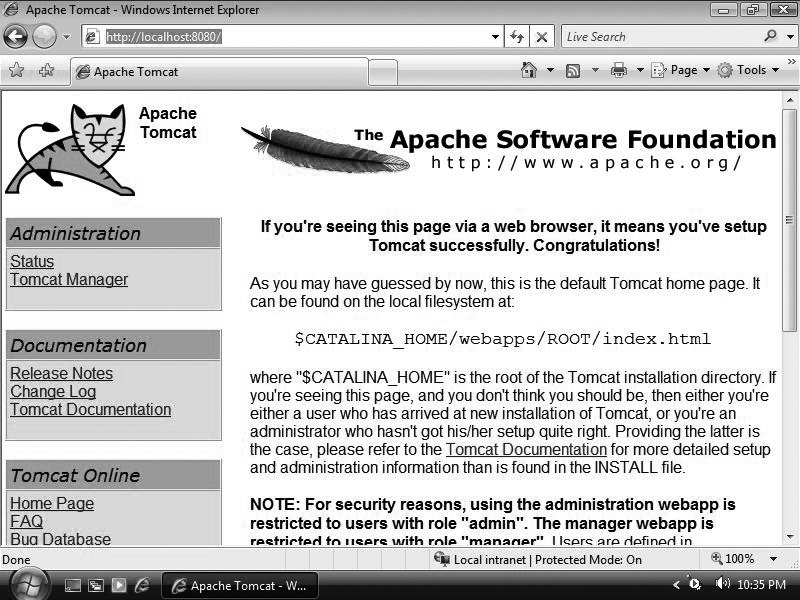
Congratulations! Your new Tomcat is installed and ready to use. You now need to start the server for initial testing, as described in the upcoming section "Starting, Stopping, and Restarting Tomcat."
Thanks to the wonderful BSD underpinnings of Mac OS X, installing Tomcat on Mac OS X is similar to the non-RPM Linux installation you have seen. When installing on Mac OS X, you should download the .tar.gz file rather than the .zip file from the Tomcat site as Unix file permissions are not properly preserved in zip files. In particular, execute permission is lost on the scripts included with Tomcat, making it impossible to start or stop Tomcat until the permissions are restored. Before choosing which version of Tomcat to install, you need to check your Java version as shown below:
$ java -version
java version "1.5.0_07"
Java(TM) 2 Runtime Environment, Standard Edition (build 1.5.0_07-164)
Java HotSpot(TM) Client VM (build 1.5.0_07-87, mixed mode, sharing)
If your Java version is at least 1.5.0, you can install Tomcat 5.5 or Tomcat 6.0. If you do not have a Java runtime of at least version 1.5.0, you cannot install Tomcat 6.0 or higher without first updating Java. If you are running a fully updated version of OS X 10.4 (Tiger) or higher, you have a minimum Java version of 1.5.0. You can download it from the Apple Developer Connection at http://connect.apple.com. Register if you have not (it's free!), and then navigate to the Java downloads section; this can also be done via Apple's Software Update. Please ensure that you are installing the latest version of the JDK from Apple. By the time you read this, Apple's 1.6 JDK will almost certainly be available, and we encourage you to install and use it.
These instructions rely on the use of the sudo
command. On OS X, you must be logged in as a user with administrative privileges to use
this command. sudo executes a single command as a
different user. These instructions use sudo to execute
commands as the users root and nobody. You should note that when sudo
asks for a password, you should enter your login password, not the password for the user
you are executing the command as, like you would with the su command.
These instructions will install Tomcat to /usr/local/. There is some debate as to the more appropriate place to install Linux or BSD style programs on OS X with some preferring to use /Library/ rather than /user/local/.
As on Linux, it is advisable to install Tomcat to run as a nonprivileged user. Some
people like to create a special user just for Tomcat, but that is not necessary. It is
simpler to use the built-in nobody user instead. These
instructions use this preexisting user rather than create a new user.
Once you have downloaded the .tar.gz file for your chosen version from the Tomcat site, you need to extract it. You can do this from the Finder or from the Terminal as follows (replacing the filename as appropriate):
$ tar -xzf apache-tomcat-6.0.14.tar.gzOnce you have downloaded and extracted Tomcat, you need to move the files to the folder you are installing to; again you can do this from the Finder, but because we'll need to use the Terminal for the remainder of these instructions, you may as well use it here for this step too. Once you have changed into the folder containing the files you extracted from the .tar.gz file, you need to run the following (replacing the filename as needed):
$ sudo mv apache-tomcat-6.0.14 /usr/local/Enter your login password, and the directory will be relocated to /usr/local.
To simplify future upgrades, you should create a symbolic link from /usr/local/tomcat to the folder you have just moved to /usr/local/, as follows (again replacing the filename as appropriate):
$ sudo ln -s /usr/local/apache-tomcat-6.0.14/ /usr/local/tomcatTomcat requires two environment variables to run: JAVA_HOME and CATALINA_HOME. JAVA_HOME specifies the Java Virtual Machine to be used by
Tomcat, and CATALINA_HOME specifies the root
directory of the unpacked Tomcat binary (runtime) distribution. They should be set by
adding the following lines to the end of /etc/profile
with your favorite text editor (e.g., sudo vi
/etc/profile):
export JAVA_HOME=/Library/Java/Home
export CATALINA_HOME=/usr/local/tomcat
The above assumes that you are using the default JVM for your version of OS X. If you wish to use a different JVM, you'll have to change the value for JAVA_HOME.
Because /etc/profile is only read when a Terminal is opened, you should close your Terminal and open a new one at this point. You can check that the variables have been set properly as follows:
$echo $JAVA_HOME/Library/Java/Home $echo $CATALINA_HOME/usr/local/tomcat
Tip
Later, if you decide to use launchd for starting
and stopping Tomcat, as we show you below, you do not need the environment variable
definitions in /etc/profile.
You're almost done now; you just need to change the ownership of your Tomcat install
to the user nobody:
$sudo chown -R nobody:nobody /usr/local/tomcat$cd /usr/local$ls -ltotal 0 drwxr-x--- 13 nobody nobody 442 Sep 27 15:36 apache-tomcat-6.0.14
Tip
Notice that Tomcat is now by owned nobody and has
very restrictive permissions for execution.
Tomcat should now be ready to run, although it will not restart on reboots. To see how to make Tomcat run when your server computer boots up, see the upcoming section "Automatic Startup."
The FreeBSD ports system includes a port of Tomcat 6. See http://www.freshports.org/www/tomcat6/ for more up-to-date details about it.
First, make sure you update your Tomcat 6 port tree. Here's how:
#cd /root#cp /usr/share/examples/cvsup/ports-supfile tc6-supfile
Edit the tc6-supfile.
|
Change the lines that say: |
To say: |
|---|---|
|
*default host=CHANGE_THIS.FreeBSD.org |
*default host=cvsup.FreeBSD.org |
|
ports-all |
#ports-all |
|
#ports-www |
ports-www |
See the end of the page http://www.freebsd.org/doc/en_us.iso8859-1/books/handbook/cvsup.html to find the best default host name to use for your geographical location.
Now, use the modified supfile to update the tree:
#pkg_add -r cvsup#cvsup -g -L 2 tc6-supfile
Once the tree is up to date, install it like this:
#cd /usr/ports/www/tomcat-6#make install
This does not build Tomcat from its source code. Instead, it "builds" the FreeBSD ports package files by extracting the official Apache binary release archives, and adds FreeBSD-specific packaging files, and then installs them all where they should be installed on FreeBSD. When that is done, edit your /etc/rc.conf file and add these lines to the end:
tomcat60_enable="YES"
tomcat60_java_opts="-Djava.net.preferIPv4Stack=true"
The first line enables the RCng init script—this
init script has code that will not try to start
Tomcat unless the tomcat60_enable variable is enabled
this way, to prevent Tomcat from accidentally starting at boot time. Adding the second
line will avoid a problem that prevents Tomcat from opening its TCP server ports.
[1] * See Appendix A for more information about how to work around a distribution's incompatible Java implementation.
[2] * Think of this source RPM package as the content necessary to build the binary RPM package, not necessarily the Java source code to Tomcat itself. This book's Tomcat RPM package was built using the officially compiled Tomcat class files, so the Java source isn't included in the source RPM package, nor is it necessary to build the multiplatform "binary" RPM package.
Get Tomcat: The Definitive Guide, 2nd Edition now with the O’Reilly learning platform.
O’Reilly members experience books, live events, courses curated by job role, and more from O’Reilly and nearly 200 top publishers.

