Editing in Wikipedia is much like using a very basic text editor, with a few word-processing tools thrown in. You type text into the edit box (less commonly written editbox), and then click buttons to preview and finally save your work.
You edit Wikipedia articles in a big, white text box in the middle of the window. To get to that box, you must go into edit mode.
In the search box on the left side of the screen, type WP:SAND, and press Return to go to the sandbox.
You’ll do all your work in this chapter in the sandbox, so you won’t actually change any Wikipedia articles.
From the sandbox page (Figure 1-1), click the “edit this page” tab.
You’re now in edit mode, complete with the edit box shown in Figure 1-2.
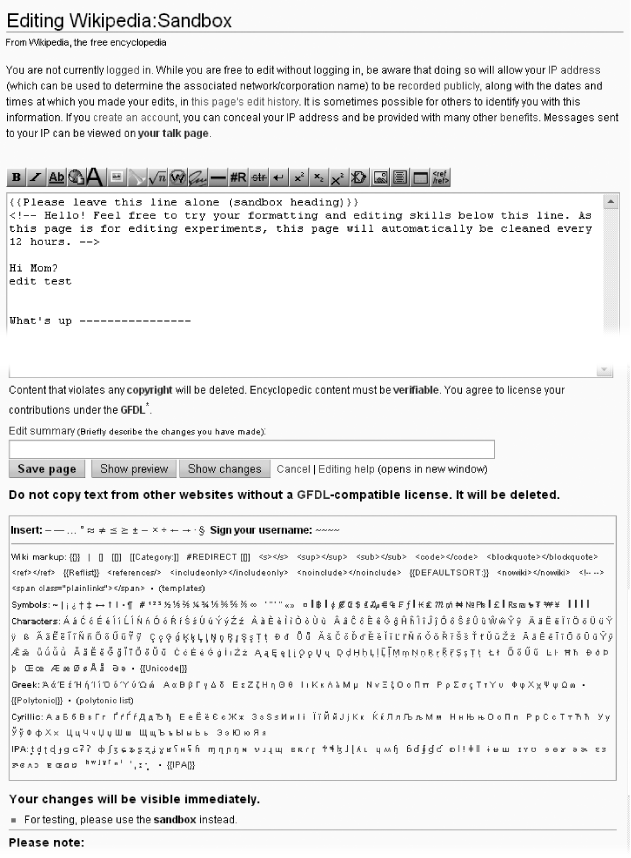
Figure 1-2. The sandbox, in edit mode. The text in the box (the edit box) is only an example—what you see will depend on what the other editors have just done to the page. The edit toolbar along the top of the edit box is standard; it provides one-click options for the most common kinds of formatting of content. Also standard is all the text between the sentences “It will be deleted” and “Your changes will be visible immediately.”
Note
If the bottom of Figure 1-2 looks intimidating, don’t worry: There are only about two dozen items that editors actually use, except in exceedingly rare circumstances. If you’re curious, Appendix A provides a complete cross-reference to everything on the bottom of Figure 1-2, as well as all the icons on the edit toolbar.
Delete everything but the first three lines, which are instructions.
The edit box contents should look like Figure 1-3. In this box, you’ll type some text that includes bold and italic formatting, and section headings.
Figure 1-3. The edit box after deleting all but the top three lines. Now the edit box is ready for you to add text. Of what remains, the first line is a template (see Understanding and Using Templates), and the second and third lines are an invisible comment—visible, that is, only when you’re in edit mode.
Note
If someone else has deleted part or all of the top three instructional lines in Figure 1-3, don’t worry—the steps on these page will work just fine without them. But you may want to add them back to help others using the sandbox.
If you compare Figure 1-1 to Figure 1-3, you may be puzzled about a couple things: What is the purpose of the curly brackets (the first line in the edit box in Figure 1-3), and why is the text in Figure 1-1 (“Welcome to the Wikipedia Sandbox! This page allows you to carry out experiments”) not the same as the underlying text in Figure 1-3?
The answer to both questions is essentially the same: The curly brackets indicate a template, and the purpose of templates, generally, is to add standard text to a page. Because templates are so important—you’ll find them everywhere at Wikipedia—there’s a separate section on them later in this chapter (see Understanding and Using Templates).
Type the text shown in Figure 1-4 (except the first three lines at the top, which should already be there) into the edit box.
For this example, you don’t have to type all the text if you don’t want to. You can even type some text of your own invention, as long as it includes each of the following:
Section headings. Type two equal signs at the beginning and two more at the end of a line of text. (If you create at least four headings, Wikipedia automatically creates a table of contents, as you’ll see in a moment.)
Boldface. Type three apostrophes (') before and after the text you want to bold.
Italic. Type two apostrophes (') before and after the text you want to italicize.


Figure 1-4. Typing this text into the edit box is a quick lesson in the three most common types of Wikipedia formatting. Putting equal signs on both sides of text turns it into a section heading (after you save your edit). Text surrounded by three apostrophes gets bolded; text surrounded by two apostrophes gets italicized.
Note
Never put a blank space at the beginning of a line unless you want that line of text to stand out (which you never want in an article). With a blank space at the beginning, Wikipedia displays a line of text in a box with a light blue background. If it’s a long line of text, the text goes off the screen to the right, requiring the reader to scroll to see it all.
One of the most important things after doing an edit is to preview it—to see how it’s going to look. For edits involving formatting, previewing is absolutely essential. But even if you’ve added only plain text, you should still preview it because you want to get in the habit previewing every time.
Experienced editors often skip previewing when making small, routine edits. Usually that’s okay, but sometimes, to their embarrassment, after seeing what the page looks like after being saved, they realize they need to do another edit to fix their own mistakes. So, until you’ve become an experienced editor, preview your work every time.
Before you click the “Show preview” button, however, you should do one more thing—provide a summary of the edit you just made. You should do this now, rather than later, because previewing will also show you what the edit summary will look like. Think of the edit summary as a way for you to explain your edit to other editors. The explanation can be very brief (“typo,” “revert vandalism”) or it can be lengthy (up to 200 characters). Keep it as short as you can, and make it as long as you need to.
In the “Edit summary” box (Figure 1-5), type a few words to describe the purpose of your edit.
In other words, follow the instructions in fine print: “Briefly describe the changes you have made.” For example, in this case you might type Test edit – first time using the Sandbox. (See the box below for information about edit summaries.)
Once you’ve added an edit summary, it’s time to check your work.
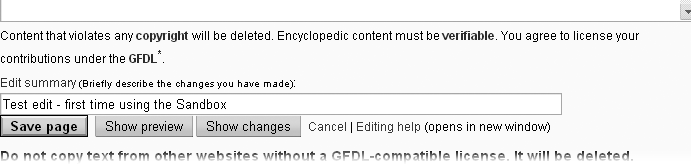
Figure 1-5. When you add an edit summary, make it descriptive but concise. (As noted in Figure 1-2, the checkboxes for “This is a minor edit” and “Watch this page” are visible only if you’re a registered user who is logged in.)
Click the “Show preview” button just below the edit window (the button is shown in Figure 1-5) to see what the Wikipedia page will look like after you save your edit.
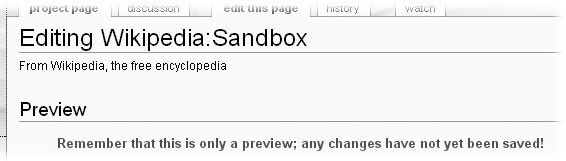
A Wikipedia preview screen has three parts. The very top of the screen (Figure 1-6) shows a warning that you’re not looking at a saved version of the page. The middle and bottom of the screen (Figure 1-7) show both what the page will look like after you save it (if you don’t change it further) and the edit box and related tools.
Figure 1-6. At the very top of the preview screen there’s always a warning, in red, that you’re looking at a preview, not something that has been saved.
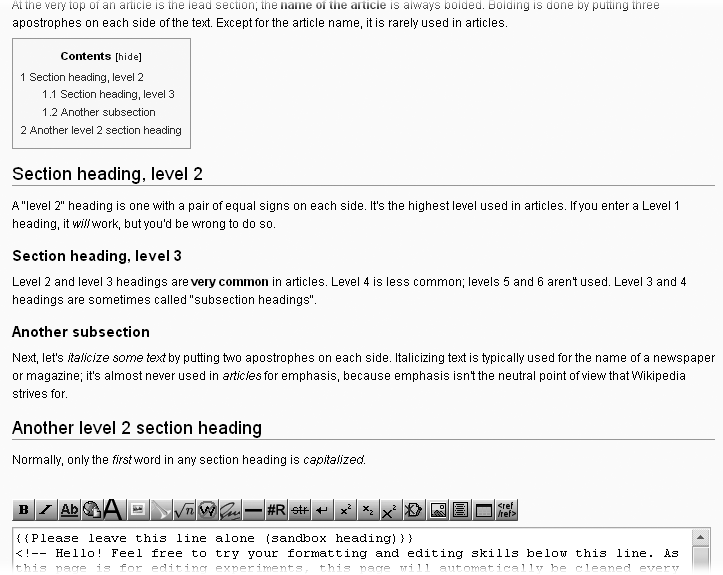
Figure 1-7. The middle and part of the bottom half of the preview screen, showing how the edit from Figure 1-4 looks after saving the page. Wikipedia automatically adds a table of contents for articles that have four or more section headings. At bottom is the now-familiar edit box, so you can make corrections or improvements to your article.
Click the “Save page” button (see Figure 1-5 for the location of this button, if you need to). At this point, one of three things happens:
Most of the time, the page changes, incorporating your edit. That is, the page looks like what it did when you looked at it in preview mode, except now there is no preview warning on top. Your edit is complete; you’re done.
You might see a cached version of the page. You’ll see a version of the page that looks like it did before you edited the page. In this case, you should refresh the page in your Web browser; typing Ctrl-R (⌘-R on the Mac) does the trick in most browsers. Once you see your edit has taken affect, you’re done. (In the rare case where refreshing the page doesn’t work, you need to tell your computer to remove old copies of everything. See the page Wikipedia:Purge; shortcut WP:PURGE.)
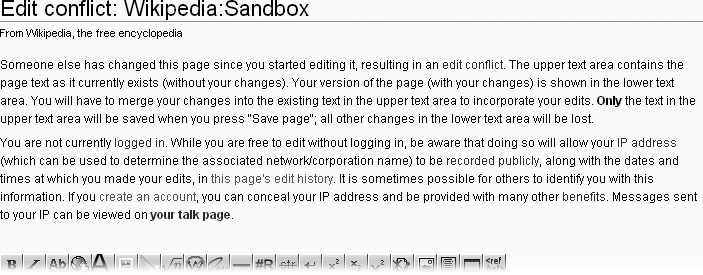
The worst case scenario is that Wikipedia refuses to make the change because someone else changed the page while you were editing it. Figure 1-8 shows what the page will look like in case of an edit conflict.
Get Wikipedia: The Missing Manual now with the O’Reilly learning platform.
O’Reilly members experience books, live events, courses curated by job role, and more from O’Reilly and nearly 200 top publishers.

