Chapter 3. Formatting and Editing
Those of us who create presentations for a living have our own pet peeves about PowerPointâs editing and formatting tools. We also know how important it is to start a presentation right, using well-developed templates, masters, and default settings to speed production along.
This chapter begins by showing you how to overcome issues with design templates and slide masters to help you lay a good foundation for your presentations. It also explains how to create your own templates, work with multiple masters and slide layouts, take advantage of various tools to align objects, and tackle formatting issues such as changing case and setting hanging indents.
TEMPLATES AND MASTERS
Locate Your Templates
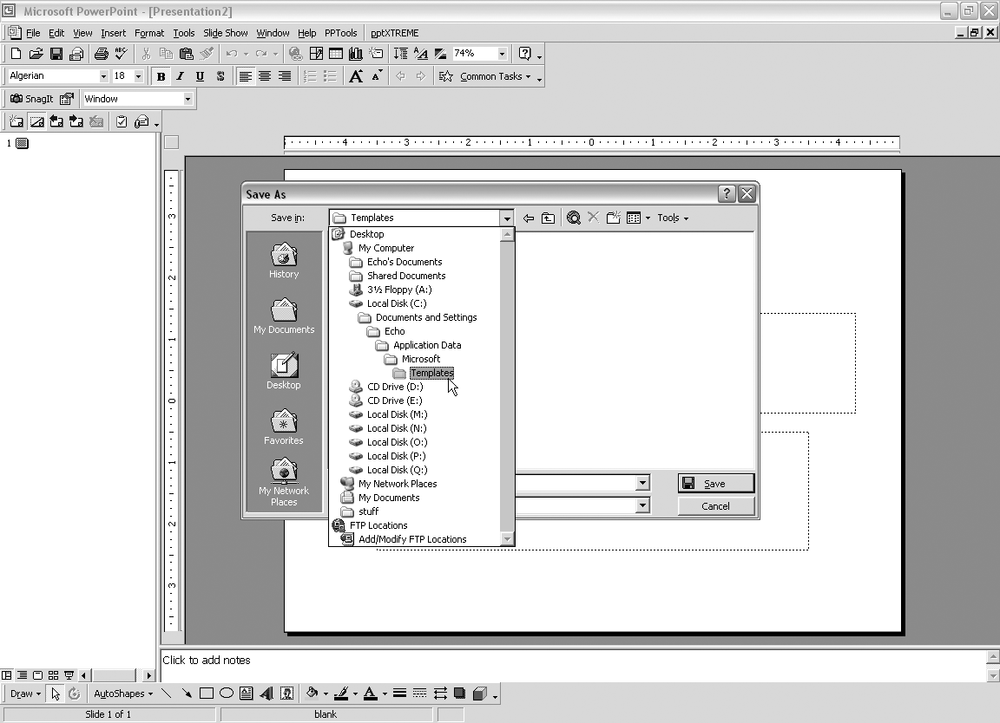
THE ANNOYANCE: I made a design template, but it doesnât show up in the template list when I select File â New. Why canât PowerPoint find my templates?
THE FIX: To see where PowerPoint stores these templates, select File â Save As and choose Design Template (*.pot) from the âSave as typeâ drop-down menu. Next, click the âSave inâ pull-down arrow to see the full path to where the templates live (see Figure 3-1). Save or copy your .pot file to that folder.
Get Fixing PowerPoint Annoyances now with the O’Reilly learning platform.
O’Reilly members experience books, live events, courses curated by job role, and more from O’Reilly and nearly 200 top publishers.

