Chapter 1. Getting Started with jQuery: Web Page Action
You want more for your web pages. You’ve got HTML and CSS under your belt and want to add scripting to your skill set, but you don’t want to spend your life writing lines and lines of script. You need a scripting library that allows you to change web pages on the fly. And since we’re wishing, can it play well with AJAX and PHP, too? Can it do in 3 lines of code what most client-side languages do in 15? Wishful thinking? No way! You need to meet jQuery.
You want web page power
You already know how to build great-looking web pages with clean, valid HTML and CSS. But static web pages just don’t cut it anymore—people want a responsive web page. They want action, animation, interaction, and lots of cool effects.
HTML and CSS are fine, but...
Plain old HTML and CSS are good for giving your page structure and style. Once you have a rendered HTML page, it’s there, but it’s static.
What if you want to change how the page looks, or add or remove something from it? You either have to do some really crazy CSS gymnastics, or you simply have to load a new page. And that can get ugly fast. Why? Because all you’re really doing with HTML and CSS is controlling how a page is displayed.
...you need the power of script
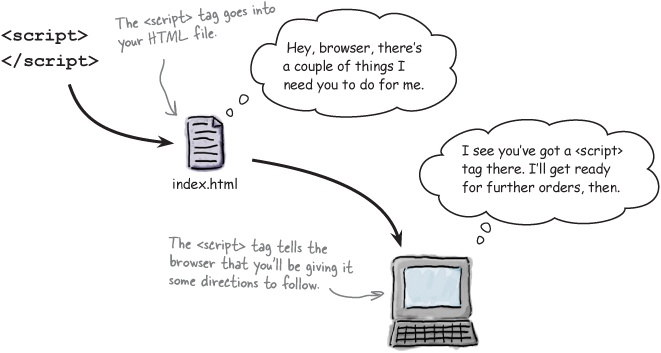
To change your web pages on the fly, without reloading, you need to talk to your browser. How do you pull that off? With an HTML tag known as <script>.
Great question. Remember that HTML is a markup language that handles document structure.
And cascading style sheets (CSS) control the look and feel and position of those elements. HTML and CSS control how a web page is built and displayed, but neither of them can add behavior to the web page. What we need for that is a scripting language. What we need is jQuery.
Enter jQuery (and JavaScript)!
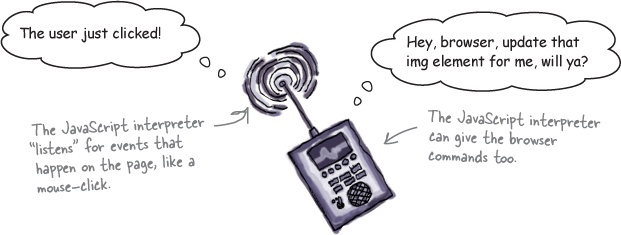
The language we use to give the browser directions is JavaScript. Every browser comes with a built-in JavaScript interpreter that takes the directions you write in between the <script> tags and translates those directions into different kinds of action on the web page.
To give the interpreter directions, you ultimately need to speak JavaScript. But don’t worry! This is where jQuery comes in. jQuery is a JavaScript library specialized for changing web page documents on the fly. Let’s check some jQuery out.
jQuery is a JavaScript library specialized for changing web page documents on the fly.
That’s a great question. It does seem a bit like magic, right?
Let’s look at a web page from the perspective of the browser—specifically, how jQuery can change the web page from within the browser.
Look into the browser
It’s time to pull back the curtain to see what’s really going on behind a web page as a browser displays it. Your browser uses the HTML Document Object Model (DOM) to build a page from simple HTML markup and CSS code into a clickable page complete with text, images, videos, and all the other great content we love to browse.
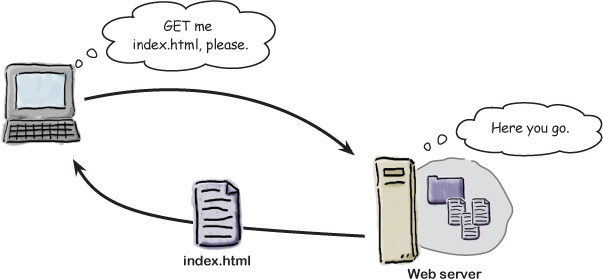
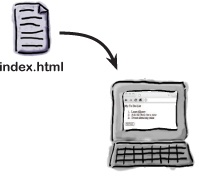
The browser loads the HTML file it gets from the server.
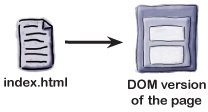
The browser’s layout engine goes through the HTML and CSS to build a “document” using the HTML Document Object Model (DOM).
The browser displays a rendered page in the browser’s viewport.
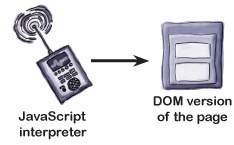
The JS interpreter references the DOM to make changes to the web page without needing to reload it.
The hidden structure of a web page
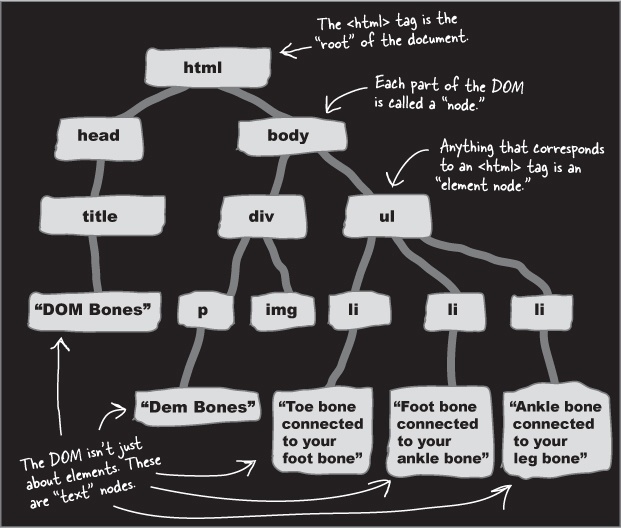
Over the years, the DOM has helped HTML, CSS, and JavaScript work together more effectively. It provides a standardized skeleton that all modern browsers use to make browsing the Web more effective. Many people think of the DOM as being built like a tree: it has a root and branches with nodes at the end. Alternatively, you can think of it as an x-ray for how the page is built.
An x-ray tells a doctor what’s going on with the body’s hidden structure. Like an x-ray, the DOM shows us the hidden structure behind the page. But unlike an x-ray, JavaScript and jQuery use the DOM to change the structure on the page.
jQuery makes the DOM less scary
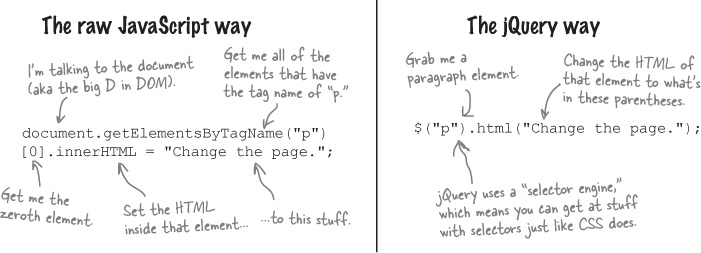
The DOM can seem complex and intimidating, but luckily for us, jQuery keeps it simple. Don’t forget: jQuery is JavaScript, but a much more approachable version. When you want to control the DOM, jQuery makes it much easier. For instance, let’s say we want to change the HTML inside of the only paragraph element on our page.
Or let’s say we want to change the HTML inside of five paragraph elements on our page:
One of jQuery’s main strengths is that it allows you to work with the DOM without having to know every little thing about it. Underneath it all, JavaScript is doing the heavy lifting. Throughout this book, you’ll learn to use JavaScript and jQuery together. In Chapter 6, we’ll learn more about jQuery’s relationship to JavaScript, and we’ll beef up our JavaScript skills along the way. For now, when you need to work with the DOM, you’ll use jQuery.
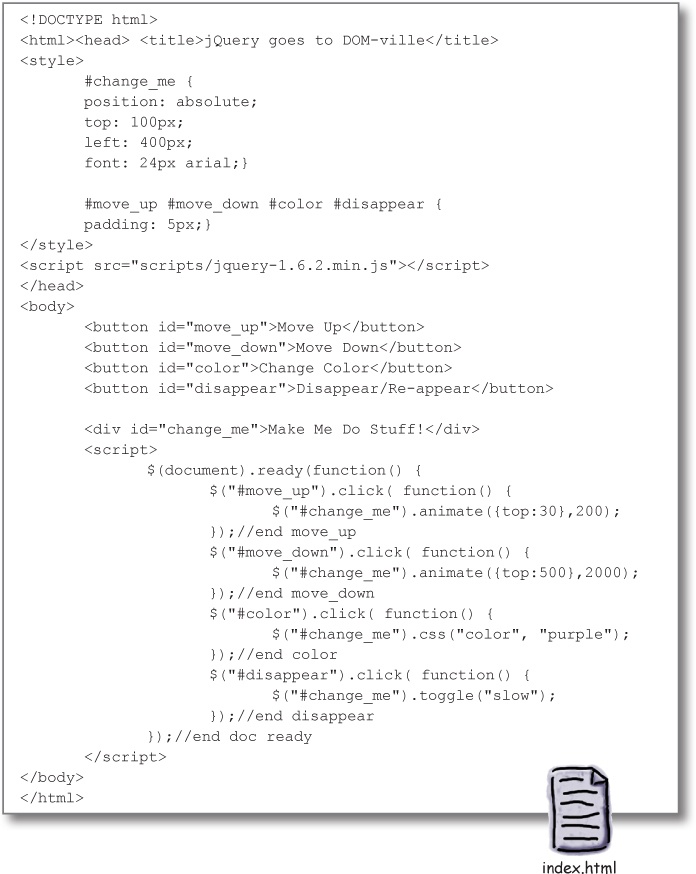
Let’s take jQuery for a spin around DOM-ville, shall we?
How does that work?
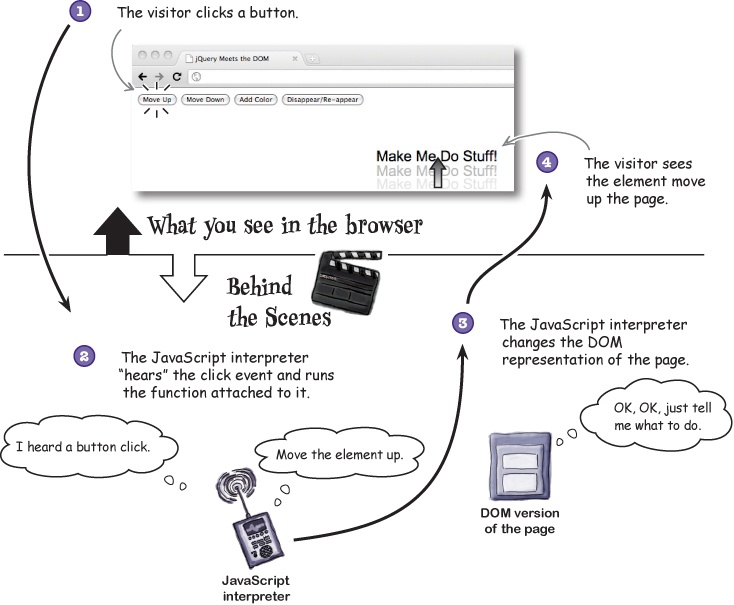
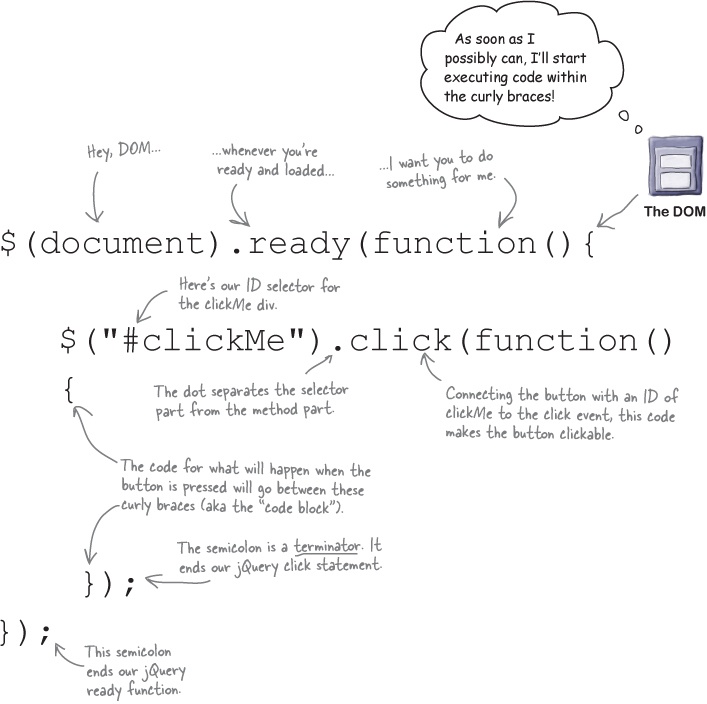
Pretty nifty how jQuery can manipulate the page, isn’t it? The important part to keep in mind is that none of the original HTML and CSS changed when you pressed each button. So how did jQuery do it? Check it out:
The JavaScript interpreter doesn’t change the original HTML and CSS files. It makes changes to the DOM’s representation of the page in the browser’s memory.
The dollar sign represents all of the cash you’ll rake in with your newly acquired jQuery skills. Kidding, but it does bring home the bacon in the jQuery world.
Introducing the jQuery function (and shortcut)
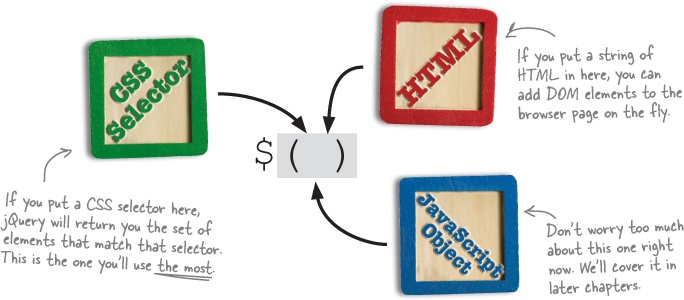
The dollar sign with the parentheses is the shorter name of the jQuery function. This shortcut saves us from writing “jQuery ()” every time we want to call the jQuery function. The jQuery function is also often referred to as the jQuery wrapper.
The short name and the long name point to the same thing: the big code block known as jQuery. Throughout this book, we’ll use the shortcut. Here are three different things you can put into the jQuery function.
jQuery selects elements the same way CSS does
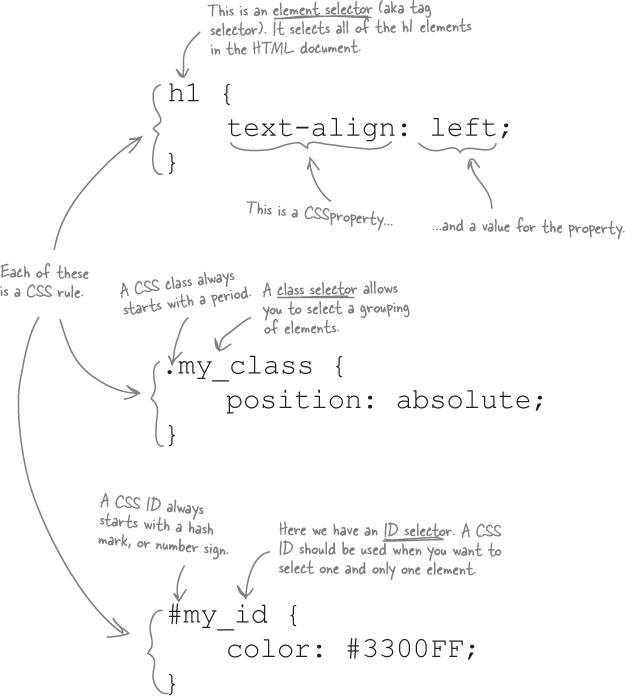
You already know more about jQuery than you realize. The main way you get at stuff with jQuery is to use selectors—the same selectors you’ve used with CSS. If you’re a little fuzzy on CSS selectors, it’s OK. Let’s have a quick refresher.
Style, meet script
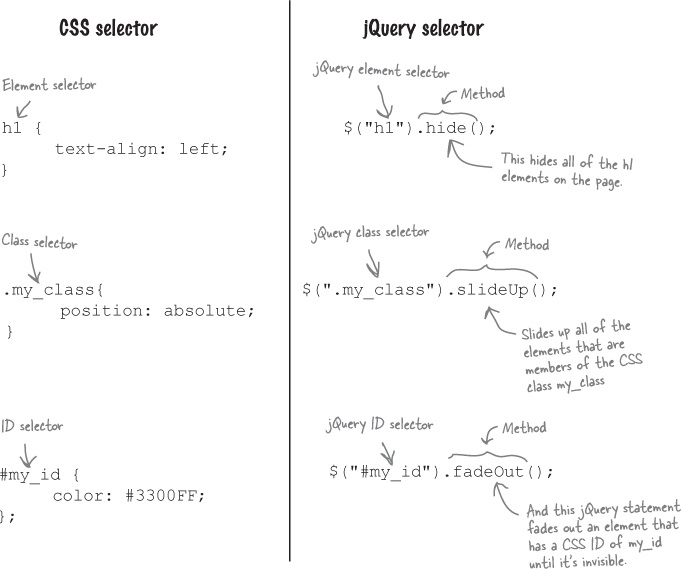
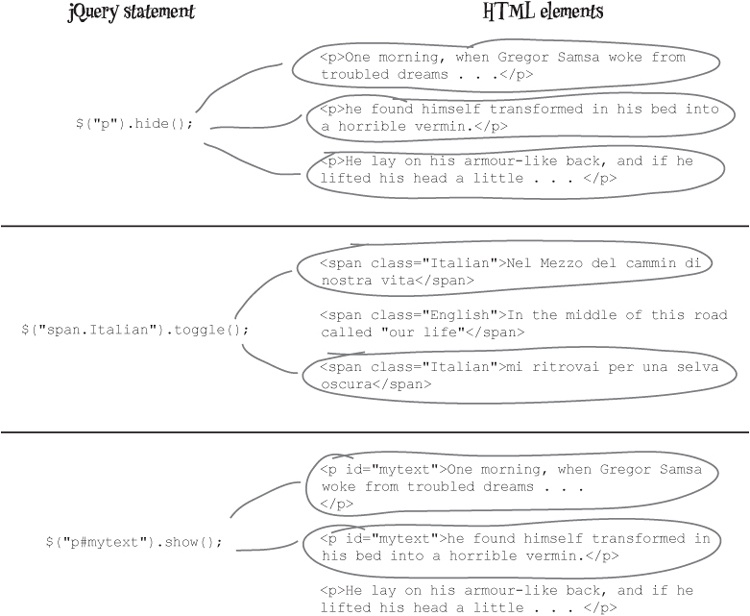
The great thing about jQuery is that it uses those same CSS selectors we use to style our page to manipulate elements on the page.
CSS selectors select elements to add style to those elements; jQuery selectors select elements to add behavior to those elements.
Note
You’ll do more with combining selectors and methods in Chapter 2 and the rest of this book.
jQuery selectors at your service
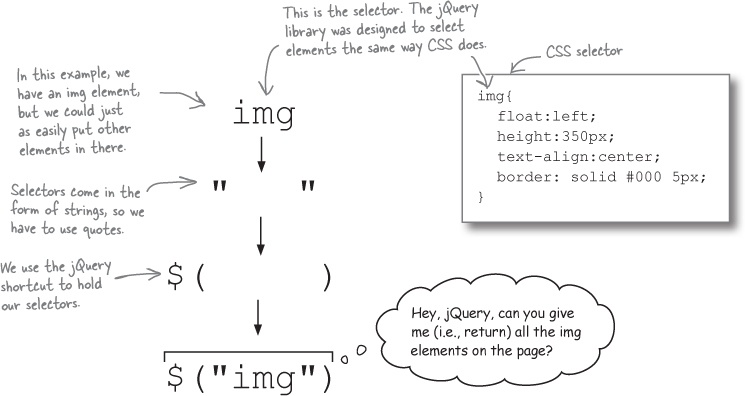
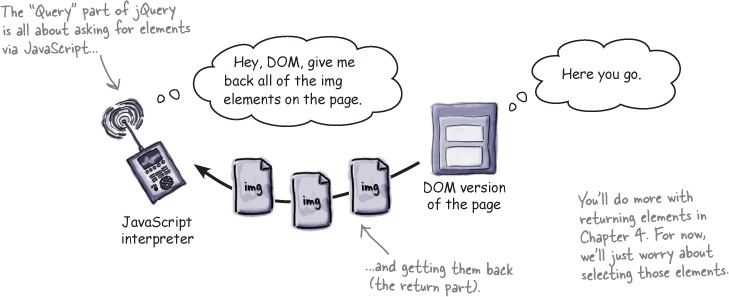
As its name suggests, jQuery is all about querying. You ask for something with a selector, and the JavaScript interpreter asks the DOM to get it for you. If you ask for an element with nested elements, jQuery will give you the nested elements too. Let’s take apart a jQuery selector a bit more to make sure we know how it works.
jQuery in translation
To show you just how easy it is to learn jQuery, here’s a little breakdown of a few jQuery phrases to use when travelling in DOM country.
Your first jQuery gig
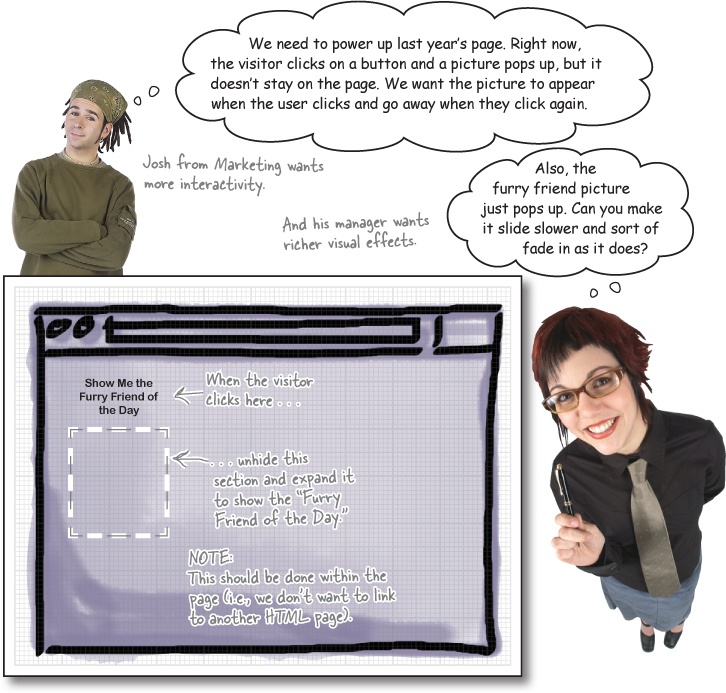
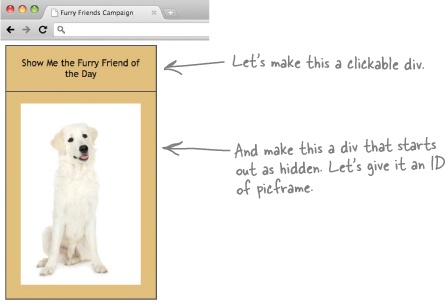
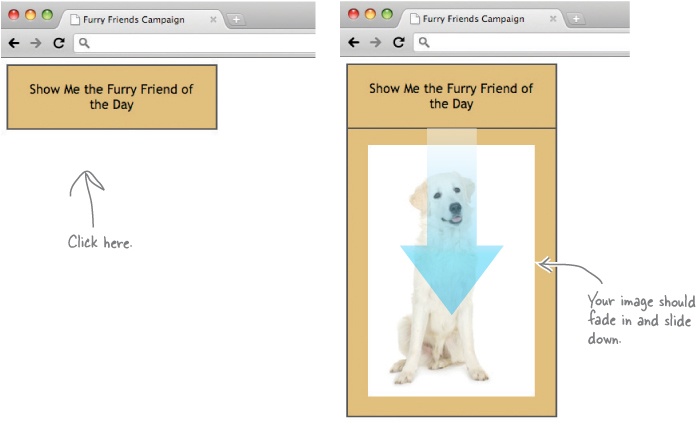
You just landed a job as the new web developer for the Webville Pet Rescue Foundation. The marketing team wants to kick off their annual fundraising campaign with a revamp of last year’s “Help Our Furry Friends” web page. They gave you a screen shot from last year with details on what they want the page to do.
Well, no one wants to let Marketing down on the first day—you don’t want to be on their bad side! So let’s see what we’re working with here...
You could, but things might get messy.
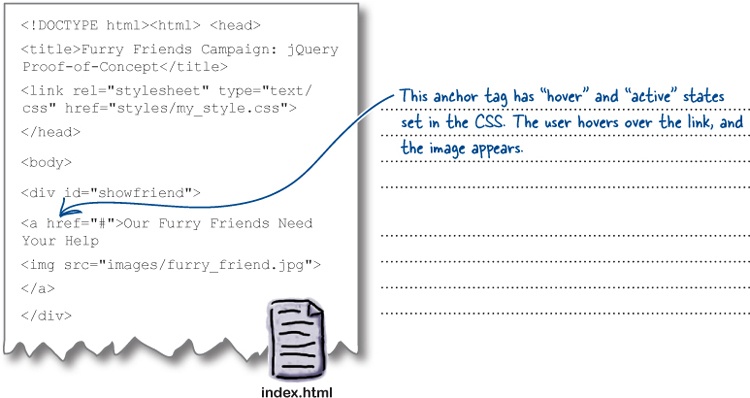
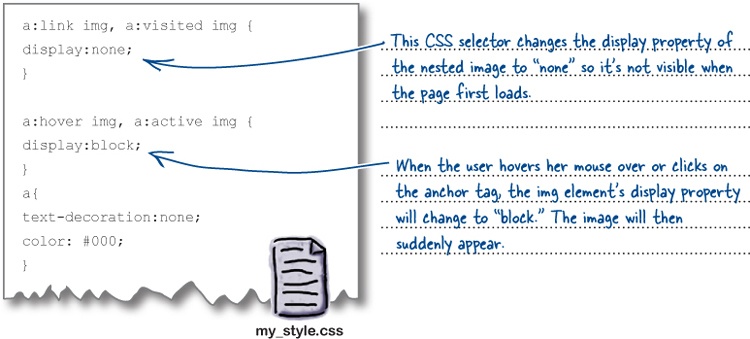
Before we can use jQuery to make the cool effects that Marketing wants, we need to make sure that jQuery has everything in place to work its magic. As you already know now, one of jQuery’s main jobs is to manipulate HTML elements, so we need to have good structure. To get at elements, jQuery uses the same selectors that CSS uses, so we also need to have well-defined styles.
Revisit your requirements
When you’re thinking about your structure, it’s always good to go back to what you’re trying to build. Marketing wants an image to slide down and fade in when people click on the “Show Me the Furry Friend of the Day” section of the page. What changes to the HTML and CSS might you need to make?
Set up your HTML and CSS files
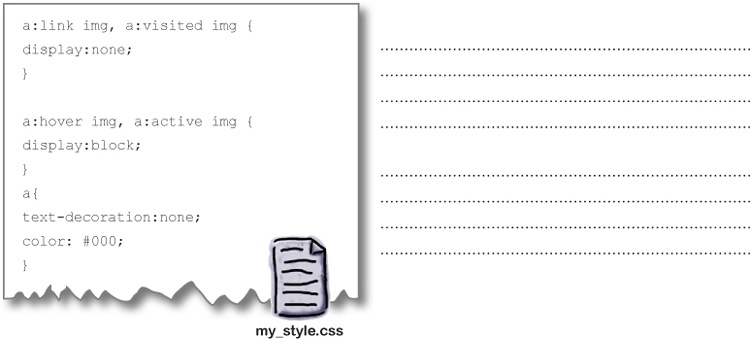
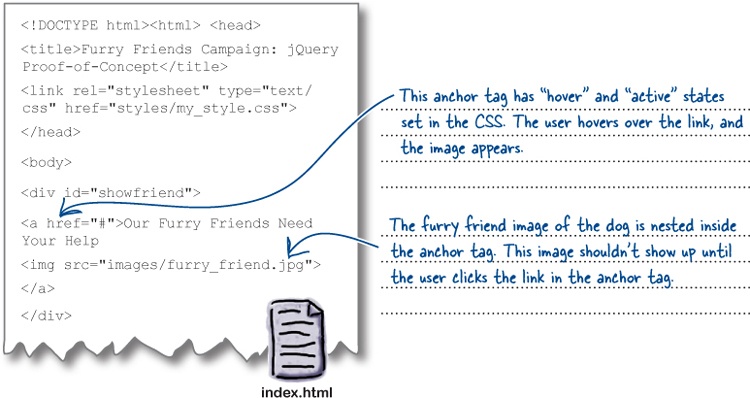
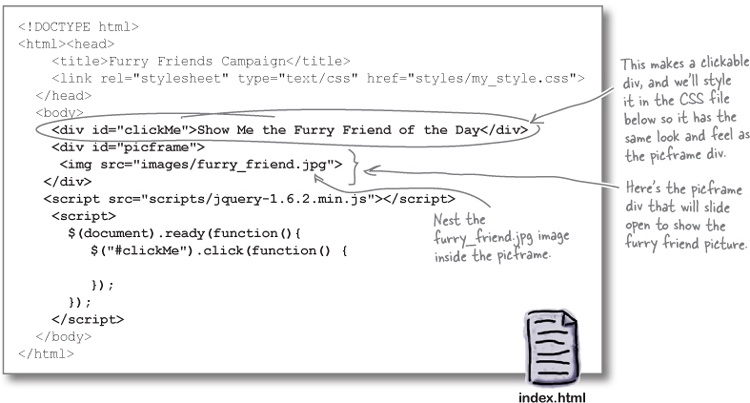
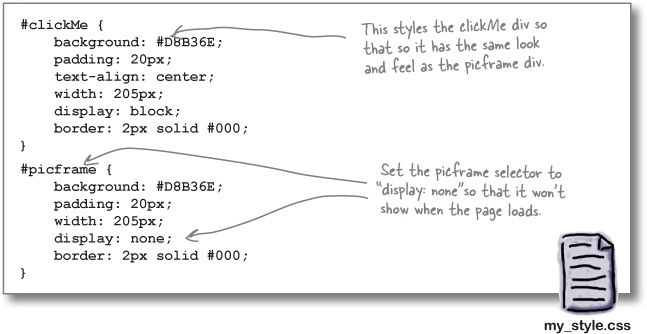
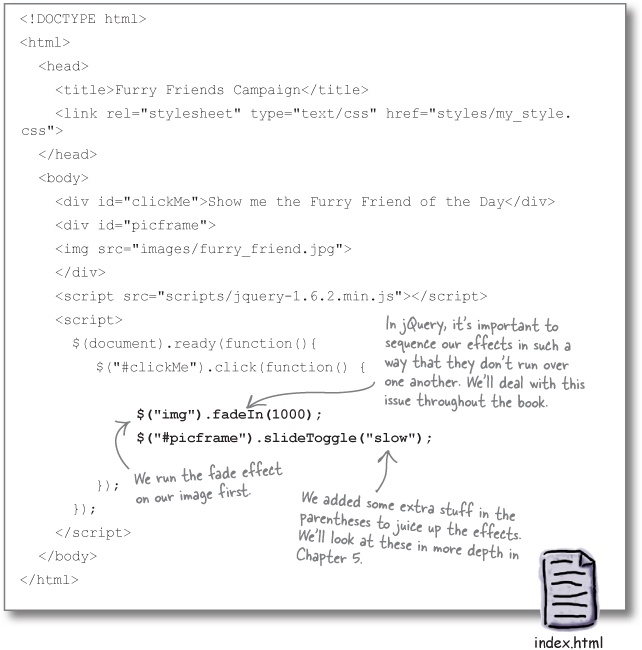
Let’s think about what we’ll have to set up in our HTML and CSS files before you write any jQuery statements. Open up the jQuery files for Chapter 1 (if you haven’t done that yet, be sure to go back to the opening section How to use this book: Intro for details). Find the Begin folder in Chapter 1. Then, add the code in bold below to the files, as shown here.
Do this!
You’re right. Our HTML and CSS are ready; now we need some jQuery.
We want the picframe div to slide and to fade. Fortunately, the jQuery folks have built effects that let us control both of these rich visual actions: slides and fades. We’ve devoted a whole chapter later in the book to jQuery effects (Chapter 5), so don’t worry about getting every little thing down now. Let’s just start sliding and fading first.
Slide on in...
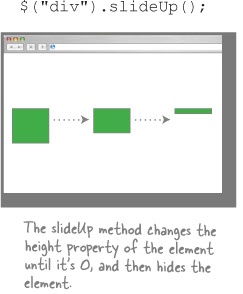
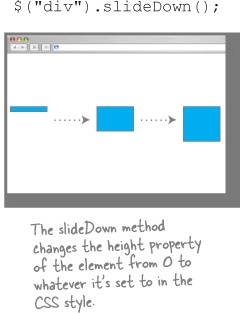
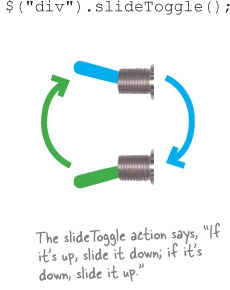
The first effect we’ll implement is having the image slide into view, which is one of the things the marketing team manager wants to have happen. There are three ways to deal with sliding:
May the fade be with you
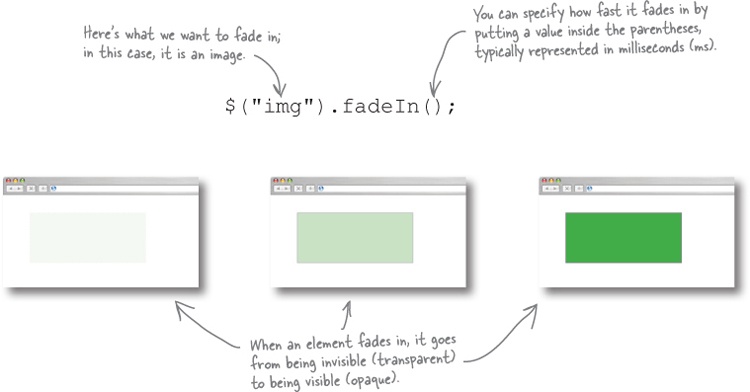
We also want the image to gradually appear, going from invisible to fully visible. Again, jQuery has a method for that, and that method is called a fade. The fade methods are pretty similar to what you just saw for sliding: you have FadeIn, FadeOut, FadeTo, and FadeToggle. For now, let’s just use FadeIn, which gives us control over the opacity and transparency properties of HTML elements.
That’s it?
Amazingly, you only need to write two lines of jQuery code to get these effects to work. Now you’re probably beginning to get a sense of why so many people like jQuery. Add the bolded lines below to your index.html file, and you’re good to go.
Do this!
You rescued the Furry Friends campaign
You got the job done with some HTML and CSS fine-tuning, and just two lines of jQuery. Just think of all the puppies you’ve saved...
Your jQuery Toolbox
You’ve got Chapter 1 under your belt and now you’ve added the basic jQuery function, selectors, click events, and the fade effect to your toolbox.
jQuery function
You use this to select elements from an HTML page to manipulate.
The $ shortcut means you don’t have to type “jQuery” over and over.
The jQuery function can handle selectors, straight HTML, and even JavaScript objects.
Selectors
jQuery selects elements the same way CSS does: with selectors.
Just about any kind of HTML element is fair game for a jQuery selector.
Fade effect
Once you’ve selected an element, you can fade it in a variety of ways, using FadeIn, FadeOut, FadeTo, and FadeToggle.
You can fade in all kinds of elements, from text to images and more.
Control the speed of your fade effect by putting a time (in milliseconds) value inside the parentheses at the end of the statement.
Get Head First jQuery now with the O’Reilly learning platform.
O’Reilly members experience books, live events, courses curated by job role, and more from O’Reilly and nearly 200 top publishers.
