Chapter 1. Installation
For this Cookbook to be useful, you need to install the Apache Web server software. So what better way to start than with a set of recipes that deal with the installation?
There are many ways of installing this package; one of the features of open software like Apache is that anyone may make an installation kit. This allows vendors (such as Debian, FreeBSD, Red Hat, Mandrake, Hewlett-Packard, and so on) to customize the Apache file locations and default configuration settings so that these settings fit with the rest of their software. Unfortunately, one of the consequences of customization is that the various prepackaged installation kits are almost all different from one another, which means that when it comes to getting assistance, you need to find someone familiar with the kit you’re using.
In addition to installing it from a prepackaged kit, of which the variations are legion, there’s always the option of building and installing it from the source yourself. This has both advantages and disadvantages; on the one hand, you know exactly what you installed and where you put it, but, on the other hand, it’s possible that binary add-on packages will expect files to be in locations other than those you have chosen.
If setting up the Web server is something you’re going to do once and never again, using a packaged solution prepared by your system vendor is probably the way to go. However, if you anticipate applying source patches, adding or removing modules, or just fiddling with the server in general, building it yourself from the ground up is probably the preferred method. (The authors of this book, being confirmed bit-twiddlers, always build from source.)
This chapter covers some of the more common prepackaged installation varieties and also how to build the server from the source yourself.
Throughout the chapter, we assume that you will be using dynamic shared objects (DSOs) rather than building modules statically into the server. The DSO approach is highly recommended; it not only makes it easy to update individual modules without having to rebuild the entire server, but it also makes adding or removing modules from the server’s configuration a simple matter of editing the configuration file.
DSOs on Unixish systems typically have a .so extension; on Windows, they end with a .dll suffix.
Problem
You have a Red Hat Linux server and want to install or upgrade the Apache Web server on it using the packages that Red Hat prepares and maintains.
Solution
If you are a member of the Red Hat Network (RHN), Red Hat’s subscription service, you can use Red Hat’s up2date tool to maintain your Apache package:
# up2date -ui apache apache-devel apache-manualIf you’re running a more recent version:
# up2date -ui httpd httpd-devel httpd-manualIf you aren’t a member of RHN, you can still download the packages from one of Red Hat’s servers (either ftp://ftp.redhat.com or ftp://updates.redhat.com), and install it with the following command:
# rpm -Uvh apacheDiscussion
The -Uvh option to the rpm command tells it to:
Upgrade any existing version of the package already on the system or install it for the first time if it isn’t.
Explain the process, so that you can receive positive feedback that the installation is proceeding smoothly.
Display a pretty line of octothorpes (
#) across the screen, marking the progress of the installation.
If you use the packages Red Hat maintains for its own platform, you will benefit from a simple and relatively standard installation. However, you can only update versions for which Red Hat has put together an RPM package, which typically means that you may be lagging weeks to months behind the latest stable version.
There is also the issue of platform compatibility; for instance, at some point the version of Apache provided for Red Hat Linux changed from 1.3 to 2.0, and newer versions of the operating system will probably only have the 2.0 packages available. Similarly, if you run an older version of Red Hat Linux, the newer packages will probably not install properly on your system.
It’s a good idea to install the apache-devel package as well. It’s quite small, so it won’t have much impact on your disk usage; however, it includes files and features that a lot of third-party modules will need in order to install properly.
See Also
Red Hat’s full platform release archive at ftp://ftp.redhat.com/
Red Hat’s incremental update (errata) archive at ftp://updates.redhat.com/
Problem
You have a computer running Debian, or one of the Debian-based distributions, such as Ubuntu, and wish to install Apache.
Discussion
As with any package-based Linux distribution, it’s usually best to stick with the packages supplied by that distribution in order to have ease of updates, and maximum interoperability with other packages installed on the same system. On Debian, this means using apt-get.
It’s a good idea to install the apache2-dev package as well, as it provides utilities, such as apxs, which will be useful in installing third-party modules, should the need arise.
Debian has its own unique arragement of configuration files,
which is unlike that of any other distribution. Both modules and sites
(virtual hosts) are arranged in subdirectories so that they can be
enabled or disabled at will using utilities that come with Debian’s
version of Apache. For example, to enable a particular module, you
will use the a2enmod command, which
makes the appropriate changes to the server configuration file to
cause that module to be loaded. For example:
# a2enmod rewriteFor a full description of where Debian places its files and directories, you should consult http://wiki.apache.org/httpd/DistrosDefaultLayout.
See Also
man a2enmod
Problem
You want to install the Apache Web server software on a Windows platform.
Tip
If you already have Apache installed on your Windows system, remove it before installing a new version. Failure to do this results in unpredictable behavior. See Recipe 1.7.
Solution
Primarily, Windows is a graphically oriented environment, so the Apache install for Windows is correspondingly graphical in nature.
The simplest way to install Apache is to download and execute the Microsoft Software Installer (MSI) package from the Apache Web site at http://httpd.apache.org/download. The following screenshots come from an actual installation made using this method.
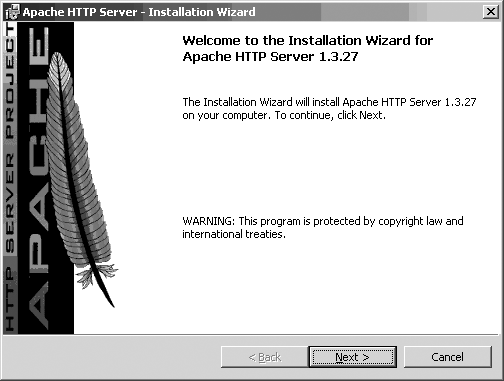
Each step of the installation procedure is distinct in the process and you can revise earlier decisions, until the files are installed. The first screen (Figure 1-1) simply confirms what you’re about to do and the version of the package you’re installing.
The second screen (Figure 1-2) presents the Apache license. Its basic tenets boil down to the following: do what you want with the software, don’t use the Apache marks (trademarks like the feather or the name Apache) without permission, and provide proper attribution for anything you build based on Apache software. (This only applies if you plan to distribute your package; if you use it strictly on an internal network, this isn’t required.) You can’t proceed past this screen until you agree to the license terms.
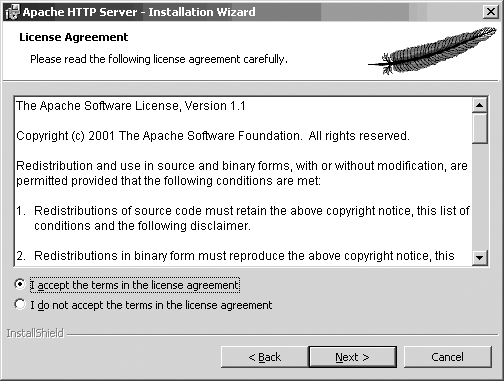
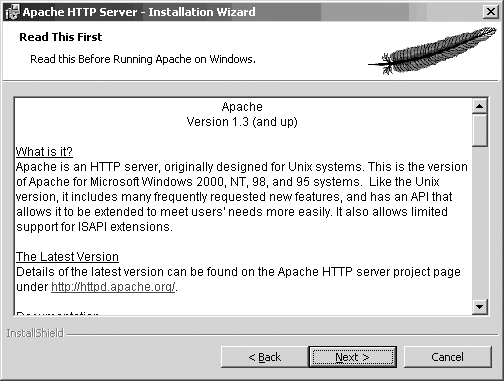
Figure 1-3 shows the recommended reading for all new users of the Apache software. This describes special actions you should take, such as making configuration changes to close security exposures, so read it closely.
If you are installing Apache for the first time, the installation process asks for some information so that it can make an initial configuration for your server (Figure 1-4). If you already have a version of Apache installed, nothing you enter on this screen will override your existing configuration.
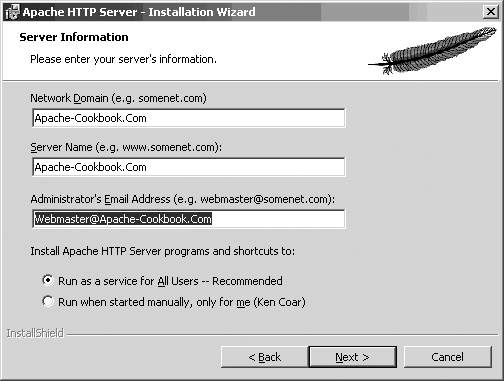
The Server Name in the figure is filled with the same value as the Network Domain field; this is a nod to the growing tendency to omit the “www” prefix of Web sites and use the domain name (e.g., http://oreilly.com/ instead of http://www.oreilly.com/ ). What name you specify for the server is just advisory, allowing the installation process to configure some initial values; you can change them later by editing the configuration file. The important thing is that the Server Name value be resolvable into an IP address.
Next comes a screen asking what portions of the package you want to install, as shown in Figure 1-5. Just go with Typical unless you’re an advanced user. The Custom option allows you to choose whether to install the Apache documentation.
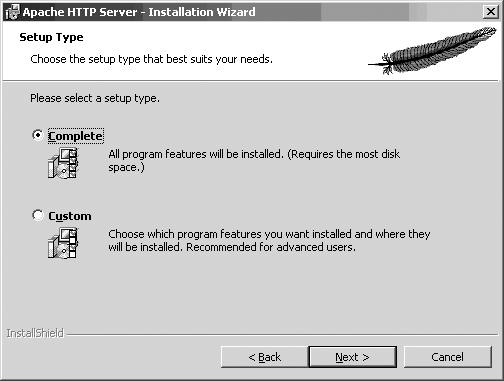
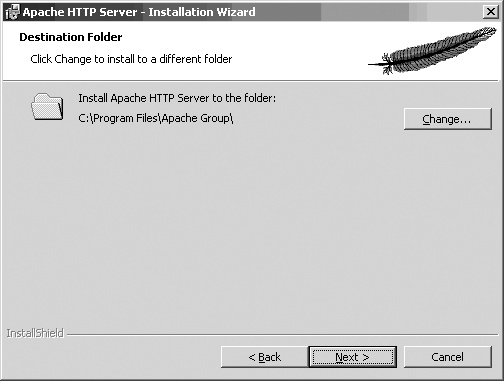
Figure 1-6 asks where you want the software installed. The screenshot shows the default location, which will become the ServerRoot.
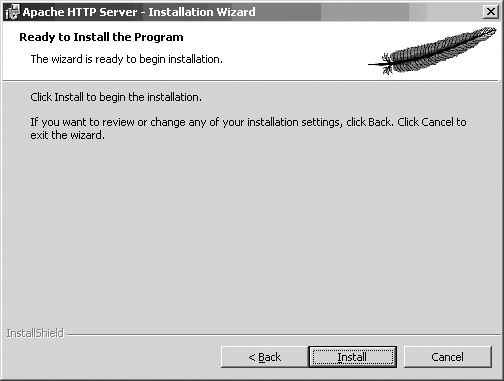
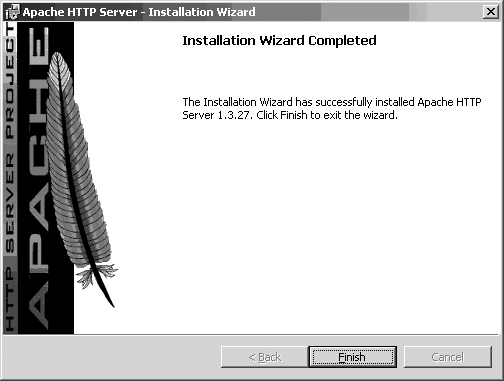
Once you’ve answered all the questions, a screen similar to Figure 1-7 will come up. This is your last chance to go back and change anything; once you click the Install button on this screen, the installation puts the pieces of the package in place on your system.
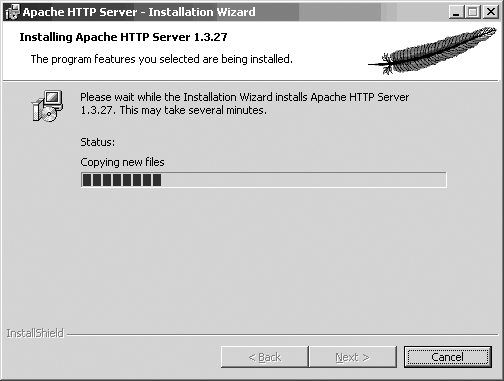
Figures 1-8 and 1-9 show the last screens for the Windows MSI install; they show the progress of the installation. When they’re finished, Apache has been installed (and started, if you chose the “Run as a service” option shown in Figure 1-4).
Discussion
A lot of effort has been put into making the Apache server run well on Windows and be managed like other Windows applications. As a consequence, the primary installation method (InstallShield or MSI) should be familiar to Windows users.
If you’ve never run Apache before, accept the defaults the first time you install it. This makes it easier for others to provide assistance if you need help, because the files will be in predictable locations.
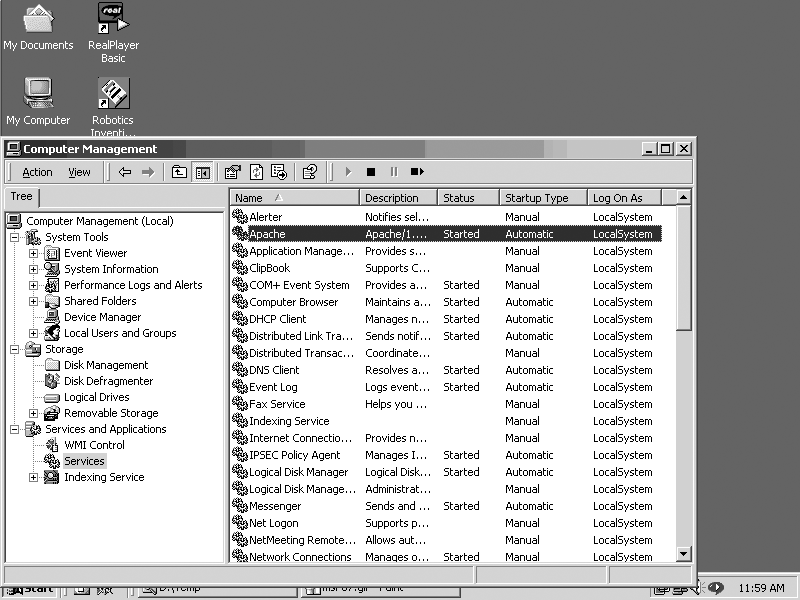
If you chose to start the Apache server as a service (see Figure 1-4), then you can modify the conditions for it to start, such as the user it should run as or whether it should start automatically, just as you would any other service. Figure 1-10 shows one way to do this; bring up the window by right-clicking on the My Computer icon on the desktop and choose Manage from the pop-up menu.
See Also
The Apache license at http://www.apache.org/LICENSE
Problem
You want to build the Apache Web server yourself from the sources directly (see Recipe 1.4), but don’t know how to obtain them.
Solution
There are a number of ways to obtain the sources. You can access the latest version in close to real-time by using Subversion (the tool used by the Apache developers for source control), you can download a release tarball, or you can install a source package prepared by a distributor, among others.
To install from a prepackaged tarball, download the tarball from http://httpd.apache.org/download.cgi, and then:
%tar xzvfhttpd-2.0.59.tar.gz
If your version of tar
doesn’t support the z option for processing zipped
archives, use this command instead:
%gunzip -c <httpd-2.0.59.tar.gz| tar xvf -
From the very latest up-to-the-minute Apache 2.0 source repository (not guaranteed to be completely functional), use:
% svn checkout http://svn.apache.org/repos/asf/httpd/httpd/branches/2.0.x/ httpd-2.0You can fetch a particular release version instead of the bleeding edge code if you know the name the developers gave it. For example, this will pull the sources of the 2.0.59 release, which is expected to be stable, unlike the up-to-the-minute version:
% svn checkout http://svn.apache.org/repos/asf/httpd/httpd/tags/2.0.59/ httpd-2.0.59You can find the names of the tags used in the source tree by visiting either http://svn.apache.org/viewvc/httpd/httpd/tags/ or with:
% svn ls http://svn.apache.org/repos/asf/httpd/httpd/tags/Discussion
No matter how you install the source, the directory tree will be ready for configuration and building. Once the source is in place, you should be able to move directly to building the package (see Recipe 1.4).
If you chose to install the sources using the Subversion method, you can keep your sources up-to-date by simply executing the following command from the top level of the source directory:
% svn updateThis will update or fetch any files that have been changed or added by the developers since the last time you downloaded or updated.
If you update to the latest version of the sources, you’re getting whatever the developers are currently working on, which may be only partially finished. If you want reliability, stick with the released versions, which have been extensively tested.
See Also
Problem
You want to build your Apache Web server from the sources directly rather than installing it from a prepackaged kit.
Solution
Assuming that you already have the Apache source tree—whether you installed it from a tarball, Subversion, or some distribution package, the following commands—executed in the top directory of the tree, builds the server package with most of the standard modules as DSOs:
%./buildconf%./configure --prefix=/usr/local/apache>--with-layout=Apache --enable-modules=most --enable-mods-shared=all \>--with-mpm=prefork%make#make install
If you want more detailed information about the various options and their meanings, you can use the following command:
% ./configure --helpDiscussion
Building the server from the sources can be complex and time-consuming, but it’s essential if you intend to make any changes to the source code. It gives you much more control over things, such as the use of shareable object libraries and the database routines available to modules. Building from source is also de rigeur if you’re developing your own Apache modules.
If you want to build the modules statically into the server,
replace any occurrences of
--enable-mods-shared=
with
list--enable-mods=.list
The options to the configure script are many and varied; if you haven’t used it before to build Apache, locate some online tutorials (such as those at http://apache-server.com/tutorials/ or http://httpd.apache.org/docs-2.0/install.html) when you want to change the defaults. The default options generally produce a working server, although the filesystem locations and module choices may not be what you’d like; they may include modules you don’t want or omit some you do. (See Chapter 2 for some examples.)
Solution
Download ApacheToolbox from http://www.apachetoolbox.com/. (Note that the version numbers will probably be different than these, which were the latest available when this section was written.) Unpack the file:
%bunzip2Apachetoolbox-1.5.65.tar.bz2%tar xvfApachetoolbox-1.5.65.tar
(Depending on your version of tar, you may be able to combine these
operations into a single tar
xjvf command.)
Then run the installation script:
#cdApachetoolbox-1.5.65#./install.sh
Discussion
ApacheToolbox is developed and maintained by Bryan Andrews. It is a shell script that assists in the configuration and installation of Apache. It includes support for over 100 commonly used or standard modules.
When you run the script, you select modules from lists appearing on various screens. Once you have decided on your list of modules, ApacheToolbox downloads the third-party modules you have selected and the tools that you don’t have installed, and then runs the Apache configure script with any arguments needed to create the combination you have requested.
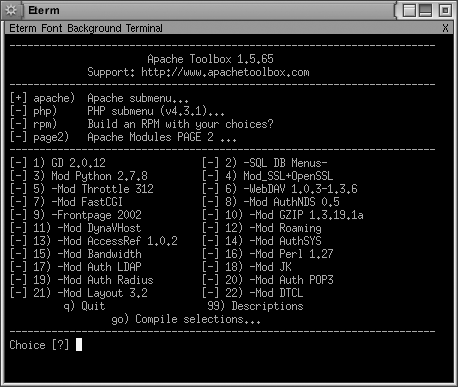
The main screen (see Figure 1-11) lists the most popular third-party modules that ApacheToolbox can install. Select or deselect a particular module by typing the number next to that module’s name.
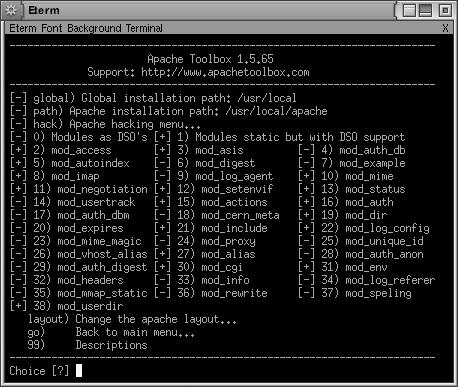
Typing apache moves you
to the second screen (see Figure 1-12),
which lists the standard Apache modules. Add or remove individual
modules by typing the number next to their module names.
You can choose options for configuring the modules on additional menus, and you can build an RPM on your installation configuration, which you can then install on multiple machines without requiring that ApacheToolbox be installed.
Once you have made all your module selections, type go to tell ApacheToolbox to start the
configuration process.
Your preferences are saved to a file (etc/config.cache) so that if you want to reinstall Apache with the same configuration, you merely need to run ApacheToolbox again, and it will start up with the selections from the last run. To upgrade to a new version of Apache, get the latest version of ApacheToolbox, and ask it to run the installation script with your last selections (without going through the menu process), by typing the following commands:
#./install.sh --update#./install.sh --fast
Once ApacheToolbox has completed its work, you can edit the configuration script to insert or modify arguments. Once you are satisfied and ApacheToolbox has run the configuration script, go into the Apache source subdirectory and run make and make install to compile and install Apache:
#cdapache_1.3.27#make#make install
See Also
Problem
You want to be able to start and stop the server at need, using the appropriate tools.
Solution
On Unixish systems, use the apachectl script; on Windows, use the options in the Apache folder of the Start menu.
Discussion
The basic Apache package includes tools to make it easy to control the server. For Unixish systems, this is usually a script called apachectl, but prepackaged distributions may replace or rename it. It can only perform one action at a time, and the action is specified by the argument on the command line. The options of interest are:
apachectl startThis will start the server if it isn’t already running. If it is running, this option has no effect and may produce a warning message.
apachectl gracefulThis option causes the server to reload its configuration files and gracefully restart its operation. Any current connections in progress are allowed to complete. The server will be started if it isn’t running.
apachectl restartLike the
gracefuloption, this one makes the server reload its configuration files. However, existing connections are terminated immediately. If the server isn’t running, this command will try to start it.apachectl stopThis shuts the server down immediately. Any existing connections are terminated at once.
For Windows, the MSI installation of Apache includes menu items for controlling the server, as shown in Figure 1-13.
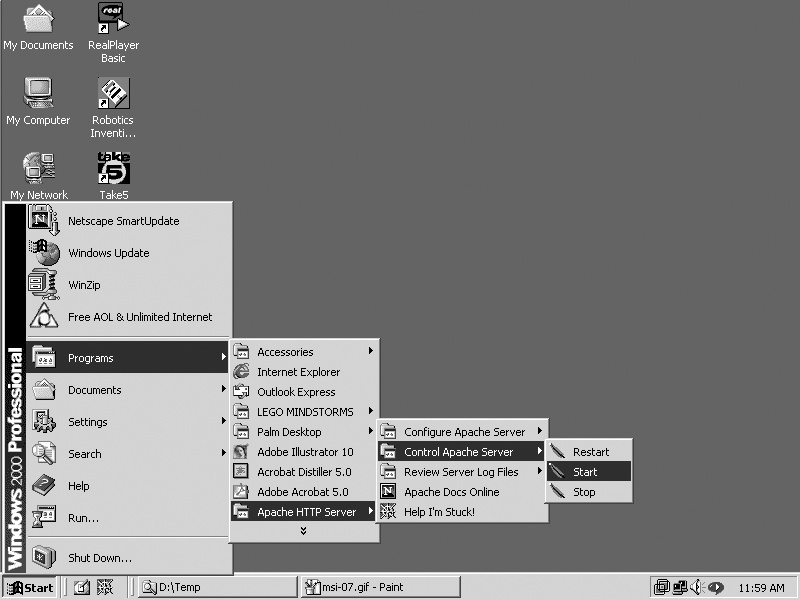
Both of the solutions shown (for Unixish and Windows systems) illustrate the basic server control operations: start, stop, and restart. The purpose of the start and stop functions should be self-evident. Any time you modify the server-wide configuration files (such as httpd.conf), you must restart the server for the changes to take effect.
See Also
Problem
You have the Apache software installed on your system, and you want to remove it.
Solution
On Red Hat Linux, to remove an Apache version installed with the RPM tool, use:
# rpm -ev apacheOther packaging systems may provide some similar mechanism. If they don’t, however, chances are that cleaning out all the files will require a lot of manual work.
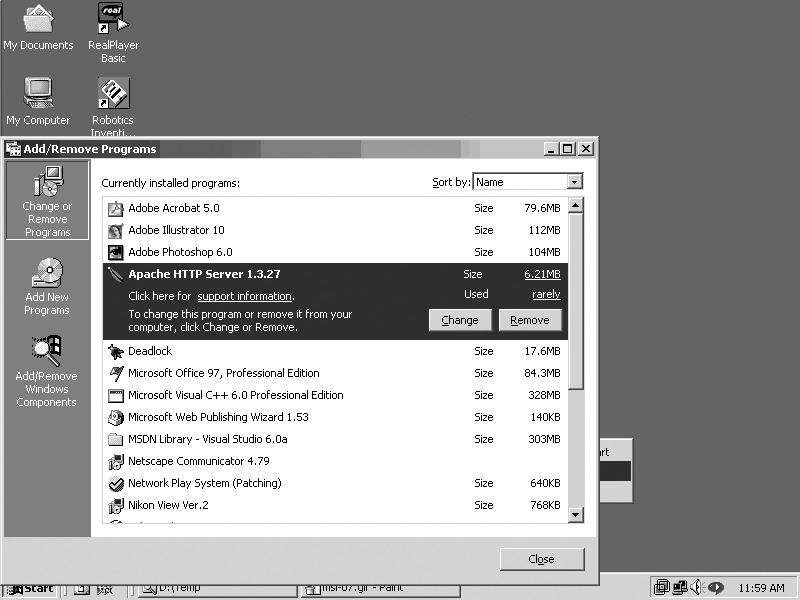
On Windows, Apache can typically be removed like any other MSI-installed software (see Figure 1-14).
Discussion
Unfortunately, there is no generic works-for-all removal method for Apache installations on Unixish systems. Some packages, such as Red Hat’s RPM, do remember what they installed so they can remove all the pieces, as shown in the solution. However, if the software was installed by building from the sources (see Recipe 1.4), the burden of knowing where files were put rests with the person who did the build and install. The same applies if the software was installed from source on a Windows system; it’s only the MSI or InstallShield packages that make the appropriate connections to allow the use of the Add/Remove Software control panel.
For a Unixish system, if you have access to the directory in
which the server was built, look for the --prefix
option in the config.nice file.
That will give you a starting point, at least. Here is a list of the
directories an Apache 2.0 installation usually puts somewhere on your disks:
| bin |
| build |
| cgi-bin |
| conf |
| error |
| htdocs |
| icons |
| include |
| lib |
| logs |
| man |
| manual |
| modules |
See Also
Problem
You want to know which version of Apache is the right one for you.
Solution
Although there is not necessarily one right answer for everyone, the Apache HTTP Server development team works very hard to ensure that every release of the software is the best, most stable, most secure product that they are able to put together, and each release of the product fixes problems that were found in earlier releases. So, it’s always our position that the latest version of the server is the one that you should be running.
As of this writing, that means the latest release of the 2.2.x branch, which, right now, is 2.2.4. When 2.4 is released, we will recommend that you upgrade to 2.4.
Discussion
This question is not always quite as simple as we would like it to be. We want to give the One Right Answer, but there are sometimes very good reasons for sticking with an older version of the software. However, these reasons are less frequently valid than they were a few years ago.
The most common reason that people give for remaining on the 1.3 version of the server is that they are running mod_something and it’s not available for 2.2 yet. In the early days of Apache 2, this was a valid reason for many people that were sticking with Apache 1.3, and it entered the commonly accepted wisdom that most modules weren’t yet available for Apache 2.
However, as various major Linux distributions started including Apache 2 as the default Web server, more and more modules became available for Apache 2, or people developed alternative modules implementing the same functionality, and this became less and less true.
As of this writing, it seems to be that only a very few commercial modules still satisfy the “not available for Apache 2” category, and this reason is not nearly as believable as it once was.
Another common reason given is that a large installation, with many virtual hosts and complex configuration, is built on Apache 1.3, and it would be an enormous undertaking to migrate it to Apache 2. This is a much more compelling reason. However, it must also be factored in that Apache 1.3 is in maintenance-only mode, and will never get the new features that are being developed for the 2.x branch. Also, perhaps more importantly, the people who provide free online support for Apache are, for the most part, themselves using Apache 2, and their knowledge of Apache 1.3 is waning. So if you have a stable installation, and have no technical difficulties, and are content to slip gradually further and further behind in terms of new functionality, then perhaps staying with 1.3 is a valid solution in that case.
If, however, you are doing a new Web server installation, there is absolutely no good reason not to do with the latest version of the product. You’ll benefit from the experience gained in the 1.3 days, and you’ll get the new features that come with the 2.2 server, as well as the better-implemented old features.
Problem
You built your Apache Web server software from the source, and now you want to upgrade it while keeping all the same configuration options.
Solution
Unpack the source of the new version into a separate tree, and execute the config.nice script created by your build of the earlier version.
Tip
This technique is primarily intended for use when upgrading within the same major version series, such as from 2.0.17 to 2.0.59, or from 2.2.0 to 2.2.4. Attempting to use it to apply older configuration options to a newer major version (such as from 2.0.17 to 2.2.4) may not work reliably.
For example, suppose you built and installed version 2.0.17 long ago, and you now want to upgrade your system to 2.0.59:
#cd /usr/local/build#tar xvf /tmp/httpd-2.0.59.tat.gz#cd httpd-20.0.59#../httpd-2.0.17/config.nice#make
Discussion
When you execute the configure script to set up your compilation and installation preferences, it creates a file called config.script with all the options you chose. The file config.nice executes configure with all those options. This means you don’t need to remember or write down all the options you specified when you finally got it working.
In addition, config.nice allows you to specify additional options, which it adds to those with which it invokes configure. When configure runs, it will create config.nice again with the complete new set of options.
See Also
Solution
On a Windows system, if you installed Apache as a service, you can configure it to start automatically just as you would any other service. Go to the Services control panel and make the desired changes there.
On Unixish systems, how you set this up differs by platform. For Red Hat-based systems:
#cp#path/to/apachectl/etc/rc.d/init.d/httpdvi /etc/rc.d/init.d/httpd# add '# chkconfig 3 92 10' #chkconfig --add httpd#chkconfig --levels 35 httpd on
This will cause Apache to be started up (and shut down) as part of the normal sequence for runlevels 3 and 5.
Discussion
The solution provided is specific to Red Hat-based platforms such as Fedora Core or RHEL. For other platforms or distributions you may instead need to edit /etc/rc.local, or copy the apachectl script into /etc/rc3.d, or something similar. Consult your operating system’s documentation for specifics.
See Also
Problem
The configure script, that is used to set up a build from source, has many options, and it’s not clear which ones are really important.
Solution
Here are some of the most important and useful options that you you might want to use:
--prefixSpecifies the top level of the directory tree into which files will be put. The default is usually
--prefix=/usr/local/apache2, but different layouts can change this (see the--enable-layoutoption in this section).--enable-layoutThis allows you to select one of the predefined filesystem structures; that is, where make install should put all the files. To see where files will be put for a particular layout, examine the config.layout in the top level of the source tree.
Currently the predefined layouts include:
Apache beos BSDI Darwin Debian FreeBSD GNU Mac OS X Server OpenBSD opt RedHat Solaris SuSE To use one of the layout names that contains spaces, you must enclose it in quotation marks:
%./configure --enable-layout="Mac OS Server"--enable-mods-sharedThis option controls which modules will be built as DSOs rather than being linked statically into the server. An excellent shortcut value is most.
--enable-sslIf you’re going to be running a secure server, you will need to include this option, as the SSL module is not activated by default.
--enable-suexecUse this option if you want the suexec utility to be built. Because of the degree to which it depends on the rest of the server build, you should specify this when configuring the main server build, and not try to build suexec later.
--with-apr,--with-apr-utilIf you have multiple versions of the Apache Portable Runtime library and utilities installed—as you might if you build Apache on a system with Subversion installed—you can use these options to ensure that the Apache server is built with a compatible APR version.
--with-included-aprThis option is a nice shorthand way of specifying the compatible bundled version of APR should be used. The option is not available prior to Apache version 2.2, though.
--with-mpmThe Multi-Processing Model, or MPM, defines how the server handles requests by setting the relationship between threads and child processes. Usually the configure script will choose one appropriate for the platform on which you’re building, but sometimes you may want to override this. For example, if you’re going to be using the PHP scripting module, you need to use the prefork MPM in order to avoid problems.
--with-portThis option is useful if you are building the server under a non-root username but intend to run it as a system daemon. The configure script chooses a different default for the port number depending upon whether it’s being run by root or not. With this option you can override this behaviour. The most common use of this option is:
--with-port=80
Problem
You’ve installed the Apache Web server, whether from source or an installation kit, but you’re not sure where all the files have been put. (This is useful to know if you want to uninstall it later.)
Solution
If you installed the software from a source kit, look at the
config.layout file in the top
level of the source directory. Look for a <Layout> stanza that matches the
--enable-layout option given to the configure script. (If none was supplied,
the Apache layout will have been
used.)
If you installed the software from an RPM package, use the
-ql option to see where the files have been
installed:
%rpm -ql httpd
If you installed from a kit prepared by a distributor, such as Ubuntu, check with the distribution documentation to find out where the files are stored.
Discussion
One of the advantages—and disadvantages—of open software is that everyone can build an installation kit. And everyone pretty much chooses options different from everyone else.
The Apache source package includes a list of “common” layouts, and most installation kits use one or another of these.
Get Apache Cookbook, 2nd Edition now with the O’Reilly learning platform.
O’Reilly members experience books, live events, courses curated by job role, and more from O’Reilly and nearly 200 top publishers.

